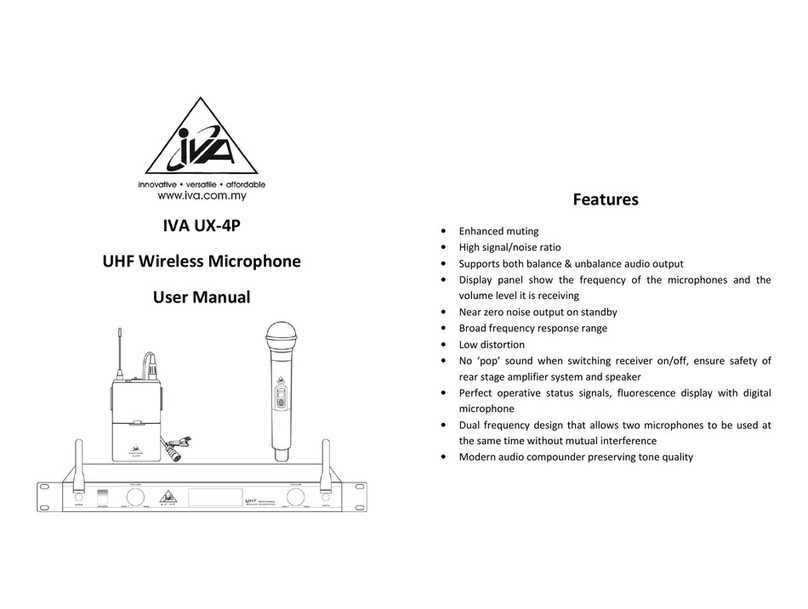
Infrasonic UFO PRO User manual

USB Condenser Microphone
Quick Start Guide
UFO PRO 드라이버 다운로드 링크
UFO PRO DRIVER DOWNLORD LINK
www.simsaudio.co.kr/download/ufo
IUQ160120001
UFO PRO 마이크로폰을 구매해 주셔서 감사합니다!
UFO PRO 마이크로폰은 플러그앤 플레이 타입의 USB 컨덴서 마이크로폰입니다. 보컬 및 악기
레코딩, 인터넷 방송 등을 위해 최적화 된 성능과 사양으로 제작되었으며, 고성능 USB 처리 칩셋과
고품질 카디오이드 픽업 패턴 컨덴서 캡슐을 장착하여 쾌적하고 명확한 사운드와 레코딩 환경을
제공합니다. 마이크로폰의 바디는 1/8 규격의 스테레오 헤드폰 잭, 마이크로폰 게인 조절 노브,
헤드폰 출력 컨트롤 노브 등이 포함되며 제로 레이턴시 (Zero latency) 모니터링을 지원합니다.
제품 주요 특징 (Features)
▪ USB 2.0 호환 ▪ 해상도 / 샘플링 레이트 : 24Bit / 96kHz.
▪ 지원 샘플링 레이트 : 8 / 16 / 32 / 44.1 / 48 / 96kHz
▪ 동시입력, 출력 터미널 : 레코딩, 플레이백 모드
▪ 로우컷 (Low cut), -10dB 감도, 마이크 지향성 조정 스위치 포함
▪ 고품질 마이크로폰 게인 조절 노브, 출력 볼륨 조절 노브.
▪ 1/8 스테레오 헤드폰 잭 ▪ 34mm 대형 다이어프레임 골드 플레이트 캡슐
▪ 고품질 내장형 헤드폰 엠프 칩셋 ▪ 디스토션 감쇄 및 저전력 소비, 고음질 출력
시스템 요구사양
<PC>
▪ Windows® 7 / 8 / 10 / 최신 업데이트 버전
▪ 2 GB RAM 이상
▪ 1개의 USB 연결포트
1. UFO PRO 컴퓨터 연결 방법 <사진 1-1 ~ 1-4 참조>
❶ 제품에 동봉된 USB 케이블을 사용하여 그림과 같이 컴퓨터와 마이크를 연결합니다.
❷ 마이크 하단의 USB 포트에 제품과 동봉된 USB 케이블(B타입 플러그)을 아래 그림과 같이 연결
해 주십시오.
❸ UFO 와 연결된 USB 케이블(A타입 플러그)을 컴퓨터의 USB 포트에 그림과 같이 연결하십시오.
❹ 헤드폰 잭을 UFO 전면의 3.5mm 미니 폰잭 단자에 아래 그림과 같이 연결하여 주십시오.
* 주의! : UFO Pro 제품은 그 자체로 USB 오디오 인터페이스(사운드카드) 기능을 하기 때문에
헤드폰이나 스피커를 컴퓨터의 사운드카드에 연결하면 소리가 나지 않으며, 반드시 UFO 전면의
미니 폰잭 단자에 연결하셔야 정상적으로 소리를 출력하실 수 있습니다.
2. UFO PRO 컨트롤 패널 <사진 2 참조>
❶ UFO 컨트롤패널을 항상 윈도우 상위에 표시합니다.
❷ 드라이버 버전을 확인할 수 있습니다.
❸ 컨트롤 패널의 창을 닫습니다.
❹ 모니터 버튼을 누르면 입력되는 신호를 모니터링 할 수 있습니다.
❺ 모니터 페이더를 위 / 아래로 조절하여 입력신호 및 볼륨 크기를 조절합니다.
❻ 스테레오믹스 페이더를 위 / 아래로 조절하여 윈도우에서 재생되는 WDM 어플리케이션의
음량을 조절합니다.
❼ 마스터 페이더를 위 / 아래로 조절하여 전체 마스터 볼륨의 크기를 조절합니다.
❽ 볼륨의 레벨 크기를 숫자로 표시합니다.
❾ 음소거 (Mute) 및 페이더 링크 L/R 양쪽 페이더를 하나로 조절합니다.
❿ 사용자의 컴퓨터 사양에 맞게 버퍼사이즈를 선택합니다. (기본값 10ms)
⓫ 스테레오믹스 버튼은 UFO 컨덴서 마이크 출력과 WDM 드라이버를 통해 재생되는 모든 사운드
를 동시에 출력 / 모니터링이 가능하며 두가지 사운드를 적절하게 믹스할 수 있습니다.
이 기능은 원도우 녹음기와 같은 WDM기반의 프로그램을 이용한 인터넷 방송 사용자들에게
매우 유용한 기능으로 사용됩니다.
⓬ FX 버튼은 UFO 드라이버에서 VST Host 프로그램의 오디오 신호 전송 규약인 ASIO
(Audio Streaming Input Output) 드라이버를 일반 Windows 어플리케이션에서 사용하는
WDM으로 연결하는 역할을 하여, 이팩트 처리된 신호를 자유롭고 편리하게 적용할 수 있게
해주는 기능입니다.
3. UFO PRO MAC 설치방법 <사진 3 참조>
UFO는 OS 10.8 (Panther) 혹은 그 이후의 Mac OSX에서 동작하며, 만일 그 이전 버전을
사용하고 계시다면 OS를 업그레이드 하실 것을 권해드립니다. 매킨토시에서의 설치는 매우 간단
합니다. UFO를 연결하면, 매킨토시가 자동으로 UFO를 인식하며, 그 후 위의 그림과 같이 Audio
MIDI setup에서 UFO를 설정해 줍니다. Audio MIDI setup은 Application / Utilities 폴더에서
찾으실 수 있으며, 매킨토시에서 UFO는 Mac OSX의 기본 오디오 드라이버인 Core Audio를
사용합니다.
4. 입력 감도 (Gain) 및 헤드폰 볼륨 (Volume) 설정 방법
▪ 입력 감도 (Gain)
큰 소리로 레코딩할 때 허용 입력 레벨을 초과하여 클리핑 현상이 생기거나 보다 입력값의
조정이 필요 할 경우 ‘Gain’ 노브로 설정값을 조절하여 마이크의 감도를 조절할 수 있습니다.
아래 그림과 같이 UFO 마이크의 전면에 위치한 Gain 노브를 시계방향으로 조절하여 감도(dB)
를 높일 수 있습니다. <사진 4 참조>
▪ 헤드폰 볼륨 (HP)
UFO Pro는 모니터링과 청취를 위한 1/8” (3.5mm) 표준 규격의 헤드폰 잭 연결 부를 포함하고
있습니다. 헤드폰 출력단자에 이이폰 또는 헤드폰을 연결하여 실시간으로 마이크로폰의 헤드폰
출력을 모니터 할 수 있습니다. 게인 노브와 마찬가지로 HP 노브를 시계방향으로 조절하여
출력값을 높일 수 있습니다.
* 주의! : Gain 및 볼륨 조절 노브에 많은 힘을 가하여 무리하게 동작하게 될 경우 노브가 파손될
수 있습니다.
5. 로우컷 스위치 및 -10dB 감쇄패드 <사진 5 참조>
▪ -10dB 감쇄 Pad : 드럼이나 관악기 종류 등 큰 음량의 소리를 녹음할 때 이 스위치를 조작하여
10dB 만큼 큰 소리를 클리핑 없이 녹음할 수 있습니다.
▪ 75Hz Low Cut Switch : 마이크 보컬 및 악기 녹음 시 저음 대역을 일정 부분 제거할 수 있는
기능입니다.
6. 마이크 지향성 (Polar Pattern)
▪ 단일지향성 / 양지향성 / 무지향성 설정.
▪ UFO PRO 마이크로폰 후면부의 토글 스위치를 사용하여 마이크 지향성을 3가지 모드로 조정
할 수 있습니다.
▪ 단일지향성은 보컬 및 악기 녹음, 대화용으로 사용.
▪ 양지향성 : 전방과 후방의 녹음 시 사용, 다른 방향은 약하게 녹음 됨.
▪ 무지향성 : 360도 모든 방향 녹음 시 사용.
Korean
For technical support inquiries, contact your nearest dealer, local SAMICK Corp.
distributor or SAMICK Corp. directly at:
SAMICK MUSICAL INSTRUMENTS CO.,LTD
58-3 Nonhyeon-Dong Gangnam-Gu, Seoul, Korea
<Mac>
▪ Mac ®OS X 10.8 이상 / 최신 업데이트 버전
▪ 2 GB RAM 이상
▪ 1개의 USB 연결포트
END USER WARRANTY
Trademarks
Windows is a trademark of Microsoft Corporation. Other product and brand names
are trademarks or registered trademarks of their respective companies.
End User Warranty
SAMICK warrants this product, under normal use, to be free of defects in materials
and workmanship for a period of One(1) year from date of purchase, so long as :
the product is owned by the original purchaser, with proof of purchase from
an authorized SAMICK dealer. This warranty explicitly excludes power supplies and
included cables which may become defective as a result of normal wear and tear.
In the event that SAMICK receives, from an original purchaser and within
the warranty coverage period, written notice of defects in materials or workmanship,
SAMICK will either replace the product, repair the product, or refund the purchase
at its option. To obtain warranty service, he original purchaser or his authorized
is required, shipment to and from SAMICK and possible handling charges shall be
borne by the purchaser. SAMICK will not accept returns without prepaid shipments.
In the event that repair is required, a Return Authorization Number must be obtained
from SAMICK After this number is obtained, the unit should be shipped back to
SAMICK in a protective package with a description of the problem and the Return
Authorization Number clearly written on the package. All such returns must be
shipped to SAMICK headquarters in Seoul, Korea.
In the event that SAMICK determines that the product requires repair because of
user misuse or regular wear, it will assess a fair repair or replacement fee.
The customer will have the option to pay this fee and have the unit repaired and
returned, or not pay this fee and have the unit returned and un-repaired.
The remedy for breach of this warranty shall not include any other damages.
SAMICK will not be liable for consequential, special, indirect, or similar damages or
even if its agents
have been advised of the possibility of such damages, and in no event will SAMICK’
liability for any damages to the purchaser or any other person exceed the price paid
for the product., regardless of any form of the claim.
SAMICK ed.
SAMICK
purpose.
The FCC and CE Regulation Warning
This device complies with Part 15 of the FCC Rules. Operation is subject to
the following two conditions:
(1) this device may not cause harmful interference, and
(2) this device must accept any interference received, including interference that
in construction of this device with are not expressly approved by the party
responsible for compliance, could void the user's authority to operate equipment.
Caution :
expressly approved by the party responsible for compliance, could void the user's
authority to operate equipment.
NOTE
This equipment has been tested and found to comply with the limits for a Class
A digital device, pursuant to Part 15 of the FCC Rules. These limits are designed to
provide reasonable protection against harmful interference when the equipment
is operated in a commercial environment. This equipment generates, uses, and
can radiate radio frequency energy and, if not installed and used in accordance
with the instruction manual, may cause harmful interference to radio communications.
Operation of this equipment in a residential area is likely to cause harmfulinterference
in which case the user will be required to correct the interference at his own
expense.
If necessary, consult an experienced radio /television technician for additional
suggestions.
Correspondence
For technical support inquiries, contact your nearest dealer, local SAMICK corp.
distributor or SAMICK corp. directly at:
SAMICK MUSICAL INSTRUMENTS CO.,LTD
1-6, Daejang-ri, Soi-myeon, Eumseong-gun, Chungcheongbuk-do, KOREA
.
Parts of this manual are continually being updated.
Please check our web site www.infra-sonic.com occasionally for the most recent
updated information.

UFO works with OS 10.8 (Panther) or later versions of Mac OSX. If you have earlier versions
of Mac OS, please upgrade to OS 10.8 before using the UFO. The installation is versy simple.
below. Audio MIDI Setup can be found in Applications / Utilities folder. UFO fully works with
Mac OSX’s Core Audio driver.
▪ Gain
❸ Find the USB port on your computer.
Plug the UFO’s USB cable (Series A plug
type) into the USB port of your computer.
❹ Connect your headphone into the Jack of UFO. Connect provided 3.5 mm TRS (Stereo)
mini phone jack to UFO as in the picture below.
Caution!
On the PC system, please don’t connect your headphone or monitor speakers to your sound card.
UFO is not related with your computer’s sound card. You must connect your headphone on it.
Caution!
Do not move all knob by force or harm any components of the parts. Careless moving of the knob
may damage the microphone. Be careful!
❷ Find the USB port on the bottom of UFO.
Connect provided USB cable (Series B plug
type) to UFO as in the picture as below.
The “UFO Pro” is our newest plug-and-play USB condenser microphone. It utilizes high
performance USB processing chip and high quality cardioid pick up pattern condenser
capsule, the sound is excellent and gentle. The microphone body designed with 1/8 stereo
headphone jack, microphone gain, headphone output control knob etc, it is easy to use and
can realize zero latency monitoring. This USB microphone is especially suitable for such
occasions as vocal, instrument, podcast, Internet broadcasting and personal recording etc.
❶ Always Top of the Window ❷ Driver Version Information ❸ Exit the control panel
❹ If you click ‘Monitor’, you can directly monitor the input audio source.
❺ Input fader - This is where you can monitor or adjust the input level of microphone input
or volume.
❻ Stereo mix fader -
This is where you can adjust the output level of your audio applica
tion(WDM).
❼ Master Fader : You can adjust Master output in here. You can adjust input / output
by clicking and dragging the Master fader.
❽ Volume fader level display.
❾ Mute and fader link - Fader Movement link.
❿ Here you can choose between different buffer sizes when you use it with ASIO driver.
The factory default is 10ms to provide a basic level of compatibility to different systems.
⓫ Stereo mix supports to mix both input and output signals that enables the recording of your
microphone and WDM output at the same time.
⓬ FX button - Click this button, you can use ASIO (Audio Streaming Input Output) driver and
connect this driver function to WDM. If you need to use any kinds of VST plug–in with
UFO, this button allows you to apply any FX or VST.
▪ Compatible with USB 2.0.
▪ Resolution/Sampling rate:24Bit / 96kHz.
▪ Sampling rate support :8/16/ 32/44.1/48/96kHz.
▪ Synchronous input and output terminals: Recording and playback mode.
▪ Designed with low cut,-10dB sensitivity, directional switches.
▪ High quality microphone gain, output volume control knob.
▪ With 1/8 stereo headphone jack. 34mm large diaphragm gold-plated capsule.
▪ High quality inbuilt headphone amp chip.
▪ Powerful output power, no distortion and low power consumption.
Minimum system requirement
<PC>
▪ Windows® 7, Windows® 8, or Windows® 10
▪ 2GB RAM
▪ USB 2.0 (cable included)
<Mac>
▪ Mac OS X 10,8,10.9, 10.10 or 10.11.1 (latest update)
▪ 2GB RAM
▪ USB 2.0 (cable included)
1. How to hook up UFO PRO and your computer
2. Install the UFO driver on your PC
3. Install UFO PRO on your MAC
4.How to set up ‘Gain’ and ‘Headphone volume’
7. Block diagram
5. 10dB Attenuation Pad & Low cut Switch
Congratulations!
Features
< Picture 1-2 >
< Picture 1-1 >
< Picture 2 >
< Picture 5 >
< Picture 3 >
< Picture 4 >
< Picture 1-3 >
< Picture 1-4 >
USB port
3.5mm TRS (stereo)
mini phone jack
❶ Simply you can hook up and your computer using included USB cable.
Element High quality condenser capsule
Polar pattern Cardioid / Figure 8 / Omni
Frequency Response 30Hz-18kHz
Sensitivity -34dB (0dB=1V/Pa at 1kHz)
Max.Input SPL 130dB (at 1kHz 1% T.H.D)
Sampling Rate 24Bit/96kHz
Stereo ADC THD+N=0.01% / SNR=89dB
Dynamic Range=89d B
Stereo DAC
THD+N=0.005% / SNR=96dB
Dynamic Range=93dB
Stereo output power : 400mW
Quick Start Guide
MONITOR
WDM
In
WDM
Out
STEREO
DAC
Computer
MASTER
ASIO
In
ASIO
Out
Pre-amp Gain
Mini Phone Jack
for line out and
headphone
Polar Response
Frequency Response
MONO
ADC
Pre
Amp
H.P
Driver
▪ -10 dB Attenuation Pad
When recording a loud voice or drum sound, pad switch can be to allow extended level, 10dB.
By using this switch, you can record+10dB louder input levels without clippings or distortion.
▪ 75Hz Low Cut Switch
If you feel the recorder voice have too many low frequencies, you can reduce low
Frequencies by using this switch.
MIC INPUT
▪ Headphone volume (H.P)
UFO Pro includes a standard 1/8” (3.5mm)
headphone jack. You can use headphone
output to monitor your microphone output
in real-time with your earphone or headphone.
Rotate the ‘HP’ knob clockwise to increase
the Headphone volume.
If you’re recording extremely loud sounds, you can adjusting ‘Pre-amp Gain’ to eliminate
clipping. ‘Gain control knob’ is located front panel as in the picture as below.
To adjust the input level, rotate the ‘gain’ knob clockwise to increase the microphone
sensitivity (dB)
Bidirectional
Cardioid
Omidirectional
0
330
300
270
240
210
150
120
90
30
60
❹
❺
⓫
⓬
❶❷❸
❽
❾
❿
❼
❻
5020
-40
-30
-20
-60
-50
100 200 500 1K 2K 5K 10K
(Hz)
(dB)
20K
-10 dB Attenuation Pad75Hz Low Cut Switch
Diaphram of Mic
APP
FX
Stereo
Mix
