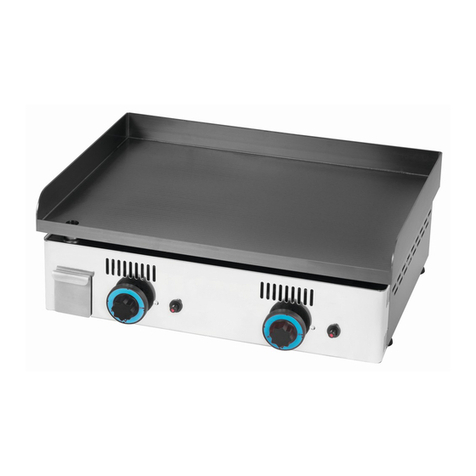
Infrico PE-60PV User manual

MANUAL DE INSTRUCCIONES
INSTRUCTIONS MANUAL
PLANCHAS ELÉCTRICAS
ELECTRIC GRIDDLES
Modelos
Models
PE-60PV; PE-75PV
Idioma:
Español
Language:
English

2
ESPAÑOL
Cuadro de características
Modelos
Dimensiones exteriores (mm)
Potencia
Total
(Kw)
Fases
Amperios
(A)
Voltios
(V)
Peso
(Kg)
Largo
Ancho
Alto
PE-60PV
600
435
208-222
4
II
17,4
230
22
PE-75PV
800
435
208-222
4
II
17,4
230
27

3
INSTALACIÓN
Emplazamiento
El emplazamiento y la instalación eléctrica debe hacerlas siempre un técnico autorizado.
Colocar el aparato debajo de una campana de aspiración para asegurar la completa evacuación
de humos.
La instalación y conexión del aparato debe realizarse siempre de acuerdo con las normas
vigentes de cada país.
El aparato está destinado a un uso profesional y debe ser utilizado por personal cualificado para
su manejo.
Al colocar el aparato deberá quedar nivelado, corrigiendo cualquier desnivel mediante las patas
regulables.
En caso de que el aparato fuese colocado cerca de paredes, paredes divisorias, muebles de
cocina, revestimientos decorativos, etc. Se aconseja que los mismos sean de material no
inflamable.
Sobretodo hay que asegurarse de que sean respetadas las normas antiincendios.
Conexión eléctrica
Todo lo relacionado con la instalación debe respetar las normas vigentes.
El interruptor general de toma deberá estar cerca del aparato y ser de fácil acceso.
La instalación general del aparato, cuya toma se encuentra situada en la parte posterior derecha,
debe hacerla siempre un técnico autorizado.
Verificar la tensión de la red. Debe corresponde a la que indica la chapa de características que
lleva el aparato.
Es indispensable tener una buena toma de tierra.
El fabricante no se responsabiliza del mal funcionamiento del aparato debido a una incorrecta
instalación o a una instalación defectuosa.

4
Esquemas eléctricos para cada mando
Encendido
ES MUY IMPORTANTE SEGUIR ESTOS PASOS!
· Comprobar que el mando del termostato esté en la posición «0».
· Girar el mando del termostato en sentido horario. Primero se encenderá el piloto blanco,
indicando que el aparato tiene corriente. Seguir girando el mando del termostato en sentido
horario hasta la temperatura deseada, graduada en varias posiciones de 50° a 300° C, se
encenderá el piloto rojo, indicando que la resistencia está en funcionamiento.
Para apagar la plancha:
· Girar el mando del termostato en sentido antihorario hasta la posición «0» y la resistencia
quedará desconectada y el aparato no tendrá corriente.
Tras instalar el aparato, y antes de su utilización, es necesario realizar una limpieza de la placa.
A continuación debe tenerse el aparato en funcionamiento durante unos 20 ó 30 minutos para
que se quemen todas las grasas y desaparezcan los olores que pudiera tener al no haberse usado
nunca.
MANTENIMIENTO
Dada la simplicidad de estos aparatos, son pocos los aspectos a los que se debe prestar atención
desde el punto de vista preventivo.
Limpieza
Limpiar diariamente las superficies de acero inoxidable con agua tibia y jabón. Nunca con
detergentes arenosos ni sustancias abrasivas.
Limpiar tanto la placa como el canal recoge-grasas con un desengrasante, con el fin de prevenir
la acumulación de grasas y así evitar que pueda incendiarse.
No es conveniente utilizar mangueras de agua para efectuar la limpieza, ya que puede afectar a
los elementos funcionales.

5
Sustitución de componentes funcionales
A lo largo de la vida de los aparatos puede ser necesaria la sustitución de alguna de las piezas
que lo componen.
Las piezas más importantes para el buen funcionamiento de estas maquinas son las siguientes:
-Termostato
-Resistencias
-Piloto blanco
-Piloto rojo
La sustitución de cualquier componente funcional que pueda afectar a la seguridad deberá ser
efectuada por un técnico autorizado.
Como norma general, siempre que se sustituya cualquier pieza, se deberá desconectar el
aparato de la red eléctrica general.
Problemas y soluciones
Indicamos las averías que pueden presentarse y sus posibles soluciones:
Al poner en funcionamiento el termostato, el piloto no se enciende:
-Comprobar que el interruptor general está conectado.
-Comprobar si hay tensión en la red general.
-La lámpara del piloto esta fundida.
Solución: sustituir el piloto.
El termostato no corta la corriente cuando la placa llega a la temperatura seleccionada:
-Verificar que el bulbo del termostato esté en su alojamiento.
-El bulbo del termostato esta averiado.
Solución: sustituir el termostato.
La placa no llega nunca a la temperatura seleccionada:
-Comprobar que llegue tensión a las resistencias.
-Comprobar si está fundida algunas de las resistencias.
Solución: sustituir la resistencia fundida.
Para estos casos, o para cualquier otro tipo de avería en este aparato, deberán ponerse en
contacto con nuestro SERVICIO TÉCNICO más cercano.
ADVERTENCIA
El fabricante no se responsabiliza de las modificaciones ajenas al
origen del aparato.
El fabricante no se responsabiliza de las averías producidas por una
mala utilización del aparato.
El fabricante no se responsabiliza del funcionamiento y calidad del
aparato si ello lleva implícito la inobservancia de las presentes
INSTRUCCIONES.

6
ENGLISH
Technical date table
Models
General dimensions (mm)
Maximum
Power
(Kw)
Phases
Maximum
Engineering
(A)
Main
Supply
(V)
Weight
(Kg)
Long
Wide
High
PE-60PV
600
435
208-222
4
II
17,4
230
22
PE-75PV
762
435
208-222
4
II
17,4
230
27
The register number of the plate is on the back part (see the draw of electric connexion)
keeping all the necessary details to do the electrical engineering.
Placing
To place the machine does attention it will be well level, correcting any unevenness with the
adjustable feet (to screwing or unscrewing). The general electrical engineering switch will be
placed near to the machine and wit easy access.
We advise to install the machine under the extractor Hood with the finality to absorb quickly
the vapour.
In the case the machine will be placed near the walls, party wall, cooking furniture, ornamental
coating, etc. We advise that it will be in inflammable material. It must be sure that the fire-
fighting regulations will be respected.
Guidelines
The installation must be done with the following guidelines:
· Anti-incident Prescription in force.
· Installation prescription, CEI rules.
Installation
The installation, start and maintenance of the machine will be made by authorised personnel.
All related with the installation will respect the guidelines in force.
The manufacturer will not be held responsible of bad working of the appliance due a wrong
installation or a faulty installation.
Important: Following the international arrangements, during the connexion to the appliance it
is required a mechanism who allow disconnect the mains all the poles. This mechanism will
have an overture in the contacts of minimum 3 mm.
Electric connexion
The general installation of the appliance, whose outlet is located in the back right, should make
it always by an authorized servicer.
In accordance with the Directive 73/237EEC for the low-voltage, Directive EMC 89/336 EEC
and subsequent modifications with the Directive 93/68 for CE mark.
Check the mains voltage. It must correspond to which indicates the rating plate carrying the
appliance. It is essential to have a good earth connection.

7
Electrical Diagram for each knob:
Ignition
MOST IMPORTANLY, FOLLOW THESE STEPS!!
· Make sure that the thermostat knob is in position “0”
• Turn the thermostat knob clockwise. First of all, the white pilot will turn on, indicating that
the machine has current. Turn the thermostat knob clockwise to the desired temperature,
graduated in various positions from 50º to 300º C, the red pilot will turn on, indicating that the
resistance is in operation.
To turn off the grill:
· Turn the thermostat knob anticlockwise until the “0” position and the resistance will be
disconnected and the machine won’t have current.
After installing the appliance, and before use, it is necessary to perform a cleaning of the plate.
Then the appliance should be working for about 20 or 30 minutes so all the fat burning and
odors that might have never been used disappear.
MAINTENANCE
Given the simplicity of these appliances, there are few aspects to which attention should be
paid from the preventive point of view.
Cleaning
· Daily clean the surfaces of stainless steel, with soap and warm water. Never use sandy
detergents or abrasive substances.
· Clean both the plate and the collection tray of fats with a degreasing agent, in order to prevent
the accumulation of fat and this avoid that you can catch fire.
· It is not convenient to use water hoses for cleaning, since it can affect the functional
elements.
Replace of functional components
Replacement of any part which composes it may be needed throughout the life of the
equipment. The most important pieces for the proper working of the machines are the follows:
· Thermostat
· Resistances
· White pilot
· Red pilot
The replacement of any functional component that could affect safety must be performed by an
authorized servicer.
As a general rule, the whenever you replace any parts, disconnect the appliance from the
mains.

8
Problems and solutions
We indicate faults which can present and their possible solutions:
· Put into operation the thermostat, pilot does not light up:
- Check that the mains switch is connected.
- Check for voltage in the mains.
- The pilot lamp is burned out.
Solution: replace the pilot.
· The thermostat does not cut current when the plate reaches the selected temperature:
- Check that the thermostat bulb is in your accommodation.
- The thermostat bulb is broken.
Solution: replace the thermostat.
· The plate does note never reach the selected temperature:
- Check voltage reach resistances.
- Check if it is melted any resistance
Solution: replace the melted resistance.
For these cases, or for any other type of damage to this appliance, must be put in contact with
our nearest SERVICE.
WARNING
The manufacturer will not be held responsible for any non-approved modifications.
The manufacturer will not be held responsible for any damage produced by misuse of
the appliance.
The manufacturer will not be held responsible for the operations and quality of the
appliance if the operating and maintenance instructions detailed above, are not observed.
This manual suits for next models
1
Table of contents
Languages:
Other Infrico Griddle manuals
Popular Griddle manuals by other brands
Rival
Rival GRF400 owner's guide
Redfox
Redfox KD 30 (T) Instructions for installation and use
Keating Of Chicago
Keating Of Chicago MIRACLEAN Service manual
AccuTemp
AccuTemp EGD Series S/N 7547 Installation & owner's manual

TU’S BROS
TU’S BROS GP-300 user guide
Vulcan-Hart
Vulcan-Hart 924RE ML-135221-00G24, 936RE M Service manual
Black Stone
Black Stone 1836 owner's manual

Star Manufacturing
Star Manufacturing Star-Max 0106 Specification sheet

Omcan
Omcan CE-CN-1800-G instruction manual
George Foreman
George Foreman GRP84GP Use and care guide
Alice's Garden
Alice's Garden PORTHOS PH1004SB instructions

Black Stone
Black Stone 1971 owner's manual
