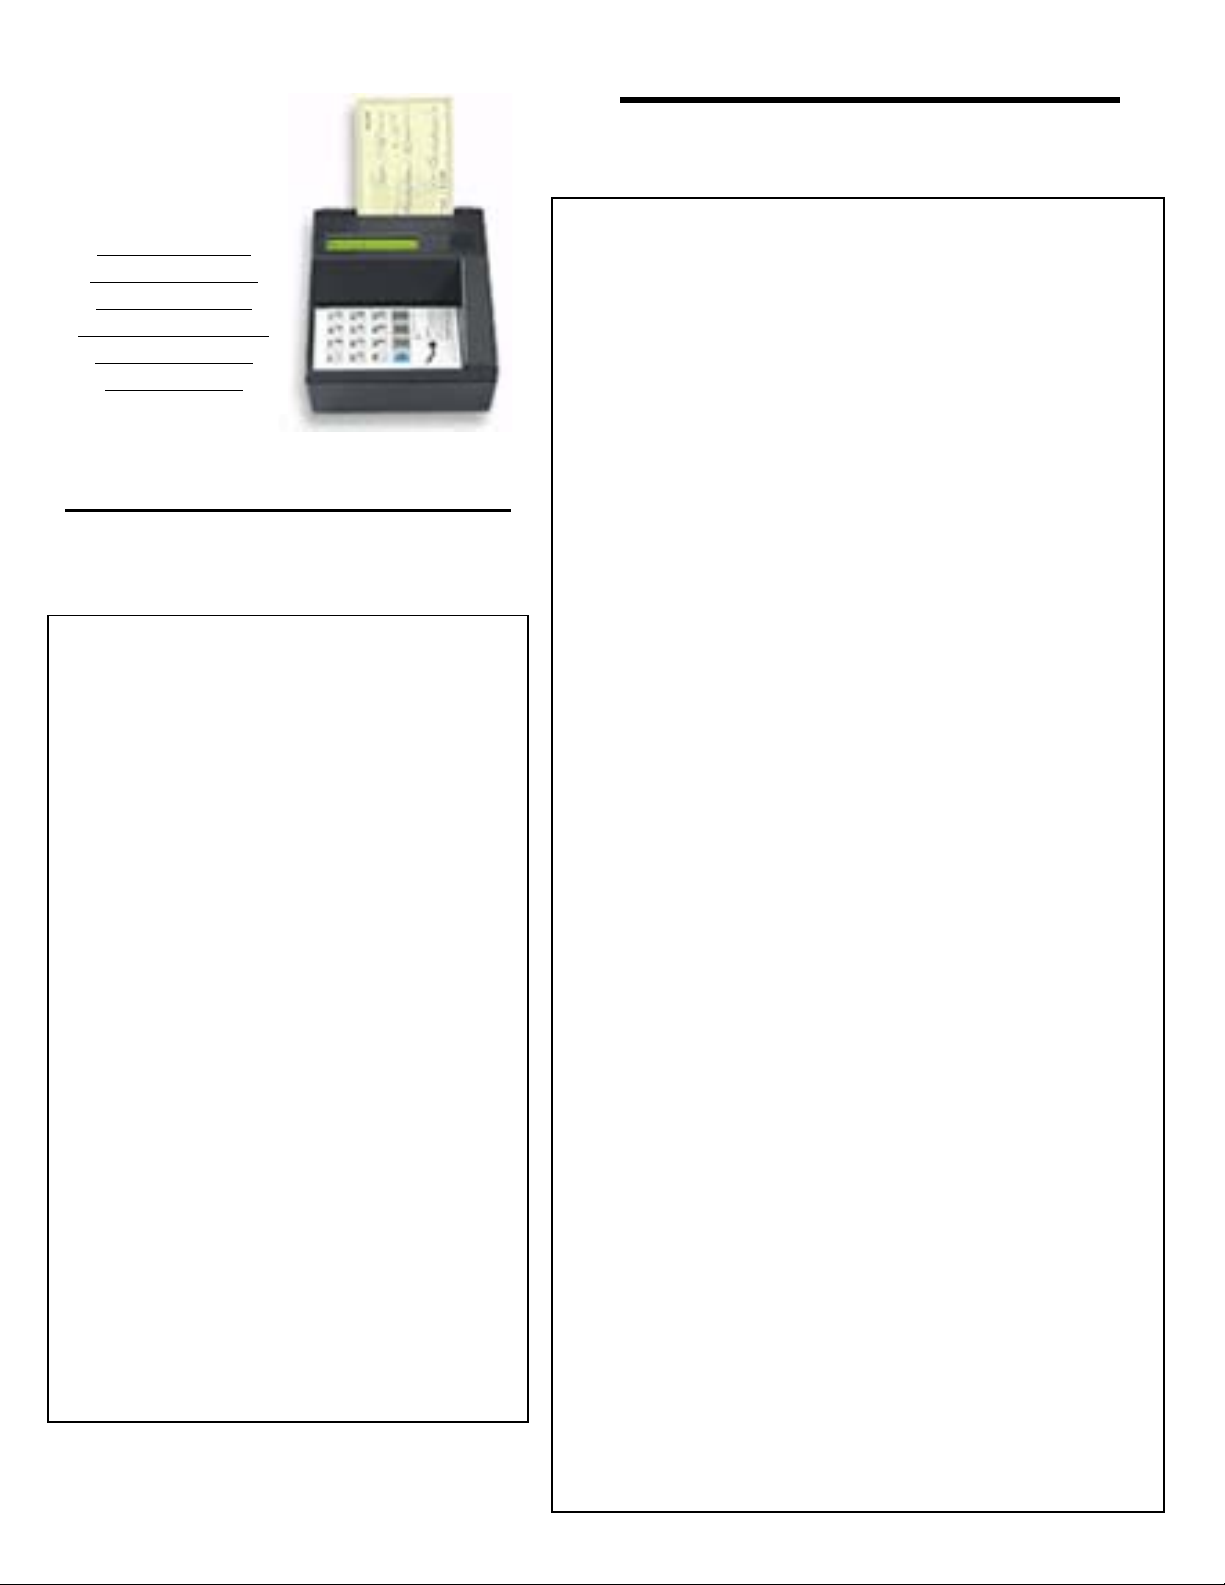
Ingenico 3000 User manual

CheckManager 3000
How to Download the CM3000
If you are unable to
download your
machine, please call
(850) 857-7752
Note: You may
need to make an
appointment to
download if we are
performing line
maintenance.
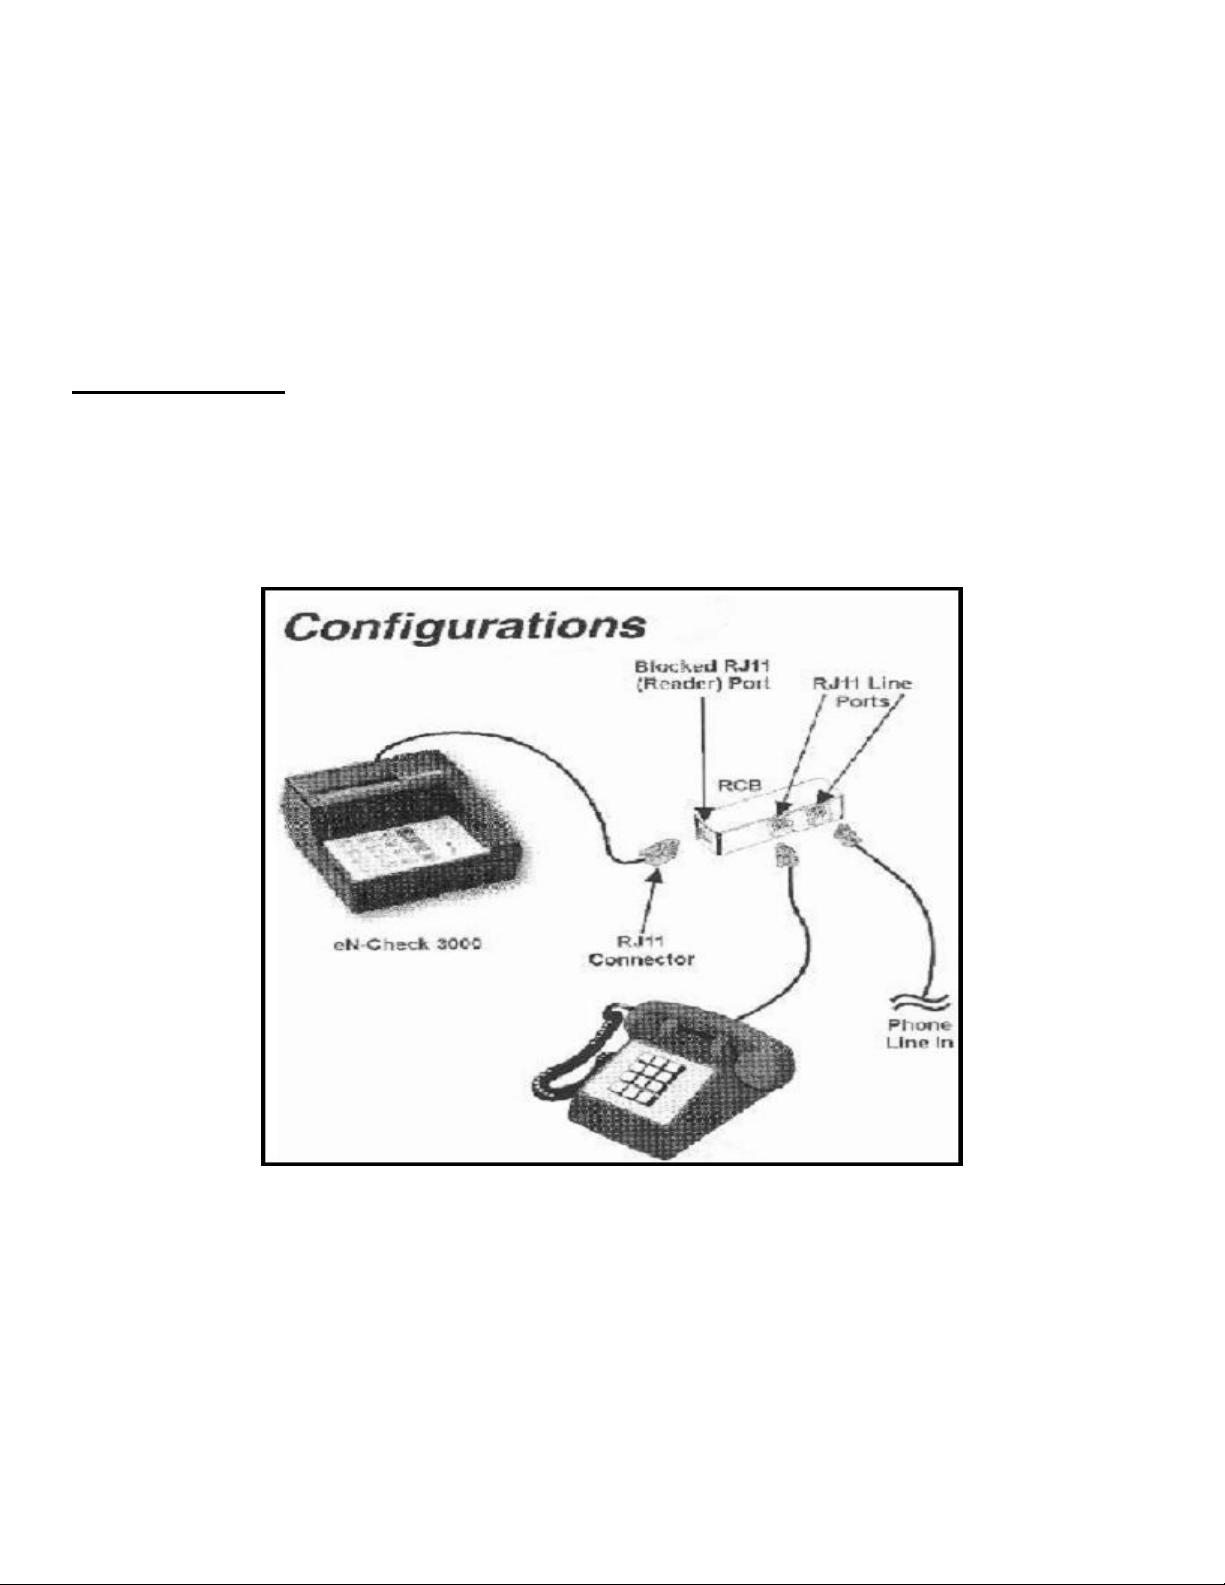
1. Make sure the CM3000 is unplugged
2. Insert a check into the CM3000
3. Plug in CM3000 with check inserted as indicated on
the face of the CM3000.
4. When prompted to remove the check press the
clear key. (Make sure that you leave the check
inserted and ready to be read.
5. The check will be pulled through the CM3000 and
you will then remove the check.
6. CM3000 will display (unit Config Mode)
Press FUNC/ENTER
7. CM3000 will display (Function?)
Press 1
8. CM3000 will display (Full dl?)
Press 1
9. CM3000 will display (Clr mem?)
Press 1
10. CM3000 will display (1200 Bd?)
Press 1
11. CM3000 will display (T. Dial?)
Press 1
12. CM3000 will display (Dwnld Phone Num?)
Press 1-888-410-4660 ENTER
13. CM3000 will display (Serial Num?)
Press 1000 ENTER
14. CM3000 will display (Application ID?)
Press V2 ENTER (V is entered by pressing 8
ALPHA ALPHA ALPHA)
15. CM3000 will dial out and start down load.
16. CM3000 will display (Down Load Done).
17. Unplug the CM3000 and then plug it back in.
18. CM3000 will display “Press 1 to Continue”—DO
NOT PRESS 1 – PRESS 9
19. CM3000 will display (1=Setup, 2=Batch). Press 1
20. Str = Store name here (Press enter)
21. StrTel = (Press enter)
22. CATel = (Press enter)
23. Tel1 = 18776401218 (Press enter)
24. Tel2 = 18776401218 (Press enter)
25. Press ENTER until CM3000 displays, “Enter
Password”. Press 12345 ENTER
26. CM3000 will display (New Password or Enter)
Press ENTER
27. CM3000 will display store XXXXXXXX. Input the 8
digit, alphanumeric code for this store and press
ENTER. (4-digit Site ID # and 4-digit store code you
assigned them in your Check Collecton Software)
(For example: C06LA123)
28. Press the ENTER key 5 times until the date reads
across the CM3000.
29.Program Complete
How to set the Time and Date
You must download before setting time
and date
Put unit into “Config Mode” by doing steps
1 thru 6 in “How to Download CM 3000”.
Then proceed as follows:
1. Press FUNC/ENTER key once.
2. Function? displays. Press “2”.
3. YEAR (1997-2096) displays. Input the
4-digit year and press “ENTER”
4. MONTH (01-12) displays. Input the
number of month. (January = 01 -
December = 12). Press “ENTER”
5. DATE (1-31) displays. Input the day of
the month. Press “ENTER”
6. HOUR (0-23) displays. (Note: The
hour is entered as military time –
1:00am=01 and 1:00pm = 13)
Input 2-digit hour and press”ENTER”
7. MINUTE (0-59) displays. Input 2 digit
minute and press “ENTER”
8. The CM3000 display will scroll the
date and time for confirmation
9. If correct, press “Enter” to complete
the operation.
Rev. 04/19/2006

Before you begin, please read this.
If any of you are using other than new CheckManager 3000 units, we suggest you "blast
the memory" clean before beginning the process of downloading our programming.
This information comes directly from the CheckManager 3000 Tech Support staff.
To clean the memory of a CheckManager 3000:
1. HOLD CLEAR KEY DOWN (8-10 SECONDS) UNTIL IT ASKS FOR A
PASSWORD.
2. ENTER PASSWORD OF 246135 AND PRESS ENTER.
3. "UNIT CONFIG MODE" DISPLAYS.
4. PRESS ENTER.
5. PRESS "0”(this is a zero).
6. "PASSWORD" AGAIN DISPLAYS.
7. PRESS 4 ALPHA ALPHA ALPHA 1937 AND PRESS ENTER.
8. "CLEARING UNIT" WILL DISPLAY.
9. ALLOW TO RUN UNTIL "UNIT CONFIG MODE" AGAIN DISPLAYS.
10.UNPLUG UNIT (Power down).
11. THE UNIT IS NOW READY FOR OUR PROGRAMMING.
Rev. 04/19/2006

How to Verify a Check with the CheckManager 3000
1. PRESS 1 - “VERIFY CHECK “ APPEARS
2. RUN THE CHECK THROUGH THE READER AS NOTED ON READER - MICR LINE ON
RIGHT - FACE UP.
3. UPON SUCCESSFULLY READING THE CHECK, “AMOUNT” WILL APPEAR.
4. ENTER AMOUNT OF CHECK.
5. PRESS ENTER (BLUE KEY)
6. THE MACHINE WILL DIAL OUR VERIFICATION SYSTEM
7. RESULT WILL APPEAR ON SCREEN:
AP_______ = APPROVED. THIS ALPHANUMERIC CODE WILL HAVE BOTH NUMBERS
AND LETTERS. WRITE THIS CODE ON THE CHECK.
EXCESS $H - EXCESS DOLLARS PER HOUR
EXCESS $D - EXCESS DOLLARS PER DAYS
EXCESS #H - EXCESS # PER HOURS
EXCESS #D - EXCESS # PER DAYS
DECLINED - DECLINED
EXCESS ACCOUNTS = EXCESS ACTIVITY. CAUTION!! CHECK HAS PASSED THE SET
AMOUNTS OF EXCESS ACTIVITY - SEEING MANAGER FOR APPROVAL IS
SUGGESTED.
DECLINED = MEANS THAT WE HAVE AT LEAST ONE RETURNED CHECK IN THE DATA
BASE UNPAID. REFER TO HOME OFFICE FOR INFORMATION. IT IS SUGGESTED YOU
DO NOT TAKE THE CHECK.
• PRESS CLEAR BEFORE RUNNING ANOTHER CHECK.
• NOTE: IF A CHECK WILL NOT SCAN, FOR WHATEVER REASON, YOU CAN
VERIFY THE CHECK MANUALLY. DO THIS BY PERFORMING STEP 1, AND THEN
PRESSING THE # KEY.
• YOU WILL THEN NEED TO TYPE IN THE ROUTE, ACCOUNT, AMOUNT AND
CHECK NUMBER MANUALLY.
Rev. 04/19/2006

CheckManager 3000 (IVI was recently purchased by
Ingenico and it is now called the eN Check 3000.)
Installation and Operation Instructions
The CheckManager 3000 TM is a dial check reader for check authorization / guarantee service
applications with the following features:
• Motorized check reader.
• One-line visual display of 16 characters.
• 16-key keyboard.
• Two modular telephone jacks.
• One RS-232 port.
• One optional Magstripe reader connector.
The ports and jacks allow you to attach optional devices such as a serial printer. Refer to the
illustration below to locate the appropriate jack or port when directed in the instructions that follow.
Selecting Installation Site
Position the CheckManager 3000 with sufficient space to attach the cable and to feed a check. To
mount the Check Manager 3000 with screws, use two#4 panhead screws (not included).
NOTE: Do not place the CheckManager 3000 next to a monitor, next to a “demagnetizer” or
near a power transformer. If you do, you might receive an error while verifying a check.
Connecting Communications
Your CheckManager 3000 has an internal dial-up modem for connecting to a remote host computer
across a standard telephone line. A telephone line cable is supplied to connect your CheckManager
3000 to an available modular telephone jack.
Rev. 04/19/2006

To connect your CheckManager 3000 to a telephone line:
1. Insert one end of the supplied telephone line cable into one of the modular telephone
connectors on the back of the CheckManager 3000.
2. Insert the free end of the telephone line cable into the modular telephone jack.
3. If a telephone set or other equipment is currently connected to the telephone wall jack, unplug
it. If you wish to use the telephone set or other equipment, plug the connector into the free
modular telephone jack in the CheckManager 3000, as described below in connecting a POS
terminal or telephone set.
Connecting Peripheral Devices
The built-in ports on the CheckManager 3000 allow you to attach up to three optional devices:
• Serial printer to the 8-pin DIN connector.
• POS terminal or standard telephone set to the RJ11 connector.
• Optional 3-track magnetic stripe reader to the 10-pin modular jack connector.
Connecting a Printer
Each printer uses a special type of cable, which is ordered separately.
To connect a printer/PC to your CheckManager 3000:
1. Ensure that the CheckManager 3000 is not powered-up
2. Insert the male 8-pin DIN end of the printer cable into the 8-pin port on the back of the
CheckManager 3000.
3. Insert the other end of the printer cable into the appropriate serial port on your printer. For
further instructions, refer to the installation instructions included with your printer.
Connecting a POS terminal or telephone set.
The second modular telephone jack in the CheckManager 3000 can be used to connect a POS
terminal or telephone set. This allows you to make a normal voice or credit card authorization calls
when the CheckManager 3000 is not in use processing a check authorization transaction.
To connect a POS terminal / telephone set the CheckManager 3000:
1. Ensure that the power is unplugged from the CheckManager 3000.
2. Insert one end of the telephone line into the free modular jack on the back of the
CheckManager 3000.
3. If not already connected, insert the other end of the telephone line into the appropriate jack on
your POS terminal or telephone.
Connecting Power
The CheckManager 3000 does not have a power switch. As soon as you connect the unit to power, it
is powered up.
1. Insert the small plug on the power transformer into the CheckManager 3000 receptacle.
2. Plug the power transformer into a 120-volt AC power outlet.
NOTE: The CheckManager 3000 should be supplied with a UL listed power transformer unit marked
Class 2. The power output of the transformer is 10VAC, + / - 5%, 1500mA with maximum open load
voltage of 12.5VAC.
Rev. 04/19/2006

Check Feeding Instructions
1. Place the check face-up with the bottom of the check flush to the right side (see illustration on
the reader).
2. Push the check forward to engage the reader.
3. Release the check when the reader pulls the check.
Keyboard Operation Instructions
The keyboard is used to enter numeric, alpha and / or special character data required for the check
authorization application.
Numeric / */ # / character entry
1. Firmly press the key with the desired character.
Alpha / , / ‘ / “ / - / space / character entry
1. Firmly press the key with the desired character.
2. Then press the ALPHA key (Just like using a Cellular Phone)
3. Continue to press the ALPHA key until the correct character is displayed.
Function Keys
The function keys are application dependent. The definitions given below are “standard” use of the
key.
1. CLEAR KEY – clear last entry.
2. BACKSPACE – move the cursor back to change a character.
3. ALPHA – use to enter “alpha” and special characters.
4. FUNC/ENER – used to select a function or complete an operation.
Maintaining the CheckManager 3000
Cleaning the MICR check reader:
The Magnetic Ink Character Reader should be cleaned periodically since iron oxide particles from the
magnetic ink can build up on parts that come in contact with the check and may affect check reading.
A cleaning kit (P/N 900038) can be ordered to clean the check reader head.
Cleaning the case:
Unplug the power transformer before proceeding with cleaning instructions. Remove dust from the
CheckManager 3000 using a damp cloth. To wash off accumulated dirt and grime, use mild soap and
water. Do not allow water to enter inside the case. Do not use solvents, cleaning fluids, or abrasives
as these could destroy the plastic and cause serious damage to the keyboard or display.
Troubleshooting
Solving Problems:
When you first connect your CheckManager 3000 to the power source, after a few seconds a
message should be visible on the display.
If your CheckManager 3000 does not display a message:
1. Check that the power pack is plugged into a working power outlet.
Rev. 04/19/2006

2. Check that the small plug on the power cable is inserted firmly into the power jack on the
CheckManager 3000.
Solving communications problems
If your CheckManager 3000 does not properly complete transactions:
1. Check that the telephone cable (s) are securely attached into the modular jacks.
2. Check that the wall modular jack is working by connection a telephone set and listening for a
dial tone.
3. Verify correct application is loaded in the CheckManager 3000.
Using an RCB
This document describes the different types of configuration options available with the Line-In-Use
RCB. The RCB senses when a phone line is in use, then prevents any device that is attached to the
blocked RJ11 port (Reader Port) from interrupting the existing connection.
The RCB consists of a single circuit board with three RJ11 (phone-line type) connectors. Figure 1
illustrates the position of the ports on the CheckManager 3000 always connects to the Reader Port.
Rev. 04/19/2006

Rev. 04/19/2006

Rev. 04/19/2006
The above instructions are an overview of the “Installation and Operation Instructions” that was
provided by IVI CheckMate Inc. along with your CheckManager 3000 purchase. Please note that
Ingenico has purchased the IVI Company and the CheckManager 3000 is now called the eN
Check 3000. However, the functionality remains the same.
This overview is used only as a reference guide should you require the complete “Installation and
Operation Instructions” please contact your sales representative.
Copyright © 2004, Quick Check Inc., All rights reserved
Other manuals for 3000
1
Table of contents
Other Ingenico Cash Register manuals