manuals.online logo
Brands
  1. Home
  2. •
  3. Brands
  4. •
  5. Sam4s
  6. •
  7. Cash Register
  8. •
  9. Sam4s ER-230 Series Troubleshooting guide

Sam4s ER-230 Series Troubleshooting guide

Other manuals for ER-230 Series

7

Other Sam4s Cash Register manuals

Sam4s ER-655II User manual

Sam4s

Sam4s ER-655II User manual

Sam4s ER-260EJ Owner's manual

Sam4s

Sam4s ER-260EJ Owner's manual

Sam4s SPS-300 Series User manual

Sam4s

Sam4s SPS-300 Series User manual

Sam4s ER-380M Troubleshooting guide

Sam4s

Sam4s ER-380M Troubleshooting guide

Sam4s NR-300 Series User manual

Sam4s

Sam4s NR-300 Series User manual

Sam4s ER-900 Series Owner's manual

Sam4s

Sam4s ER-900 Series Owner's manual

Sam4s ER-265 Owner's manual

Sam4s

Sam4s ER-265 Owner's manual

Sam4s SPS-500 User manual

Sam4s

Sam4s SPS-500 User manual

Sam4s ER-380 Troubleshooting guide

Sam4s

Sam4s ER-380 Troubleshooting guide

Sam4s ER-150 User manual

Sam4s

Sam4s ER-150 User manual

Sam4s SPS-500 User manual

Sam4s

Sam4s SPS-500 User manual

Sam4s SPS-520 Assembly instructions

Sam4s

Sam4s SPS-520 Assembly instructions

Sam4s ER-420 Series User manual

Sam4s

Sam4s ER-420 Series User manual

Sam4s ER-150II User manual

Sam4s

Sam4s ER-150II User manual

Sam4s ER-230 Series Troubleshooting guide

Sam4s

Sam4s ER-230 Series Troubleshooting guide

Sam4s ER-900 Series Troubleshooting guide

Sam4s

Sam4s ER-900 Series Troubleshooting guide

Sam4s ER-650 Troubleshooting guide

Sam4s

Sam4s ER-650 Troubleshooting guide

Sam4s ER-180T Owner's manual

Sam4s

Sam4s ER-180T Owner's manual

Sam4s ER-900 Series User manual

Sam4s

Sam4s ER-900 Series User manual

Sam4s ER-150II User manual

Sam4s

Sam4s ER-150II User manual

Sam4s ER-900 Series User manual

Sam4s

Sam4s ER-900 Series User manual

Sam4s ER-5200 Troubleshooting guide

Sam4s

Sam4s ER-5200 Troubleshooting guide

Sam4s ER-230 Series Owner's manual

Sam4s

Sam4s ER-230 Series Owner's manual

Sam4s NR-500 Series Owner's manual

Sam4s

Sam4s NR-500 Series Owner's manual

Popular Cash Register manuals by other brands

Royal 480nt operating manual

Royal

Royal 480nt operating manual

Olivetti ECR 8200 S user guide

Olivetti

Olivetti ECR 8200 S user guide

TEC TEC FS-3600 owner's manual

TEC

TEC TEC FS-3600 owner's manual

Integrated System Laboratory ISL 4006 user manual

Integrated System Laboratory

Integrated System Laboratory ISL 4006 user manual

Sharp XE-A206 Guía de inicio Rápido

Sharp

Sharp XE-A206 Guía de inicio Rápido

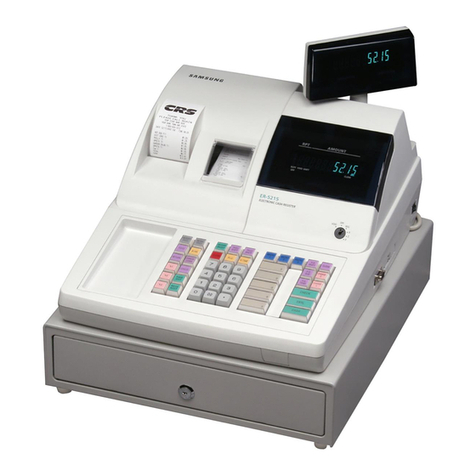
Samsung ER 5215 Operator's manual

Samsung

Samsung ER 5215 Operator's manual

Toast Toast Quick setup guide

Toast

Toast Toast Quick setup guide

QUORION CR 1200 user manual

QUORION

QUORION CR 1200 user manual

Olivetti ECR 7700 LD eco Plus user guide

Olivetti

Olivetti ECR 7700 LD eco Plus user guide

Sharp XE-A137-WH Operation Basic user manual

Sharp

Sharp XE-A137-WH Operation Basic user manual

Sharp XE-A203 - Cash Register Thermal Printing Graphic Logo... instruction manual

Sharp

Sharp XE-A203 - Cash Register Thermal Printing Graphic Logo... instruction manual

TEC TEC MA-1060 owner's manual

TEC

TEC TEC MA-1060 owner's manual

American Changer CLASSIC Series Operation manual

American Changer

American Changer CLASSIC Series Operation manual

Sharp XE-A130 Bedienungsanleitung

Sharp

Sharp XE-A130 Bedienungsanleitung

Casio PCR-T273 user manual

Casio

Casio PCR-T273 user manual

Sharp ER-2540 Service manual

Sharp

Sharp ER-2540 Service manual

Sharp ER-2540 Service manual

Sharp

Sharp ER-2540 Service manual

Casio QT-7300 Series user manual

Casio

Casio QT-7300 Series user manual

manuals.online logo
manuals.online logoBrands
  • About & Mission
  • Contact us
  • Privacy Policy
  • Terms and Conditions

Copyright 2025 Manuals.Online. All Rights Reserved.

Model ER
Model ER
-230
-230
Before You Start
Please locate the
following items:-
1 x Paper Rolls.
1 x Operation and
Program Manual.
To Install Till Roll
1
!
Entering a Basic Sale
2
• Plug the power cord of the cash register into
the AC outlet (plug socket).
• Remove the printer cover (A)(B).
• Push the Yellow lever to release the printer
mechanism. (C).
• Ensure that the paper roll is being fed from the
bottom of the roll (E).
• Feed the leading edge of the paper roll through
the paper slot (D).
• Pass the leading edge of the roll of paper
through the cutter slot on the printer cover,
tear off the excess paper, close the paper
mechanism lever and replace the printer
cover (F).
VOID
VOID
RPT
RPT
AMOUNT
A M O U N T
OFF
OFF
REG
REG X Z P S
BAT
BAT
The cash register has PLU buttons 1-12 through which to register
your sales. The purpose of these are to assist you in analysing
your business. (For example PLU 1 could be used for entering
‘Food’ and PLU 2 could be used for ‘Non-Food’ etc.) By pressing
the appropriate PLU button and registering your sale you will
begin to analyse your sales ready for the end of the day report.
• Press the MODE key until the display shows a line over the REG position.
• Press the PLU key on the keyboard (i.e. 1) if the button has a preset price or
• Enter an amount on the numeric keypad. (For example, for £2.99, enter: 299).
Do not use the decimal key and press the PLU key on the keyboard (i.e. 4)
• To enter another sale repeat as above.
• Press the SUBTOTAL button to show the value due.
• If you would like to calculate change, enter the value of money given to you by the customer.
Do not use the decimal key. (For example, for £10.00 enter: 1000).
• If you do not wish for the change due to be displayed then go on to the next stage.
• Press the CASH/TEND button to open the drawer.
• If the money given has been entered, then the change will be displayed.
Battery Information.
The ER-230 register runs on Mains power or its internal battery power.
The register can run for 8hrs on a single charge. It is important to note the
following points regarding the battery:-
• Prior to initial operation the battery should be charged for 15 hours in
a well ventilated area.
• The battery should not be fully discharged, and if this occurs should be
charged immediately.
• To charge the battery from flat will take in excess of 15 hours, therefore
regular charging is advisable.
• The battery can be charged with the register in the off or on mode.
!
Reporting
3
Setting the Date and Time
4
Entering Product Prices
5
Entering a Product Description
6
Programming Receipt Message
7
VOID
VOID
RPT
RPT
AMOUNT
A M O U N T
OFF
OFF
REG
REG X Z P S
BAT
BAT
VOID
VOID
RPT
RPT
AMOUNT
A M O U N T
OFF
OFF
REG
REG X Z P S
BAT
BAT
VOID
VOID
RPT
RPT
AMOUNT
A M O U N T
OFF
OFF
REG
REG X Z P S
BAT
BAT
VOID
VOID
RPT
RPT
AMOUNT
A M O U N T
OFF
OFF
REG
REG X Z P S
BAT
BAT
VOID
VOID
RPT
RPT
AMOUNT
A M O U N T
OFF
OFF
REG
REG X Z P S
BAT
BAT
The cash register has two reporting modes. Xmode for printing
out the information without clearing any figures.
Zmode for printing and clearing the figures back to zero ready
for the next day.
• Press the MODE key until the display shows a line over either the Xposition to print without
clearing or Zposition to print & clear sales.
• Press 1followed by the SUBTOTAL button.
• The end of day report is then printed.
• Press the MODE key until the display shows a line over REG.
• Further reports can be found in the Programming/Operation Manual.
• Press the MODE key until the display shows a line over
the Pposition.
• Enter 1 3 0 0 and press the SUBTOTAL button.
• Enter time in 24-hour format. (For example enter 1400 for 2:00pm).
• Press the X/TIME button.
• Enter the date in MM(month) DD(day) and YY(year) format. (For example enter 080109 for August 1st 2009).
• Press the X/TIME button.
• Press the CASH/TEND button to finalise the program.
• Return to the REG position ready for normal use.
• Press the MODE key until the display shows a line over
the Pposition.
• Enter 2 0 0 and press the SUBTOTAL button.
• Press a PLU button on the keyboard (i.e. 1 ).
• Enter the price of the PLU without the decimal point. (For example, for £2.99, enter: 299)
• Press the X/TIME button. Either enter the second price or enter 0and press X/TIME .
• Press the CASH/TEND button to finalise the program.
• Return to the REG position ready for normal use.
• Press the MODE key until the display shows a line over
the Pposition.
• Enter 3 0 0 and press the SUBTOTAL button.
• Press a PLU key on the keyboard (i.e. 1).
• Type in the description using the letters on the buttons.
• Press the X/TIME button to accept the word.
• Press the CASH/TEND button to finalise the program.
• Return to the REG position ready for normal use.
• Press the MODE key until the display shows a line over
the Pposition.
• Enter 7 0 0 and press the SUBTOTAL buttons.
• Enter the line number i.e. 1-6 for the top of the receipt and
7-12 for the bottom of the receipt.
• Press the X/TIME button.
• Use the letters on the buttons to type the message.
• Then press the SUBTOTAL button.
• Press the CASH/TEND button to finalise the program.
• Return to the REG position ready for normal use.