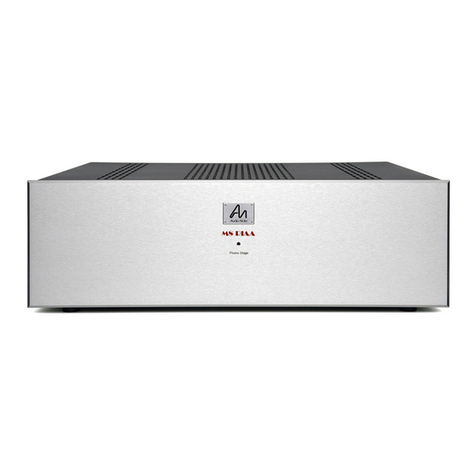
Innersound RCP-1 User manual

I
t
t
I
I
I
T
I
t
I
I
I
T
t
h
:
h
h
E
F
;
RCP-I lnnersound
Reference
Pream
pl
ifier
Owner'sManual

Table
of Contents
INSTALIATION
OPERATION
CARE
AND
CLEANING
SPECIFICATIONS
WARRANry

t
t
t
t
t
t
I
INSTALLATION
rocArlorr
OurReference
Preamplifier
isbest
situated
onits
own
shelf
inarack
or
bookshelf
whereitwillperform
atitsbest.
lrrPUTcorilEcTtoilS 3|nd sysTE}| ruRr oll/oFF
signalinput
ismade
through
goldptated
RCA
(unbalanced)
orXLR
(balanced)
connectors.
Atotal
of sixinputs
are
available,
three
ofwhich
provide
bothXLR
andRCA.
The
other
threeinputs
areRCA
only- Thisis
a"line
stage"
preamp,
so
although
theinputs
have
specific
labels,
they
are
allatline
level,
areidentical
infunction,
and
canbe
used
with
any
line-level
component.
Thefirst5 inputs
(cD,
Tuner,
Video,
Aux,
processor)
are
"main"
inputs.
The
last
one
(Monitor)
is
a"loop"
with
afixed
level
output
associated
with
it. The
"Monitor"
loop
issometimes
calleda"Tape
Monitor."
lt is
designed
to beused
with anaudiorecorder
(cassette,
DAT,
CDR,
minidisk,
etc.)where
thecurrentlv
selected
input
source
isrecorded.
This
outputisunaffected
bytheoverall
system
volume,
sotherecording
level
isnot
alteredifyou
need
to adjust
thelistening
lever.
OUTPUTCOIIilEGTIOIIS
There
are
two separate
outputchannels
through
gordprated
RCA
(unbalanced)
orXLR
(balanced)
connectors.
The
balanced
and
unbalanced
connectors
arenot
to beused
simultaneously
onasingle
output
channel.

POWER COII]IECTTOIIS
Be
certainallassociatedequipmentis
turnedoffbefore
plugging
in
the
preamp.
Insertthe
power
cord
into
theACLINE
INPUTonthe
back
panel
andthenconnectitto anappropriate
power
source.Then
youmayturn
on
vour
othercomoonents.
The
preamplifier
is
designedto be
left
oncontinually.
By
leaving
the
electronics
on,theystaywarm
andarealways
intheir
optimumoperating
stateand
readvfor immediateuse. However.
thereis
a power
switch
provided
ontherear
panel
foroccasionswhen
you
wouldliketo turn
yourpreamplifier
off(i.e.
yougo
awayonvacation
orthereis
alightning
storm).
The
preamplifier
uses
justafewwatts
of power
so
power
consumption
is
notanissue.Allindicator
lightsarelight
emitting
diodes
(LEDs),
including
thedigital
display,sotheywillneverburn
outor need
reolacement.
ETECTRTCAIPROTECTTO]I
Althoughnot
essential,
itisa
good
ideato useasurge
protector
to
prevent
damage
toyour
expensiveequipmentin
theeventofanelectrical
stormor othercausesof abnormallyhighvoltage.
These
are
inexpensive
andcan
be
obtainedfromanvhardwarestore.You
do notneedto usean
expensivelineconditioner,butif
you
do,thesenormallywillhave
surge
protection
built-inso
you
donotneed
to useadditional
surge
protection.
TheAClinevoltage
and
line
fuseofthepreamplifier
are
preset
atthe
factoryforyour
location.lf it isnecessary
to change
thesesettings,
contactthe
factory
for instructions.

I
I
t
I
I
t
I
r
t
I
I
T
T
I
T
I
I
t
T
T
I
I
I
OPERATION
TheInnersoundReferencePreamplifieris
asophisticated,computer
operatedunitthathas
manyfunctions.Despiteits
complexity,it appears
very
simple. Greatcareandthought
were
put into makingit "user
friendly"
and
ergonomicallywell
designed.Allof thefollowingfunctions
areavailablefrom thefront panel
controlsandbyremote
control. Each
functionislistedbelowwithdirections
onhowto operate
it.
IIIPUT SELECTIOII
Press
theappropriately
labeled
button
onthefront panel
to select
a
source.Whenactivated,
asmall,
blue
LED
abovetheswitchwilllight.
Thefour"main"
inputs
(CD,
Tuner,Video,Aux)
operatetogethersothat
selectinganyoneof theseinputsswitchesouttheothers.
The
"Monitor"
buttontoggles
between
your
recorder
andwhatevermain
inputisselected.lftherecorder
hasa monitoringfunction
(where
the
recordingcanbe
played
backduringrecording),
you
can
set
your
recorderfor playback
andbypressing
the"Monitor"
button,
youcan
switchbetweentheinputsourceandtherecorder's
playback.
Thisway
you
can
"monitor"
andcompare
the
quality
ofyour
recording
to the
source.
STAilDBYE
Use
this switchto togglebetweenstandbyemode
andoperationmode.
Wheninstandbye,
the
displayis
turnedoffwhiletheblue
"standbye"
LED
isilluminated.
Standbyeturnsoffthesignaloutputswhile
stillkeepthe
remaining
audiocircuits
infull
operation.

I
t
t
I
T
T
RESET
Use
this
function
to resetall
preamplifier
settings
totheirdefault
factory
setting.Resetting
theunitis
done
byholding
inthe"RESET"
buttonuntil
"rE'is
displayed
inthecenter
display.
Since
someof
the
preamplifier
functions
areonly
accessed
by
theremotecontrol,
theresetbutton
is
provided
to getback
to a"normal
operating
mode
iftheremote
control
is
notavailable.
UOTUTE
Thestargate
knobsurrounding
thenumber
displayadjusts
the
output
levelofthepreamplifier
inprecise
1
dBstepsacross
a rangeof t00dB.
Thiscontrol
rotates
continually
- it isnotlimitedto the280degree
rotation
of conventional
rotarycontrols.Thedigitalreadout
shows
the
output
levelin I dBincrements
between
thenumbers
"00"
and
"99"
Thevolume
control
isnotaconventional
potentiometer
- it isanoptical
device
that
controlsa microprocessor.
Unlike
conventional
stepped
resistor
ladderattenuators,
thismicroprocessor
has
notransient
clicksor
pops
as
you
change
the
volume.Likearesistor
ladder,thelevelof each
channel
isclosely
matched
sotheleft/rightbalance
willremain
constant
as
you
adjust
thelevelupand
down. Thetolerance
iswithin0.1%,
which
isvastlybetterthaneven
the bestconventional,
dualstereo
potentiometers.
BAIA]IGE
Use
themode
button
andthestargate
volume
knobto controlthe
left/right
balance.
Pressing
themode
button
willtogglebetween
"Main",
"Right",
and
"Left."
Inthewindow
next
tothenumber
display
aretwo
indicatordiodes
identifyingtheright
(red)
and
left
(green)
modes.
Inthe
"Right"
and
"Left"
modes
thestargate
functions
to control
therightor left

channel
volume.
A level
of"00"
inthe
number
displav
means
zero
attenuation
(ormaximum
volume).
SYSTET GAI]I
Innersound's
unique
balancecontrol
makes
it possible
to adjust
the
overall
system
gain. Forexample,
let's
assume
you
wantto reduce
the
gain
by l0 dB. Simply
press
the
"MODE"
button
once'
which
willswitch
you
tothe
rightchannel.
Reduce
the
gain
byl0 dB
with
the
volume
knob. Press
the"MODE"
button
again,
which
willswitch
you
to theleft
channel.
Reduce
the
gain
on
that
channel
byl0 dB. Pressthe
"MODE"
button
again
to return
to "MA|N."
Thechannels
willbein perfect
balance,
but
their
levels
willbereduced
by
exactly
l0 dB. Asproof
ofthis,
you
willsee
that
for agiven
acoustic
output
level,
you
willhaveto turnup
the
volume
sothenumber
indicator
reads
l0 dB
higher.
Why
would
you
want
to dothis?
There
are
many
reasons.
Forexample,
if
you have
retatively
deticate
speakers
and
anextremely
powerful
amplifier,
you
canoverdrive
thespeakers
and
damage
them. Byreducing
thegain,
you
can
limit
the
output
to any
safe
level
you
wish.
Another
reason
is
forcomfort.lt iseasy
to accidently
set
the
volume
too
high
and
get
avery
loud
"blast"
of music
you
didn't
expect.By
setting
the
gain
so
that
the
maximum
loudness
level
is
an
indicated
99
dB,the
level
willnever
be
excessive.
RETOTE COIITROT
The
RCP-l
Preamplifier
isdesigned
to operate
viathe
frontpanel
controls
and
remote
control.
The
following
functions
are
controllable
byremote
control.

5TA]IDBVE
Usethisfunctiontotogg|ebetweenoperationmodeandstandbyemode.
rtofutE UP/nosil
Use
this
function
to increase
ordecrease
the
overall
volume
level'
GD/D|3C
Select
use
this
function
toselect
the
source
connected
to
the
cD/Dlsc
input'
TUITER/Iil2 9ele6
use
this
function
toselect
the
source
connected
tothe
TUNER/|N2
inOut'
UrDEO/rill select
Use
this
function
toselect
the
source
connected
tothe
VIDEO/lN3
input'
AUX/lntt Select
use
this
function
toselect
the
source
connected
tothe
AUX
/lN4
input'
toruTOR Select
use
thisfunction
to select
the source
connected
to the MoNITOR
inputor
to listen
to the
output
ofyourrecording
device'
PnocEssoR Sebct
use
this
function
toselect
the
source
connected
tothe
PROCESSOR
input
or
tolisten
tothe
output
of
your
video
processor'
If,UTE
use
this
function
totemporarily
turn
off
the
output
of
the
preamplifier'
roilo
Use
this
function
to toggle
between
monaural
and
stereo
output' The
light
indicates
the
mono
position'
This
function
is*:,1t^"-Y-i:
checking
to see
that
yourspeakers
are
inphase
(a
solid
c:T: t;1lt-:
should
bepresent
inmono)
and
forchecking
system
left/right
balance'
PHASE NET'ER5E
use
this
function
toshift
the
phase
of
the
output
audio
by
180
degrees'
D|SPI.AY BRIGHT]IESS

I
I
I
I
I
I
I
I
I
l
I
F
h
h
h
F
Use
this
function
to adjust
thebrightness
ofthecenter
display
between
fourdifferent
settings-
toDE Select
use
this
function
to shift
between
"right".
"left",and
"main"volume
settings.
CARE
AND CLEANING
lfyouwishtocleanyourpre-amplifier,useag0%lsopropylAlcohol'
Window
cleaners
like
"Windex"also
work
well' Do
notuse
anv
abrasive
cleaners
or chemical
solvents
like
"AjaX",Acetone,
or paint
thinners'
use
particular
care
not
todamage
the
aluminum
chassis'
Aluminum
is
a
medium
hardness
metat
and
although
it isanodized,
it can
be
easily
scratched
by
thecareless
use
oftools
during
installation'
or byrough
handling.
Theunit may
overheat
and
thefinishmay
fadeif exposed
to direct'
unfiltered
sunlight
or intense
heat
for prolonged
periods'
save
yourboxandpacking
materials.
They
wiltbe
very
helpful
for
moving
or ifyouneed
to ship
theunit
forany
reason'

SPECIFICATIONS
CIRCUIT SPECIFIGATIOIIS
ffiprrts
Six
inputs
atline
level,
inctuding
atape
loop-Three
inputs
offering
balanced
using
XLR
connector-
Outputs
Three
outputs
atline
level.
One
fixed
level
output
(monitor
loop)
andtwo
controlted
byelectronic
attenuator,
(both
with balanced
andsingle
ended).
I
I
Bcndwtdth
Dlstortlon
Less
than
0.01%
froml0
higher,
shunted
bY
1000
Goln
Hz
to 40 kHz@
5voltsoeak
into600ohms
or
pF
orless.
Input lmpedonce
47kohms
balanced
or single-ended
ilolse
Greater
than 100dB
below
1volt reference
Ontput lmpedrrnce
50
ohms,
non-reactive,
batanced
or single-ended
torlrnum OutPUt
ct1osstoltr
Better
than70dB
@
20kHz

noted Powet
DlmenslonS
I7 inches
wide
bV
4'625
inches
tallbyl4 inches
deep
(44cmWxl2cmTx36cmD)
welght
32.5
pounds
(14.6
kG)
ilote
specifications
are
subject
to change
withoutnotice.
Dimensions
and
weight
are
approximate-
