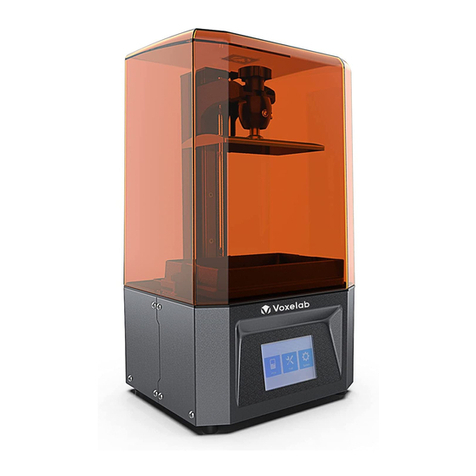
Inno3D 3D Printer S1 User manual

Inno3D3DPrinterS1–UserGuideRev1.0
P/N:60601Rev1.0Jan2016
Inno3D 3D Printer S1 – Cubic Design Mini 3D Printer
User Manual
1 234
5
6
7
8 9 10 11
12
1. Print Button
2. Filament Change Button
3. Message / Status OLED display
4. SD-Card insertion indicator
5. PC Connection indicator
6. SD-Card Slot
7. Detachable Print Platform
8. Extruder
9. USB Cable connector
10. Power Cable connector
11. 3D Printer Main Power Switch
12. Filament Mount Holes

Inno3D3DPrinterS1–UserGuideRev1.0
P/N:60601Rev1.0Jan2016
Section1:Accessorylist
1. PLAFilamentX1Spool(0.5Kg)
2. Filamentguidetube X1
3. FilamentmountX1
4. Filamentguidetubestand X2
5. PowerSupplyUnit X1
6. A/Cpowercord X1
7. SD‐CardX1
8. USB‐AtoUSB‐Bcable X1[1meter]
9. QuickStartGuide X1
10. Removableprintplatform X1
11. Printplatformmasktapesheet X10pieces
Section2:QuickStart
QuickStepsforprintingthefirstmodel
3DPrinter
Calibration
Loadthe
Filament
Printthe
TestObject

Inno3D3DPrinterS1–UserGuideRev1.0
P/N:60601Rev1.0Jan2016
Section3:PowerontheInno3D3DPrinterS1
ImportantNotice:AllMachineprotectioncardboardsandfoamsmustbe
removedbeforepoweringonthe3DPrinter.
1. ConnectthepowercabletothePowersupplyunit.
CAUTION:Powercableplugstandardisvariousfromdifferentcountries,please
refertoyourcountrymainpowerstandard–wallsocket,beforeplugginginthe
powercable
2. Insertthepowersupplyoutputplug(24VDC)tothe3DPrinterpowerinputsocket
3. MakesuretheInno3D3DPrinterS1Powerswitchisin“Poweroff”position
PowerOffposition

Inno3D3DPrinterS1–UserGuideRev1.0
P/N:60601Rev1.0Jan2016
4. Connectthepowercabletothewallsocket(mainACpoweroutlet)
5. Checkallcablesareconnectedwithcorrectorientation,andallprotectioncard
boardsandfoamareremovedfrommachine
6. Installtheprintplatforminthedirectionasshownbelow,andtightlyfitittothe
platformslotinthe3DPrinter
7. PowerontheInno3D3DPrinterS1
8. “PrinterReady”messagewillbeshowninLEDdisplayafterInno3D3DPrinterS1
StartupLogo

Inno3D3DPrinterS1–UserGuideRev1.0
P/N:60601Rev1.0Jan2016
Section4:ControlandUserInterface
1.PrintButton
2.ChangeFilamentButton
3.SD‐Cardinsertionindicator
4.PCconnectionindicator
5.OLEDdisplayforprintprogressandsystemmessagedisplay
Section5:AutomaticPrintPlatformCalibration
Forthebestprintresult,the3DPrintershouldbekeptinexacthorizontalalignment(same
horizontallevelofleftandrightposition).Thefollowingsectionexplainstheautomaticprint
platformlevelingfeatureinthisInno3D3DPrinterS1.
Notice:PrintPlatformCalibrationisonlyrequiredafter
a. Installingyour3DPrinter,
b. ChangingtheExtruderunit,
c. CleaningtheprintNozzle
d. Repairingthe3DPrinter,or
e. Movingthe3DPrintertoanewplace
1
2
3
45

Inno3D3DPrinterS1–UserGuideRev1.0
P/N:60601Rev1.0Jan2016
PrintPlatformCalibrationprocedures:
1. Pressandkeepholdingthe“ChangeFilamentbutton”duringsystempoweron.
2. Releasethebuttonwhenyousee“Calibration…..Wait……..”message
3. Printplatformcalibrationprocesswillbestartedandwaitabout5minutesforthe
calibrationprocesscomplete
4. Aftermessage“Calibrationcompleted”displaying,the3DPrinterwillautomatically
adjusttheprintplatformdistanceand“PrintReady”messagewillbeshown.
Holdthe“ChangeFilament
Button”andpoweronthe
System.
Releasethe“Change
Filament“buttonwhen
messagedisplay.

Inno3D3DPrinterS1–UserGuideRev1.0
P/N:60601Rev1.0Jan2016
Section6: Loading/ChangeFilament
1. InstalltheFilamentMountkittothe3DPrinter
FilamentMountkitcanbeinstalledatthe“right”,“left”or“back”
sideofthe3DPrinter
2. InserttheFilamenttotheFilamentGuideTube
InserttheFilamentfromspooltotheFilamentGuideTube
3. Pressthe“ChangeFilament”button
Changefilamentfeaturestartsafterpressingthebutton,
and“ChangeFilament”messagewillbeshownonthe
display.Waitforabout3‐5mins,message“Insertnew
filamentandpressbutton”willbeshown

Inno3D3DPrinterS1–UserGuideRev1.0
P/N:60601Rev1.0Jan2016
4. InserttheFilamenttoExtruderandPress“ChangeFilament”buttonsimultaneously
(Holdthefilamenttight,andpushittowardstheExtruderfilamentinlet,youcanfeel
thatthefilamentismovingdowntotheExtruder)
Afterinsertingthefilament,youcanseethefilamentisextrudedfromthenozzle
5. Holdthe“ChangeFilament”buttontocompletetheprocess,untilthe“Exit”
messagedisplay
Section7: TheFirstPrint
AfterinstallingtheInno3D3DPrinterS1andloadthefilament,nowyoucandothefirstprint.
Notice:Atestprintobjectisstoredinsidethe3DPrinter.Youcantestyourprinterfunctionalityby
printingthattestobject.
1. Inthe“PrinterReady”state,justsimplypressthe“Print”button.Thetestobjectwillbe
printedinabout6‐7minutes
Holdthe“Change
Filament”buttonuntil
the“Exit”message
appear
Pressthe“Print”Button

Inno3D3DPrinterS1–UserGuideRev1.0
P/N:60601Rev1.0Jan2016
Section8:HowtoPrint
PrintfromSD‐Card
ImportantNotice:Onlyfilenamed“print.gcode”intheSD‐CardwillbeprintedfromtheInno3D
3DPrinterS1.Allothergcodefileswithdifferentfilenamewillnotbeprinted.Youshould
renamethegcodefileto“print.gcode”beforeprintingitfromSD‐Card.
1. EnsureyourgcodefileisstoredinSD‐Card,andthefilenameisnamedas“print.gcode”
2. InserttheSD‐CardintheSD‐Cardslotofthe3DPrinter
3. TheSD‐Cardinsertionindicatorwillbelightupwithbluecolor
4. Checkthefilamentisloadedand“PrinterReady”isshownonInno3D3DPrinterS1
display
5. Simplepressthe“Print”buttontoprintyour3DModel
PrintbyconnectingtoPersonComputer
Notice:
ToprinttheobjectwithPCconnection,thePersonalComputermustbeconnectedduring
theprintingoperation.
Whenthe3DPrinterisconnectedtoyourPersonalComputer,thePersonalComputerwill
takecontrolofthe3DPrinterandallbuttonsin3DPrinterswillbenoresponseuntilthe
PCisdisconnected.
1. ConnecttheInno3D3DPrinterS1andyourPersonalComputerwiththeUSBcable
Pressthe“Print”button

Inno3D3DPrinterS1–UserGuideRev1.0
P/N:60601Rev1.0Jan2016
2. ExecutetheInno3D3DPrinterS1applicationprogram*
3. Selectthecorrectprintprofileandbuildthegcodefile
4. ConnecttheInno3D3DPrinterS1withtheapplicationbyclickingthe“connect”iconin
application
5. Checkthefilamentisloadedand“PCConnected”messageisshownon3DPrinter
6. Clickthe“Print”iconinapplicationtoprintthe3Dmodel
*Note:RefertoSection9,forthebasicoperationandcontrolinstructionoftheInno3D3DPrinterS1application
Congratulations!!!YourInno3D3DPrinterS1isreadytouse.Now
youcancreateyourown3Dobjectsandenjoy3DPrinting.

Inno3D3DPrinterS1–UserGuideRev1.0
P/N:60601Rev1.0Jan2016
Section9:UsingInno3DPrinterS1ApplicationSoftware
Beforestartingtheapplication:
ApplicationSoftwareinstallation:
MinimumSystemrequirement:
Microsoft®Windows®7/8with8GBsystemmemory
Intel®orAMD®systemwithDual‐coreprocessororabove
Minimum20GBfreespaceisavailable
TheapplicationsoftwareandUSBdriverforyourInno3D3DPrinterS1canbefoundinthe
bundledSD‐Card“Application”folder,oritcanbedownloadedfromInno3Dwebsite.
ImportantNotice:USBdevicedrivermustbeinstalledbeforeinstallingtheapplicationsoftware,
otherwisethe3DPrintercannotbeconnectedtoyourPCSystem.
DriverandSoftwareinstallation:
1. InstalltheUSBdevicedriverforyourInno3D3DPrinterS1
a. Doubleclickthefile“CDMv2.08.30WHQLCertified.exe”,followtheonscreen
instructionbypressing“next”.TheUSBdriverforInno3D3DPrinterS1willbe
installedtoyoursystemautomatically.
Create3DModel
/orDownload3D
Modelfrom
Internet
Savethe3D
Modelas"STL"
fileformat
Convertthesaved
STLfiletoGcode
fileformatfor
printing

Inno3D3DPrinterS1–UserGuideRev1.0
P/N:60601Rev1.0Jan2016
2. InstalltheInno3D3DPrinterS1Application
a. Doubleclickthe“3DPrinterS1V10.exe”(note:V10istheversionnumber,whichwill
bechangedforthelatestapplicationrelease)fileandfollowstheonscreen
instructionbypressing“next”–>“Agree.”‐>“Install”.TheInno3D3DPrinterS1
applicationsoftwarewillbeinstalledinyoursystemautomatically.
b. TheInno3D3DPrinterS1datafileisin“Gcode”fileformat,all3Dobjectswhichare
createdinyourCADapplicationsoftwaremustbeconvertedto“Gcode”fileformat
beforesendingtoprint.
c. Inno3D3DPrintS1PCapplicationisthesoftwarewhichcanconvertyour3Dobjects
from“STL”fileformatto“Gcode”fileformatforprinting.
UsetheInno3D3DPrinterS1PCApplication:
Importthe
STLfile
SelectPrint
Profile
Modify
Model
Orientation
Modify
Model
Scale
Build
Gcodefile PrintModel

Inno3D3DPrinterS1–UserGuideRev1.0
P/N:60601Rev1.0Jan2016
ImporttheSTLFile:
1. DoubleclicktheInno3D3DPrinterS1Applicationsoftwareicon,andwaitthe
applicationstart.
2. Clickthe“Import”icontoreadyour3DModelin“STL”fileformat.
The3DModelwillbeimportedandshowintheprintareaoftheApplicationscreen
Note:Importedmodelwillbecenteredintheprintarea,andtheX,Y,Zorientationare
thesameasyourCADdatafile
PrintArea

Inno3D3DPrinterS1–UserGuideRev1.0
P/N:60601Rev1.0Jan2016
SelectPrintProfile:
1. Inno3D3DPrinterS1ProfileTypes:
a. Beforeyouprintthe3DObject,theprintprofileshouldbeselectedfirst.
b. Theprintprofilecanbeselectedattheupperrightdropdownmenuofthe
applicationsoftware.
c. TheInno3D3DPrinterS1extruderisbundledwiththe“N04F”nozzle
–Thiswillbethedefaultsetting
ModifyModelOrientation:
1. Orientation:
Rotate Translate Scale
a. Rotate:
i. PlaceyourobjectindifferentdirectionbyrotatingitonX,Y,orZaxis.
b. Translate:
i. Movetheobjectinanydirectionwithinthebuildplatform,bypressing
the“Up”,“Down”,“Left”,“Right”arrowkey.
c. Scale:
i. Ifthe3DObjectistoobigortoosmallforprinting,youcanusethe
“Scale”toadjustthe3DModelsize,sothatitcanbefittedintheprint
platform.
N04F=use0.4mmnozzletoprint
PLA=PLAfilament
FINE=0.13mmlayerresolution
NORMAL=0.2mmlayerresolution
QUICK=0.3mmlayerresolution

Inno3D3DPrinterS1–UserGuideRev1.0
P/N:60601Rev1.0Jan2016
BuildGcodefile:
1. Build:
a. Aftermodifyingthe3Dmodelinapplication,the3DModelcanbeconvertedto
Gcodefileformatbypressingthebuildicon.Thefilewhichyouhaveimportedwill
beconvertedto“Inno3D3DPrinterS1GCode”fileformatautomatically.The
convertedfileswillautomaticallybesavedinthesamefolderofyourSTLfile.
b. ConvertedGcodefilewillbesavedasTWOfiles:
i. FilenamesameasSTLfilewith“.gcode”extension
ii. Filenameas“print.gcode”
ImportantNote:Ifyouprintthe3DModelwithSD‐Card,thecorresponding“print.gcode”filemustbe
copiedtotheSD‐Cardforprinting.(Inno3D3DPrinterS1onlycanprintthe“print.gcode”filefromtheSD‐
Card!!
c. BeforebuildingtheGcodefile,dialogboxwillbeopenedfornecessaryprint
parameterssetup.
EnableRaft:Raftisatechniqueusedtopreventwarping.Your3DModelis
printedontopofa“raft”,abottomlayer–verythinlayerofplasticinsteadof
directlyprintonthebuildsurface.Theraftwillbeprintedlargerthanthe
objectandcreatesadhesionsurfacewiththeprintplatform.
PrintwithSupport:Enablingthesupportfeatureisveryimportantforfloating
objectsorobjectswithfloatingparts.Thesupportingmaterialcanbeeasily
removedfromtheprintout.
ImportantNote:If“Support”settingisselectedforprinting,“Raft”MUSTalsobeselected.
ThesupportconstructionmustbeprintedontheRaft.

Inno3D3DPrinterS1–UserGuideRev1.0
P/N:60601Rev1.0Jan2016
EnablePlatformTape:ThePlatformTapeisa103mmx118mmbluecolor
stickerwhichbundledwithInno3D3DPrinterS1.WithPlatformtape,your
printobjectwillnotbedeformedorbendedduringtheprintprocess.
PlatformTapeisrecommendedforprinting,thedefaultbluecolorPlatform
Tapethicknessis“0.12mm”.Ifyoufindtheprintobjectcannotbeadheredin
theprintplatformverywell,youcantrytomodifythethicknesstoasmaller
value.(Forexample,setthethicknessto0.10mm)
PrintModel:
Inno3D3DPrinterS1candirectlyprintthe3DmodelfromPCto3DPrinter–onlineprinting,orstore
thegcodefileinSD‐CardandprintthefilefromSD‐CardwithoutPCConnected–offlineprinting.
1. DirectPrintfromPC:
a. PowerofftheInno3D3DPrinterS1andyourPC
b. ConnectthebundledUSBcablefromthePCUSBporttotheInno3D3DPrinter
USBport
c. Power‐ontheInno3D3DPrinterS1andyourPCforconnection
d. ExecutetheInno3D3DPrinterapplication
e. Ensurethatthe“Connect”Iconintheapplicationisclickedandtheconnect
indicatoriconturntoGreencolor
f. EnsuretheInno3D3DPrinterS1isconnectedtoyourPCwith“PCConnected”
messageshowninthedisplay.
PlatformTape

Inno3D3DPrinterS1–UserGuideRev1.0
P/N:60601Rev1.0Jan2016
g. Pressthe“Print”icontoprintthe3DObjectdirectlytotheInno3D3DPrinter
2. PrintfromSD‐Card:
a. IfyouwanttokeeptheGcodeprintfileinSD‐Cardandprintitlater,justsimple
browsethefolder(.gcodefilewillbegeneratedinthesamefolderofyourSTL
objectwhichyouwereimportedforconverting).
b. Copythegcodewithfilename“print.gcode”inthefoldertotherootdirectoryof
theSD‐Card(Forexample:convertthe3DModelfile“circle.stl”inapplication,
theapplicationwillcreateTWOgcodefile,withfilename“circle.gcode”and
“print.gcode”.Pleasecopytheprint.gcodefiletotheSD‐Cardinsteadofthe
circle.gcode)
c. InserttheSD‐CardtotheInno3D3DPrinterS1SD‐Cardslot
d. EnsuretheSD‐CardinsertionindicatoristurnedON(Bluelight)
e. Simplypressthe“Print”buttonforprintingthe3DModel
Pressthe“Print”button
toprintthe3DModel

Inno3D3DPrinterS1–UserGuideRev1.0
P/N:60601Rev1.0Jan2016
f. WaittheNozzletemperatureandtheprintplatformtemperaturereachesthe
defaultsetting,andthemodelwillstarttoprint.
[CAUTION]:Don’ttouchtheExtruderandPlatformduringExtruderandplatformpre‐
heatingandprintingoperation.ExtremelyhightemperatureontheExtruderand
Platformsurface.
Section10:3DPrinterControlinApplication
WhentheInno3D3DPrinterS1isconnectedtotheApplicationprogram,allbuttonsofthe3D
printerdisabled.The3DPrintercanonlybecontrolledbytheApplicationProgram.
TocontroltheInno3D3DPrinterS1:
1. Clickthe“Control”icon
2. The3DPrinterControlMenuwillbeshown

Inno3D3DPrinterS1–UserGuideRev1.0
P/N:60601Rev1.0Jan2016
3. X,Y,ZAxisControl
MoveX,Y,ZorallthreeAxistotheHomePosition
4. MoveX‐Axis(LeftorRight)
5. MoveY‐Axis(frontorBack)
6. MoveZ‐Axis(UporDown)
MoveX‐Axisinpositionof“0.1mm”,
“1.0mm”or“10mm”
MoveY‐Axisinpositionof“0.1mm”,
“1.0mm”or“10mm”
MoveZ‐Axisinpositionof“0.1mm”,
“1.0mm”or“10mm”

Inno3D3DPrinterS1–UserGuideRev1.0
P/N:60601Rev1.0Jan2016
AppendixI:
GeneralSafety
CAUTION:ThepowersuppliesandinternalcircuitryintheInno3DPrintersystemmayproducehigh
voltagesandenergyhazards,whichcancausebodilyharm.Onlytrainedservicetechniciansare
authorizedtoremovethecoversandaccessanyofthecomponentsinsidethe3DPrinter.
CAUTION:TheInno3DPrintershouldbe“PowerOff”bypressingthepowerswitchto“OFF”position
beforeconnectingordisconnectingthemainpowersupplycables.
CAUTION:Plugthepowercordinwrongsocket/orlocationmaydamageyour3DPrinter.Please
ensurethepowercordisinsertedincorrectorientationandsocketbeforepoweringonyour3D
Printer
WARNING:Topreventthespreadoffire,keepcandlesorotheropenflamesawayfromthe3D
Printeratalltimes.
Table of contents
