INOLAV IS203-1-1 User manual

For easy installation of your Inolav
faucet you will need:
· To READ ALL the instructions completely before beginning.
· To READ ALL warnings,care, and maintenance information.
®
You May Need
Thermostatic Valve Trim Installation
Instructions
Owners Manual
Technical information:
Installation Considerations:
For best results, We recommends that this unit be installed by a
licensed, professional plumber.
Please read over these instructions thoroughly before beginning
installation. Make sure that you have all tools and supplies needed to
complete the installation.
To prevent scald injury, the maximum output temperature of the shower
valve must be no higher than 120°F. In Massachusetts, the maximum
output temperature can be no higher than 112°F.
Keep this booklet and the receipt (or other proof of date and place of
purchase) for this product in a safe place. The receipt is required should
it be necessary to request warranty parts.
•
•
•
•
Recommended water pressure : 15 - 75 PSI
Max. water pressure : 145 PSI
Recommended hot water temp. : 120 - 140°F
Max. hot water temp: 176°F
Flow rate: Up outlet: 5 GPM@60 PSI
Left outlet: 5 GPM@60 PSI
Right outlet: 5 GPM@60 PSI
ASME A.112.18.1
For warranty issues call us at 1-855 472 4304 or send us an e-mail at warranty@inolav.com For questions call us at 1-855 472 4304 or visit our website at www.inolav.com
IS203-1-1 IS203-1-2
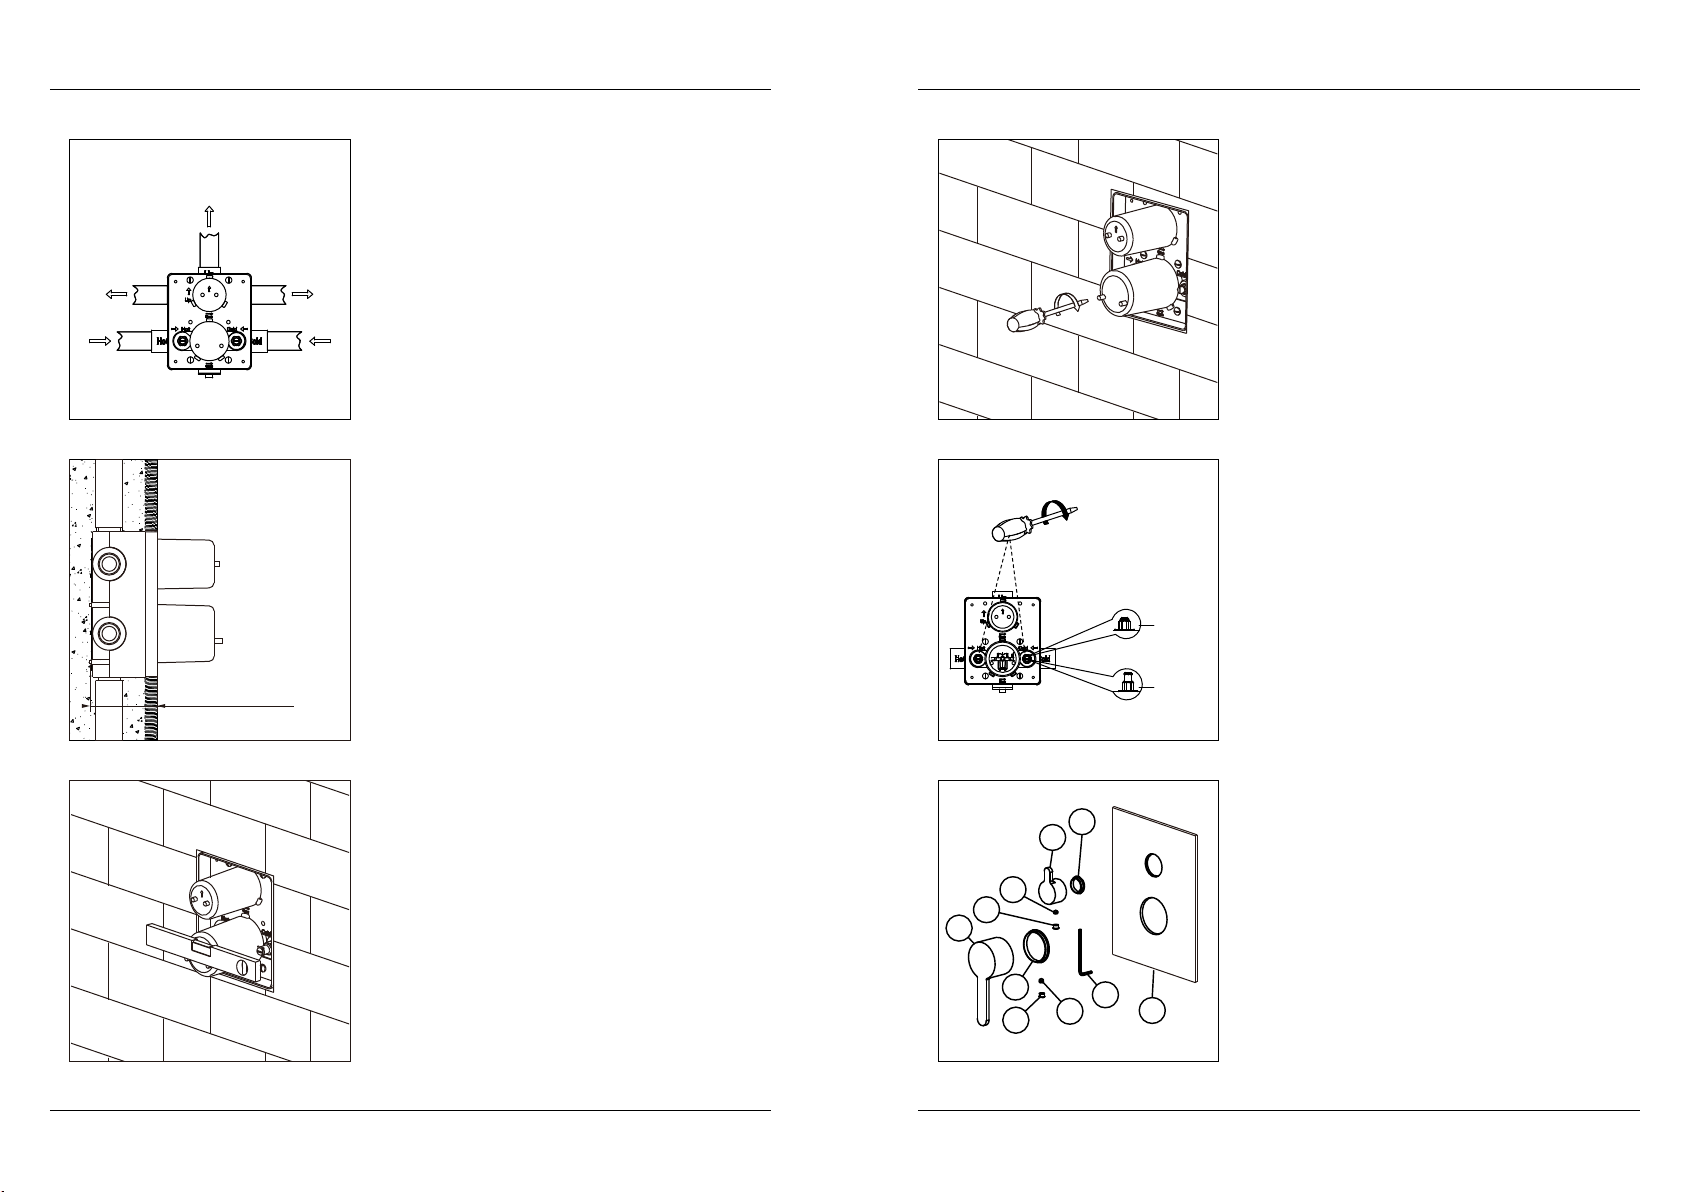
Connect the water pipe:
Left for hot water, right for cold
water.
Caution! Flush the hot and
supplies before you start the
installation.
1- Water sealing test:
Use screwdriver close the stops,
open the water pipe to test the
waterway sealing. If the sealing is
not good, fix it then go to next
step.
3-
Trim installation preparation:
Make sure you have these spare
parts before you go to next
step.
thermostatic mixer handle(1),
cap(2), handle screw(3), diverter
handle(4), plastic washer(5),
plastic washer(6), cap(7),
handle screw(8), allen key(9),
escutcheon(10)
4-
Insert the Valve to the wall:
Leave enough space for the valve
on the wall, insert the valve
and adjust the valve space
between 68mm to 78mm(2.67” to
3.07”) , using spirit level to
adjust the two salient point at
same level, then fix the valve and
put on tiles.
Caution! Please check the tile
thickness, make sure the plastic
surface not go beyond the
tile surface.
2-
X
Mixed
Mixed
Mixed
Cold
Hot
X
1
6
78
9
10
2
3
4
5
Close
Open
2.67”~ 3.07”
For warranty issues call us at 1-855 472 4304 or send us an e-mail at warranty@inolav.com For questions call us at 1-855 472 4304 or visit our website at www.inolav.com
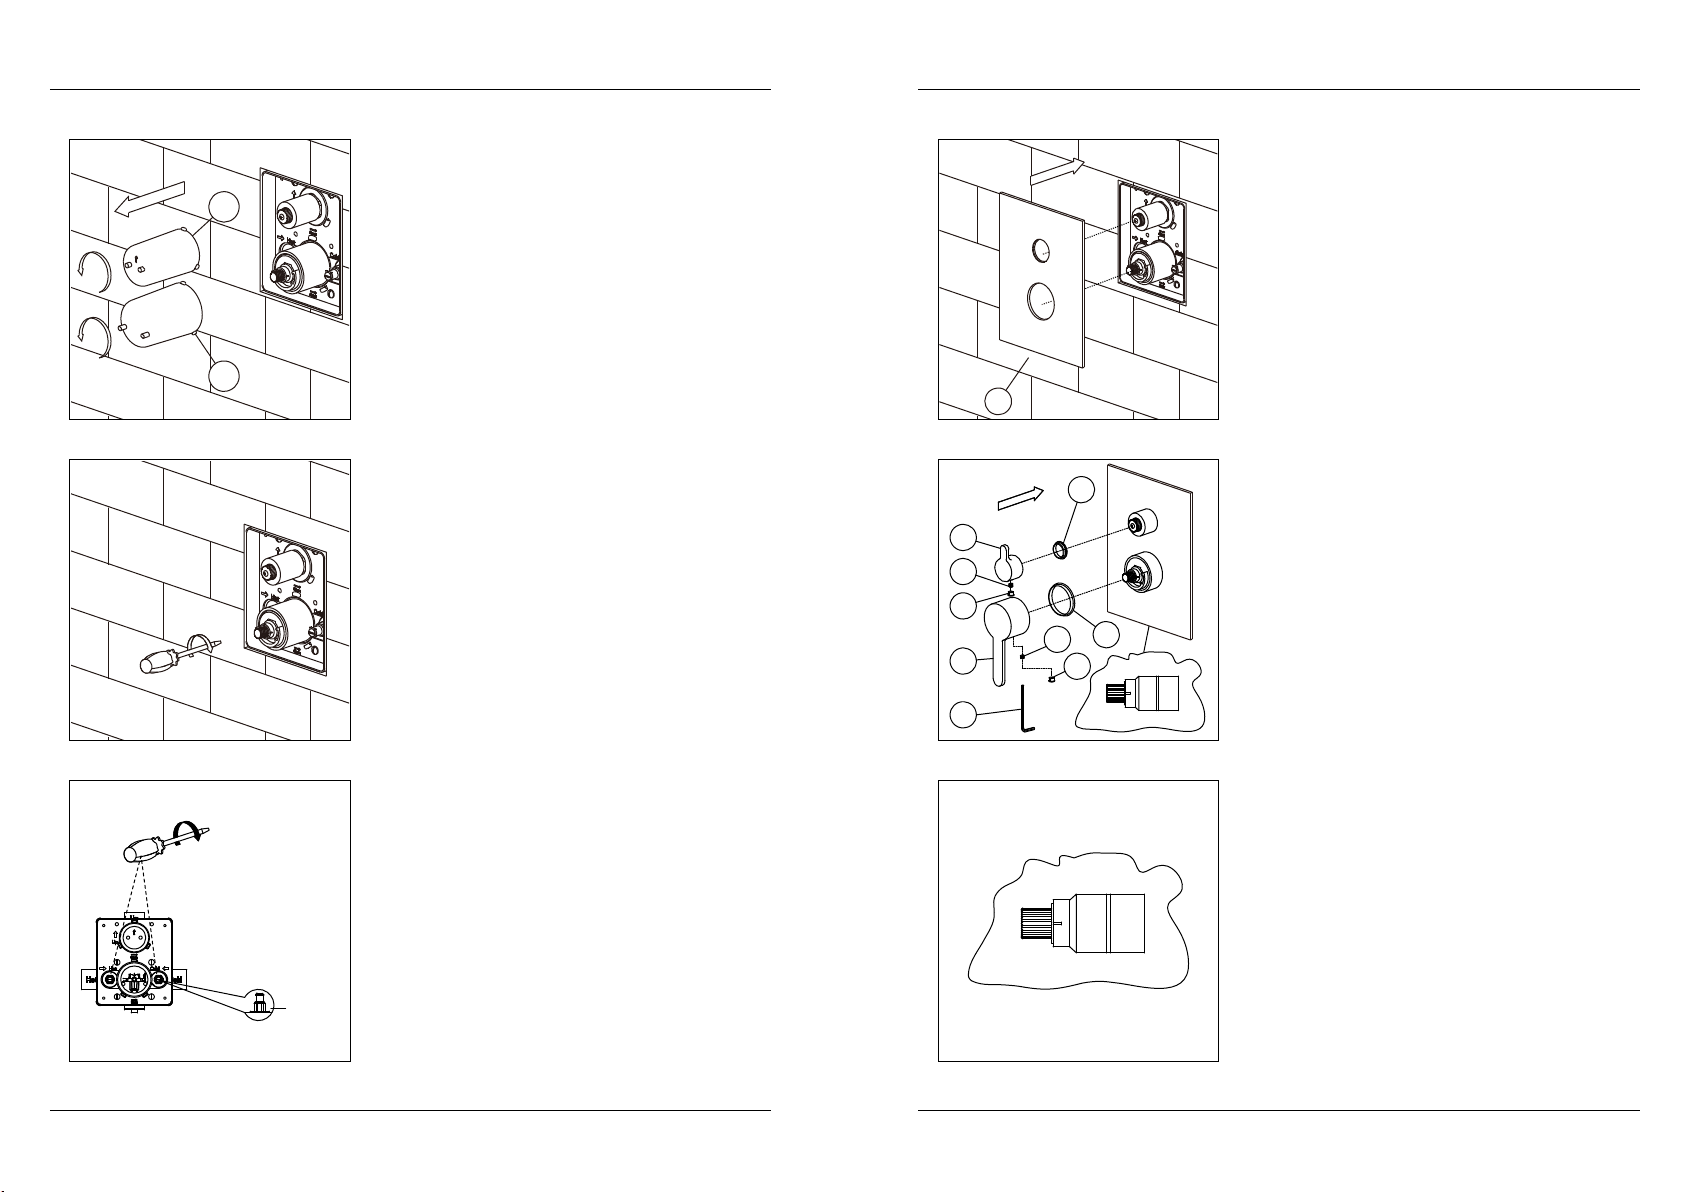
Remove the protective plastic
cover(1) and plastic cover (2).
5- Install the escutcheon(1) slowly,
make sure the escutcheon keep
tight with the wall.
7-
Install the diverter handle (1),
make sure plastic washer (4) is on
top of handle (1),Use the allen key
tighten the handle screw(3), put on
the cap(2).Install the thermostatic
mixer handle(6) so that the safety
stop override button is at the 9:00
position.
Use the allen key(9) tighten the
handle screw(8), put on the cap(7).
Caution! Please check the black
mark on the thermostatic cartridge
point to the rectangle notch on the
plastic parts, if not, please rotate
the brass parts. Then install the
handle.
8-
Open the stops:
Using screwdriver to open the
stops to maximum open status.
Caution! Don t keep open when
the stops reach the maximum
open status, otherwise it may
broken.
6-
1
2
Open
1
2
3
6
9
4
5
8
7
′
For warranty issues call us at 1-855 472 4304 or send us an e-mail at warranty@inolav.com For questions call us at 1-855 472 4304 or visit our website at www.inolav.com
1
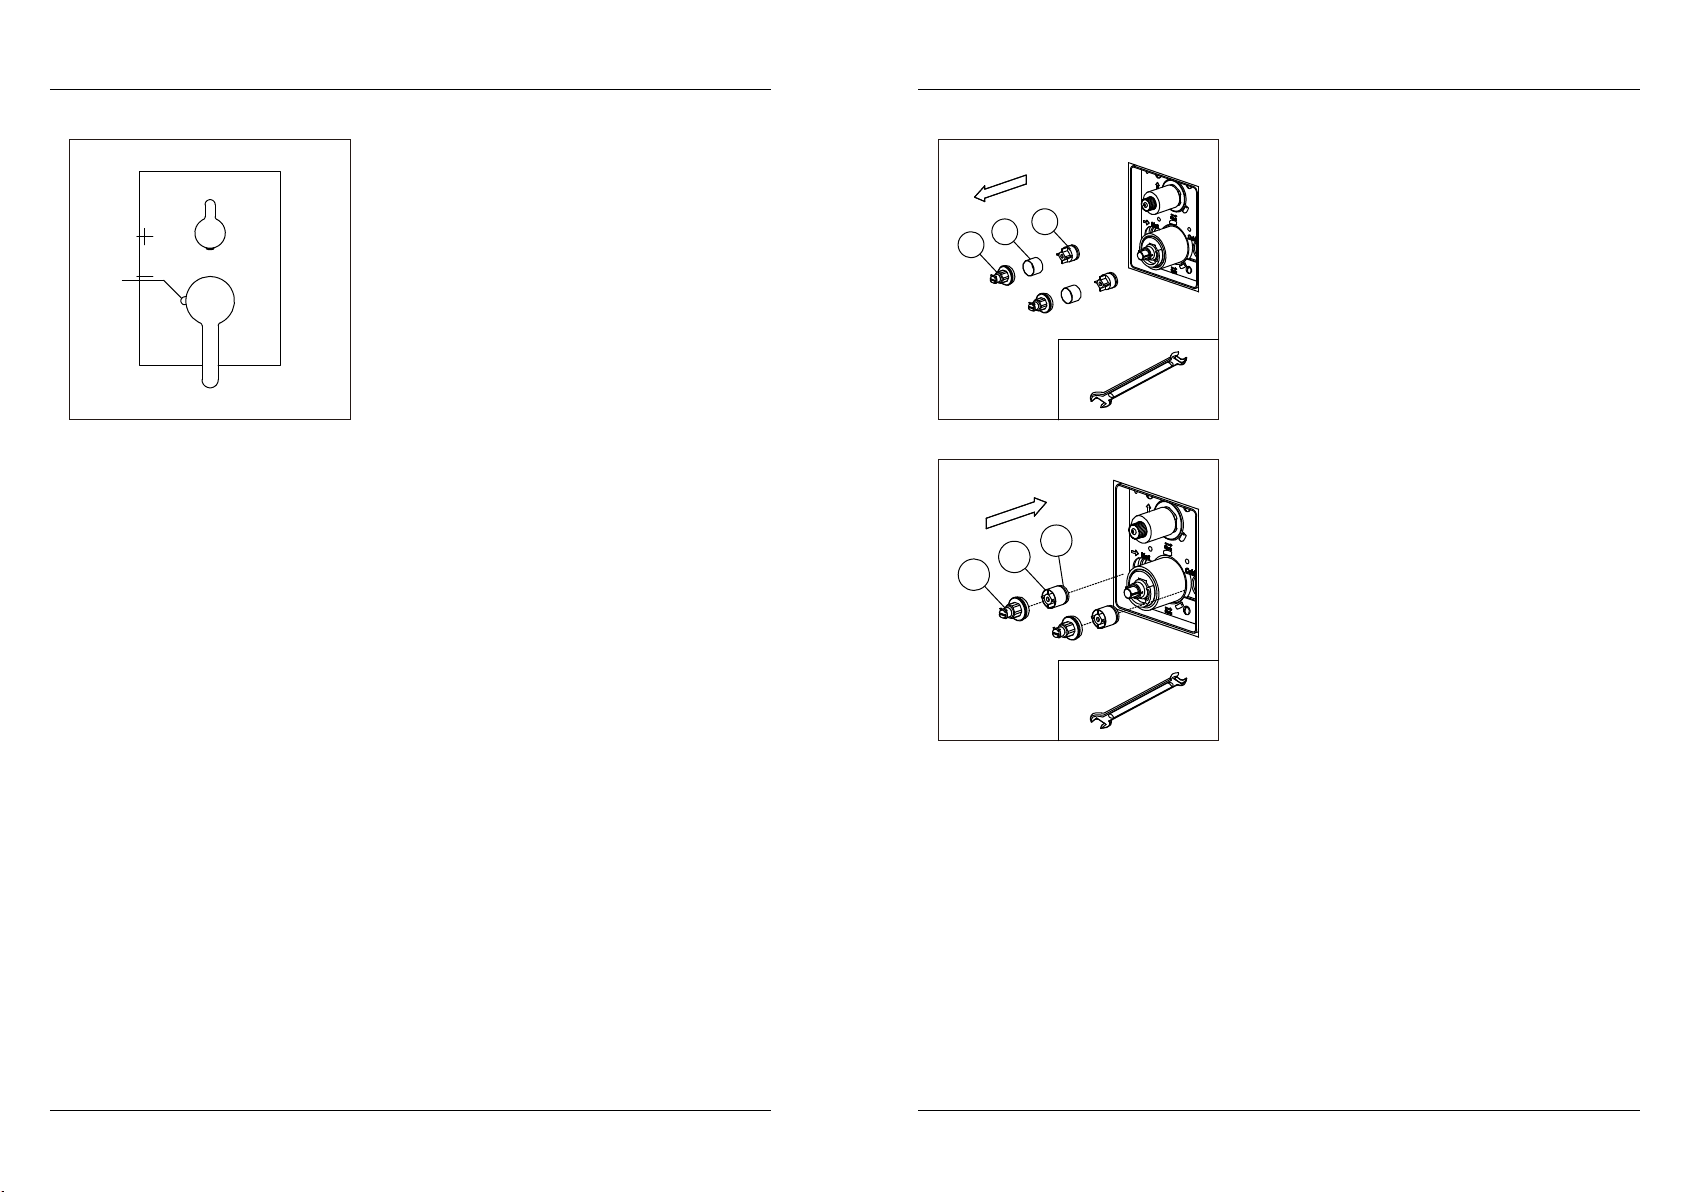
Test the handle: Test the valve,
water temperature will decrease
when you clockwise rotate, and
water temperature will increase
when you anti clockwise rotate.
Caution! If you need to adjust
temperature more than 100°F, then
you need to press the overrides.
Button and make a anti-clockwise
rotate. It should not be possible to
turn the stem further
counter-clockwise.
9-
Using the spanner to anti
clockwise stops (1).
Take out filter (2) and check Valve
(3).
Using clear water to rinse filter (2).
Slide filter (2) to check Valve (3).
then thread it to the valve body.
Using the spanner to connect
stops (1 )to the valve.
Clean the stops filters:
1-
2-
3-
4-
5-
100° 123
1
2
3
For warranty issues call us at 1-855 472 4304 or send us an e-mail at warranty@inolav.com For questions call us at 1-855 472 4304 or visit our website at www.inolav.com

Anti clockwise the sleeve(1).
Using a spanner anti clockwise
locking nut (2).
Remove the diverter cartridge(3).
Anti clockwise the sleeve(5)
Take our cartridge control ring (6)
Using a spanner anti clockwise the
locking nut(7), then take it out.
Using allen key to loose screw(4).
Take out the thermostatic cartridge
(8).
Remove the diverterl cartridge:
1-
2-
3-
Remove thermostatic cartridge:
1-
2-
3-
4-
5-
Put diverter cartridge (3) to the
valve, be noted the cartridge pin
should fix the hole of the valve.
Using a spanner clockwise locking
nut (2).
Clockwise the sleeve(1).
Install the thermostatic cartridge
(8)to the valve.
Using allen key to fix screw(4).
Using a spanner clockwise the
locking nut (7).
Put on cartridge control ring (6).
Clockwise sleeve (5) to the valve.
Install the diverter cartridge:
1-
2-
3-
Install the thermostatic
cartridge:
1-
2-
3-
4-
5-
For warranty issues call us at 1-855 472 4304 or send us an e-mail at warranty@inolav.com For questions call us at 1-855 472 4304 or visit our website at www.inolav.com
This manual suits for next models
1
Table of contents
Other INOLAV Bathroom Fixture manuals

Popular Bathroom Fixture manuals by other brands

Kohler
Kohler Mira Sport Max J03G Installation and user guide

Moen
Moen 186117 Series installation guide

Hans Grohe
Hans Grohe Raindance Showerpipe 27235000 Instructions for use/assembly instructions

Signature Hardware
Signature Hardware ROUND SWIVEL BODY SPRAY 948942 Install

fine fixtures
fine fixtures AC3TH installation manual

LIXIL
LIXIL HP50 Series quick start guide


