6
NS-CM10SS9
www.insigniaproducts.com
Before using your coffee maker
1Remove the exterior and interior packaging.
2Make sure that the package contents are complete and in good condition. See
Package contents on page 4.
Tips and hints for using your coffee maker
• A clean coffee maker is essential for making great-tasting coffee. Clean your
coffee maker regularly. See Cleaning your coffee maker on page 8.
• Always use fresh, cold water.
• Store unused coffee in a cool, dry place. After opening, reseal the coffee tightly
and store it in a refrigerator to maintain freshness.
• For optimum coffee taste, buy whole coffee beans and finely grind them just
before brewing.
• Do not reuse coffee grounds and do not reheat brewed coffee.
• Clean the coffee maker when over-extraction causes oiliness (small droplets of
oil on the surface of brewed, black coffee). This may occur more frequently
when you use dark, heavily roasted coffees.
Using your coffee maker
Preparing your coffee maker for use
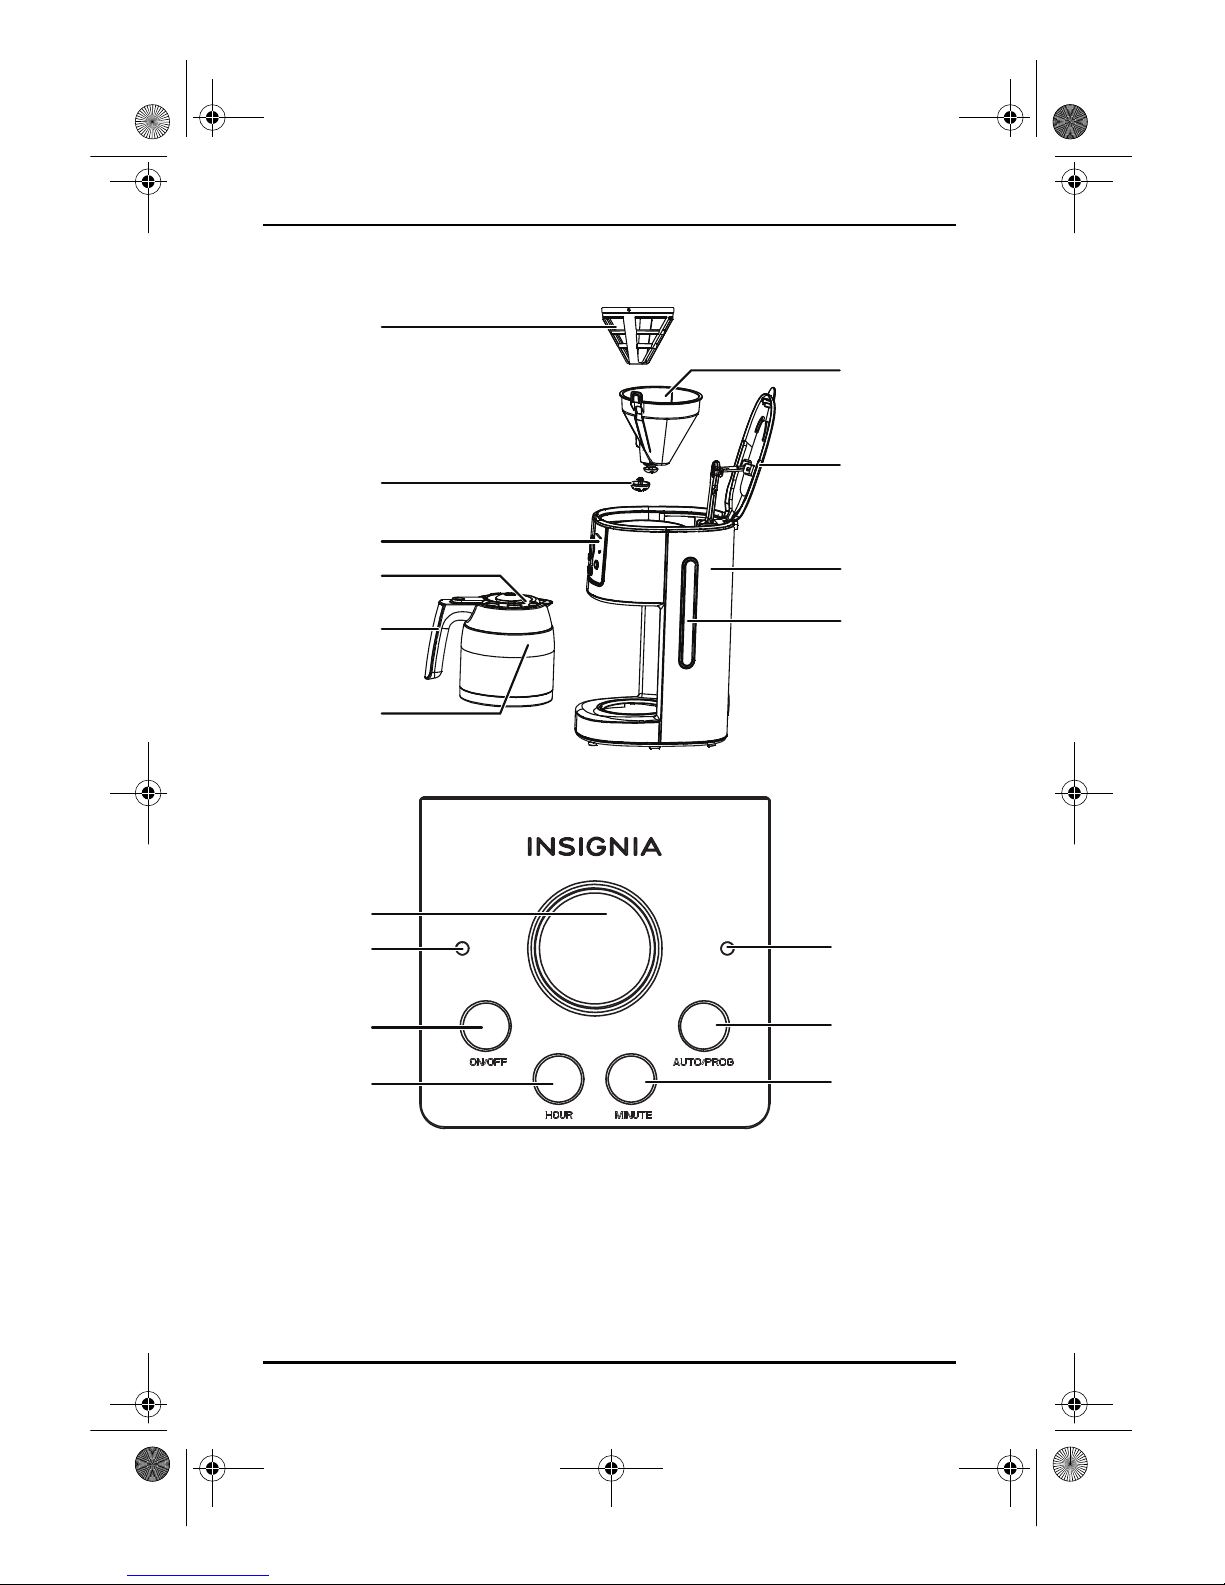
1Open the top lid and fill the water tank with drinking water. The water level
should not exceed the MAX level as indicated on the water gauge.
2Place the funnel into the funnel holder inside the water tank, if not already in
place. Make sure that it is positioned correctly in the groove on the tank rim,
otherwise the top lid will not close.
3Place the nylon filter into the funnel, if it is not already in place. You can also
use a tapered-type paper funnel.
4Place the thermal carafe with the lid closed on the warming plate.
5Plug the power cord into a power outlet, then press the ON/OFF button and
brew the water without coffee. Discard the water. Repeat this step several
times to make sure that your coffee maker is clean.
6Press the ON/OFF button, let your coffee maker cool, then clean and dry the
detachable parts. See Cleaning your coffee maker on page 8.
Making a pot of coffee
1Open the top lid and fill the water tank with drinking water. The water level
should not exceed the MAX level as indicated on the water gauge.
2Place the funnel into the funnel holder inside the water tank. Make sure that it
is positioned correctly, otherwise the top lid will not close.
3Place the nylon filter into the funnel, if it is not already in place. You can also
use a tapered-type paper funnel.
4Add dry, ground coffee to the filter according to the instructions on the coffee
container or your personal taste, then close the water tank cover.
DANGER OF SUFFOCATION: Packaging materials are not toys. Keep packaging
materials, like plastic bags, foil, and foam, away from babies and children.
Packaging materials can block airways and prevent breathing.
NS-CM10SS9_18-0494_MAN_V3_EN.fm Page 6 Friday, August 24, 2018 9:03 AM