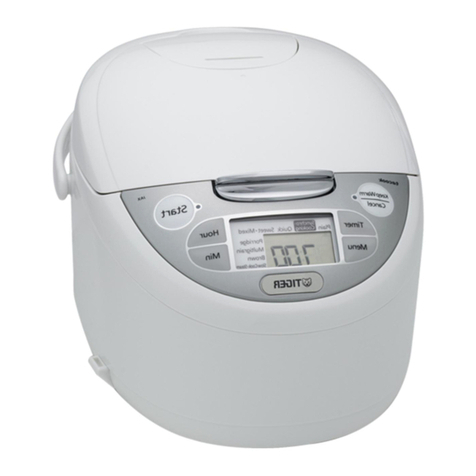
InstantPot ZEST User manual

ZEST™
Rice & Grain Cookers
8 and 20 Cup
User Manual
Welcome
Important Safeguards
Product Specications
Initial Setup
Product, Parts and Accessories
Control Panel
Initial Test Run
Smart Programs
Care and Cleaning
Troubleshooting
Warranty
Contact Information

Initial Setup
8
• Read all the Important Safeguards before using the appliance. Failure to
read and follow the Important Safeguards may result in damage to the
appliance, property damage or personal injury.
• Remove all packing material from in and around the appliance.
• Place the appliance on a stable, level surface, away from external
heat sources.
• Read and follow Care and Cleaning instructions to clean the appliance
before rst use.
• Do not remove safety warnings or rating labels from the appliance.
CAUTION Heat from an external source will damage the appliance. Never use the appliance on a
stovetop. Do not place the appliance on or in close proximity to a hot gas or electric
burner or a heated oven.

Product, Parts and Accessories
9
The Instant Zest automatically perfectly cooks a variety of grains.
Before using the Zest, verify that all parts are accounted for.
Zest Rice & Grain Cooker
Illustrations are for reference only and may differ from the actual product.
Lid Handle
Control Panel
Heating Element
(Interior)
Condensation Collector
Lid Release
Lid Lock
Power Cord
Cooker Base
Steam Vent Lid

Product, Parts and Accessories
10
Zest Rice & Grain Cooker Accessories
Illustrations are for reference only and may differ from the actual product.
Inner Pot
Steamer Tray
Rice Spoon
Measuring Cup

Control Panel
11
Your Zest features an intuitive control panel with status indicators and an LED
display to help make cooking quick and easy.
Display
Indicates the cooking time and
cooker status messages.
One-Touch Smart Programs
White Rice Brown Rice
Oatmeal Quinoa
Steam Sauté (Zest 20 Cup)
Mixed Grains (Zest 20 Cup)
Smart Program Indicator
Located above each Smart Program
button, the LED illuminates when a
Smart Program is selected or running.
Smart Program Settings
Keep Warm Delay Start
Cancel − / + buttons
1
2
3
4
33
424
2 2
4
Cancel
White
Rice Steam
OatmealQuinoa
Brown
Rice
Delay
Start Keep
Warm
Zest
Rice & Grain
Zest 8 Cup Zest 20 Cup
14

Smart Program Settings
12
Standby Mode
When the rice and grain cooker is plugged in, the display shows OFF to indicate
that it is in Standby mode.
You may select a Smart Program when in Standby mode.
Cancel
Press Cancel to stop a Smart Program at any time. The rice and grain cooker
returns to Standby mode and the display indicates OFF.
−/+Buttons
Use to increase or decrease the cooking time or Delay Start time.
Smart Programs
For the cooking time and temperature associated with each Smart Program, see
Smart Programs and Cooking Ratios.
Adjust and Save Cooking Time
Select a Smart Program, then use the −/+buttons to adjust the cooking time in
increments of 10 minutes . The adjusted cooking time is saved when the Smart
Program begins.
Only applicable to Oatmeal and Steam Smart Programs.
Adjust and Save Cooking Temperature
With the Smart Program selected, press the Smart Program button again to
toggle between HI (High) and LO (Low). The adjusted cooking temperature is
saved when the Smart Program begins.
Only applicable to Sauté and Keep Warm Smart Programs.
Keep Warm
Press Keep Warm to toggle the setting on or off at any time. Keep Warm has 2
modes:
• After cooking nishes, the cooker automatically keeps food warm for up to
12 hours.
• When selected from Standby mode, the Keep Warm Smart Program keeps
any food warm for up to 10 hours.

Smart Program Settings
13
Delay Start
After selecting a Smart Program and adjusting the cooking time and
temperature, press Delay Start, then use the −/+buttons to adjust the Delay
Start time in increments of 10 minutes to a maximum of 24 hours.
Not applicable to the Sauté Smart Program.
Reset Individual Smart Program
With the cooker in Standby mode, press and hold the Smart Program button
you wish to reset for 5 seconds. The cooker beeps to indicate that it has been
restored to the factory default settings.
Reset All Smart Programs
With the cooker in Standby mode, press and hold Cancel for 5 seconds. The
cooker will beep once to indicate that all Smart Programs have been restored to
the factory default settings.

Status Messages
14
Indicates that no Smart Program is running and the cooker
is in Standby mode.
Indicates that a Smart Program has been selected but
not yet started.
Indicates that a Smart Program is running.
Display reads On when the White Rice, Brown Rice, Quinoa, and
Mixed Grains Smart Programs are running.
Display changes to MM:SS when less than 10 minutes
of cooking time remains.
Indicates the time remaining in the Delay Start cycle, or Smart
Program cooking time remaining when using the Oatmeal,
Steam or Sauté Smart Programs.
Display changes to MM:SS when less than 1 hour remains until
Delay Start or Smart Program completion.
Indicates that the selected Smart Program is set to LO (Low).
Indicates that the selected Smart Program is set to HI (High).
Indicates that the Smart Program has ended.

Smart Programs
15
For the cooking time and temperature associated with each Smart Program,
see Smart Programs and Cooking Ratios.
The Zest features Smart Programs for one-touch cooking of popular rice and
grains. For best results, follow grain-to-water ratios as described in Smart
Programs and Cooking Ratios.
These Smart Programs detect the volume of ingredients in the inner pot and
control cooking times and temperatures automatically:
White Rice Brown Rice Oatmeal
Quinoa Mixed Grains (Zest 20 only)
1. Press the Smart Program button to select the Smart Program of your choice.
The Smart Program begins automatically after 10 seconds.
Note: If Delay Start is on, the display indicates the countdown to the delayed start
time. When cooking begins, the rice cooker counts down the remaining cooking
time.
2. Press Cancel to stop a Smart Program at any time. The cooker returns to
Standby mode and the display indicates OFF.
The Zest also features Smart Programs for other cooking methods:
Steam Sauté
Cooking times and temperatures for these Smart Programs are adjustable.
Steam
The Steam Smart Program uses steam (212°F / 100°C) to cook food.
1. Press Steam to select the Steam Smart Program.
2. Use the −/+buttons to adjust the cooking time to a maximum of 1 hour.The
Smart Program begins automatically after 10 seconds.
Note: If Delay Start is on, the display shows the countdown to the delayed start time.
When cooking begins, the display counts down the remaining cooking time.

Smart Programs
16
Sauté (Zest 20C only)
The Sauté Smart Program lightly fries/browns foods using a small amount of oil
in the inner pot.
1. Press Sauté to select the Sauté Smart Program.
2. Press Sauté again to toggle between HI (High) and LO (Low) temperatures.
3. Use the −/+buttons to adjust the cooking time to a maximum of 30
minutes. The Smart Program cooking begins automatically after 10
seconds.
Note: Delay Start and Keep Warm are not available when using the Sauté Smart
Program.
The Zest also offers the Keep Warm Smart Program to keep any food warm for
up to 10 hours.
Keep Warm
1. When in Standby mode, press Keep Warm to select the Keep Warm Smart
Program.
2. Press Keep Warm again to toggle between HI (High) and LO (Low)
temperatures.
3. Use the −/+buttons to adjust the warming time to a maximum of 10 hours.
Smart Program cooking begins automatically after 10 seconds.
Adjustments to cooking time and temperature may only be made when using
Keep Warm as a standalone Smart Program. Any adjustments made do not
affect the Keep Warm setting when it is used in conjunction with other Smart
Programs.

Smart Programs and Cooking Ratios
17
The cooking times and temperatures for all Smart Programs are controlled
automatically (according to the volume of ingredients to be cooked) and are
not user-adjustable.
Smart
Program
Grain to
Liquid Ratios Cooking Time Cooking Time
Adjustment Cooking Temperature
White Rice 1:1.5 Automatic
25–60 min per vol
N/A 212°F / 100°C
Not user-adjustable
Brown Rice 1:2 Automatic
40–90 min per vol
Quinoa 1:1.5 Automatic
3 –60 min per vol
Mixed
Grains*1:2 Automatic
40–90 min per vol
Steam N/A Default: 10 min User-adjustable
Range: 5–60 min
212°F / 100°C
Not user-adjustable
Sauté*N/A Default: HI, 30 min
User-adjustable
Range: 1–30 min
User-adjustable
LO: 221°F / 105°C
HI: 320°F / 160°C
Oatmeal 1:3 Default: 50 min User-adjustable
Range: 20–60 min
212°F / 100°C
Not user-adjustable
Auto
Keep Warm N/A Default/Max:12 hrs N/A
User-adjustable
LO: 149°F / 65°C
HI: 176°F / 80°C
Keep Warm N/A Default/Max: 10 hrs User-adjustable**
Range: 1hr–10 hrs
User-adjustable
LO: 149°F / 65°C
HI: 176°F / 80°C
* Zest 20 Cup model ONLY.
** Keep Warm cooking time is NOT user-adjustable when used in conjunction with Smart
Programs for Automatic Cooking.

Initial Test Run
18
Follow these steps to familiarize yourself with the Zest, and to ensure your
cooker is operating properly.
1. Depress the lid release button (located on the lid handle)
and lift the lid.
2. Remove the inner pot from the cooker base.
3. Place the steam rack on the bottom of the inner pot.
4. Add 1 cup (8 oz / 250 mL) of clean water to the inner pot.
5. Return the inner pot to the cooker base and close the lid,
ensuring it clicks.
6. Plug the power cord into a 120 V outlet. The display indicates OFF.
7. Press Steam to select the Steam Smart Program.
8. Press Keep Warm to turn the warming setting off.
The Smart Program cooking begins automatically after 10 seconds.
When the Smart Program ends, the cooker beeps and the
display indicates END.
9. Carefully dispose of the water in the inner pot, then start using
your rice and grain cooker!
CAUTION The cooker may be hot during and after cooking. Do not touch hot surfaces.

Care and Cleaning
19
Clean the cooker after each use.
Always unplug the cooker and let it cool to room temperature before
cleaning. Never use harsh chemical detergents, scouring pads, or powders to
clean any part of the cooker.
Allow the cooker to dry completely before further use or storage.
Part / Accessory Instruction Cleaning Method
Accessories
• Condensation collector
• Plastic steamer tray
• Rice measuring cup
• Plastic rice spoon
Empty and rinse the condensation
collector after each use.
Clean accessories after use.
Dishwasher Safe
Inner Pot
Always ensure the inner pot is dry on
the outside before inserting into the
cooker base.
Ensure all grease and food debris is
fully removed.
Optionally, spray with non-stick
cooking spray before adding food.
Hand Wash
Lid
Clean after each use.
Wipe with a soft, damp cloth or
sponge.
Cooker Base
If wet food or grease enters the cooker
base, wipe clean with a soft, damp
cloth or sponge.
Clean the exterior with a soft, damp
cloth or sponge, and wipe dry to
avoid streaking.
How-to Videos and Recipes available online at instantappliances.com
WARNING
Do not immerse the appliance in
water. Do not rinse the appliance
under a tap. Do not wet the
prongs of the power cord.
Without proper cleaning,
food may build up around
the steam release.
If you smell smoke, press Cancel and
unplug the appliance. Once cool, remove
the inner pot and check for foreign objects
between the inner pot and heating element.

Troubleshooting
20
Register your product today at instantappliances.com/support/register.
Contact Customer Care:
1-800-828-7280
support@instantappliances.com
instantappliances.com/#Chat
Problem Possible Reason Try This
Display remains blank
after connecting the
power cord.
Bad power
connection or no
power.
Inspect power cord for damage. Do not use
if the power cord is damaged in any manner.
Check outlet to ensure it is powered.
Cooker’s electrical
fuse has blown. Contact Customer Care.
Difculty opening the
lid. Lid release
Press down the lid release button on the lid
handle, then lift up to one side. The lid is not
removable.
Rice or grain is
chewy, too hard, or
undercooked.
Lid was opened too
early.
After cooking completes, open the cooker
and quickly uff the rice or grains, then close
the lid and let the cooker sit for an additional
5–10 minutes.
Not enough water or
liquid.
Add ½ to 1 cup water, mix, and run the
cooking program again.
Rice or grain requires
a longer cooking
time.
Run the cooking program a second time.
Rice or grain is too soft,
or overcooked.
Too much water or
liquid.
Stir the rice or grain to redistribute the
cooking liquid. Close the lid and run Keep
Warm for 10-30 minutes as required, stirring
occasionally.
Rice or grain was
cooked for too long. Refer to recipe instructions.
Error code
appears on
display, cooker
beeps and lights
ash continuously.
E1 Faulty sensor
detected. Contact Customer Care.
E3 Faulty sensor
detected. Contact Customer Care.
Any other servicing should be performed by an authorized service representative.
CAUTION Do not attempt to service the appliance yourself.
Table of contents
