InstantWave NWH1022 User manual

OEM’s manual
VersionA1
National Datacomm Corporation
4th Fl., No. 24-2, Industry East Road IV
Science-based Industrial Park
Hsinchu, Taiwan, R.O.C.
Technical Support
E-mail: techsu[email protected]om.tw
NDC World Wide Web
http://www.ndclan.com.tw/
CardBus Enhanced
Wireless Network Ada
p
ter
NWH1022

TRADEMARKS
NDC and InstantWave are trademarks of National Datacomm Corporation. All other names
mentioned in this document are trademarks/registered trademarks of their respective owners.
NDC provides this document “as is,” without warranty of any kind, either expressed nor
implied, including, but not limited to, the particular purpose for which it is intended. NDC
may make improvements and/or changes in this manual or in the product(s) and/or the
program(s) described in this manual at any time. This document could include technical
inaccuracies or typographical errors.
FCC WARNING
This equipment has been tested and found to comply with the limits for a Class B Digital
device, pursuant to part 15 of the FCC Rules. These limits are designed to provide
reasonable protection .
This equipment generates, uses, and can radiate radio frequency energy and, if not installed
and used in accordance with the instructions, may cause harmful interference to radio
communications. However, there is no guarantee that interference will not occur in a
particular installation. If this equipment does cause harmful interference to radio or
television reception, which can be determined by turning the equipment off and on, the user
is encouraged to try to correct the interference by one or more of the following measures:
Reorient or relocate the receiving antenna
Increase the separation between the equipment and receiver
Connect the equipment into an outlet on a circuit different from that to which the
receiver is connected
Consult the dealer or an experienced radio/TV technician for help
Changes or modifications not expressly approved by the party responsible for
compliance could void user's authority to operate the equipment.
This device complies with part 15 of the FCC Rules. Operation is subject to the following
two conditions:
1. This device may not cause harmful interference, and
2. This device must accept any interference received, including interference that may
cause undesired operation
FCC RF Radiation Exposure Statement
This equipment complies with FCC RF radiation exposure limits set forth for an
uncontrolled environment. This equipment should be installed and operated with a minimum
distance of 20 centimeters between the radiator and your body. Test
CAUTION:
This device is not authorized to be integrated and used in PDAs, hand-held devices, laptops,
or any portable devices, as separate FCC equipment authorization must be obtained to
address RF exposure (SAR) requirements for portable devices into which this module is
installed. The device is ONLY approved to be integrated and used in mobiles devices of the
type Access Point.
ii CardBus Enhanced Wireless Network Adapter

CardBus Enhanced Wireless Network Adapter iii
Packing List
The adapter package should contain the following items:
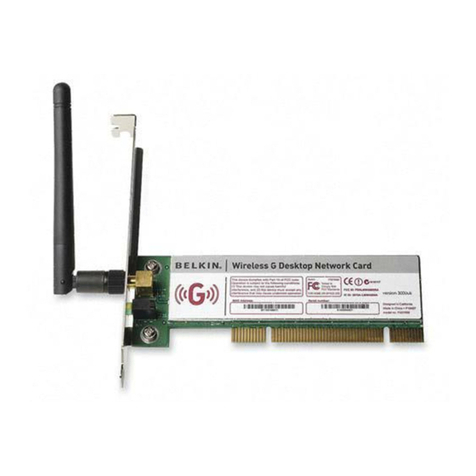
• One InstantWave NWH1022 CardBus enhanced wireless network adapter with
integrated antenna
• Four floppy disks – one containing drivers, two containing the InstantWave
HighRate Utility for the NWH1022, and one containing this user’s guide in
PDF format

iv CardBus Enhanced Wireless Network Adapter
Table of Contents
INTRODUCTION..................................................................................................1
SYSTEM REQUIREMENTS.......................................................................................1
Hardware .........................................................................................................1
Software............................................................................................................1
TERMINOLOGY USED IN THIS GUIDE.....................................................................2
ADAPTER INSTALLATION...............................................................................4
LEDS....................................................................................................................4
DRIVER INSTALLATION/UNINSTALLATION .............................................5
INSTALLATION IN WINDOWS 98............................................................................5
Uninstalling the Driver from Windows 98 .......................................................7
INSTALLATION IN WINDOWS ME...........................................................................8
Uninstalling the Driver from Windows Me ....................................................10
INSTALLATION IN WINDOWS 2000......................................................................10
Uninstalling the Driver from Windows 2000 .................................................11
INSTALLATION IN WINDOWS XP.........................................................................11
Uninstalling the Driver from Windows XP.....................................................11
THE INSTANTWAVE HIGHRATE UTILITY................................................13
HIGHRATE UTILITY INSTALLATION ....................................................................13
USING THE HIGHRATE UTILITY ..........................................................................14
Adapter Properties.........................................................................................17
Site Survey (Infrastructure Mode Only) .........................................................25
Signal Quality Indicator.................................................................................26
Station Traffic Monitor...................................................................................26
UNINSTALLING THE INSTANTWAVE UTILITY......................................................26
DRIVER/UTILITY UPGRADE PROCEDURE ...............................................27
TROUBLESHOOTING.......................................................................................28
TECHNICAL SUPPORT....................................................................................31

CardBus Enhanced Wireless Network Adapter v
NDC LIMITED WARRANTY............................................................................32
SPECIFICATIONS..............................................................................................34
APPENDIX...........................................................................................................36
INDEX...................................................................................................................37

vi CardBus Enhanced Wireless Network Adapter
List of Figures
FIGURE 1. AN AD HOC NETWORK...........................................................................2
FIGURE 2. AN INFRASTRUCTURE NETWORK............................................................2
FIGURE 3. ROAMING IN THE SAME DOMAIN............................................................3
FIGURE 4. ADD NEW HARDWARE WIZARD-1............................................................5
FIGURE 5. ADD NEW HARDWARE WIZARD-2............................................................6
FIGURE 6. ADD NEW HARDWARE WIZARD-3............................................................6
FIGURE 7. ADD NEW HARDWARE WIZARD-4............................................................7
FIGURE 8. ADD NEW HARDWARE WIZARD-1............................................................8
FIGURE 9. ADD NEW HARDWARE WIZARD-2............................................................9
FIGURE 10. ADD NEW HARDWARE WIZARD-3..........................................................9
FIGURE 11. CHOOSE DESTINATION LOCATION........................................................13
FIGURE 12. INSTANTWAVE HIGHRATE UTILITY.....................................................14
FIGURE 13. TOOLBAR..............................................................................................15
FIGURE 14. PREFERENCES.......................................................................................16
FIGURE 15. LAMP ICON...........................................................................................16
FIGURE 16. ADAPTER PROPERTIES/CONFIGURATION ..............................................17
FIGURE 17. ADAPTER PROPERTIES/ADVANCED INFORMATION ...............................19
FIGURE 18. ADAPTER PROPERTIES/LINK INFO ........................................................20
FIGURE 19. ADAPTER PROPERTIES/ENCRYPTION ....................................................22
FIGURE 20. TROUBLESHOOTING..............................................................................24
FIGURE 21. SITE SURVEY........................................................................................25
FIGURE 22. SIGNAL QUALITY INDICATOR...............................................................26
FIGURE 23. STATION TRAFFIC MONITOR ................................................................26

CardBus Enhanced Wireless Network Adapter 1
Introduction
Thank you for choosing an InstantWave wireless networking product. This guide
gives comprehensive instructions on installing and using the InstantWave
NWH1022 CardBus enhanced wireless network adapter, and also explains how to
install and use the InstantWave utility program.
Your InstantWave wireless network adapter is part of a family of easy-to-use, high-
performance wireless communication products. This family of products includes:
• InstantWave 11-Mbps Wireless Access Point (NWH650)
• InstantWave 11-Mbps Wireless Access Point (NWH660)
• InstantWave 11-Mbps Wireless Workgroup Bridge (NWH6210)
• InstantWave 11-Mbps Wireless Ethernet Client (NWH2210)
• InstantWave 11-Mbps Wireless Secure Router (NWH8010)
• InstantWave 11-Mbps Wireless PC Card (NWH1010)
• InstantWave 11-Mbps Wireless PCI Card (NWH630)
System Requirements
Hardware
The adapter is designed to be installed in an IBM-type microcomputer with a
CardBus interface (also known as a PCMCIA or PC Card interface or slot). The
minimum system configuration is the same as that required to run Microsoft
Windows (Windows 98, Me, 2000, or XP).
To allow installation of the driver and utility software for the adapter, the computer
must have a 3.5-inch floppy disk drive.
Software
The utility and driver software included with the adapter will work in Microsoft
Windows 98, Windows ME, Windows 2000, and Windows XP.

2 CardBus Enhanced Wireless Network Adapter
Terminology Used in this Guide
Ad Hoc Network
An ad hoc network is formed by a number of wireless stations (without an access
point) communicating via radio waves. For the users, the shared resources on the
wireless network appear exactly as they would on a regular wired network. The
wireless operation of the network is totally transparent. Figure 1 depicts a typical
ad hoc network scenario.
Figure 1. An Ad Hoc Network
Infrastructure Network
An infrastructure network is formed by several stations and one access point (AP),
with the stations within range of the AP. Figure 2 depicts a typical infrastructure
network topology.
Figure 2. An Infrastructure Network
Se
r
ve
r
Wired Computers
Access
Point
Wireless Computers
Wireless
Computers

CardBus Enhanced Wireless Network Adapter 3
BSSID/MAC ID
BSSID (Basic Service Set ID) is an ID unique to each AP that is factory set and is
identical to the MAC ID (Media Access Control ID). It allows each AP to be
identified on the network.
Domain Name/SSID
A domain is usually defined by the network administrator as a segment/subnet of a
large network and may be made up of overlapping wireless cells. Wireless nodes
can roam freely within the same domain without disconnecting from the network.
Figure 3 depicts a common wireless network setup.
Figure 3. Roaming in the Same Domain
Roaming
The convenience of a mobile PC is the ability to move freely. The concept is
similar to that of a cellular phone moving from one base station to another.
InstantWave offers built-in high-performance seamless roaming capabilities.
Server
Access Points
Wireless Computers

4 CardBus Enhanced Wireless Network Adapter
Adapter Installation
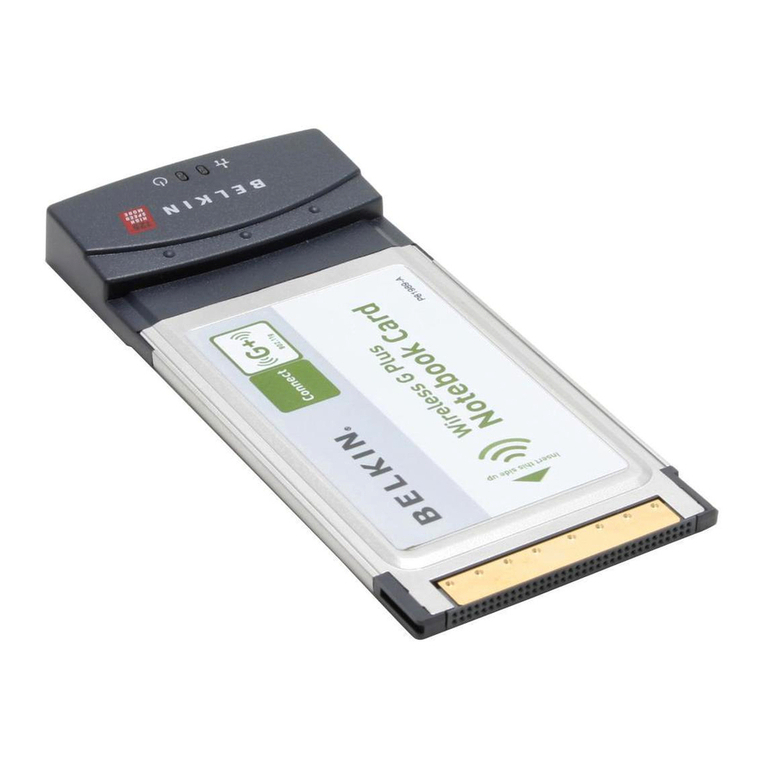
The adapter fits into a Type II or Type III CardBus slot, also known as a PCMCIA
or PC Card slot. The antenna is encased in a plastic case, in line with the main
body of the adapter, such that it extends outside the slot when the adapter is
inserted.
step1. Insert the adapter into the computer’s CardBus slot. Insert the adapter
with its 68-pin connector facing the slot and the label facing up.
step2. Repeat the above procedure for each of the other computers to be
networked.
LEDs
The adapter has two light-emitting diode (LED) indicators, one to indicate power
and one to indicate wireless activity. When you hold the adapter so the antenna
housing faces right like a capital letter D, the power LED is above the activity LED.
The power LED shines green whenever the adapter is receiving power; the activity
LED shines orange when the adapter is transmitting or receiving.

CardBus Enhanced Wireless Network Adapter 5
Driver Installation/Uninstallation
For Windows 98 see the following section, for Windows Me go to page 8, for
Windows 2000 go to page 10, and for Windows XP go to page 11. Note that if
networking components have not yet been installed in the operating system, you
may be asked to insert the Windows installation CD-ROM during installation of
the driver.
A message about certification of the driver may appear during installation in some
versions of Windows. This message can safely be ignored.
Installation in Windows 98
Complete the following procedure to install the driver for Windows 98.
step1. Turn on the power and start Windows 98.
step2. Windows 98 will detect the adapter. The Add New Hardware Wizard
dialog box will open (Figure 4).
Figure 4. Add New Hardware Wizard-1
step3. Click Next.

6 CardBus Enhanced Wireless Network Adapter
Figure 5. Add New Hardware Wizard-2
step4. Choose Search for the best driver for your device (Figure 5). Click
Next to open the following window (Figure 6).
Figure 6. Add New Hardware Wizard-3
step5. Insert the driver disk. Check Floppy disk drives, check Specify a
location, and enter a:\win98 (assuming the floppy drive is A). Click
Next.

CardBus Enhanced Wireless Network Adapter 7
Figure 7. Add New Hardware Wizard-4
step6. The Add New Hardware Wizard will indicate that Windows 98 found
the driver (Figure 7). Click Next and follow the on-screen instructions
to complete the installation.
Uninstalling the Driver from Windows 98
To completely remove the adapter and driver from your system you will need to
physically remove the adapter (with the system powered off). The hardware
removal procedure is the reverse of the hardware installation procedure. Restart the
computer and then proceed as follows:
step1. Click Start/Settings/Control Panel. Double-click the Network icon.
Highlight the entry TI ACX100 WLAN Adapter.
step2. Click the Remove button to remove the adapter driver.
step3. Click OK. The system will ask you to restart the PC. Click Yes.

8 CardBus Enhanced Wireless Network Adapter
Installation in Windows Me
Complete the following procedure to install the driver in Windows Me:
step1. Turn on the power and start Windows Me.
step2. Windows Me will detect the adapter. The Add New Hardware
Wizard will open (Figure 8).
Figure 8. Add New Hardware Wizard-1
step3. Select Specify the location of the driver and click Next.

CardBus Enhanced Wireless Network Adapter 9
Figure 9. Add New Hardware Wizard-2
step4. Check Search for the best driver for your device and check
Specify a location. Assuming the floppy drive is drive A, type
a:\win98 (the driver is the same as that for Windows 98).
step5. Insert the adapter driver disk and click Next to open the following
window (Figure 10).
Figure 10. Add New Hardware Wizard-3

10 CardBus Enhanced Wireless Network Adapter
step6. Click Next. The Add New Hardware Wizard will complete the
installation.
step7. Click Finish and follow the on-screen instructions to complete
the installation.
Uninstalling the Driver from Windows Me
To completely remove the adapter and driver from your system you will need to
physically remove the adapter (with the system powered off). The removal
procedure is the reverse of the hardware installation procedure on page 4. Restart
the computer and then proceed as follows:
step1. Click Start/Settings/Control Panel. Double-click the Network
icon, then highlight the entry TI ACX100 WLAN Adapter.
step2. Click the Remove button to remove the adapter driver.
step3. Click OK. The system will ask you to restart the PC. Click Yes.
Installation in Windows 2000
step1. Turn on the power to the PC and start the Windows 2000 operating
system.
step2. The Found New Hardware Wizard dialog box will open. Click Next.
step3. Choose Search for a suitable driver for my device and click Next.
step4. Check Specify a location. Click Next.
step5. Insert the adapter driver disk. Type a:\win2k (assuming the floppy disk
drive is drive A) and click OK.
step6. Click Next when Windows finds a driver for this device.
step7. Click Yes to begin copying the driver files.
step8. In the Completing the Found New Hardware window, click Finish.

CardBus Enhanced Wireless Network Adapter 11
Uninstalling the Driver from Windows 2000
To completely remove the adapter and driver from your system you will need to
uninstall the device driver first:
step1. Click Start/Settings/Control Panel. Double-click the System icon, then
select the Hardware tab and click Device Manager.
step2. Highlight the entry TI ACX100 WLAN Adapter in the the Network
Adapters section.
step3. Click the right mouse button and select Uninstall.
step4. Click OK to confirm the device removal.
step5. Click OK to close Device Manager and the System Properties window.
Then shut down the computer and physically remove the adapter. The hardware
removal procedure is the reverse of the hardware installation procedure on page 4.
Installation in Windows XP
step1. Turn on the power to the PC and start the Windows XP operating
system.
step2. The Found New Hardware Wizard dialog box will open. Click Next.
step3. Check Install from a list or Specify a location and click Next.
step4. Check Include this location in the search.
step5. Insert the driver disk. Type a:\winxp (assuming the floppy disk drive is
drive A) and click OK.
step6. Click Next when Windows finds the driver for the adapter.
step7. Click Continue Anyway to begin copying the driver files.
step8. In the Completing the Found New Hardware window, click Finish.
Uninstalling the Driver from Windows XP
To completely remove the adapter and driver from your system you will need to
uninstall the device driver first:

12 CardBus Enhanced Wireless Network Adapter
step1. Click Start/Settings/Control Panel. Double-click the System icon, then
select the Hardware tab and click Device Manager.
step2. Highlight the entry TI ACX100 WLAN Adapter in the Network
Adapters section.
step3. Click the right mouse button and select Uninstall.
step4. Click OK to confirm the device removal.
step5. Click OK to close Device Manager and the System Properties window.
Then shut down the computer and physically remove the adapter. The hardware
removal procedure is the reverse of the hardware installation procedure on page 4.

CardBus Enhanced Wireless Network Adapter 13
The InstantWave HighRate Utility
The InstantWave HighRate Utility is a Windows-based application that allows
users to monitor and configure an InstantWave wireless adapter. The program
includes tools that allow users to determine the best location to place the
InstantWave products, or to diagnose the wireless network for problems.
The utility allows users to configure the wireless network type (ad hoc or
infrastructure), domain name (SSID), and security (WEP). The Site Survey tool
allows users to view existing groups (domain name/SSID of wireless cells in a
domain). It provides the option to manually join a particular group in the network.
Tools are also provided for viewing the network in terms of wireless signal quality,
and for monitoring the station data throughput.
HighRate Utility Installation
step1. Insert InstantWave Utility disk 1 in the floppy disk drive and click
Start/Run. Type a:\setup.exe (where the floppy disk drive is A).
step2. A Welcome screen will appear. After reading the installation
description, click Next to advance to the Choose Destination Location
dialog box (Figure 11).
Figure 11. Choose Destination Location

14 CardBus Enhanced Wireless Network Adapter
step3. Click Next to copy the program files to the default location,
C:\Program Files\Instantwave\HighRate Utility, or click Browse to
choose another location.
step4. The setup program will copy the necessary files into the specified
directory. Insert disk 2 when instructed to do so. File copying progress
will be displayed in the InstantWave HighRate Utility setup screen.
step5. Click OK to complete the installation.
Using the HighRate Utility
The InstantWave HighRate Utility toolbar appears in the top right corner of the
screen whenever the computer is started up with the adapter inserted. You can also
display the toolbar as follows:
step1. Click the Start button on the taskbar.
step2. Go to Programs, Instantwave, and HighRate Utility (Figure 12).
Figure 12. InstantWave HighRate Utility
step3. Click HighRate Utility, and the InstantWave toolbar will appear in the
upper right corner of the screen, offering fast access to the utility
functions (Figure 13).
Table of contents
