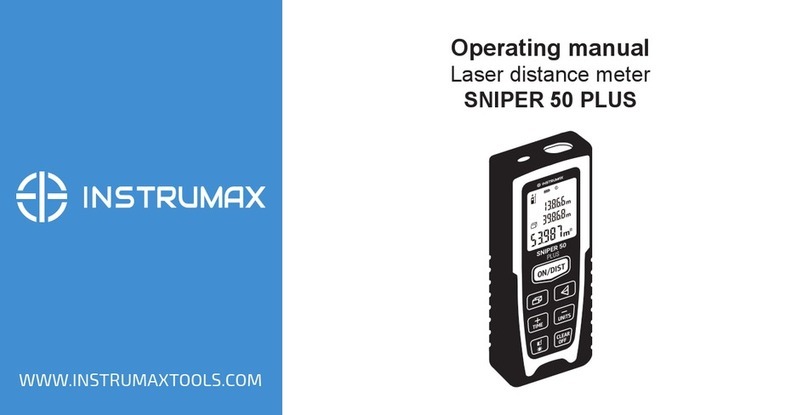
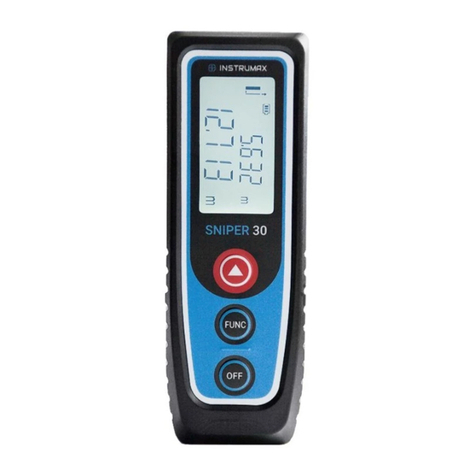
Instrumax SNIPER 80 PLUS User manual

Operating manual
Laser distance meter
SNIPER 80 PLUS
WWW.INSTRUMAXTOOLS.COM

2
SNIPER 80
PL
US
Congratulations on the purchase of laser distance meter
INSTRUMAX SNIPER 80 PLUS!
Permitted use
· Measuring distances
· Computing functions, e.g. areas, volumes, addition and
subtraction, Pythagorean calculation
· Transfer measured distances for processing on a mobile
device in a special program.
The safety regulations and instructions along with the
operating manual should be read carefully before initial
operation.The person responsible for the instrument
must ensure that equipment is used in accordance with
the instructions. This person is also accountable for the
deployment of personnel and for their training and for
the safety of the equipment when in use.
SAFETY INSTRUCTION
Prohibited use
Please follow up instructions given in operating manual.
Do not use instrument in explosive environment (lling sta-
1
2
1
1
2
3
4
5
6
7
6
5
4
3
2
7
8
9
10
11
12
13
14151617

tion, gas equipment, chemical production and so on).
Do not remove warning labels or safety instructions.
Do not open instrument housing, do not change it’s construc-
tion or modication.
Do not stare at beam. Laser beam can lead to eye injury (even
from greater distances).
Do not aim laser beam at persons or animals.
Opening of the equipment by using tools (screwdrivers, etc.),
as far as not specically permitted for certain cases.
Inadequate safety precautions at the surveying site (e.g. when
measuring on the roads, construction sites and so on).
Use the instrument in the places where it could be dangerous:
on the air transport, near manufacturers,
production facilities, in the places where the work of laser
distance meter can lead to the harmful effects on
people or animals.
Laser classication
The instrument is a laser class 2 laser product with
power < 1 mW and wavelength 620-650 nm. Laser is safety
in ordinary conditions of usage.
3
START UP
Keypad
1. ON / Measure / Continious measurements
2. Area / Volume / Indirect measurements (Pythagorean)
3. Addition / Timer
4. Clear / OFF
5. Subtraction / Measuring units
6. Reference setting / Backlight
7. Memory
Display
1. Laser ON
2. Reference (front/rear)
3. Maximum value (continious measurements)
4. Area / Volume / Indirect measurements (Pythagorean)
5. Minimum value (continious measurements)
6. Addition/Subtraction
7. Main Line
8. Measuring units
9. Line 1
1
2
SNIPER 80
PL
US

4
SNIPER 80
PL
US
10. Line 2
11. Line 3
12. Tilt angle on axes X and Y
13. Battery power
14. Timer
15. Memory number
16. Memory function
17. Service
Inserting / Replacing Batteries
Remove the battery cover, insert the battery correctly. Pay
attention to correct polarity. Close the battery compart-
ment.
Replace the battery when symbol constantly blinks in the
display. Batteries should be removed in case of danger of
corrosion, if the device will not be used for a long time.
The tool is equipped with charging port for battey charging.
There is a charging port covered with rubber cap on the
side of the tool. To charge, connect the cable to the mi-
croUSB charging port, and then connect the charger to a
household electrical outlet.
Attention! Never connect the charger when using
non-rechargeable batteries. Do not leave the device un-
attended, when connecting the charger. The parameters
of the charger must comply with the parameters of the
household power supply and have an output voltage of
not more than 5 V.
MENU FUNCTIONS
Swtich on and off
Press the button ON (1) to switch on the instrument and la-
ser.
Press and hold key for about 2 seconds to start continuous
measuring.
The device also switches off automatically after 3 minutes of
inactivity i.e. no key is pressed within that interval.
To switch off the instrument press and hold button OFF (4)
for 2 sec.
Reference Setting
Default reference setting is from the rear of the device.

5
SNIPER 80
PL
US
Press button (6) to set the reference from the front, rear, tri-
pod. When the end-piece is folded out fully, the reference rear
is set.
You will see the reference symbol on the display.
Selecting Units
Press and hold the button (5) for 2 sec. until the desired unit
is displayed.
Illumination
Press and hold the button (6) for 2 seconds to switch the illu-
mination on or off.
Clear-Key
Cancel the last action. Press button (7).
MEASUREMENTS
Single distance measurement
Press button and hold button ON (1) to activate the laser. Press
again to trigger the distance measurement. A beep will sound.
The result is displayed immediately.
Continuous Measurement
Press and hold button ON (1) for about 2 seconds to start
continuous measuring. That function allows to measure mini-
mum and maximum distances from the xed point. This func-
tion is widely used for diagonal measurements (maximum
value) or horizontal distances up to vertical plane (minimum
value). Minimum (5) and maximum (3) values will be shown
on the display.
FUNCTIONS
Area
Press the button (2) once.The symbol Area (4) is displayed.
Press button ON (1) to take the rst measurement (for exam-
ple, length). Measured value is displayed in line 3.
Press button ON (1) to take the second measurement (for ex-
ample, width). The result of measured area is displayed in the
line 2. The area result is displaye din the main line. Perimeter

6
SNIPER 80
PL
US
is displayed in the line 1.
Volume
For volume measurements, press button (2) twice until the
symbol (4) for volume measurement appears on the display.
Press button ON (1) to measure width, length and height.The
volume value will be displayed in the main display area (8).
Indirect measurement
Pythagorean measurement is used in the condition that the
objective needing to be measured is covered or has no effec-
tive reecting surface and can’t be measured directly.
Make sure you adhere to the prescribed sequence of mea-
surement:
All target points must be in a horizontal or vertical plane.
The best results are achieved when the instrument is rotated
about a xed point (e.g. rear part of the tool is attached to the
xed surface, e.g. wall).
Activate continious measurement function to take measure-
ments.
Distance that is necesary to be measured is blinking in the
icon 'triangle'. Press button ON for the measurements.
The result will be displayed in the main display area.
Timer
Use Timer for accurate measurement of big distances. Press
and hold button (3) to set the delay in 5 sec. When you
release the button, you will see time (in sec) (14) on the dis-
play. This time shows how many seconds we have to start
the measurement. Time reading of last 5 seconds goes with
sound alarm. The instrument will start the measurement after
the last sound alarm.
Memory
The tool stores the measured values (up to 60 values) on the
internal memory.
Press button (7) to display the rst stored value.
Press button (7) once again to enter into the stored values.
Choose the necessary value by pressing buttons (3) or (5).
Press and hold button (7) until you will hear a sound alarm to

7
store the obtained result. The result is always stored into the
rst memory cell. Last memory cell is deleted.
Operation with mobile operation
Measured distances can be transferred to
the mobile device.
To get started, install the ADA PHOTO
PLAN software. For that scan QR code
on the package or use the search in the
online app stores.
In the application, you can take photos of measured objects
or drawing. On the line denoting dimensions, you can
apply the values received from the device.
Errors
All message codes are displayed with either “Info” and
(Error). Following mistakes can be corrected.
INFO CAUSE REMEDY
204 Data overow Repeat procedure
252 Temperature too
high
Cool down instru-
ment
253 Temperature too low Warm up instrument
255 Receiver signal too
weak
Use target plate
256 Received signal too
strong
Use target plate
(grey side)
258 Wrong initialization Switch on – off the
instrument
260 Instrument or target
moved
Stabilize the instru-
ment or the target
205 Out of measurement
range
Measure the distance
according to speci-
cation
SNIPER 80
PLUS

8
SPECIFICATIONS
Range, without
target, m
0.05 to 80
Accuracy, mm ±1.5*
Smallest unit dis-
played
1 mm
Laser class 2
Laser type 620-650nm, <1 mW
IP rating IP 54
Automatic switch off 3 minutes of inactivity
Display illumination yes
Battery life, 2 x AAA > 5000 measurements
Weight 105g
206 Physical property
violation
Make sure the mea-
surement satises
the Pythagorean
theorem. Make sure
the values used for
evaluation have
same unit.
Error Hardware error Switch on/off the de-
vice several times and
check if the symbol still
appears. If so please
call your dealer for
assistance.
SNIPER 80
PL
US

9
Temperature range:
Storage
Operating
-25º to +70º
-10º to +50º
* In favourable conditions (good target surface properties, room
temperature).
Maximum deviation occurs under unfavorable conditions such as bright
sunlight or when measuring to poorly reecting or very rough surfaces.
Measuring conditions
Measuring errors can occur when measuring toward color-
less liquids (e.g. water) or dust free glass, styrofoam or sim-
ilar semi-permeable surfaces. Aiming at high gloss surfaces
deects the laser beam and measurement errors can occur.
Against non-reective and dark surfaces the measuring time
can be increased.
Precautions
Please, handle the instrument with care.
Avoid viabrations and hits.
During transportation put the instrument into the soft bag.
Note: the instrument should be dry!
Care and cleaning
Do not immerse the instrument in water. Wipe off dirt with a damp,
soft cloth. Do not use aggressive cleaning agents or
solutions.
Specic reasons for erroneous measuring results
- Measurements through glass or plastic windows;
- Dirty laser emitting window;
- After instrument has been dropped or hit. Please check the
accuracy.
- Large uctuation of temperature: if instrument will be used
in cold areas after it has been stored in warm areas (or the
other way round) please wait some minutes before carrying
out measurements.
Electromagnetic acceptability (EMC)
It cannot be completely excluded that this instrument will dis-
turb other instruments (e.g. navigation systems);
will be disturbed by other instruments (e.g. intensive electro-
magnetic radiation nearby industrial facilities or radio transmit-
SNIPER 80
PL
US

10
ters).
Laser classication
The instrument is a laser class 2 laser product accortding
to DIN IEC 6082 5-1:2007. It is allowed to use unit without
further safety precautions.
Warranty
This product is warranted by the manufacturer to the origi-
nal purchaser to be free from defects in material and work-
manship under normal use for a period of one (1) year from
the date of purchase. During the warranty period, and upon
proof of purchase, the product will be repaired or replaced
(with the same or similar model at manufactures option),
without charge for either parts of labour.
In case of a defect please contact the dealer where you
originally purchased this product. The warranty will not
apply to this product if it has been misused, abused or al-
tered. Without limiting the foregoing, leakage of the battery,
bending or dropping the unit are presumed to be defects
resulting from misuse or abuse.
Exceptions from responsibility
The user of this product is expected to follow the instructions
given in operators’ manual.
Although all instruments left our warehouse in perfect condi-
tion and adjustment the user is expected to carry out periodic
checks of the product’s accuracy and general performance.
The manufacturer, or its representatives, assumes no respon-
sibility of results of a faulty or intentional usage or misuse
including any direct, indirect, consequential damage, and loss
of prots. The manufacturer, or its representatives, assumes
no responsibility for consequential damage, and loss of prots
by any disaster (earthquake, storm, ood ...), re, accident,
or an act of a third party and/or a usage in other than usual
conditions.
The manufacturer, or its representatives, assumes no respon-
sibility for any damage, and loss of prots due to a change of
data, loss of data and interruption of business etc., caused by
using the product or an unusable product. The manufacturer,
or its representatives, assumes no responsibility for any dam-
age, and loss of prots caused by usage other thsn explained
in the users’ manual.
SNIPER 80
PL
US

The manufacturer, or its representatives, assumes no re-
sponsibility for damage caused by wrong movement or action
due to connecting with other products.
WARRANTY DOESN’T EXTEND TO FOLLOWING CASES:
1. If the standard or serial product number will be changed,
erased, removed or wil be unreadable.
2. Periodic maintenance, repair or changing parts as a result of
their normal runout.
3. All adaptations and modications with the purpose of improve-
ment and expansion of normal sphere of product application,
mentioned in the service instruction, without tentative written
agreement of the expert provider.
4. Service by anyone other than an authorized service center.
5. Damage to products or parts caused by misuse, including,
without limitation, misapplication or nrgligence of the terms of
service instruction.
6. Power supply units, chargers, accessories, wearing parts.
7. Products, damaged from mishandling, faulty adjustment, main-
tenance with low-quality and non-standard materials, presence of
any liquids and foreign objects inside the product.
8. Acts of God and/or actions of third persons.
9. In case of unwarranted repair till the end of warranty period be-
cause of damages during the operation of the product, it’s trans-
portation and storing, warranty doesn’t resume.
For more information you can visit our website INSTRUMAXTOOLS.COM

Поздравляем Вас с приобретением лазерного
дальномера INSTRUMAX SNIPER 80 PLUS!
Назначение инструмента
Лазерный дальномер INSTRUMAX SNIPER 80 PLUS
позволит Вам:
- измерять расстояния дистационно,
- вычислять функции: сложение, вычитание, площади,
объема, расстояния по теореме Пифагора,
- передавать измеренные расстояния на мобильные
устройства для обработки в специальной программе.
Руководство пользователя должно быть тщательно
изучено перед тем, как Вы начнете измерения. Лицо,
ответственное за прибор, должно удостовериться,
что все пользователи лазерного дальномера следу-
ют данному Руководству.
Инструкция по безопасной эксплуатации прибора
ЗАПРЕЩАЕТСЯ:
Использование прибора не по инструкции и использова-
12
ние, выходящее за пределы разрешенных операций.
Использование прибора во взрывоопасной среде (АЗС,
газовое оборудование, химическое производство и т.д.)
Вывод прибора из строя и удаление с прибора предупре-
дительных и указательных надписей.
Вскрытие прибора с помощью инструментов (отверток и
т.д.), изменение конструкции прибора или его модифика-
ция.
Намеренное ослепление лазером третьих лиц, прямое
наведение прибора на солнце.
Смотреть на лазерный луч.
Ненадлежащие меры безопасности на участке проведе-
ния геодезиической съемки (например, при проведении
измерений на дорогах, строительных площадках и т.д.).
Использование прибора в местах, где это может быть
потенциально опасно: на воздушном транспорте, вблизи
производств и технологических объектов, в местах,
где работа дальномер
а может привести к вредному
воздействию на людей или животных.
SNIPER 80
PL
US

13
SNIPER 80
PL
US
Классификация лазерного прибора
Класс лазера 2. Мощность излучения менее 1 mW.
Длинна волны лазера 620-650 нм.
Лазер является безопасным в нормальных условиях
эксплуатации и в поддающихся прогнозированию
ситуациях.
НАЧАЛО РАБОТЫ
Клавишная панель
1. Кнопка включения / измерения / трекинг (ON)
2. Площадь/объем/косвенные измерения (по теореме
Пифагора)
3. Сложение / таймер
4. Стереть / выключение (OFF)
5. Вычитание / изменение единиц измерения
6. Выбор точки отсчета / подсветка
7. Функция памяти.
2
1
Дисплей
1. Лазер “ВКЛ”
2. Точка отсчета (верхний край/ нижний край)
3. Максимальное значение (режим трекинг)
4. Вычисление площадь/объем/косвенные измерения
(по теореме Пифагора)
5. Минимальное значение (режим трегинг)
6. Знак сложения/вычитания
7. Основная строка
8. Единица измерения
9. Строка 1
10. Строка 2
11. Строка 3
12. Угол наклона по осям Х и Y
13. Статус батареи
14. Включение таймера
15. Номер ячейки памяти
16. Функция памяти
17. Сервис

14
SNIPER 80
PL
US
Установка/замена элементов питания
1. Сдвиньте защелку крышки вниз. Снимите крышку отсе-
ка для батарей.
2. Поместите в него новые элементы питания. Соблюдай-
те полярность.
3. Закройте отсек для батареи.
Замените элементы питания, когда на дисплее символ
батареи будет обозначать полную разрядку.
Если прибор не будет использоваться долгое время, из-
влеките батареи.
Дальномер оснащен зарядным портом для заряда акку-
муляторов.
На боковой панели прибора расположен порт зарядки
microUSB защищенный резиновой заглушкой. Для заря-
да подключите кабель к порту зарядки microUSB, а затем
подключите зарядное устройство к бытовой электросети.
Внимание! Никогда не подключайте зарядное устрой-
ство при использовании не перезаряжаемых батарей.
При подключении зарядного устройства не остав-
ляйте прибор без присмотра. Параметры зарядного
устройства должны соответствовать параметрам бы-
товой электросети и иметь выходное напряжение не
более 5 В.
ФУНКЦИИ МЕНЮ
Включение / выключение прибора
Нажмите один раз кнопку ON (1): прибор и лазер вклю-
чены.
При более длительном нажатии на эту клавишу происхо-
дит включение режима трекинг.
Прибор отключается автоматически через три минуты
после последнего выполненного действия если не были
нажаты никакие клавиши.
Для выключения дальномера нажмите на кнопку OFF (4)
в течении 2 секунд.
Выбор точки отсчета
По умолчанию прибор производит измерения от его ниж-
ней поверхности. На клавишной панели нажимая кнопку
(6) выберите точку отсчета: верхняя чаять дальномера,

15
SNIPER 80
PL
US
нижняя часть дальномера, штатив. На экране прибора
отображается выбранная точка отсчета измерений.
измерение от нижней части скобы. На экране прибора
отображается выбранная точка отсчета измерений.
Выбор единиц измерения
На клавишной панели нажав кнопку (5) в течении 2
секунд, выберите единицу измерения.
Включение / выключение подсветки
На клавишной панели нажав кнопку (6) в течении 2
секунд, включите/выключите подсветку экрана.
ИЗМЕРЕНИЯ
Однократное измерение расстояния
Нажмите однократно на кнопку ON (1) для включения
прибора, активации лазерного указателя. Нажмите еще
раз для проведения измерения. Прозвучит звуковой сиг-
нал. Результат измерения отобразится на дисплее.
Непрерывное измерение расстояния
При длительном нажатии кнопки ON (1) включается
функция — режим трекинг (непрерывного измерения
расстояния).
Эта функция позволяет пользователю измерять мини-
мальные или максимальные расстояния от зафиксиро-
ванной точки. Чаще всего эта функция используется для
измерения диагоналей (максимальное значение) или
горизонтальных расстояний до вертикальной поверхно-
сти (минимальное значение). Значения максимального
(3) и минимального (5) расстояния будут отображены на
дисплее.
ФУНКЦИИ
Функция вычисления площади
Нажмите один раз кнопку (2): Отображается значок
площадь (4) на дисплее.
Нажмите кнопку ON (1): производится измерение перво-

16
SNIPER 80
PL
US
го значения расстояния (например, длины). Измеренное
значение отображается в строке 3.
Нажмите ON (1): производится измерение второго зна-
чения расстояния (например, ширины). Измеренное
значение отображается в строке 2. Результат измерения
площади отображается в основной строке. В строке 1
отобразится периметр.
Функция вычисления объема
Нажмите два раза кнопку (2): Отображается значок
ОБЪЕМ (4).
Нажимайте кнопку ON (1) измерьте ширину, длину и
высоту. Результат измерения объема отображается в
итоговой строке (8).
Косвенное измерение
Прибор может производить измерение расстояний по
теореме Пифагора. Эта процедура помогает измерять
расстояния в труднодоступных местах.
Придерживайтесь ранее предписанной последователь-
ности измерений:
• Все точки измерения должны быть расположены по
вертикали или горизонтали на поверхности стены.
• Лучшие результаты достигаются, когда прибор повора-
чивается вокруг неподвижной точки (например, нижняя
часть прибора прижата к неподвижной поверхности,
например к стене).
• Для произведения измерения может быть вызвана
функция трекинг (Непрерывное измерение расстояния).
Эта функции может быть использована для оценки и
измерения минимального/максимального значения. Ми-
нимальное значение используется для произведения из-
мерений, которые должны находиться под прямым углом
к точке измерения; максимальное расстояние использу-
ется для всех других измерений.
Удостоверьтесь, что первое измерение и измеряемое
расстояние измеряются под прямыми углами. Исполь-
зуйте функцию трекинга (непрерывное измерение
расстояния).
Расстояние, которое предстоит измерить, мигает в

17
SNIPER 80
PL
US
значке треугольник (4). Нажимайте кнопку ON (1) для
измерений. Результат отобразится в основной строке (8).
Таймер
Для точного измерения больших расстояний используйте
таймер. Нажмите и удерживайте (3) кнопку для установки
задержки в 5 сек. Как только Вы отпустите кнопку, на дисплее
будет отображаться время (в сек.) (14), оставшееся до нача-
ла измерения. Отсчет последних 5-ти секунд сопровождает-
ся звуковым сигналом. После того, как прозвучит последний
сигнал, прибор произведет измерение.
Сложение / Вычитание
Прибор может складывать или вычитать значение изме-
рений длины, площадей и объемов. Нажмите ON (1) для
первого измерения. Нажмите кнопку (3): следующее изме-
рение суммируется к предыдущему.
Нажмите кнопку (5): следующее измерение вычитается из
предыдущего.
Нажмите ON (1) для следующего измерения. Для получе-
ния результат нажмите ON (1) еще раз.
Память
Прибор сохраняет измеренные значения на внутреннюю
память. Может быть сохранено до 60 значений.
Нажмите (7), чтобы на экране появилось первое со-
храненное значение.
Нажимайте (7) еще раз, чтобы войти в сохраненные
значения. Нажимая кнопки (3) или (5) выберете среди
сохраненных значений необходимое.
Для записи полученного результата в память прибора
нажмите и удерживайте кнопку (7) до звукового сигнала.
Результат всегда записывается в первую ячейку памяти.
Последняя ячейка памяти при этом стирается.
Работа с мобильным приложением
Измеренные расстояния можно передавать на
мобильное устройство. Для начала работы, устано-
вите программное обеспечение ADA PHOTO PLAN,

18
SNIPER 80
PL
US
просканировав QR код на упаковке, или
воспользуйтесь поиском в онлайновых
магазинах приложений.
В приложении можно делать фотографии
измеряемых объектов или чертеж. На
линии, обозначающие размеры, можно
наносить значения, полученные от прибора.
ПРЕДУПРЕЖДЕНИЯ НА ДИСПЛЕЕ
Все предупреждения на дисплее отображаются с значком
InFo и кодом ошибки. Следующие ошибки могут быть
исправлены.
Info Причина Метод исправле-
ния ошибки
204 Ошибка вычисления Повторите про-
цедуру
252 Перегрев прибора Дайте устройству
охладиться
253 Слишком низкая температура Согрейте прибор
255 Принятый сигнал слишком
слабый, время измерения
слишком длительное
Используйте визир-
ную пластину
256 Полученный сигнал слишком
сильный
Используйте
визирную пластину
(серая сторона)
258 Ошибка инициализации Выключите-включи-
те прибор
260 Прибор или мишень сдви-
нулись
Стабилизируйте
прибор или мишень
205 Выход за диапазон измерения Измеряйте рас-
стояние согласно
техническим
характеристикам

SNIPER 80
PL
US
ТЕХНИЧЕСКИЕ ХАРАКТЕРИСТИКИ
19
206 Нарушение пропорции прямоу-
гольного треугольника
Убедитесь, что
измерение соот-
ветствует теореме
Пифагора (гепоте-
нуза не может быть
меньше любого из
катетов).
Error Ошибка прибора Если это сооб-
щение остается
активным после
нескольких отклю-
чений и включений
инструмента, пожа-
луйста, обратитесь
к авторизованному
дилеру.
Дальность без отражателя, м 0,05-80
Точность, мм ±1,5мм*
Наименьшая используемая единица
измерения, мм
1 мм
Класс лазер 2
Тип лазера 620-650 нм, <1
мВт
Защита от брызг и пыли IP 54, пыле- и
влагозащищенный
Автоматическое отключение, сек. через 180 с
Подсветка дисплея да
Срок службы батареи, 2 х ААА более 5 000
измерений
SNIPER 80
PL
US

20
SNIPER 80
PL
US
Вес 105 г
Температурный диапазон: хранение
Работа с прибором
-25ºС - +70ºС
-10ºС - +50ºС
*при благоприятных условиях работы (хорошие отражательные
свойства поверхности, комнатная температура). При неблагопри-
ятных условиях, таких как интенсивный солнечный свет, плохие
отражательные свойства поверхности или высокотемпературные
колебания, точность может ухудшиться. Используйте визирную
пластину.
Условия измерений
Дальность измерений
Гарантированный диапазон измерений — до 80 м.
В ночное время, в сумерках, либо если объект, до кото-
рого производится измерения затенен, дальность изме-
рений может быть больше заявленной призводителем.
Используйте визирную пластину для того, чтобы увели-
чить дальность измерений при ярком освещении, или
если объект до которого проводится измерение, имеет
плохую отражающую поверхность.
Поверхности, до которых производятся измерения
Возможны ошибки, если измерение производится до
прозрачных поверхностей (вода, стекло, полупрозрач-
ные пластики). Также возможны ошибки при измерении
до глянцевых и зеркальных поверхностей.
Возможные причины ошибочных результатов измерений
Загрязнено окно оптической части прибора,
Прибор уронили или ударили. В этом случае проверьте
прибор в авторизованном сервисном центре.
Сильные колебания температуры: если после хранения
в тепле прибор используется при низкой температуре. В
этом случае подождите несколько минут, перед тем как
начать работать с прибором. Измерение до зеркальных,
сильно рассеивающих, поверхностей с неоднородной
Table of contents
Languages:
Other Instrumax Measuring Instrument manuals
Popular Measuring Instrument manuals by other brands

Somogyi Elektronic
Somogyi Elektronic Home MVT 808ACE instruction manual
Technische Alternative
Technische Alternative ATON End user guide
Katronic Technologies
Katronic Technologies KATflow 210 operating instructions

A&D
A&D AD-4212A-100 instruction manual
YOKOGAWA
YOKOGAWA MT300 user manual
E Instruments
E Instruments E500 user manual
