INSTYLE EzyFast 6414-153 User manual
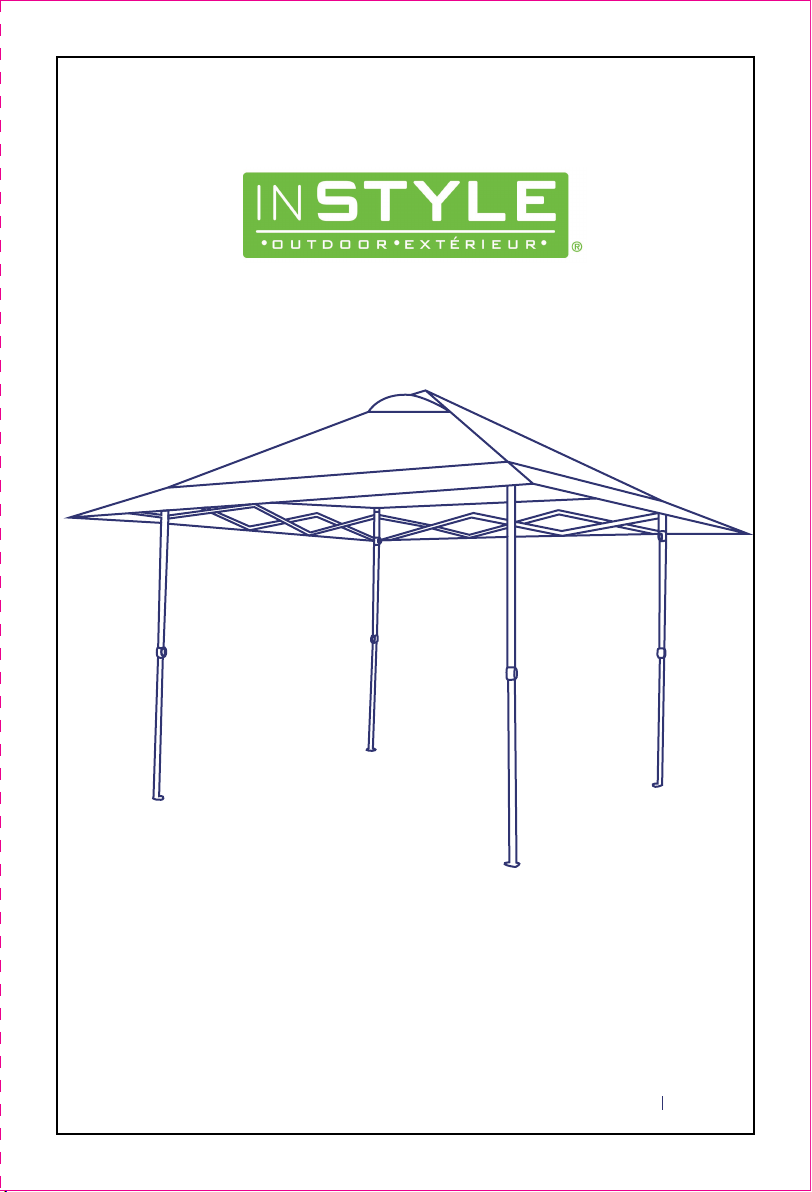
EzyFast Umbrella Structure Gazebo
SKU: 6414-153
Instruction Manual
1Page

2Page
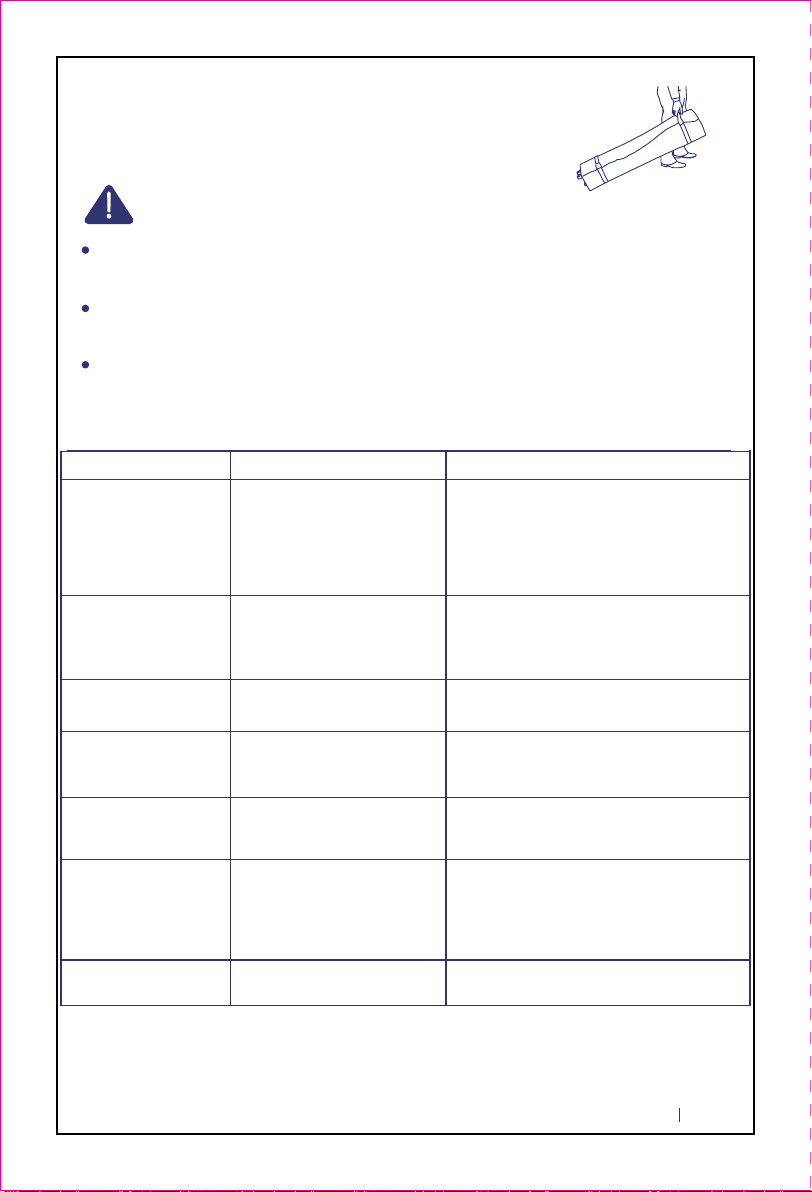
CARE AND MAINTENANCE
Extra weight down at legs is highly recommended.
Do not use in extreme weather conditions. Do not use in lightning storms.
Do not use in very windy weather. Do not over use in rainy weather.
Take down the gazebo before extreme weather events.
Be cautious when handling the frame. Avoid pinching hands or fingers in
any moving parts as frame opens and closes.
The gazebo is designed for temporary use, not a permanent structure.
Do not leave up for extended periods and do not leave the gazebo
unattended. Take down the gazebo and store away after use.
Keep children away from the set-up area.
Avoid twisting the frame during set up. Raise legs evenly. The frame
tubes may break if you twist the frame too much.
Wash frame and canopy with a mild solution of soap and water, rinse
thoroughly. Dry completely. Do not use bleach or solvents.
Inspect frame periodically to ensure all bolts and nuts are tight.
Always return the gazebo to storage bag after use. Suggest taking the
canopy off the frame for separate storage in the bag. Be sure the
canopy is completely dry before storing it.
There could be some minor leaking or dripping from the seams,
recommend using seam-sealer spray, available at most hardware
stores or on-line stores.
THIS SHELTER MUST BE SECURED WITH GUY ROPES AND PEGS
ONCE SET UP AT ALL TIMES.
THIS MAY PROVIDE SUPPORT DURING A SUDDEN GUST OF WIND.
IGNORING THIS WARNING MAY CAUSE THE SHELTER TO BE
BLOWN AWAY AND CAUSE SERIOUS DAMAGE AND INJURY.
AT ALL
TIMES!
110mm
80mm
CONSUMER WARNING LABEL - (QTY X 2)
Sew into Seam of Carry Bag: OUTSIDE OF BAG / AND GAZEBO CANOPY
SECURE THE FRAME
WITH PEGS ADD EXTRA
WEIGHT TO LEGS
IF NEEDED.
PLEASE READ
THIS IS A SHADE STRUCTURE, NOT A PERMANENT STRUCTURE.
GAZEBO MUST BE PACKED DOWN WHEN NOT IN USE.
THISGAZEBO SHOULD NOT BELEFT UNATTENDED IN HEAVY RAIN.
DO NOT USE
DURING SEVERE
WEATHER
CONDITIONS.
CARE AND MAINTENANCE:
•HAND WASH CANOPY WITH A MILD SOLUTION OF SOAP AND
WATER. RINSE THOROUGHLY, AND DRY COMPLETELY. DO NOT USE
BLEACH OR SOLVENTS.
•TO CLEAN THE FRAME, SIMPLY WIPE DOWN WITH A DAMP CLOTH.
•GENTLY TIGHTEN BOLTS AND NUTS IF FRAME COMES LOOSE.
•THE GAZEBO IS DESIGNED AS A TEMPORARY SUN SHELTER, NOT
A PERMANENT STRUCTURE. DO NOT LEAVE UP FOR EXTENDED
PERIODS AND DO NOT LEAVE THE GAZEBO UNATTENDED.
TAKE DOWN THE GAZEBO AND STORE AWAY AFTER USE.
•ENSURE YOU READ THE USER MANUAL AND FAMILIARISE
YOURSELF WITH THE PRODUCT BEFORE USE.
MODEL: AO-G20 PRODUCT CODE: 62475/62476 V.1
KEEP AWAY FROM
HEAT SOURCES AND
OPEN FLAMES.
DO NOT USE IN WINDY
CONDITIONS.
YOU MUST SECURE
ALL GUY ROPES.
CARE AND MAINTENANCE:
•HAND WASH CANOPY WITH A MILD SOLUTION OF SOAP AND
WATER. RINSE THOROUGHLY, AND DRY COMPLETELY. DO NOT USE
BLEACH OR SOLVENTS.
•TO CLEAN THE FRAME, SIMPLY WIPE DOWN WITH A DAMP CLOTH.
•GENTLY TIGHTEN BOLTS AND NUTS IF FRAME COMES LOOSE.
•THE GAZEBO IS DESIGNED AS A TEMPORARY SUN SHELTER, NOT
A PERMANENT STRUCTURE. DO NOT LEAVE UP FOR EXTENDED
PERIODS AND DO NOT LEAVE THE GAZEBO UNATTENDED.
TAKE DOWN THE GAZEBO AND STORE AWAY AFTER USE.
•ENSURE YOU READ THE USER MANUAL AND FAMILIARISE
YOURSELF WITH THE PRODUCT BEFORE USE.
MODEL: AO-G20 PRODUCT CODE: 62475/62476 V.1
KEEP AWAY FROM
HEAT SOURCES AND
OPEN FLAMES.
SECURE THE FRAME
WITH PEGS.
110mm
80mm
CONSUMER WARNING LABEL - (QTY X 2)
Sew into Seam of Carry Bag: OUTSIDE OF BAG / AND GAZEBO CANOPY
DO NOT USE DURING
SEVERE WEATHER
CONDITIONS.
SECURE
KEEP ALL FLAME AND HEAT SOURCES AWAY FROM THIS TENT
FABRIC. This Tent is Made With Fabric That Meets CPAl-84 Specification
For Flame Resistance. lt is Not Fireproof. The Fabric Will Burn lf
Left ln Continuous Contact With Any Flame Source. The application
of any foreign substance to the tent fabric may render the flame-resistant
properties ineffective.
WARNING:

3Page
Common Mistakes and Misuses to Avoid
Mistake 1. Incorrect setup
Ensure you are following our assembly instructions when setting up a gazebo. Set up without reading the
instruction manual can cause unnecessary damage to the gazebo and increase unnecessary wear and tear.
Mistake 2. Using Gazebos without being properly anchored
This is the single biggest mistake inexperienced users can make. A sudden wind can cause serious
damage. Gazebos must be secured to a fixed structure in any circumstances to provide additional stability by
using pegs and guy ropes. This is essential to avoid wind damage. Further support can be achieved by using
leg weights, like sandbags and steel leg weights.
Mistake 3. Using a gazebo in extreme weather conditions
The gazebo is designed as a temporary sun shelter. It works for normal weather conditions for a period of time.
Do not recommend using in rainy and windy days. Strictly avoid use in extreme weather conditions. The power
of nature is incredible.
Mistake 4. Your gazebo is left up overnight or left attended
Gazebo shall be not left outside overnight. Weather change constantly and largely unpredictable. Unexpected
rain, sudden strong wind, or temperature changes may cause serious damage to your gazebo. Nature is full
of surprise.
Mistake 5. Forcefully take the canopy top away without undoing the Velcro ties
This may cause tears at the points that Velcro ties are sewn. Velcro ties and loops are used to secure the
canopy top to the frame after setting up. They must be untied before take-down.
Mistake 6. The canopy is left on the frame when it’s folding down
Unnecessary wear and tear will increase if the canopy was left on the frame when it’s folded down. The moving
truss tubes may catch the fabric and cut it during the closing, causing tears. This wrongful operation will weaken
or tear your canopy.
Mistake 7. Retract the dirty telescoping legs
While used on the beach or other wet and dirty ground, the sands or dirt may get into the telescoping tubes
and cause them to get stuck if not removed and cleaned before retracting. Always make sure the legs are cleaned
and free from sand and dirt before retracting.
Mistake 8. Repack a wet or damp gazebo after using
Repack a wet or damp gazebo after using can cause mildew. Take your gazebo down when it is completely
dry, then fold the cover neatly and store it back in the bag.
Mistake 9. Ignore the effect of damaged parts
Damaged parts on your gazebo can cause further damage. Check the gazebos framework for a damaged roof,
brackets, bent truss bars, and loose or missing bolts, and replace/tighten as necessary.
Mistake 10. Excess water or use chlorine-containing cleaning chemicals to wash the gazebo
It is a good idea to give our gazebos a regular clean to prevent the build-up of dirt and the formation of mold.
Using a hose is a good way to get rid of dirt from the canopy. In some circumstances, excess and unattended
water on the frame can cause the materials to rust. The proper way to clean your gazebo(both cover and frame)
is to use cold water and a soft cloth together with a mild soap such as bleach-free dish-washing detergent or mild
soap. We recommend you apply some silicone spray to the joints from time to time to keep them in good working
order.
Reminders for Canopy Users
NEVER forcefully setup or takedown. NEVER twist the frame. NEVER assume there is no wind. NEVER
leave your shelter unattended. NEVER use it in prolonged raining situations.
CAUTION sudden wind can blow shelter over and cause damage. CAUTION forceful operation can damage
or destroy the frame. CAUTION any unattended shelter can cause serious injury and or damage.
ALWAYS anchor or weight down. ALWAYS take down in wind greater than 15mph. ALWAYS take down in
a lightning storm. ALWAYS refer to the instruction manual.
4Page
IMPORTANT: DO NOT USE EXCESSIVE FORCE DURING
ANY PART OF SET-UP. DO NOT TWIST THE FRAME.
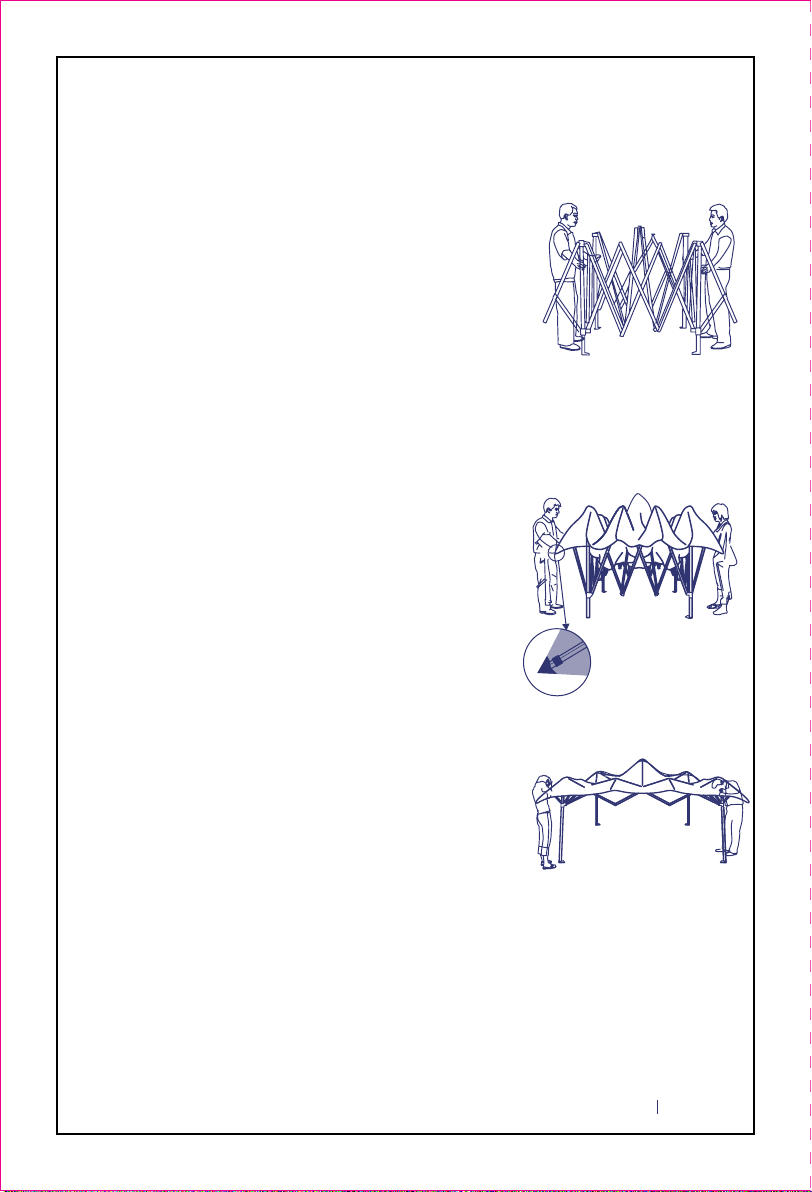
SET-UP INSTRUCTIONS
Working with a partner on the opposite side,
stand frame upright and grab the two outer
legs. Slightly lift the frame off the ground and
each take a step backwards.
STEP 1
STEP 3
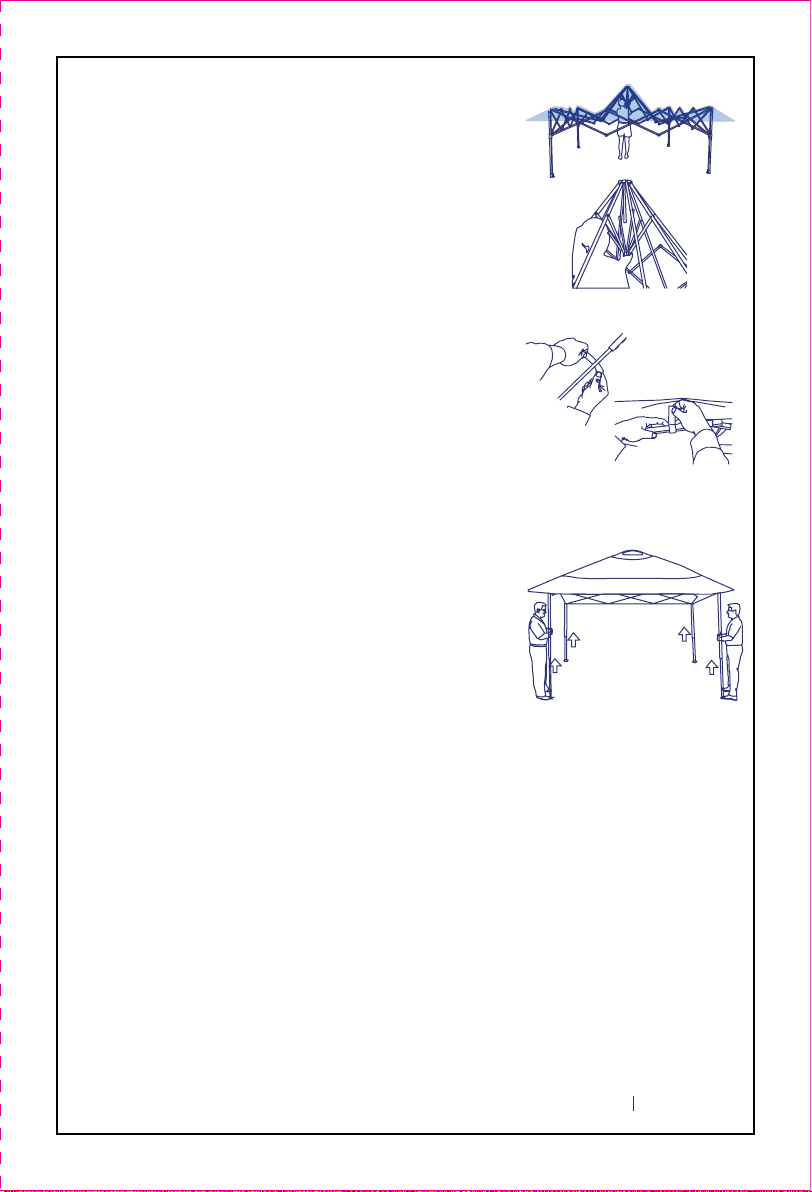
Place the main canopy on top of the frame and
pull the canopy corner pockets over the awning
tubes.
Each partner grabs the cross beams in the middle,
lifts slightly and slowly walks backwards to further
extend the frame. Take care not to use
excessive force.
STEP 2
5Page
Secure the canopy fabric to the frame by
wrapping the straps around the roof tubes
and cross beams.
STEP 5
Lift two adjacent legs from the top outer
section and pull down inner leg sections
until they lock into position. Repeat on the
other two legs, being careful not to twist
the frame too much. Otherwise it could
break the tubes. This gazebo offers three
height levels. To adjust, lift the leg and
push the button, then pull the inner leg
until it locks into the next position. Raise
all legs evenly.
STEP 6
STEP 4
Get under the canopy, push the lower roof
hub fully up till the central rod gets into the
hub. The roof frame is then fully extended
and self-locked.
6Page
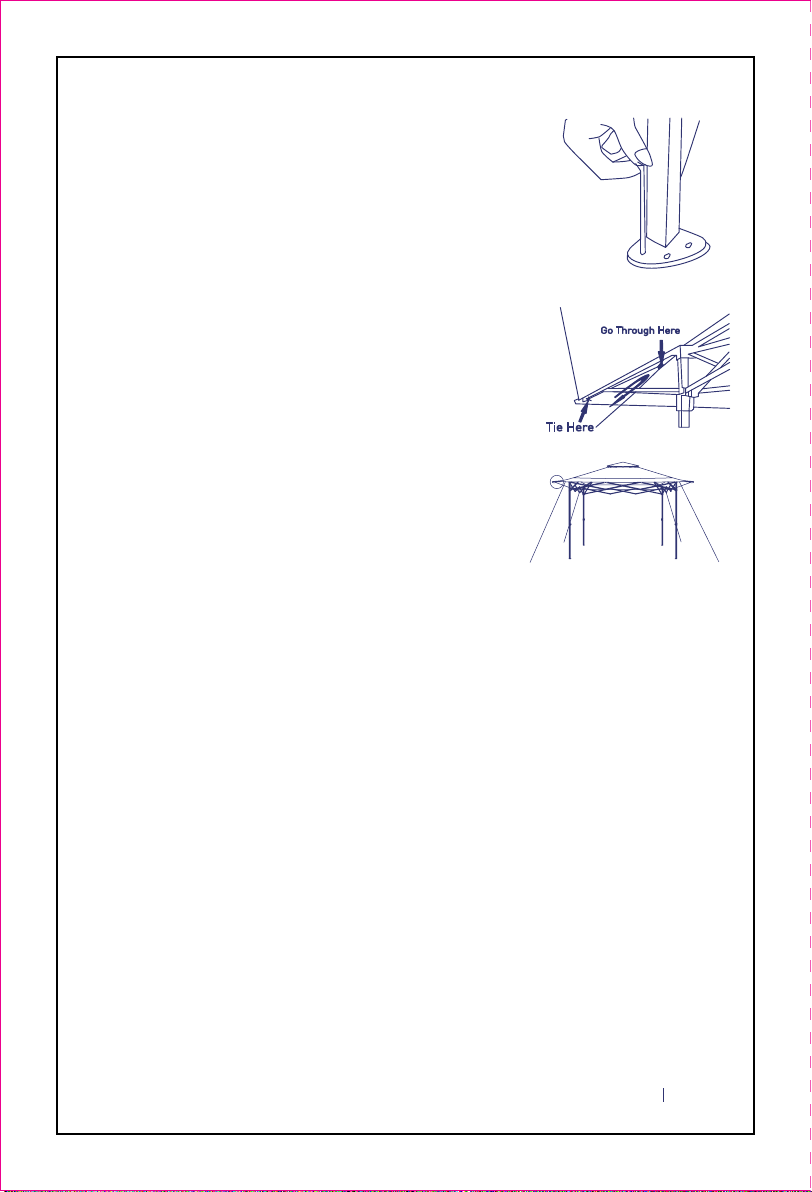
Tie four guy ropes to the canopy corners as
diagram shows. Measure out each rope to a
suitable distance to the ground. Secure a stake
at that location and tie the guy rope to the stake.
Use the plastic adjusters on the ropes to ensure
proper tension. The gazebo must be secured
with guy ropes and pegs. Any extra measures
to secure the canopy are recommened. A
gust of wind may blow the canopy over if it's
not appropriately secured!
If using on dirt or grass, peg down the gazebo by
pushing a small peg through the hole in the base
of each foot.
STEP 7
STEP 8

7Page
IMPORTANT: DO NOT USE EXCESSIVE FORCE DURING
TAKE DOWN. UNDO ALL TIES, STRAPS AND GUY ROPES.
Undo all Veclro straps or ties from around the
roof tubes and cross beams. Failure to do
so may tear the fabric during take down!
STEP 1
Release push button on each leg and shorten
the frame to its original height.
STEP 3
Remove pegs, guy ropes.
STEP 2
STEP 4
Remove canopy pack away in storage bag,
ensuring first that they’re fully dry.
STEP 5
With a partner on the opposite side, grasp the
middle section of the frame and lift slightly off
the ground. Then slowly walk towards each
other allowing the frame to fold inwards and
come together, being careful not to catch
your fingers in the frame.
STEP 6
TAKE-DOWN INSTRUCTIONS
Get under the canopy, pull the lower roof hub
down till the frame partially closed and
unlocked.
IMPORTANT: PRINT SPECS
NUMBER OF COLOURS TO PRINT
DO NOT ALTER ARTWORK/DIELINE
3
MAGENTA YELLOW BLACK
DIELINE
IMPORTANT: PRINT SPECS
NUMBER OF COLOURS TO PRINT
DO NOT ALTER ARTWORK/DIELINE
3
MAGENTA YELLOW BLACK
DIELINE
110mm
Sew into Seam of Carry Bag: OUTSIDE OF BAG / AND GAZEBO CANOPY
SKU: 6414-153 Code: 20JSEF0091003
Email: [email protected]
Home Hardware Stores Limited
34 Henry Street West, St. Jacobs, Ontario,
Canada N0B 2N0 8Page
Troubleshooting
The gazebo must be secured to the ground with
anchors and guy ropes.
One person set up is allowed but be cautions to avoid
injury or damage.
Do not use in extreme weather, take down in windy or
rainy conditions.
warning
Ensuring the gazebo is completely dry, pack the
frame away in the storage bag and wheel it away
to a suitable storage.
STEP 7
Problem Possible
Cause Prevention /Solution
Blowing away by sudden
wind
Gazebo/canopy not anchored
and weighted down. Very windy
weather
Always use guy ropes, anchors, and put bottled
waters or sands in weight pockets or use sand
bags if any. Any measures to help hold down
or secure gazebo/canopy are highly
recommended! Lower canopy also helps. In
very windy days, close the canopy
Canopy top sagging
Unlocked roof, untied securing
Velcro straps, skewed legs.
Fabric aging and loose over time
Open and lock the frame, tie up the canopy
top to frame, keep it tight with tension,
straighten up legs. Replace the canopy top if
aged
Frame tubes break during
set up
Twist the frame too much or
forceful set up
Raise the 4 legs evenly and step by step, avoid
skewing the frame, operate gently
Difficult to close down / to
take off canopy top
Velcro straps still tied at truss
beam or roof tubes / frame
skewed
Undo all the Velcro straps and ties before
closing the frame/ lower the legs evenly
before closing down the roof
Roof hub too tall to reach
or frame falls during
opening
Leg extender doesn't
lock in
Unlocked status while user keep
pushing the button
Bolts and nuts come loose over
time
Check and tighten the bolts and nuts
Frame come loose
Legs raised before roof frame
opened
Open and lock the roof frame before raising
up the legs
Push in the button and slide the leg tube a little
to pass the current locking point, then must
release button and further slide the leg tubes.
The leg will click and lock automatically in next
position
Table of contents
Other INSTYLE Tent manuals


Popular Tent manuals by other brands

Apex Garden
Apex Garden 22-YH-20S067HD Assembly instructions

GigaTent
GigaTent GT005 owner's manual

Outdoor Revolution
Outdoor Revolution Movelite Oxygen 3 quick start guide

Skandika
Skandika Esbjerg Travel 4 Setup & maintenance

Ozark Trail
Ozark Trail WMT922.4A Assembly instructions

Wenzel
Wenzel 33047 Assembly instructions


