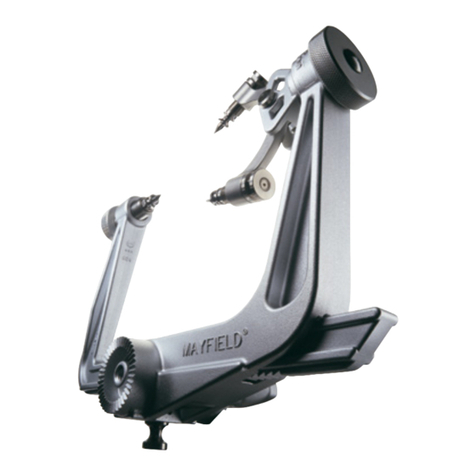
Integra LifeSciences MAYFIELD NeuroGen A1113 User manual

MAYFIELD®
NeuroGen Adaptor
( A1113)
Instruction Manual
Manufacturer:
Integra LifeSciences Corporation
4900 Charlemar Drive, Building A
Cincinnati, OH 45227, USA
Tel: 513-533-7979
Fax: 513-271-1915
integralife.com
Integra LifeSciences Services (France) SAS
Immeuble Séquoia 2
97 allée Alexandre Borodine
Parc Technologique de la Porte des Alpes
69800 Saint Priest, FRANCE
Phone: +33 (0) 4 37 47 59 00
Fax: +33 (0) 4 37 47 59 99
EN –ENGLISH......................................................................................................
FR –FRANÇAIS.....................................................................................................
IT –ITALIANO.....................................................................................................
DE –DEUTSCH ..................................................................................................
ES –ESPAÑOL....................................................................................................
NL –NEDERLANDS...........................................................................................

2
EN – ENGLISH
This page is intentionally le blank.

3
EN – ENGLISH
MAYFIELD®
NeuroGen Adaptor
( A1113)
Instruction Manual
Manufacturer:
Integra LifeSciences Corporation
4900 Charlemar Drive, Building A
Cincinnati, OH 45227, USA
Tel: 513-533-7979
Fax: 513-271-1915
integralife.com
EC REP
Integra LifeSciences Services (France) SAS
Immeuble Séquoia 2
97 allée Alexandre Borodine
Parc Technologique de la Porte des Alpes
69800 Saint Priest, FRANCE
Phone: +33 (0) 4 37 47 59 00
Fax: +33 (0) 4 37 47 59 99
REF

4
EN – ENGLISH
Meaning Of Symbols Used In This Manual - ENGLISH
CAUTION!
Hazards which could result in equipment or property damage
WARNING!
Hazards which could result in severe personal injury or death
Caution
Product complies with the requirements of directive 93/42/EEC
Manufacturer
Authorized Representative in the European Community
Consult Instructions for use
Caution: Federal (US) law restricts this device to sale by or on the order of a licensed
healthcare practitioner
This device is not indicated for use in an MR environment
Catalog number
Date of manufacture (YYYY-MM-DD)
Lot number
Serial number

5
EN – ENGLISH
ENGLISH
Description
The MAYFIELD® NeuroGen Adaptor (A-1113) is designed
for use as an adaptor to mount the MAYFIELD Base Unit
to the operating table when the table’s receptacle holes
are not appropriate or present. An adjustable end bracket
allows the NeuroGen Adaptor to fit a wide variety of
operating room tables. The NeuroGen can also be stored
directly to the operating room table without interfering
with other surgical procedures.
Figure 1
1
2
3
4
5
6
7
7
Figure 2
1. Rail Support
2. Crossbar
3. Locking Knobs (base unit)
4. Base Unit Receptacle
5. Adjustable end bracket
6. Non-Adjustable end bracket
7. Side Rail Knobs
The MAYFIELD NeuroGen Adaptor Replacement Parts:
Base Unit Locking Knob Assembly 41A1508A
Side Rail Locking Knobs 41A1508B
WARNING:
Failure to read and follow these instructions may
result in serious injury.
WARNING:
Failure to properly position the patient and to
fully secure all adjustment portions of this or any support
device may result in serious patient injury.
WARNING:
Do not alter the design of the device in part or
whole as serious patient injury could result.
WARNING:
This device is not intended for use in or near the
vicinity of a strong magnetic field. (MRI)
Inspection:
Always inspect instruments before and aer use. If a
component appears damaged and/or does not seem to
function properly, do not use the device and immediately
send the instrument to an authorized Integra repair center
for evaluation, repair or replacement. Allow your Integra
Representative to inspect this device a minimum of two
times per year to assist you in its proper function.
Instructions for use:
Mount the MAYFIELD NeuroGen Adaptor to O.R. Table
1. To prepare the NeuroGen Adaptor for placement on the
O.R. table, loosen the two Side Rail Locking Knobs by
turning counter-clockwise.
2. Hold an end bracket in each hand and extend the
NeuroGen to its maximum length.
3. Position the non-adjustable end bracket on one of the
O.R. table side rails. Then slide the adjustable end bracket
toward the opposite side until it engages the side rail.
4. Tighten the Side Rail Locking Knobs located on each end
bracket by turning clockwise until both brackets are tight
and securely aached to the side rails.
CAUTION:
Be certain that End Brackets are correctly in
place on O.R. Table side rails. Locking the NeuroGen
inappropriately could cause the NeuroGen to slip off O.R.
Table.

6
EN – ENGLISH
Figure 3 Figure 4
Incorrect alignment Correct alignment
Mount the Base Unit to the NeuroGen Adaptor
1. Loosen the Base Unit Knobs to open the receptacles
completely.
2. Insert the Support Rods of the Base Unit into the
NeuroGen receptacles. The MAYFIELD NeuroGen
Adaptor provides multiple receptacles to allow for
lateral adjustment of the Base Unit. (See Figure 1.)
3. Tighten the Base Unit Knobs to secure the Base Unit in
place.
WARNING:
Before using the Base Unit, carefully read the
product insert for the correct usage and warnings.
Cleaning and Sterilization
Aer each use, disassemble all components of the system
and thoroughly clean using a damp cloth and neutral pH
detergent. Remove all traces of blood and debris and dry
completely.
Inspection:
Carefully inspect all parts aer each cleaning to assure all
components are in proper working condition.
CAUTION:
Components should be returned for repair if wear
is noted.
Manual Wash
CAUTIONS
• Alkaline and highly acidic detergents and solutions
cause damage to the devices.
• Channels and crevices found on this device require
particular aention during cleaning.
• Pay special aention to the water quality used
throughout reprocessing. Hard water can damage
the surface of the equipment. Avoid using hard water.
Instead use purified water unless otherwise specified.
Limitations on reprocessing
• Repeated processing has minimal effects on these
devices. Product life is normally determined by wear
and damage due to use.
• It is important to have Integra NeuroSpecialists
perform routine inspections (twice yearly is
recommended). See contact information below.
INSTRUCTIONS
Containment/Transportation
• Follow health care facility protocol for safe
containment and transport to the decontamination
environment.
• It is recommended that devices are cleaned
immediately aer use.
Cleaning – Manual Equipment: Water, Neutral pH Deter-
gent, So Bristle Brush, Towels
Method
1. Prepare neutral pH enzymatic detergent solution (e.g.
Endozime® AW Triple Plus with APA (Ruhof), 1:128 ratio)
according to detergent manufacturer’s instructions
using lukewarm tap water.
2. Prepare equipment for soaking by disassembling
removable parts and loosening connections.
3. Rinse equipment in warm water before placing into
bath.
4. Completely soak equipment in water/detergent
solution for 30 minutes maximum.
5. Clean thoroughly with a so nylon bristle brush. NOTE
– If possible, use a disposable brush.
6. Rinse in warm purified water until all visible substances
and residual detergent are removed. NOTE – Make sure
to give special aention to hard-to-reach areas.
7. Thoroughly dry equipment with so clean towels
and use medically compressed air if needed, to dry
channels, crevices and lumens.
8. Inspect the equipment to make sure there is no visible
organic debris or residue from cleaning agent.
Repeat process if any soil is detected.
Drying
• Products should be dry at this point. If wetness or
excess liquid is detected, dry with a so clean towel.
• Medically compressed air can be used if needed.

7
EN – ENGLISH
Optional Automatic Wash / Disinfect
CAUTIONS
• Alkaline and highly acidic detergents and solutions
cause damage to the devices.
• Channels and crevices found on these devices require
particular aention during cleaning.
• Pay special aention to the water quality used
throughout reprocessing. Hard water can damage
the surface of the equipment. Avoid using hard water.
Instead use purified water unless otherwise specified.
Limitations on Reprocessing
• Repeated processing has negative effects on these
devices and is not recommended for routine use.
• It is important to have Integra NeuroSpecialists
perform routine inspections (twice yearly is
recommended).
See contact information.
INSTRUCTIONS
Cleaning - Automated Equipment: Neutral pH Detergent
Method
1. Prepare equipment for cleaning by disassembling
removable parts and loosening connections.
2. Rinse equipment in warm water before placing into
washer.
3. Load device into the washer and place small parts in
container or tray inside the washer unit in order to
avoid loosing small components.
NOTE – Load devices carefully into washer in order to
avoid collision.
4. Follow the instructions listed below and set washer
machine to these exact parameters:
Phase Time
(Min.)
Water Tem-
perature
Detergent and
Concentration
Pre-wash
1
4:00 Cold water N/A
Enzyme
Wash
4:00 Hot water Neutral pH
enzymatic (e.g.
Endozime® AW
Triple Plus with
APA, Ratio 1:128)
Wash 1 10:00 60.0ºC
(140º F)
Neutral pH
detergent
(e.g. Renu-Klenz™
, Steris, Ratio
1:256)
Rinse 1 0:30 Hot water N/A
Thermal
Rinse**
2:00 82.2ºC
(180º F)
N/A
** Optional phase for disinfection of components –
minimum water temperature as indicated or per worker
manufacturer specifications for the thermal rinse cycle.
NOTE – Any deviation from this guideline could result in
damage to the equipment as well as improper cleaning
results.
Rinse with purified water. Do not perform if parameters
cannot be achieved.
5. Remove from washer and dry completely if needed.
6. Inspect equipment to make sure there is no visible
organic debris or residue from cleaning agent.
Repeat process if any visible soil is detected.
Maintenance and Care
To ensure proper function and to extend the life and
performance of the equipment, Integra LifeSciences
recommends the following:
Recommended Action Recommended Frequency
Return the device to
the Integra LifeSciences
Repairs department for
detailed inspection and
servicing.
Once / year
Request that Integra
NeuroSpecialists perform
routine inspections of the
device
Twice / year
In the absence of proper care and servicing of the device,
negative effects may be seen aer repeated processing
over time which may lead to reduced performance.
Contact information: See the Service and Repair section
for contact information on how to return your device for
periodic servicing and to request periodic inspections.
See Inspection and/or Service notes section for routine
checks to be performed on the device.
Device Disposal
NOTE: Follow hospital procedures for disposal of this
device.

8
EN – ENGLISH
Integra Standard Warranty
INTEGRA LIFESCIENCES CORPORATION (“INTEGRA”)
warrants to the original purchaser only that each new
INTEGRA product is free from manufacturing defects in
material and workmanship under normal use and service
for a period of one (1) year (except as otherwise expressly
provided as to accessory items) from the date of delivery
by INTEGRA to the first purchaser, but in no event beyond
the expiration date stated on any product labeling.
• Surgical instruments are guaranteed to be free from
defects in material and workmanship when maintained
and cleaned properly and used normally for their
intended purpose.
• Any covered product that is placed by INTEGRA under
a lease, rental, or installment purchase agreement and
that requires repair service during the term of such
placement agreement shall be repaired in accordance
with the terms of such agreement.
If any covered defect occurs during the warranty period
or term of such placement agreement, the purchaser
should communicate directly with INTEGRA’s home
office. If purchaser seeks to invoke the terms of this
warranty, the product must be returned to INTEGRA at its
home office. The defective product should be returned
promptly, properly packaged, and postage prepaid. Loss
or damage in return shipment to INTEGRA shall be at
CUSTOMER’s risk. INTEGRA’s sole responsibility under this
warranty shall be repair or replacement, at INTEGRA’s sole
discretion at INTEGRA’s expense, subject to the terms of
this warranty and applicable agreements.
IN NO EVENT SHALL INTEGRA BE LIABLE FOR ANY
INCIDENTAL, INDIRECT, CONSEQUENTIAL OR PUNITIVE
DAMAGES IN CONNECTION WITH THE ACQUISITION
OR USE OF ANY INTEGRA PRODUCT. Further, this
warranty shall not apply to, and INTEGRA shall not be
responsible for, any loss arising in connection with the
purchase or use of any INTEGRA product that has been
repaired by anyone other than an authorized INTEGRA
service representative or altered in any way so as, in
INTEGRA’s judgment, to affect its stability or reliability,
or which has been subject to misuse, negligence or
accident, or which has been used otherwise than in
accordance with the instructions furnished by INTEGRA.
THIS LIMITED WARRANTY IS EXCLUSIVE AND IN LIEU
OF ALL OTHER WARRANTIES, EXPRESSED OR IMPLIED,
AND OF ALL OTHER OBLIGATIONS OR LIABILITIES ON
INTEGRA’S PART, AND INTEGRA NEITHER ASSUMES
NOR AUTHORIZES ANY REPRESENTATIVE OR OTHER
PERSON TO ASSUME FOR IT ANY OTHER LIABILITY IN
CONNECTION WITH INTEGRA’S PRODUCTS.
INTEGRA DISCLAIMS ALL OTHER WARRANTIES,
EXPRESSED OR IMPLIED INCLUDING, BUT NOT LIMITED
TO, IMPLIED WARRANTIES OF MERCHANTABILITY
AND FITNESS FOR A PARTICULAR PURPOSE, AND
ANY IMPLIED WARRANTY ARISING FROM COURSE OF
PERFORMANCE, COURSE OF DEALING, USAGE OR TRADE
OR OTHERWISE, OR APPLICATION OR WARRANTY OF
QUALITY AS WELL AS ANY EXPRESSED OR IMPLIED
WARRANTY TO PATIENTS. No warranty or guarantee may
be created by any act or statement nor may this Standard
Warranty be modified in any way, except as a result of a
writing signed by an officer of INTEGRA. These limitations
on the creation or modification of this warranty may not
be waived or modified orally or by any conduct.
Service and Repair
For service and repair outside the United States, contact
your local authorized Integra representative.
In the United States, send all instruments for service or
repair to:
Integra LifeSciences Corporation
4900 Charlemar Drive, Building A
Cincinnati, Ohio 45227
(Always include the purchase order number and a wrien
description of the problem.)
Or phone:
513-533-7979
877-444-1114 (USA only)

9
EN – ENGLISH
Manufacturer:
Integra LifeSciences Corporation
4900 Charlemar Drive, Building A
Cincinnati, OH 45227, USA
Tel: 513-533-7979
Fax: 513-271-1915
integralife.com
Integra LifeSciences Services (France) SAS
Immeuble Séquoia 2
97 allée Alexandre Borodine
Parc Technologique de la Porte des Alpes
69800 Saint Priest, FRANCE
Phone: +33 (0) 4 37 47 59 00
Fax: +33 (0) 4 37 47 59 99
Integra and the Integra logo are registered trademarks of Integra LifeSciences Corporation in the United States and/or
other countries. MAYFIELD is a registered trademark of SM USA, Inc. and is used by Integra under license. Endozime is a
trademark of Ruhof Corporation. Renu-Klenz is a trademark of Steris Corporation.
2017 Integra LifeSciences Corporation. All Rights Reserved. 451A1113 Rev. C 11/17 0845512-1
EC REP

PB 9
FR –FRANÇAIS
Adaptateur
MAYFIELD® NeuroGen
( A1113)
Mode d’emploi
Fabricant:
Integra LifeSciences Corporation
4900 Charlemar Drive, Building A
Cincinnati, OH 45227, États-Unis
Tél: 513-533-7979
Télécopie: 513-271-1915
integralife.com
Integra LifeSciences Services (France) SAS
Immeuble Séquoia 2
97 allée Alexandre Borodine
Parc Technologique de la Porte des Alpes
69800 Saint Priest, FRANCE
Phone: +33 (0) 4 37 47 59 00
Fax: +33 (0) 4 37 47 59 99
REF

10 11
FR –FRANÇAIS
Signification des symboles utilisés dans ce manuel - FRANÇAIS
ATTENTION!
Dangers pouvant causer des dommages au matériel ou à aux biens
AVERTISSEMENT!
Dangers pouvant causer des blessures personnelles graves, voire fatales
Aention, consulter la documentation jointe
Ce produit est conforme aux exigences de la directive 93/42/CEE
Fabricant
Représentant autorisé dans la Communauté européenne
Consulter le mode d’emploi
Aention : la loi fédérale américaine réserve la vente de ce dispositif par ou sur prescription d’un
médecin ou d’un praticien.
Il est déconseillé d’utiliser cet appareil pour la résonance magnétique
Référence catalogue
Date de fabrication
Numéro de lot
N° de série

10 11
FR –FRANÇAIS
FRANÇAIS
Description
L’adaptateur MAYFIELD® NeuroGen (A-1113) est conçu
pour être utilisé en tant qu’adaptateur pour fixer l’unité
de base MAYFIELD à la table d’opération, lorsque les
ouvertures de montage de cee dernière ne sont pas
adéquates ou sont absentes. Un support d’extrémité
réglable permet à l’adaptateur NeuroGen d’être fixé sur
un grand nombre de tables d’opération. Le NeuroGen
peut également être rangé directement contre la table
d’opération sans interférer avec les autres procédures
chirurgicales.
Figure 1
1
2
3
4
5
6
7
7
Figure 2
1. Support de rail
2. Barre transversale
3. Boutons de verrouillage (unité de base)
4. Ouverture de l’unité de base
5. Support d’extrémité réglable
6. Support d’extrémité non réglable
7. Boutons de rail latéral
Pièces de rechange de l’adaptateur MAYFIELD
NeuroGen :
Ensemble du bouton de verrouillage de
l’unité de base 41A1508A
Boutons de verrouillage de rail latéral 41A1508B
AVERTISSEMENT :
Tout manquement à lire et à observer ce mode
d’emploi risque d’entraîner des lésions graves.
AVERTISSEMENT :
Le fait de ne pas positionner correctement le
patient et de ne pas complètement fixer toutes
les portions de réglage de ce dispositif ou de tout
dispositif de soutien pourrait exposer le patient à des
risques de blessures.
AVERTISSEMENT :
Ne pas modifier, toute ou une partie de la
conception du dispositif sous peine d’exposer le
patient à des blessures graves.
AVERTISSEMENT :
Ce dispositif n’est pas conçu pour être utlisé
à proximité d’un champ magnétique puissant
(IRM)
Inspection :
Toujours vérifier les instruments avant et après leur
utilisation. Si un élément semble endommagé et/ou ne
pas fonctionner correctement, ne pas utiliser le dispositif
et l’envoyer immédiatement à un centre de réparation
Integra agréé où il sera évalué, réparé ou remplacé. Faire
vérifier ce dispositif par votre représentant Integra au
moins deux fois par an pour veiller à son fonctionnement
correct.
Mode d’emploi :
Monter l’adaptateur MAYFIELD NeuroGen sur la table
d’opération
1. Pour préparer l’adaptateur NeuroGen à sa mise enplace
sur la table d’opération, desserrer les deux boutons
de verrouillage de rail latéral en tournant dans le sens
anti-horaire.
2. Tenir un support d’extrémité dans chaque main et
étirer le NeuroGen jusqu’à sa longueur maximale.
3. Placer le support d’extrémité non réglable sur un des
rails latéraux de la table d’opération, puis faire glisser
le support d’extrémité réglable en direction opposée
jusqu’à ce qu’il s’enclenche sur le rail latéral.
4. Serrer les boutons de verrouillage de rail latéral situés
sur chaque support d’extrémité en tournant dans le
sens horaire jusqu’à ce que les deux supports soient

12 13
FR –FRANÇAIS
serrés et bien fixés aux rails latéraux.
ATTENTION :
S’assurer que les supports d’extrémité sont
bien en place sur les rails latéraux de la table
d’opération. Le NeuroGen risque de ne pas rester fixé à la
table d’opération s’il est incorrectement verrouillé.
Figure 3 Figure 4
Alignement incorrect Alignement correct
Monter l’unité de base sur l’adaptateur NeuroGen
1. Desserrer les boutons de l’unité de base pour ouvrir
complètement les ouvertures.
2. Insérer les tiges de support de l’unité de base dans
les ouvertures du NeuroGen. L’adaptateur MAYFIELD
NeuroGen présente plusieurs ouvertures pour
permere un réglage latéral de l’unité de base. (Voir la
Figure 1)
3. Serrer les boutons de l’unité de base pour la fixer en
place.
AVERTISSEMENT :
Avant d’utiliser l’unité de
base, lire aentivement la notice produit pour
l’utilisation correcte et les avertissements.
Neoyage et stérilisation
Après chaque utilisation, démonter tous les
composants du système et les neoyer à fond avec un
chiffon humide et un détergent à pH neutre. Éliminer
toutes traces de sang et débris et sécher
complètement.
Inspection :
Inspecter aentivement toutes les pièces
après chaque neoyage pour s’assurer que tous les
composants fonctionnent correctement.
ATTENTION:
En cas de signe d’usure, les composants doivent
être renvoyés pour réparation.
Lavagemanuel
MISES EN GARDE
• Des solutions et des détergents alcalins et fortement
acides peuvent endommager les dispositifs.
• Les canaux et fentes présentes sur ce dispositif
nécessitent une aention particulière au cours du
neoyage.
• Faire particulièrement aention à la qualité de l’eau
utilisée pendant tout le reconditionnement. De l’eau
dure peut endommager la surface du matériel. Éviter
d’utiliser une eau dure. Utiliser à la place une eau
purifiée, sauf mention contraire.
Limites du reconditionnement
• Un reconditionnement répété a peu d’effets sur
ces dispositifs. La durée de vie des produits est
normalement déterminée par l’usure et par les
dommages liés à l’usure.
• Il est important que les neuro-spécialistes d’Integra
effectuent des inspections régulières (une fréquence
de deux fois par an est recommandée). Voir les
coordonnées ci-dessous.
INSTRUCTIONS
Confinement/Transport
• Respecter le protocole de l’établissement hospitalier
concernant le confinement et le transport en
toute sécurité du matériel jusqu’à la zone de
décontamination.
• Il est recommandé de neoyer les dispositifs
immédiatement après usage.
Neoyage – Équipement pour le neoyage manuel :
Eau, détergent à pH neutre, brosse à poils doux, linges
Méthode
1. Préparer une solution de détergent enzymatique de
pH neutre (par exemple Endozime® AW Triple Plus avec
APA (Ruhof), dans un rapport 1/128) conformément aux
instructions du fabricant du détergent en utilisant une
eau du robinet tiède.
2. Préparer le matériel au trempage en démontant les
parties amovibles et en desserrant les joints.
3. Rincer le matériel à l’eau chaude avant de le mere
dans le bain.
4. Tremper complètement le matériel dans la solution
d’eau/détergent pendant un maximum de 30 minutes.
5. Neoyer soigneusement et complètement avec
une brosse à poils doux en nylon. REMARQUE – Si
possible, utiliser une brosse jetable.
6. Rincer dans de l’eau purifiée chaude jusqu’à ce que
toutes les substances visibles et les traces résiduelles
de détergent aient été éliminées. REMARQUE– Veiller
à porter une aention particulière aux endroits
difficiles d’accès.

12 13
FR –FRANÇAIS
7. Sécher complètement le matériel avec des linges
propres et doux et utiliser si besoin de l’air comprimé
médical pour sécher les canaux, fentes et lumières.
8. Examiner le matériel pour s’assurer qu’il ne présente
pas de débris organiques visibles ou de résidus de
l’agent de neoyage.
Répéter le processus en cas de souillure visible.
Séchage
• À ce stade, les produits doivent être secs. Si de
l’humidité ou un excès de liquide est détecté, sécher
en utilisant un linge propre et doux.
• De l’air comprimé médical peut être utilisé si besoin.
Lavage/désinfection automatique
optionnel(le)
MISES EN GARDE
• Des solutions et des détergents alcalins et fortement
acides peuvent endommager les dispositifs.
• Les canaux et fentes présentes sur ces dispositifs
nécessitent une aention particulière pendant le
neoyage.
• Faire particulièrement aention à la qualité de l’eau
utilisée pendant tout le reconditionnement. De l’eau
dure peut endommager la surface du matériel. Éviter
d’utiliser une eau dure. Utiliser à la place une eau
purifiée, sauf mention contraire.
Limites du reconditionnement
• Un reconditionnement répété a des effets négatifs
sur ces dispositifs et n’est pas recommandé pour une
utilisation régulière.
• Il est important que les neuro-spécialistes d’Integra
effectuent des inspections régulières (une fréquence
de deux fois par an est recommandée).
Voir les coordonnées.
INSTRUCTIONS
Neoyage - Équipement automatisé : Détergent à pH
neutre
Méthode
1. Préparer le matériel au neoyage en démontant les
parties amovibles et en desserrant les joints.
2. Rincer le matériel à l’eau chaude avant de le mere
dans la laveuse.
3. Charger le dispositif dans la laveuse et placer les
petites pièces dans un contenant ou dans un plateau à
l’intérieur de la laveuse de façon à éviter de perdre ces
petits éléments.
REMARQUE – Charger les dispositifs avec soin dans la
laveuse de façon à éviter des collisions.
4. Suivre les instructions énumérées ci-dessous et régler
la laveuse selon ces paramètres exacts :
Phase Temps
(Min.)
Température
de l’eau
Détergent et
concentration
Prélavage
: 1 4 min 00 Eau froide S/O
Lavage
aux
enzymes
4 min 00 Eau chaude pH
enzymatique
neutre (par
exemple,
Endozime® AW
Triple Plus avec
APA, Rapport
1/128)
Lavage 1 10 min
00 60,0 ºC (140
ºF) Détergent à
pH neutre (par
exemple, Renu-
Klenz™, Steris,
Ratio 1/256)
Rinçage 1 0 min 30 Eau chaude S/O
Rinçage à
chaud** 2 min 00 82,2 ºC (180
ºF) S/O
** Phase facultative de désinfection des composants
: température minimum de l’eau telle qu’indiquée ou
selon les spécifications du fabricant par utilisateur
pour le cycle de rinçage à chaud.
REMARQUE : Tout écart par rapport à ces instructions
risquerait d’endommager le matériel et de réduire
l’efficacité du neoyage.
Rincer avec de l’eau purifiée. Ne pas le faire si les
paramètres ne peuvent pas être obtenus.
4. Retirer de la laveuse et sécher complètement si
nécessaire.
5. Examiner tous les éléments pour vérifier qu’ils ne
comportent pas de débris organiques visibles ni de
résidus de l’agent de neoyage.
Répéter le processus en cas de souillure visible.

14 15
FR –FRANÇAIS
Garantie
INTEGRA LIFESCIENCES garantit que chaque nouveau produit
INTEGRA LIFESCIENCES est libre de vices de matériaux et de
fabrication sous réserve d’un usage et d’un service normal
pendant une période d’un an (sauf lorsque expressément stipulé
différemment en ce qui concerne les accessoires), à partir de
la date de livraison par INTEGRA LIFESCIENCES à l’acheteur
initial jusqu’à la date d’expiration indiquée sur l’étiquee de
chaque produit. Les instruments chirurgicaux MAYFIELD sont
garantis libres de vices de matériaux et de fabrication lorsqu’ils
sont utilisés de manière normale pour les fonctions prévues.
INTEGRA LIFESCIENCES, à sa discrétion, réparera ou remplacera
à ses frais tout produit couvert sous la garantie qui lui a été
renvoyé, sous réserve des conditions de la présente garantie et
des accords applicables. Un produit défectueux doit être renvoyé
promptement, port payé et emballé de manière appropriée. Le
CLIENT est responsable des pertes ou des dommages encourus
lors de l’expédition à INTEGRA LIFESCIENCES.
En aucun cas INTEGRA LIFESCIENCES ne se porte responsable
de dommages secondaires, indirects, consécutifs ou punitifs
en rapport avec l’acquisition ou l’utilisation d’un produit
INTEGRA LIFESCIENCES. En outre, cee garantie ne s’applique
pas et INTEGRA LIFESCIENCES n’est pas responsable en cas de
dommages survenant par suite de l’achat ou de l’utilisation d’un
produit INTEGRA LIFESCIENCES qui a été réparé par quelqu’un
d’autre qu’un technicien agréé par INTEGRA LIFESCIENCES ou a
été modifié de telle façon que, à l’avis d’INTEGRA LIFESCIENCES,
sa stabilité ou sa fiabilité en est affectée ou a souffert d’un
usage abusif, de négligence ou d’un accident ou a été utilisé
de manière non conforme aux directives fournies par INTEGRA
LIFESCIENCES. CETTE GARANTIE LIMITÉE EST EXCLUSIVE ET
REMPLACE TOUTES LES AUTRES GARANTIES, TANT EXPRESSES
QUE TACITES, ET TOUTES LES AUTRES OBLIGATIONS OU
RESPONSABILITÉS D’INTEGRA LIFESCIENCES, ET INTEGRA
LIFESCIENCES N’ACCEPTE NI AUTORISE UN REPRÉSENTANT
OU UNE AUTRE PERSONNE À ACCEPTER EN SON NOM TOUTE
AUTRE RESPONSABILITÉ EN RAPPORT AVEC LES PRODUITS
INTEGRA LIFESCIENCES.
INTEGRA LIFESCIENCES REJETTE TOUTES LES AUTRES
GARANTIES EXPRESSES OU TACITES, Y COMPRIS TOUTE
GARANTIE TACITE DE COMMERCIALITÉ OU D’APTITUDE À UN
USAGE, UNE APPLICATION OU UNE GARANTIE DE QUALITÉ
SPÉCIFIQUE, AUTRES QUE CELLES EXPRESSÉMENT INDIQUÉES
DANS LA DOCUMENTATION DU PRODUIT, Y COMPRIS
L’INFORMATION D’USAGER APPLICABLE. Ce qui précède
ne libère pas INTEGRA LIFESCIENCES de sa responsabilité
délictuelle, si autrement applicable sous la loi en vigueur, de
dommages dus à un préjudice corporel causé par un vice de
produit rendant le produit indûment dangereux au moment de la
vente ou de l’installation.
Service après-vente et réparation
Pour le service après-vente et les réparations en dehors
des États-Unis, contacter un représentant Integra agréé.
Pour le service après-vente et les réparations aux États-
Unis, renvoyer les instruments à :
Integra LifeSciences Corporation
4900 Charlemar Drive, Building A
Cincinnati, Ohio 45227
(Toujours inclure le numéro de commande et une
description du problème par écrit.)
ou appeler le :
513-533-7979
877-444-1114 (États-Unis seulement)

14 15
FR –FRANÇAIS
Fabricant:
Integra LifeSciences Corporation
4900 Charlemar Drive, Building A
Cincinnati, OH 45227, États-Unis
Tél: 513-533-7979
Télécopie: 513-271-1915
integralife.com
Integra LifeSciences Services (France) SAS
Immeuble Séquoia 2
97 allée Alexandre Borodine
Parc Technologique de la Porte des Alpes
69800 Saint Priest, FRANCE
Phone: +33 (0) 4 37 47 59 00
Fax: +33 (0) 4 37 47 59 99
Integra et le logo Integra sont des marques déposées d’Integra LifeSciences Corporation aux États-Unis et/ou dans
d’autres pays. MAYFIELD est une marque déposée de SM USA, Inc. et est utilisée par Integra sous licence. Endozime est
une marque commerciale de Ruhof Corporation. Renu-Klenz est une marque commerciale de Steris Corporation.
©2014 Integra LifeSciences Corporation. Tous droits réservés.
451A1113 Rev. B
EC REP

16 17
IT –ITALIANO
Adaatore NeuroGen
MAYFIELD®
( A1113)
Manuale di istruzioni
Produore:
Integra LifeSciences Corporation
4900 Charlemar Drive, Building A
Cincinnati, OH 45227, USA
Tel: 513-533-7979
Fax: 513-271-1915
integralife.com
Integra LifeSciences Services (France) SAS
Immeuble Séquoia 2
97 allée Alexandre Borodine
Parc Technologique de la Porte des Alpes
69800 Saint Priest, FRANCE
Phone: +33 (0) 4 37 47 59 00
Fax: +33 (0) 4 37 47 59 99
REF

IT –ITALIANO
16 17
Significato dei simboli usati in questo Manuale - ITALIANO
ATTENZIONE!
Pericoli che potrebbero risultare in danni ad apparecchiature o proprietà
AVVERTENZA!
Pericoli che potrebbero risultare in gravi lesioni personali o morte
Aenzione, consultare la documentazione allegata
Il prodoo è conforme ai requisiti della Direiva 93/42/CEE
Società produrice
Rappresentante autorizzato nella Comunità Europea
Consultare le istruzioni per l’uso
Aenzione: la Legge Federale degli Stati Uniti limita la vendita di questo dispositivo tramite o su
ordine di un medico.
Questo dispositivo non è indicato per l’uso in ambiente RM
Numero di catalogo
Data di fabbicazione
Numero di loo
Numero di serie

IT –ITALIANO
18 19
ITALIANO
Descrizione
L’adaatore NeuroGen MAYFIELD® (A-1113) è previsto
per l’uso come adaatore per montare l’Unità di base
MAYFIELD al tavolo operatorio quando i fori degli
alloggiamenti del tavolo non sono adai o presenti.
Una staffa terminale regolabile consente di adaare
l’adaatore NeuroGen a una grande varietà di tavoli
della sala operatoria. L’adaatore NeuroGen può
anche essere conservato direamente sul tavolo della
sala operatoria senza interferire con altri interventi
chirurgici.
Figura 1
1
2
3
4
5
6
7
7
Figura 2
1. Supporto sponde
2. Barra trasversale
3. Manopole bloccaggio (unità di base)
4. Alloggiamento unità di base
5. Staffa terminale regolabile
6. Staffa terminale non regolabile
7. Manopole sponde laterali
Parti di ricambio dell’adaatore NeuroGen MAYFIELD:
Gruppo Manopola di bloccaggio Unità di base 41A1508A
Manopole di bloccaggio sponde laterali 41A1508B
AVVERTENZA:
se non si leggono e seguono queste istruzioni si
possono verificare gravi infortuni
AVVERTENZA:
Il posizionamento scorreo del paziente
e il mancato fissaggio di tue le posizioni
di regolazione di questo dispositivo o di qualsiasi
dispositivo di supporto possono causare gravi lesioni al
paziente.
AVVERTENZA:
Non alterare il design del dispositivo in parte
o integralmente in quanto questo potrebbe
causare gravi lesioni al paziente.
AVVERTENZA:
Questo dispositivo non è indicato per l’uso in
prossimità di o in un forte campo magnetico
(RM).
Controllo:
Ispezionare sempre gli strumenti prima e dopo l’uso. Se
un componente appare danneggiato e/o non sembra
funzionare correamente, non usare il dispositivo e
inviare immediatamente lo strumento a un centro di
riparazione Integra autorizzato per essere valutato,
riparato o sostituito. Richiedere al rappresentante Integra
di ispezionare il dispositivo almeno due volte all’anno per
assistervi affinché funzioni correamente.
Istruzioni per l’uso:
Montare l’adaatore NeuroGen MAYFIELD sul tavolo
della sala operatoria
1. Per preparare l’adaatore NeuroGen per il
posizionamento sul tavolo della sala operatoria,
allentare le due manopole delle sponde laterali
ruotando in senso antiorario.
2. Tenere in ciascuna mano una staffa terminale ed
allungare l’adaatore NeuroGen al massimo.
3. Posizionare la staffa terminale non regolabile su
una delle due sponde laterali del tavolo della sala
operatoria. Quindi, far scorrere la staffa terminale
regolabile verso il lato opposto fino a quando non si
inserisce sulla sponda laterale.
4. Serrare le manopole di bloccaggio della sponda

IT –ITALIANO
18 19
laterale poste su ciascuna staffa terminale ruotando
in senso orario fino a quando entrambe le staffe non
sono stree e ben fissate alle sponde laterali.
ATTENZIONE:
assicurarsi che le staffe
terminali siano nella posizione correa sulle
sponde laterali del tavolo della sala operatoria.
Se non si blocca l’adaatore NeuroGen correamente,
può scivolare fuori del tavolo della sala operatoria.
Figura 3 Figura 4
Allineamento errato Allineamento correo
Montare l’unità di base sull’adaatore NeuroGen
1. Allentare le manopole dell’unità di base per aprire
completamente i riceacoli.
2. Inserire le aste di supporto dell’unità di base nei
riceacoli NeuroGen. L’adaatore NeuroGen
MAYFIELD ha diversi riceacoli per consentire la
regolazione laterale dell’unità di base. (Vedere la Figura
1.)
3. Serrare le manopole dell’unità di base per fissare in
posizione líunità di base.
AVVERTENZA:
prima di usare l’unità di base, leggere
aentamente il foglieo illustrativo per l’uso
correo e le avvertenze.
Pulizia e sterilizzazione
Dopo l’uso, smontare tue le componenti del sistema e
pulire bene usando un panno bagnato e un detergente
a pH neutro. Eliminare eventuali tracce di sangue e
detriti e asciugare bene.
Controllo:
Controllare tue le parti dopo la pulizia per assicurarsi
che siano in buone condizioni di funzionamento.
ATTENZIONE:
se si nota usura, restituire le componenti per
riparazioni.
Lavaggio a mano
PRECAUZIONI
• Soluzioni e detergenti alcalini e altamente acidi
causano danni ai dispositivi.
• Le scanalature e le fessure presenti sul dispositivo
richiedono un’aenzione particolare durante la pulizia.
• Prestare particolare aenzione alla qualità dell’acqua
usata durante il ritraamento. L’acqua dura può
danneggiare la superficie dell’apparecchiatura. Evitare
l’uso di acqua dura. Se non altrimenti specificato, fare
uso di acqua depurata.
Limitazioni di ritraamento
• Il traamento ripetuto ha un impao minimo su questi
dispositivi. La durata dei prodoi viene determinata
normalmente dall’usura e dai danni dovuti all’uso.
• È importante che i nuerospecialisti Integra eseguano
le ispezioni di routine (si consiglia due volte all’anno).
Fare riferimento alle informazioni di contao più
avanti.
ISTRUZIONI
Contenimento/Trasporto
• Aenersi al protocollo della struura sanitaria relativo
al contenimento e al trasporto sicuri all’ambiente di
decontaminazione.
• Si consiglia di pulire i dispositivi immediatamente
dopo l’uso.
Pulizia - Arezzatura manuale: acqua, detergente a pH
neutro, spazzola con setole morbide, salviee
Metodo
1. Preparare la soluzione detergente enzimatica a pH
neutro [ad es., Endozime® AW Triple Plus con APA
(Ruhof), rapporto 1:128] in conformità alle istruzioni del
produore usando acqua di rubineo tiepida.
2. Preparare l’apparecchiatura per l’ammollo smontando i
componenti amovibili e allentando le connessioni.
3. Risciacquare l’apparecchiatura in acqua calda prima di
meerla a bagno.
4. Immergere completamente l’apparecchiatura in una
soluzione di acqua/detergente fino a un massimo di 30
minuti.
5. Pulire accuratamente con una spazzola con setole
di nylon morbide. NOTA - Se possibile, usare una
spazzola monouso.
6. Risciacquare con acqua depurata calda finché tue
Table of contents
Languages:
Other Integra LifeSciences Receiver manuals
