Intelligent Recording Xtension Recorder Universal Adapter 3.0 User manual
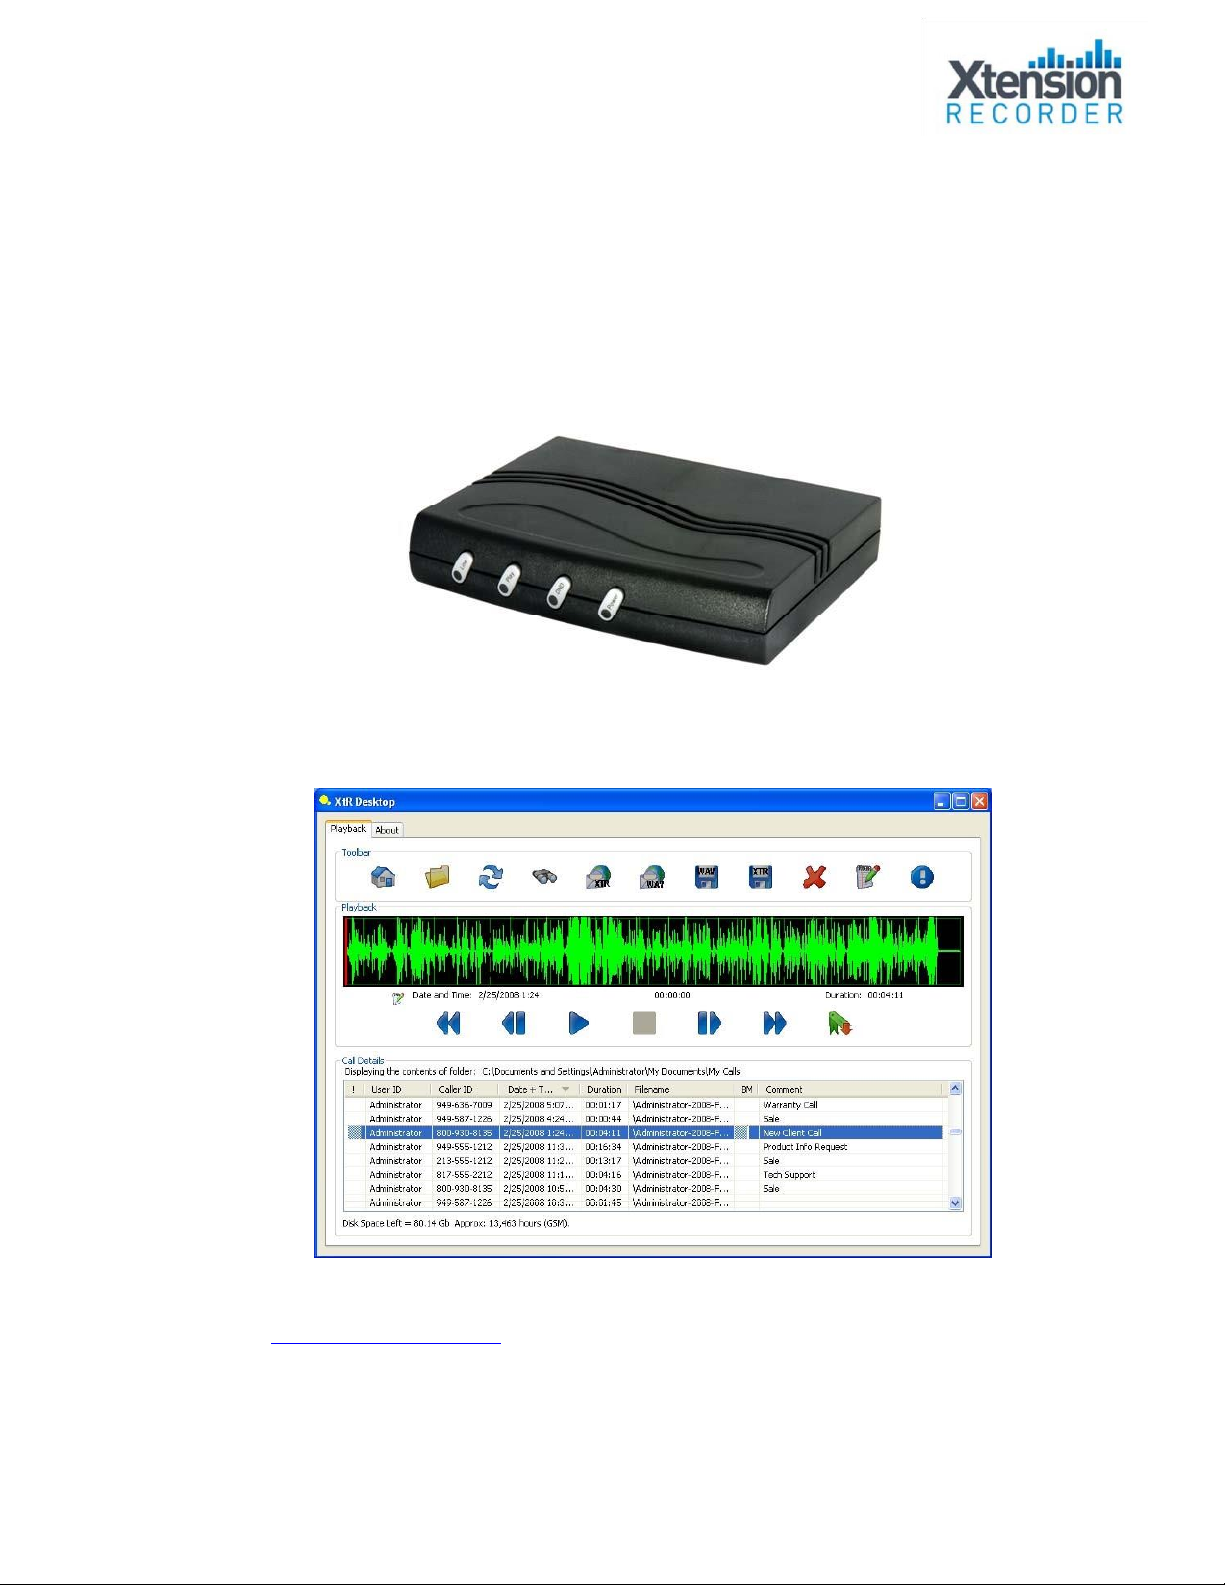
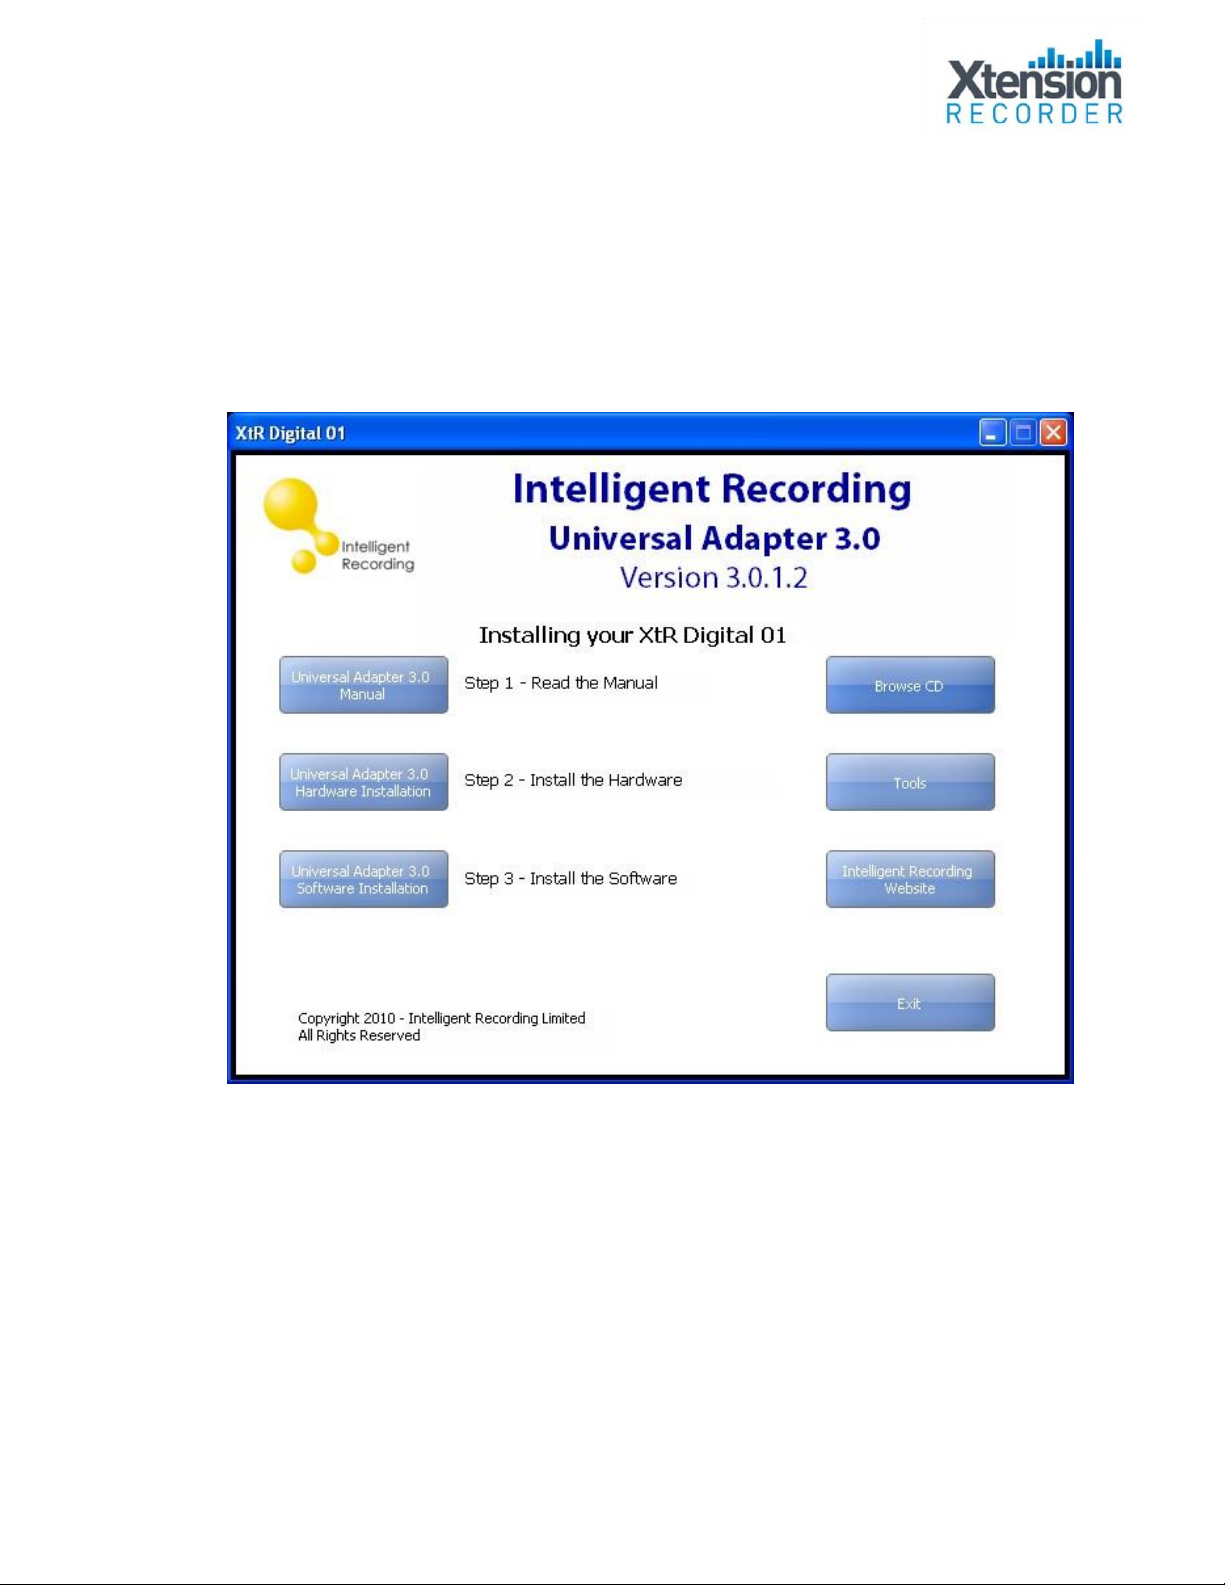
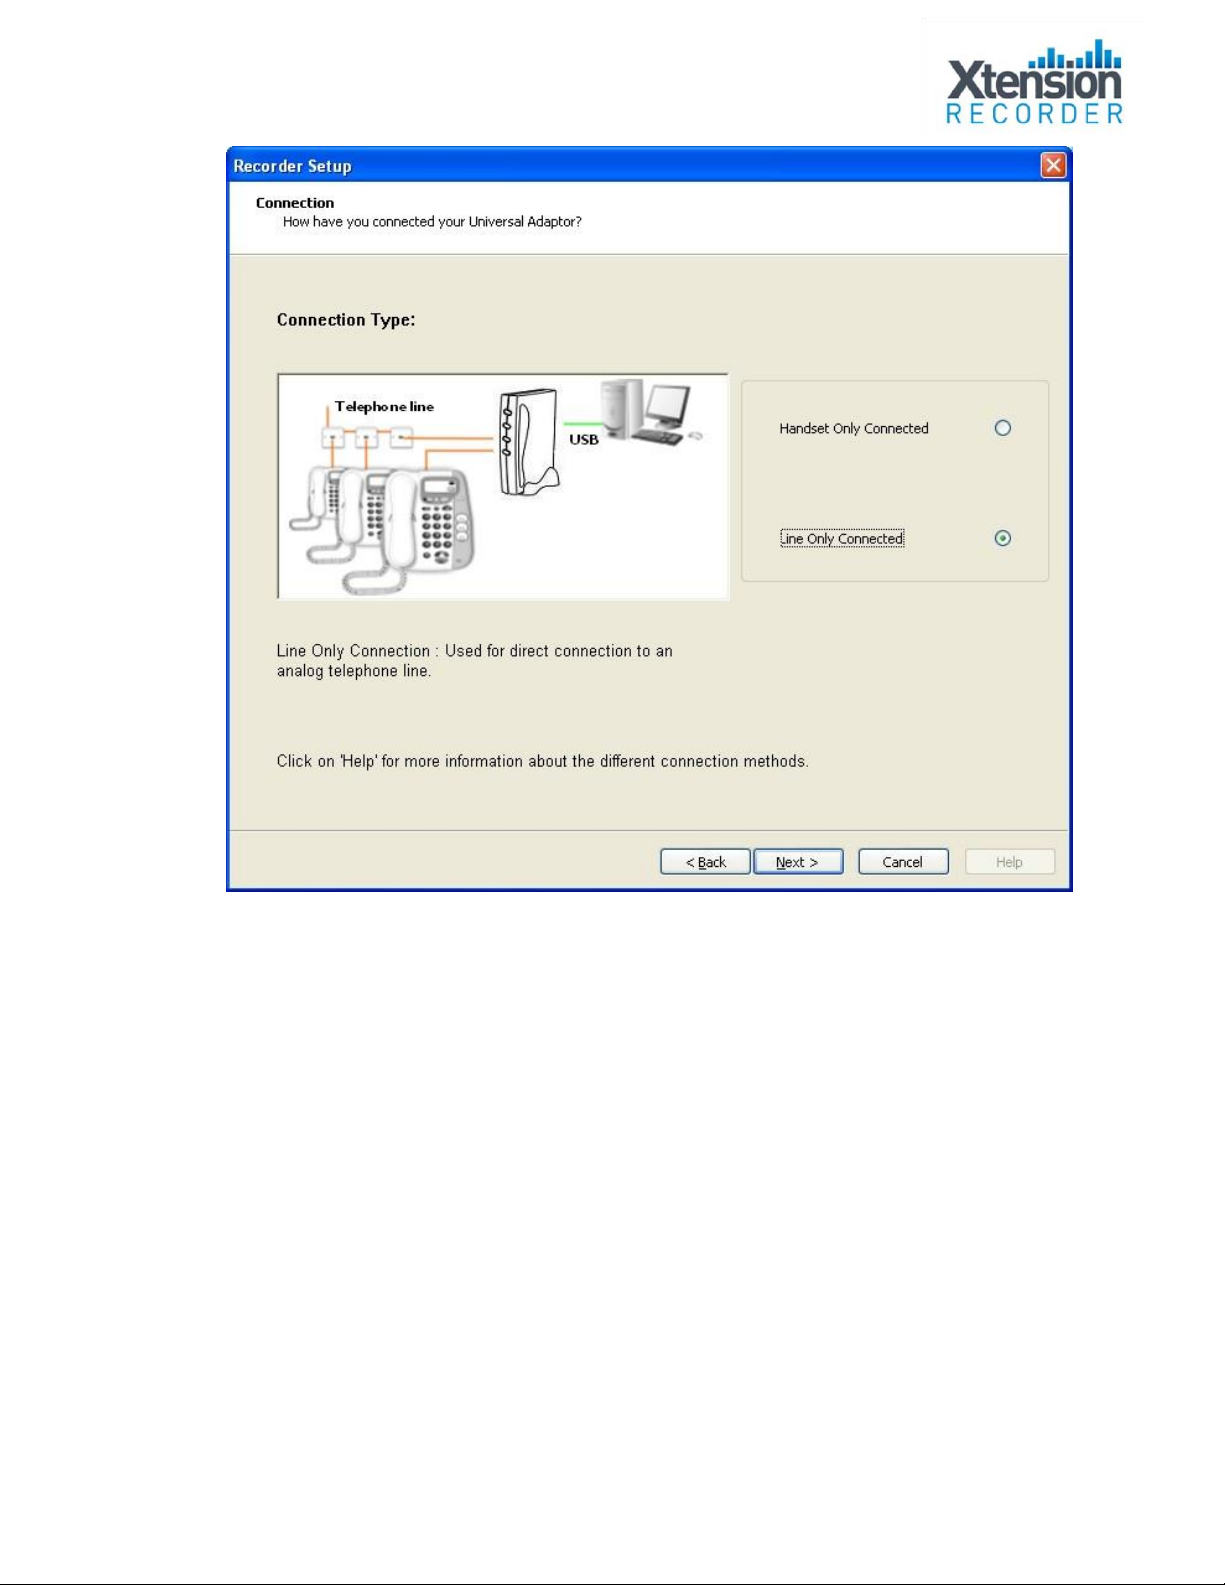
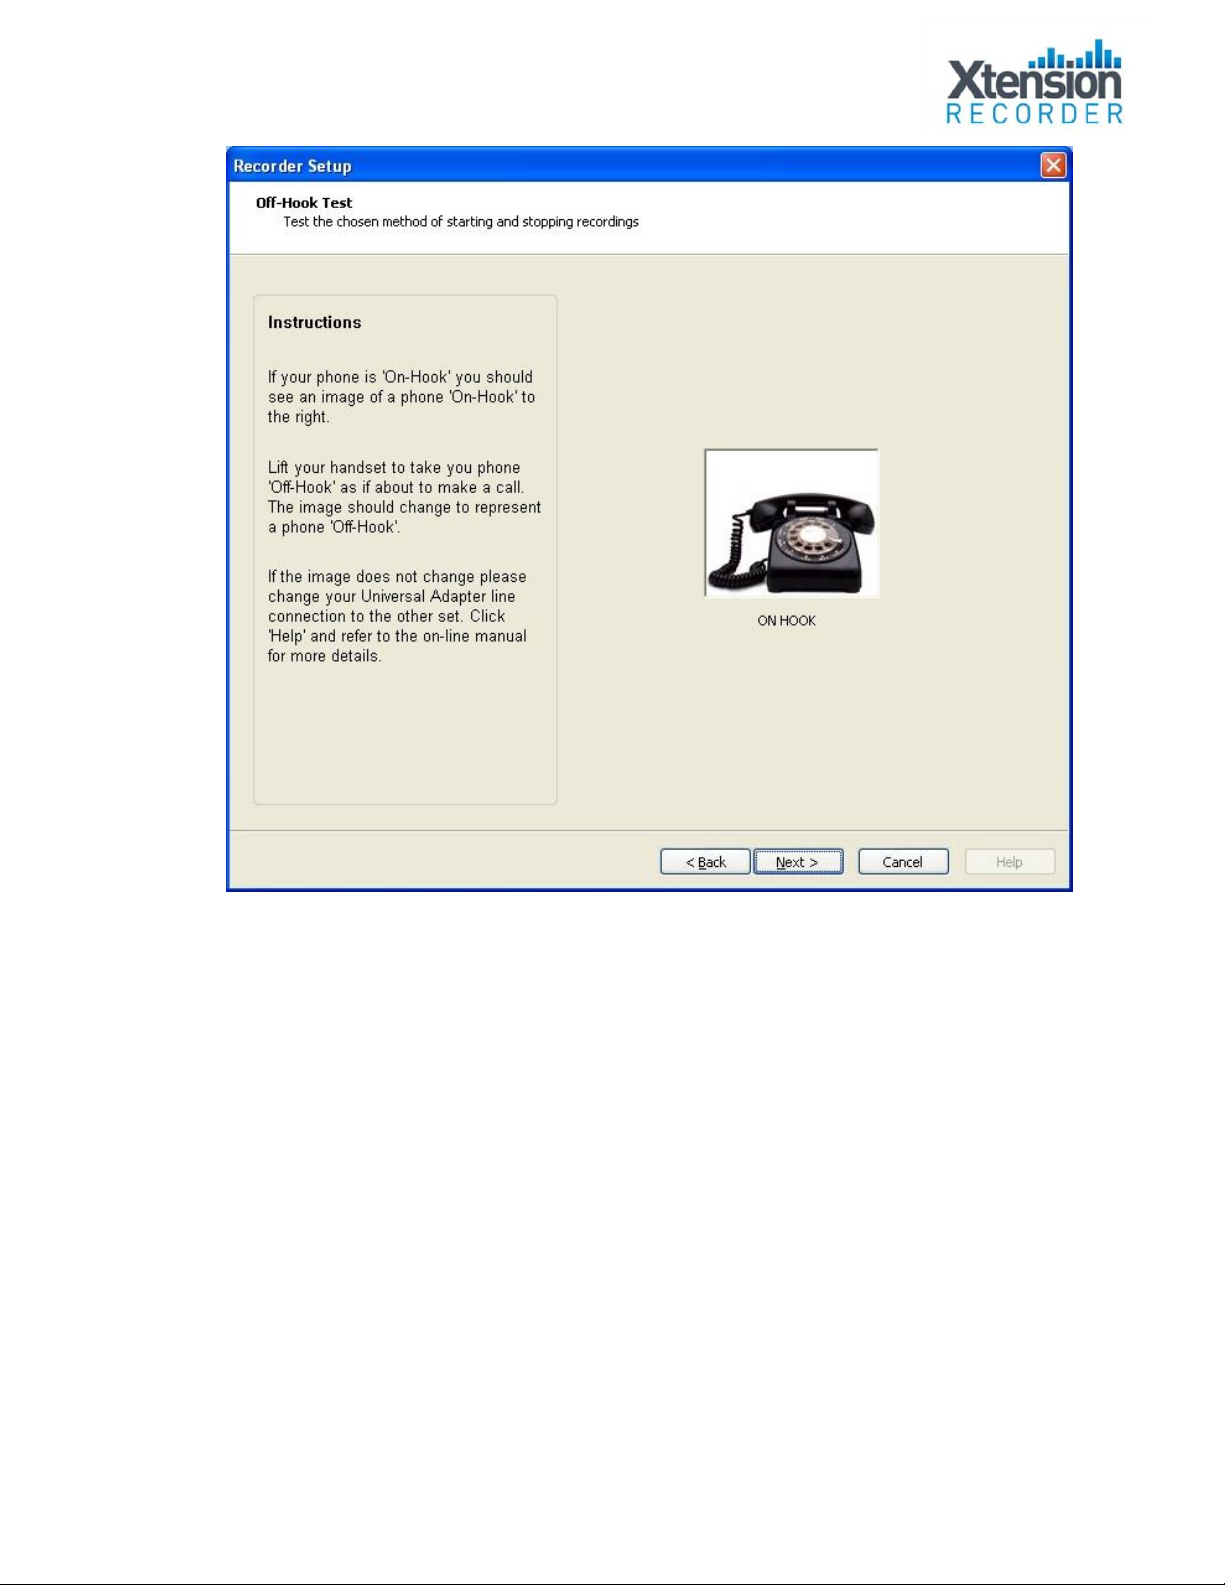
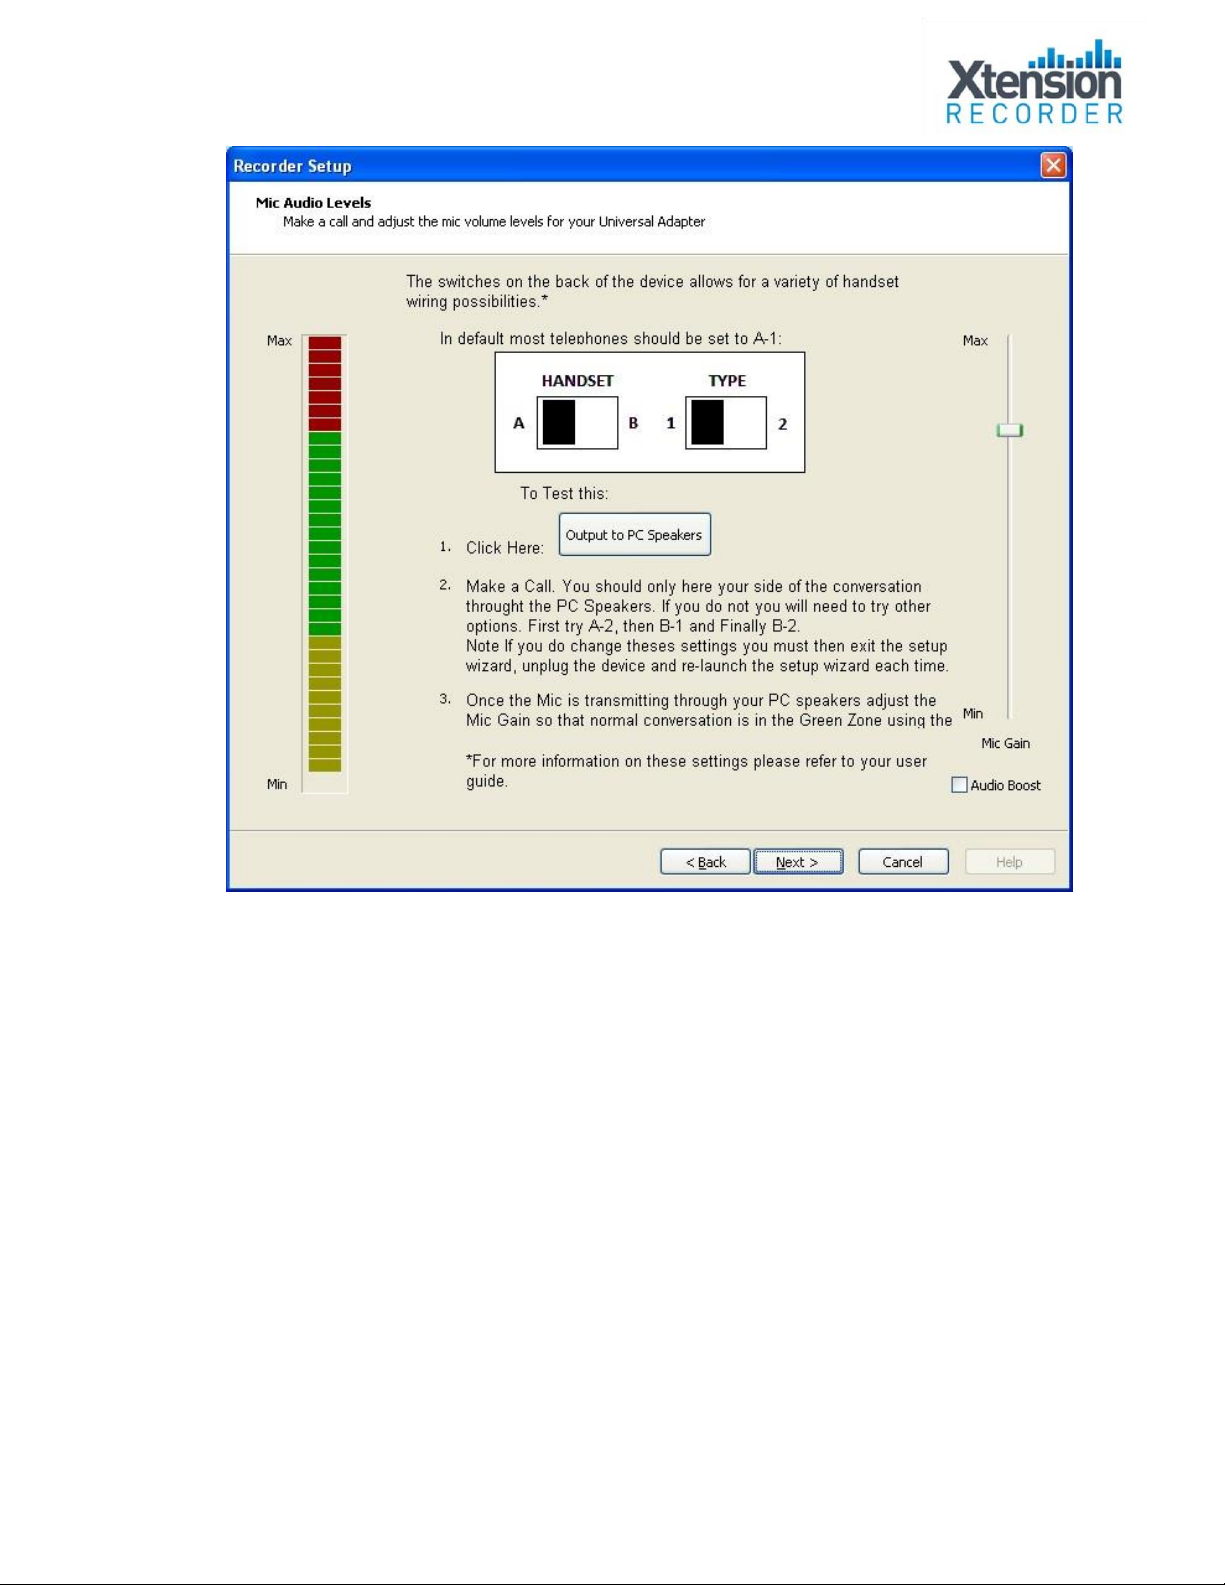
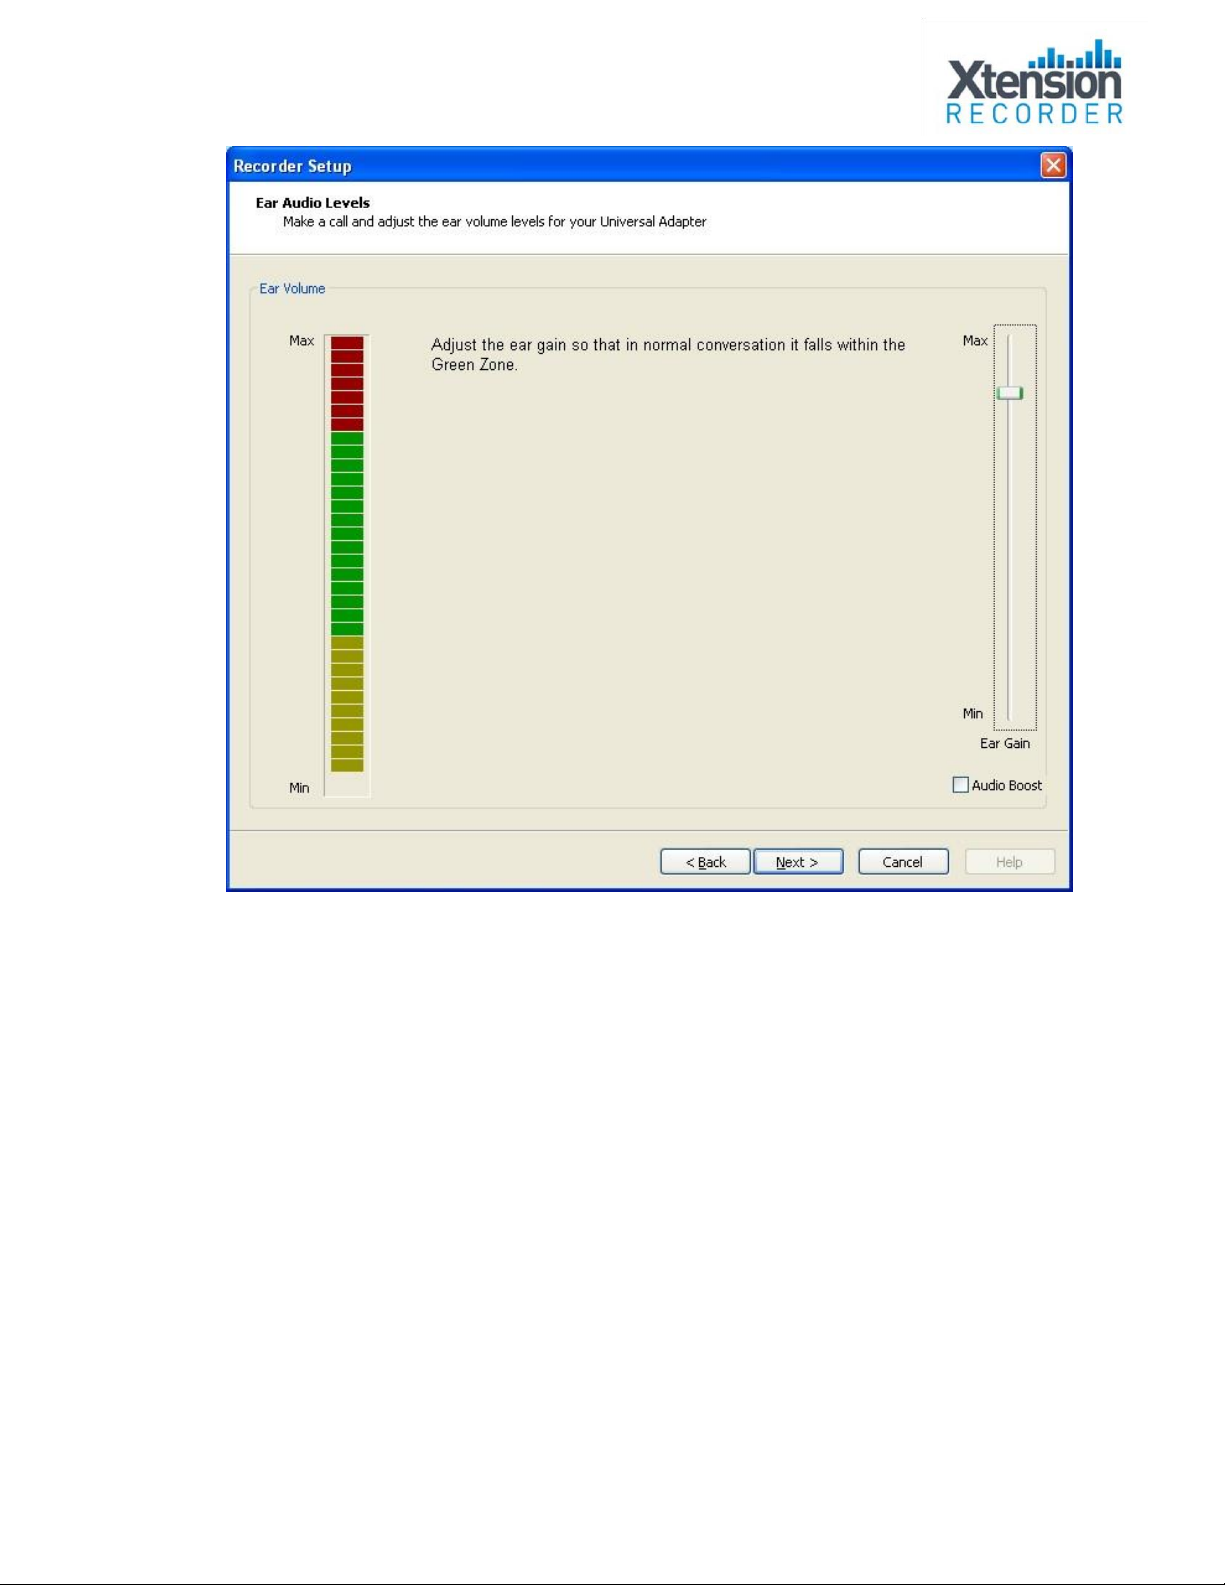
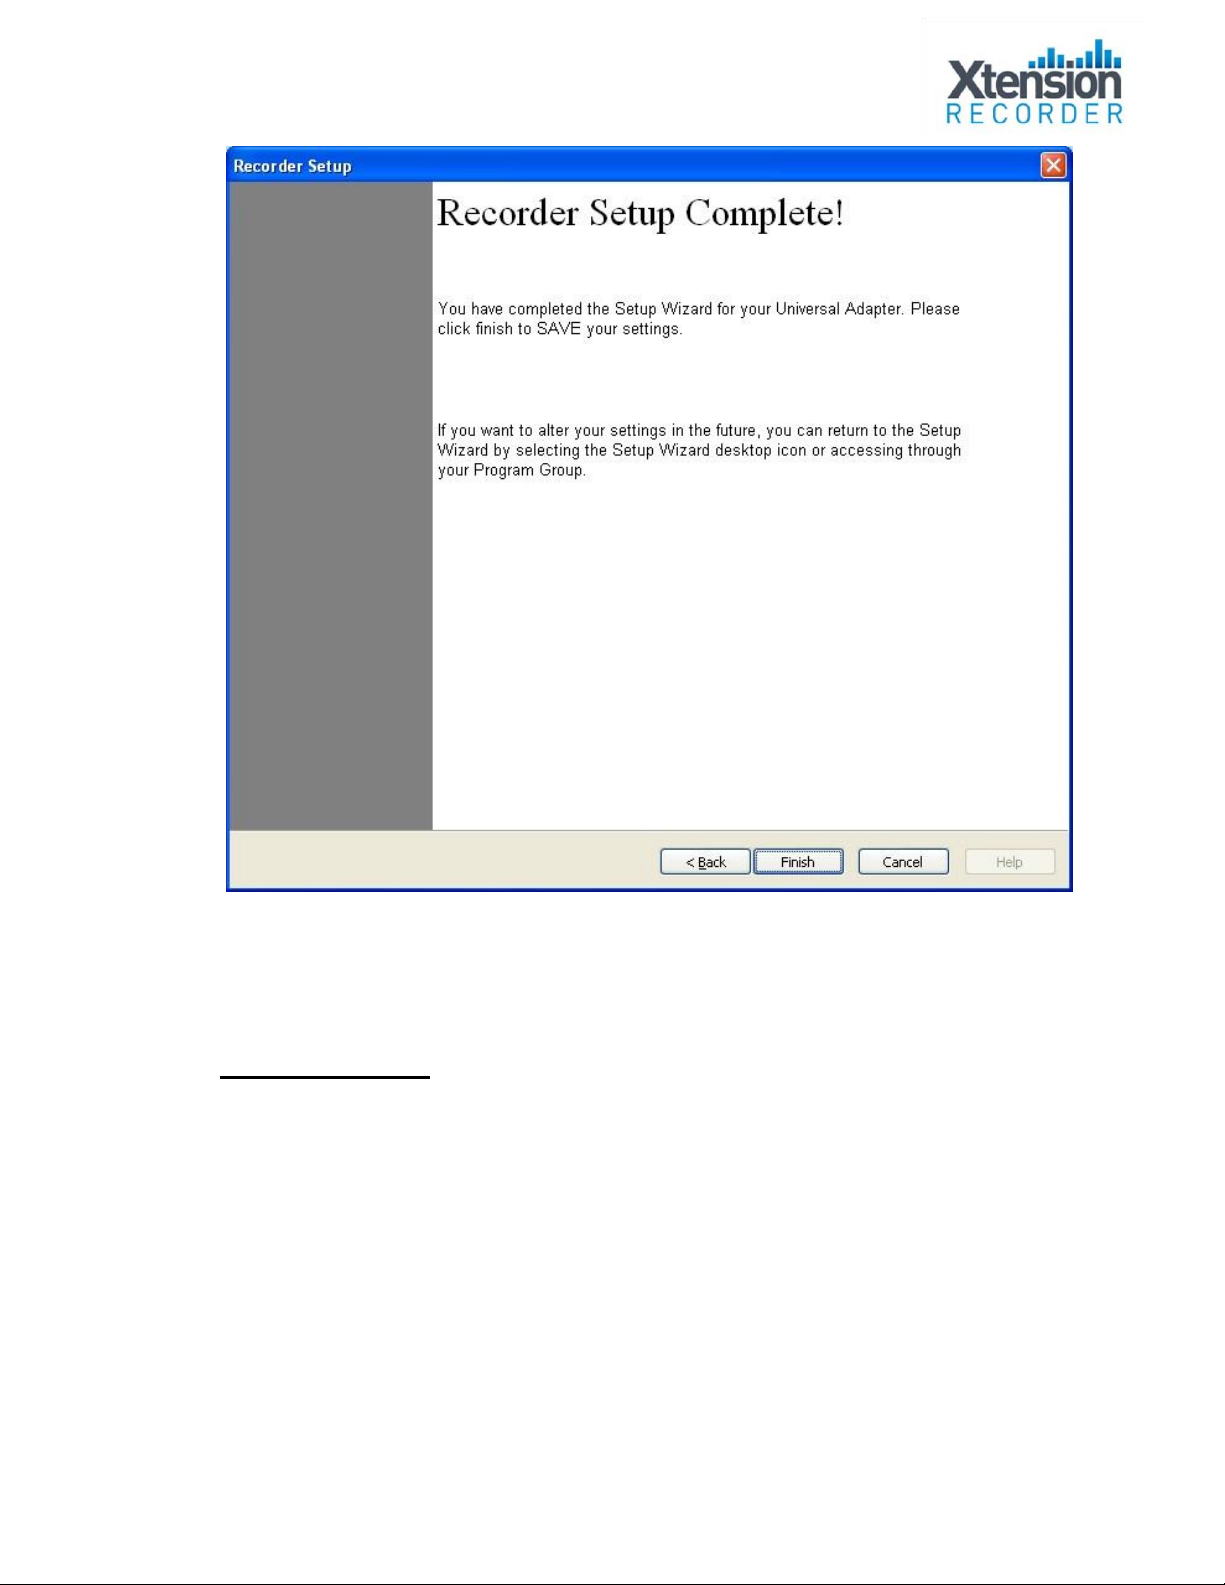
©Copyright Intelligent Recording LTD 2010 Page 1 of 34
Xtension Recorder
Universal Adapter 3.0
Installation and User Guide
Date & Issue: Issue 2 –February
2010 www.usbcallrecord.com US
Office +1 949.587.1226
UK Office +44 (0) 1909 512 148

©Copyright Intelligent Recording LTD 2010 Page 2 of 34
Introduction
This document describes the features and capabilities of the Universal
Adapter 3.0 hardware and XTR Desktop software solution.
The Universal Adapter 3.0 solution consists of a USB device that taps an
analog telephone line or the handset of telephone allowing digital
recording of your telephone conversations onto your PC. Using the
Desktop Software the Universal Adapter 3.0 provides a professional
recording solution for one user or hundreds.
PC Compatibility
The Xtension Recorder application supports Microsoft operating systems
that support USB devices. The list of existing operating systems which meet
this requirement are:
•WIN XP
•Windows Vista
•Windows 7
•Windows 8
•Windows 10
Important Note –Xtension Recorder is not supported on MAC operating
systems.
Installing the Universal Adapter 3.0v2
Step 1 –Choose the Connection type and make the physical connections
to the Universal Adapter 3.0.
The Universal Adapter supports two types of connection to deliver the best
performance according to the type of telephone you want to connect:
•Line Connection–records your conversations from the telephone
line.
•Handset Connection–records your conversations from the
telephone handset cord.
It is important that you understand the difference between the two
types of connections and make the appropriate selection in order to
record your calls.
Line Connection

©Copyright Intelligent Recording LTD 2010 Page 3 of 34
Select Line Connection if:
•You have an analog phone (Line Connection will not work for
digital PBX telephones) and
•You want to record parallel connected extensions (other extensions
on the same line such as other phones on your home line) and
•You want to collect Caller ID and Digits Dialed (CID only if provide
by your telecom line provider)
Handset Connection
•If you have a Digital or IP PBX telephone, you must use the Handset
Connection. Some features available in Line Connection are not
available (Caller ID, Digits Dialed, Parallel Recording) because they
require connection to an analog telephone line. Digital PBX systems
use digital signals for Caller ID and Dialed Digits. If you need to log
Caller ID and Dialed Digits on a Digital PBX telephone, we offer a
series of digital recorders available. Please visit
www.USBCallRecord.com for details.
Installation –Line Connection
•Remove the telephone line connection from the base of your
telephone
•Plug the line connection in the socket labelled “Line” on the back of
the Universal Adapter 3.0
•Plug the line cord provided into the socket labelled “Phone” and the
other end into the telephone.
•Verify that the Slide Switch Selector is set to the L1 Position (far left)
•Connect the supplied USB cable to the Universal Adapter 3.0 and
then insert the other end into a vacant USB port on your computer.

©Copyright Intelligent Recording LTD 2010 Page 4 of 34
Installation –Handset Connection
To set up a handset connection to the Universal Adapter:
•Remove the handset modular connector (curly cord) from your
telephone base and plug it into the “IN” port on the Universal
Adapter 3.0.
•Plug the provided small handset line cord into the telephone base
where the handset was previously plugged in and then into the “OUT”
port on the Universal Adapter 3.0.
•Plug the removed handset connector into one of the handset sockets
of the device (it doesn’t matter which one you use).
•Verify that the Slide Switch Selector is set to the L1 Position (far left) •
Set the Handset Type Switches on the back of the Universal Adapter
3.0 to the A and 1 positions.
•Connect the supplied USB cable to the Universal Adapter 3.0 and
then insert the other end into a vacant USB port on your computer.
•
Step 2 –Install and Configure the Recorder and Player
Software
Insert the CD that came with your Universal Adapter 3.0 into the
CD drive of your PC. The CD will run an installation application

©Copyright Intelligent Recording LTD 2010 Page 5 of 34
that will guide you through the software installation process.
Follow the steps as outlined on your screen
1 –Read the manual ( f you have not done so already) 2 –
Install the Hardware (see above for hardware installation) 3
–Install and configure the software.

©Copyright Intelligent Recording LTD 2010 Page 6 of 34
After clicking on Install the Software for your Universal Adapter 3.0
the following screen will appear. Select “Run”.
Select Next.

©Copyright Intelligent Recording LTD 2010 Page 7 of 34
Select Yes to accept the license agreement and continue.
Select Next to accept the default destination location for
installation (recommended).

©Copyright Intelligent Recording LTD 2010 Page 8 of 34
Select Next to select the default Data folder (recommended).
Select Finish to complete the software installation.

©Copyright Intelligent Recording LTD 2010 Page 9 of 34
Configuring the Universal Adapter 3.0 with the Recorder Setup
Wizard.
Once the software has been installed the Recorder Setup Wizard
will launch and step you through the setup of your Universal
Adapter 3.0.
Select Next to Continue. If you are unsure of your administrative privileges
click the “Save Test” button before continuing.

©Copyright Intelligent Recording LTD 2010 Page 10 of 34
If the Universal Adapter 3.0 is being set up as Line Connected –select “Line
Only Connected” as shown above and continue through the setup as
below.
If you will be setting the Universal Adapter 3.0 up in Handset Mode –Select
Handset Only Connected and go to the “Handset” wizard instructions at
the end of this section.

©Copyright Intelligent Recording LTD 2010 Page 11 of 34
Lift the handset of your telephone –the picture of the telephone should
change to “Off Hook” to verify the installation is correct (see Below).

©Copyright Intelligent Recording LTD 2010 Page 12 of 34
Telephone in Line Mode in with Off Hook condition.

©Copyright Intelligent Recording LTD 2010 Page 13 of 34
Click on “Output to PC Speakers” button and then use the slide bar to
adjust the audio levels of your recorder. Normal conversation should be in
the Green zone.

©Copyright Intelligent Recording LTD 2010 Page 14 of 34
Lift your handset and press numbers on your dial pad to verify digits are
being recognized.

©Copyright Intelligent Recording LTD 2010 Page 15 of 34
Your recorder is set up –click on Finish to start your recorder.

©Copyright Intelligent Recording LTD 2010 Page 16 of 34
Select whether to automatically record calls and whether you want to use
prompts.
Handset Setup Instructions
If you are setting the device up in Handset mode follow the steps below:
If you will be using Handset mode, select “Handset Only Connected” and
click Next.

©Copyright Intelligent Recording LTD 2010 Page 17 of 34
Click on the “Output to PC Speakers” button to adjust your volume settings.
The default setting for Handset Type is A-1, if you do not hear audio through
your PC speakers follow the onscreen directions to change your handset
type with the A/B and 1/2 switches. Once these settings are correct use the
slide bar to adjust the audio levels of your recorder. Normal conversation
should be in the Green zone. Use the Audio Boost feature if the slide bar will
not adjust to the green zone for normal conversation.

©Copyright Intelligent Recording LTD 2010 Page 18 of 34
Use the slide bar so that normal conversation is in the green zone.

©Copyright Intelligent Recording LTD 2010 Page 19 of 34
Set the voice trigger levels for Start and Idle so that the recorder is recording
during conversation and idle during quiet.

©Copyright Intelligent Recording LTD 2010 Page 20 of 34
Your recorder is set up –click on Finish to start your recorder.
Program Settings
The Xtension Recorder application software when loaded is accessible
through a desktop shortcut as well as by right-clicking on the icon that is
loaded in the system tray of the PC. This system tray icon will also flash
yellow and red to indicate an active call being recorded.
The View Options tab enables the installer and or user to set up the options
available for that user. Once set, this view can be eliminated to the user,
thereby making it impossible for them to change (see Advanced Setup
Options).
Table of contents
Other Intelligent Recording Measuring Instrument manuals
Popular Measuring Instrument manuals by other brands

Chauvin Arnoux
Chauvin Arnoux C.A847 user manual

Tektronix
Tektronix TLA 7M3 Quick start user manual

Chauvin Arnoux
Chauvin Arnoux C.A 6545 user manual

SICK MAIHAK
SICK MAIHAK MaihakMBA 200 operating instructions

Wohler
Wohler CFM 600 Operation manual

Endress+Hauser
Endress+Hauser Tankvision Multi Scan NXA83 operating instructions