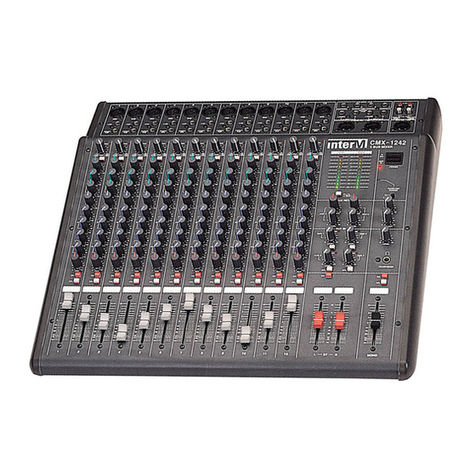
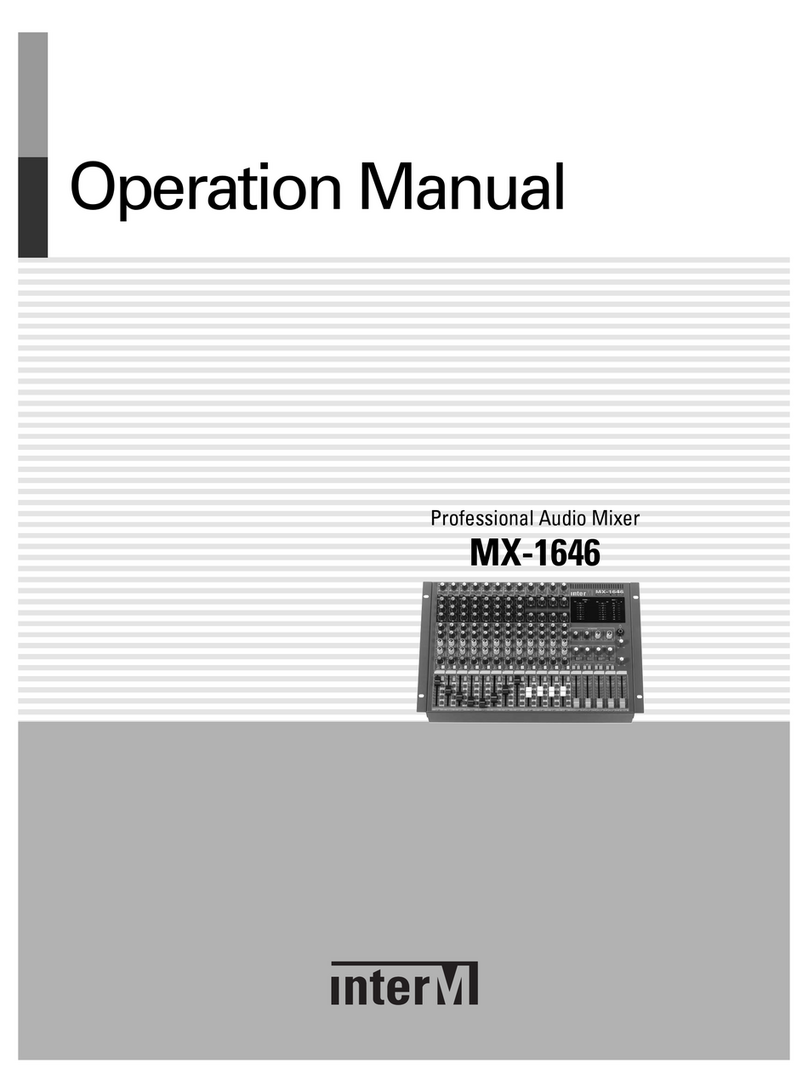
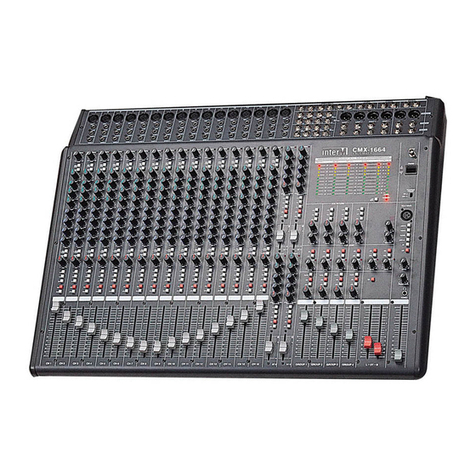
Inter-m MX-1646D User manual

Operation Manual
Professional Audio Mixer
MX-1646D

PROFESSIONAL AUDIO MIXER
Welcome
Welcome
A personal welcome to you from the management and employees of Inter-M
All of the co-workers here at Inter-M are dedicated to providing excellent products with inherently good value,
and we are delighted you have purchased one of our products.
We sincerely trust this product will provide years of satisfactory service, but if anything is not to your complete
satisfaction, we will endeavor to make things right.
Welcome to Inter-M, and thank you for becoming part of our worldwide extended family!
RISK OF ELECTRIC SHOCK
DO NOT OPEN
CAUTION
CAUTION: TO REDUCE THE RISK OF ELECTRIC SHOCK.
DO NOT REMOVE COVER (OR BACK).
NO USER-SERVICEABLE PARTS INSIDE.
REFER SERVICING TO QUALIFIED SERVICE PERSONNEL.
ATTENTION : RISQUE DE CHOC ELECTRIQUE
NE PAS QUVRIR
WARNING
To prevent fire or shock hazard, do not
expose the unit to rain or moisture.
*WARNING FOR YOUR PROTECTION PLEASE READ THE FOLLOWING-WATER AND MOISTURE: Unit should not be used near water(e.g.
near a bathtub, washbowl, kitchen sink, laundry tub, in a wet basement, or near a swimming pool, etc). Care should be taken so than objects do
not fall and liquids are not spilled into the enclosure through openings.
*Do not install this equipment in a confined space such as a book case or similar unit.
*Warning : To reduce the risk of fire or electric shock, do not expose this apparatus to rain or moisture and objects filled with liquids, such as vases,
should not be placed on this apparatus.
*This apparatus shall be connected to a mains socket outlet with a protective earthing connection.
*
To completely disconnect this apparatus from the AC mains, disconnect the power supply cord plug from the AC receptacle.
*
The mains plug of the power supply cord shall remain readily accessible.
CAUTION
*These servicing instructions are for use by qualified service personnel only. To reduce the risk of electric shock, do not perform any servicing
other than that contained in the operating instructions unless you are qualified to do so.
NOTE
*This equipment has been tested and found to comply with the limits for a Class A digital device, pursuant to Part 15 of the FCC Rules. These limits are
designed to provide reasonable protection against harmful interference when the equipment is operated in a commercial environment. This equipment
generates, uses, and can radiate radio frequency energy and, if not installed and used in accordance with the instruction manual, may cause harmful
interference to radio communications. Operation of this equipment in a residential area is likely to cause harmful interference in which case the user will
be required to correct the interference at his own expense.
This symbol is intended to alert the user to the
presence of uninsulated “dangerous voltage” within
the product’s enclosure that may be of sufficient
magnitude to constitute a risk of electric shock to
persons.
This symbol is intended to alert the user to the
presence of important operation and maintenance
(servicing) instructions in the literature accompanying
the appliance.
Caution: To prevent electric shock do not use this (polarized) plug with
an extension cord, receptacle or other outlet unless the
blades can be fully inserted to prevent blade exposure.
Attentions: Pour prévenir les chocs électriques ne pas utiliser cette
fiche polarisée avec un prolongateur, une prise de courant
on une autre sortie de courant, sauf si les lames peuvent
étre insérées à fond sans en laisser aucune partie à
découvert.
Pour deconnecter completement l’appareil du reseau
d’alimentation. deconnecter le cordon d’alimentation de la
prise murale.
La prise du reseau d’alimentation doit demeurer aisement
accessible.
PROFESSIONAL AUDIO MIXER
1
MX-1646D
Contents
Contents
Unpacking .......................................................................................................................................2
Installation
Environment....................................................................................................................................2
Important Safety Instructions.............................................................................................................2
Features ...........................................................................................................................................3
How to Operate..............................................................................................................................3
Front Panel ......................................................................................................................................4
Rear Panel .....................................................................................................................................12
How to Operate Effector / Playback / Record .......................................................................14
Troubleshooting............................................................................................................................20
Applications ..................................................................................................................................21
Block Diagram ..............................................................................................................................22
Specifications ................................................................................................................................23
Service
Procedures....................................................................................................................................26
Schematic.....................................................................................................................................26
Parts List .......................................................................................................................................26
Variations and Options...............................................................................................................26
Warranty .......................................................................................................................................26

PROFESSIONAL AUDIO MIXER
2MX-1646D
Installation
Unpacking
Unpacking
Although your MX-1646D is neither complicated nor difficult to operate, we recommend you take a few minutes
to read this brief manual and familiarize yourself with the important information regarding product features,
setup and operation.
As with most electronic devices, we strongly recommend you retain the original packaging. In the unlikely event
the product must be returned for servicing, the original packaging (or reasonable equivalent) is required.
Installation
Environment
Never place this product in an environment which could alter its performance or reduce its service life. Such
environments usually include high levels of heat, dust, moisture, and vibration.
IMPORTANT SAFETY INSTRUCTIONS
1. Read these instructions.
2. Keep these instructions.
3. Heed all warnings.
4. Follow all instructions.
5. Do not use this apparatus near water.
6. Clean only with dry cloth.
7. Do not block any ventilation openings. Install in accordance with the manufacturer’s instructions.
8. Do not install near any heat sources such as radiators, heat registers, stoves, or other apparatus (including
amplifiers) that produce heat.
9. Do not defeat the safety purpose of the polarized or grounding-type plug. A polarized plug has two blades
with one wider than the other. A grounding type plug has two blades and a third grounding prong. The wide
blade or the third prong are provided for your safety. If the provided plug does not fit into your outlet, consult
an electrician for replacement of the obsolete outlet.
10. Protect the power cord from being walked on or pinched particularly at plugs, convenience receptacles, and
the point where they exit from the apparatus.
11. Only use attachments/accessories specified by the manufacturer.
12. Use only with the cart, stand, tripod, bracket, or table specified by the manufacturer, or sold with the apparatus.
When a cart is used, use caution when moving the cart/apparatus combination to avoid injury from tip-over.
13. Unplug this apparatus during lightning storms or when unused for long periods of time.
14. Refer all servicing to qualified service personnel. Servicing is required when the
apparatus has been damaged in any way, such as power-supply cord or plug is
damaged, liquid has been spilled or objects have fallen into the apparatus, the
apparatus has been exposed to rain or moisture, does not operate normally, or has
been dropped.
S3125A

PROFESSIONAL AUDIO MIXER
3
MX-1646D
Features
How to Operate
How to Operate
1. Plug the power cord into the outlet.
2. Adjust all fader volumes on the front panel to the minimum position.
3. When the POWER switch is turned on, the Power LED lights up and the mixer operates.
4. Connect your CD player, microphone, etc. to the INPUT terminal, press the SOLO switch of the channel you want to use,
and adjust the GAIN CONTROL VOLUME and CHANNEL FADER VOLUME while checking the input signal with
headphones. Adjust the volume so that the PEAK indicator does not light up in red.
5. If PHANTOM power is required, press the PHANTOM POWER switch for the channel to supply the PHANTOM power.
Before turning on the PHANTOM power, adjust all the output volumes or faders to the minimum position to avoid very loud
pop that can damage the speaker.
6. To output the signal for each channel, press the channel selection button of your desired channel among GROUPS 1 ~ 4 or
MIX output.
7. Adjust the FADER VOLUME of the channel you want to output. Check the output level with the level meter.
8. While listening to the sound through the monitor output or headphones, use the EQ VOLUME to adjust the output sound
quality as your preference.
Features
- 16 CHANNEL INPUTS
8 channel mono microphone (XLR) and line (1/4” PHONE) inputs, 4-channel stereo line (1/4” PHONE, RCA) inputs.
- EQUALIZER
3-band EQ for mono input channels (HIGH: 10kHz / MID: 1.2kHz / LOW: 100Hz), 2-band EQ for stereo input 1/2
channels (HIGH: 10kHz / LOW: 100Hz)
- VARIOUS AUDIO OUTPUTS
MIX(L/R) output, 4 GROUP outputs, 4 AUX outputs, monitor output (L/R), headphone output (L/R)
- DIGITAL EFFECTS
16 kinds of onboard effects including Reverb, Chorus, Delay, etc.
- USB/SD PLAYBACK
Play WAV or MP3 file in the USB memory or SD card.
- AUDIO RECORDING
Record the MIX output sound in the USB memory or SD card as a WAV file.
- PC AUDIO INPUT
Connect a PC audio through the USB-B terminal.
- CONTACT CLOSURE INPUT
Block the audio output (MIX / GROUP / AUX) of the mixer.
- STANDARD RACK MOUNT SIZE
Mounted in a 19-inch standard rack by using the provided rack mount bracket
(set height: 7U; recommended height: 10U)
- TABLE-TYPE ACCESSORIES (MX-16SA)
For the table-type user’s convenience, optional accessories such as side bracket, arm rest are provided (sold separately)
※Caution: Do not connect any other device but USB memory to the USB terminal. It may cause the failure of the mixer.

PROFESSIONAL AUDIO MIXER
4MX-1646D
Front Panel
Front Panel
1. INPUT GAIN CONTROL
It adjusts the gain of the input signal.
■ MONO channel (MIC): +16dB ~ +60dB
■ MONO channel (LINE): -10dB ~ +34dB
■ STEREO channel (LINE): -10dB ~ +20dB
Adjust the gain according to the input signal of each channel to get the best sound quality. For example,
adjust all the input and output fader volumes to the 0 dB position and then adjust the input gain properly,
and adjust the EQ as necessary. It is recommended that the gain and channel fader volumes of unused
channels be kept to the minimum position.
2. EQ (EQUALIZER)
You can adjust the tone of the input signal.
■ MONO channel: 3 bands (High / Mid / Low) fixed EQ
■ STEREO 1/2 channel: 2 bands (High / Low) fixed EQ
The center frequency, range, and type of each equalizer are shown below.
1) High EQ (HIGH): 10kHz, ±15dB shelving type
2) Mid EQ (MID): 1.2kHz, ±15dB peaking type
3) Low EQ (LOW): 100Hz, ±15dB shelving type
ST 3
PK
SOLO
GAIN GAIN GAIN GAIN GAIN GAIN GAIN GAIN GAIN GAIN GAIN
ST 4
SD/USB
ON
OFF
ON
OFF
ST 4
ST 3
0
20
30
40
0
20
30
40
0
20
30
40
0
20
30
40
0
20
30
40
0
20
30
40
0
20
30
40
GAIN
-10
0
16
20
30
40
FX
PAN
5
15
5
15
5
15
5
15
-
1
0
S
O
PA
FX
PA
FX
PK
O
L
O
PK
N
X
N
X
0
16
S
ST 3
1
2
3
4
7
9
5
6
8
- Mono Input

PROFESSIONAL AUDIO MIXER
5
MX-1646D
3. AUX 1~4 SEND
This volume adjusts the signal level sent to the aux bus. Aux send is post fader. It can be used to connect
additional equipment such as graphic EQ, compressor, etc.
■ Adjustment Range: -∞ ~ +6dB
4. FX SEND
It adjusts the signal level sent to the onboard effector processor.
■ Adjustment Range: -∞ ~ +6dB
5. PAN
This is a volume for dividing the input signal of each channel into MIX L / R output and group output
channel for use in stereo.
6. SOLO SWITCH
This switch mixes the signal to the SOLO bus so that you can individually check the signal on each channel
through the headphone, monitor output, and level meter. When the SOLO switch is pressed, the
corresponding PEAK/SOLO LED blinks in green.
7. PEAK/SOLO LED
The LED lights red in PEAK status and blinks green in SOLO status. When PEAK and SOLO are turned on at
the same time, the LED lights up in orange.
8. BUS ASSIGN SWITCH
MIX switch: Select this switch to send the corresponding input channel signal to the MIX channel.
G1 ~ G4 switch: Select this switch to send the corresponding input channel signal to the Group 1/2/3/4
channel respectedly.
9. INPUT CHANNEL VOLUME
It is a volume to adjust the level of the input channel. Keep the volume down when not in use.
■ Adjustment Range: -∞ ~ +10dB

PROFESSIONAL AUDIO MIXER
6MX-1646D
1. INPUT GAIN CONTROL
It adjusts the gain of the input signal.
■STEREO channel (LINE): -10dB~+20dB
2. STEREO (ST3, ST4) MIX SWITCH
ST3 switch controls mix On or Off of the ST3 input signal.
ST4 switch controls mix On or Off of the ST4 input signal.
3. PC AUDIO MIX SWITCH
This switch mixes the PC AUDIO input signal with the ST3 input signal.
4. SD/USB MIX SWITCH
This switch mixes SD / USB playback signal with the ST4 input signal.
5. USB/SD PLAYBACK VOLUME
It adjusts the signal output level of SD / USB playback.
■Adjustment Range: -∞ ~ 0dB
6. SD/USB SELECTION SWITCH
You can select SD card or USB memory to use it for Playback or Recording.
※The AUX, FX, PAN, and FADER parts of the STEREO channel are the same as those of the MONO channel.
ST 3
GAIN GAIN
ST 4
SD/USB
ON
OFF
ON
OFF
ST 4
ST 3
PC AUDIO
ON
OFF
ON
OFF
SD/USB
SD
VOL
USB
0
5
15
5
15
1
3
5
2
4
6
- Stereo Input

PROFESSIONAL AUDIO MIXER
7
MX-1646D
1. CONTACT MUTE LED
It is a status LED to indicate the contact closure input status. When the contact closure is inputted (Dry
Contact, both terminals are connected), the MIX/GROUP/AUX output is muted and corresponding LED lights
up in red. When the rear contact is released, the LED goes out and the sound is output again.
2. POWER LED
It is an LED to indicate the power input status of the mixer. The LED lights up in blue when the AC power is
supplied and the POWER switch is turned on.
3. SOLO LED
The LED indicates whether the SOLO function is activated. If any SOLO switch is selected among the input
and output channels, the LED lights up in green.
4. GROUP LEVEL METER
These level meters (G1, G2, G3, G4) indicate the signal level of the GROUP buses.
5. MIX / SOLO LEVEL METER
These level meters indicate the output level of the MIX L / R or the output level of the channel selected by the
SOLO. Normally, the level of the MIX output is displayed. When the SOLO function is activated, the level of
the SOLO output is displayed.
CONTACT
MUTE
21
45
3
- Status LED and Level Meter

PROFESSIONAL AUDIO MIXER
8MX-1646D
1. USB MEMORY PORT
It is a USB-A type port to connect your USB memory.
※Caution: Do not connect any device other than USB memory (such as smartphone, spare battery, external
hard drive, etc.) to the USB port. It may cause a failure of the mixer.
2. SD CARD SLOT
It is a slot to mount your SD card. Press the mounted SD card again to remove the SD card.
When inserting the SD card, be sure the orientation of the SD card.
use a FAT-16 - formatted SD card or FAT-32 - formatted SDHC card.
3. MODE LED / MODE BUTTON
It is a button to change the mode and its status LED. You can select FX, TRACK or FOLDER mode.
4. PLAY / PAUSE, STOP, REC BUTTON
You can play / stop the sound source and switch between Play and Record modes by using these buttons.
5. FX OUTPUT SWITCH
It is a switch to output effector output signals to your desired bus.
■ MIX: Mix the effector signal with the Mix output channel.
■ G 1,2: Mix the effector signal with Group Output 1, 2 channels.
■ G 3,4: Mix the effector signal with Group Output 3, 4 channels.
1
3
7
8
6
5
4
2
Small hall
Big hall
Room
Church
Gated
Reverse
Chapel
Spring
Phaser
Flanger
Echo
Chorus
Early Reection
Big Ambience
Stereo Delay
Slap-back Delay
PUSHTO
SELECT
MIX
DIGITAL EFFECTS
G 3,4G 1,2
FX
SD CARD
FX PROGRAM NO.
0
M
O
GITAL EFFECTS
S
D CARD
ODE
E
E
E
Slap back
Delay
- Digital Function Control

PROFESSIONAL AUDIO MIXER
9
MX-1646D
6. FX OUTPUT VOLUME
It is a volume to adjust the effect output level.
■ Adjustment Range: -∞ ~ 0dB
7. LED NUMBER INDICATOR
It is an LED number indicator that displays the effect program number, track number, and folder number.
8. CONTROL ENCODER
It is an encoder that allows you to select the effect program number, desired track, or folder.
※For detailed information on how to operate digital functions, refer to How to Operate Effector/Play/Record.
(page 14)

PROFESSIONAL AUDIO MIXER
10 MX-1646D
1. AUX OUTPUT VOLUME
It is a volume to adjust each AUX output (AUX1~4).
■Adjustment Range: -∞ ~ +10dB
2. RECORDING VOLUME
It adjusts the level of the recording signal. When the volume is in 0dB (▼Mark), the reconding level is the
same with the Mix output level.
■Adjustment Range: -∞ ~ +10dB
1
2
3
49
8
7
6
5
PK
SOLO
AUX4AUX3AUX1 AUX2
PHONES
MONITORRECORD
10
0
10
0
1010
10
1010
A
A
AU
X
1
10
A
A
UX2
1
0
AUX4
1
0
A
UX3
10
- Output Controls

PROFESSIONAL AUDIO MIXER
11
MX-1646D
3. PEAK/SOLO LED, SOLO SWITCH
■PEAK/SOLO LED: It is an LED to display the PEAK and SOLO status of the recording signal.
■SOLO SWITCH: It is a switch to mix the recording signal with the SOLO bus. You can check the recording
signal through the headphone, monitor output, and level meter.
4. GROUP OUTPUT FADER
It is a volume to adjust the group output level.
■Adjustment Range: -∞ ~ +10dB, Rated Output: 0dB
5. HEADPHONE OUTPUT
It is a terminal to connect headphones for monitoring (Standard 1/4 inch TRS Phone Jack).
※Caution: Make sure to use stereo-type connector. Using a mono-type connector may cause a short circuit
and damage the headphone output circuit.
6. HEADPHONE OUTPUT VOLUME
It is a volume to adjust the headphone output level.
■Adjustment Range: 0 ~ 10
7. MONITOR OUTPUT VOLUME
It is a volume to adjust the monitor output level.
■Adjustment Range: 0 ~ 10
8. MIX L/R SWITCH
It is a switch to send the GROUP output signal to the L or R of the MIX bus.
9. MIX OUTPUT FADER
It is a volume to adjust the MIX output level.
■Adjustment Range: -∞ ~ +10dB, Rated Output: 0dB
( O ) (1/4˝ TRS Phone Connector) ( X ) (1/4” TS Phone Connector)

PROFESSIONAL AUDIO MIXER
12 MX-1646D
Rear Panel
Rear Panel
1. POWER SWITCH
It is a switch to turn on or off the power of the mixer.
※ Caution: Turn this switch on when the volume of the amplifier connected to the mixer is at the minimum
position.
2. PC AUDIO (USB)
This is a PC AUDIO input terminal (USB-B) that can receive audio signals by connecting a computer with a
USB-B cable.
3. MONITOR OUTPUT
It is a terminal (Standard 1/4 inch Phone Jack) to output the monitor audio signal. Use the TRS (TIP: HOT,
RING: COLD, SLEEVE: GND) connector to connect to the monitoring speaker.
■Rated Output Level: 0 dBu
4. RCA STEREO INPUTS
It is a line level input terminal (RCA Jack) that can receive stereo unbalanced audio signal. Use the RCA
connector to connect to the line level equipment.
5. TRS STEREO INPUTS
It is line level input terminal (Standard 1/4 inch Phone Jack) that can receive a stereo balanced audio signal.
Use the TRS (TIP: HOT, RING: COLD, SLEEVE: GND) connector to connect to the line level equipment. If you
connect only to the L channel input, you can use the corresponding channel (R Channel input) in mono
mode. If you connect the connector to the R channel input, it is automatically changed into stereo mode.
※ To connect an unbalanced signal, connect the ring and the sleeve of the jack.
6. PHANTOM POWER SWITCH
It is a phantom power switch to output +48V PHANTOM power through the MIC input terminal. You can use
each channel switch to individually control the phantom power output. If you turn on the PHANTOM POWER
switch, the power is output to HOT and COLD of the MIC input terminal.
GROUP OUTPUTS AUX OUTPUTS
CONTACT INPUT
AUX4 AUX3 AUX2 AUX1
G 4 G 3 G 2 G 1
GROUP OUTPUTS AUX OUTPUTS
CONTACT INPUT
PC AUDIO
1
13 12 11 10 9 8
23456 7

PROFESSIONAL AUDIO MIXER
13
MX-1646D
※ Caution: When turning PHANTOM POWER on or off, minimize the fader volume of the input channel.
If not using a condenser microphone, make sure to turn the PHANTOM switch off. If you turn on the
PHANTOM switch when the source equipment is connected, the equipment may be damaged.
7. MICROPHONE INPUTS
It is a microphone input terminal (XLR Female Jack) that can receive mono-balanced audio signal. Use the
XLR (1: GND, 2: HOT, 3: COLD) plug to connect to the microphone. It can provide the PHANTOM power.
8. AUX OUTPUTS
It is a terminal (Standard 1/4 inch Phone Jack) to output an AUX 1~4 audio signal. Use the TRS (TIP: HOT,
RING: COLD, SLEEVE: GND) connector to connect to the amplifier or powered speaker.
9. GROUP OUTPUTS
It is a terminal (Standard 1/4 inch Phone Jack) to output Group 1~4 audio signal. Use the TRS (TIP: HOT,
RING: COLD, SLEEVE: GND) connector to connect to the amplifier or powered speaker.
10. HI-Z INPUTS
It is a line level input terminal (Standard 1/4 inch TRS Phone Jack) that can receive mono-balanced audio
signal. Use the TRS (TIP: HOT, RING: COLD, SLEEVE: GND) plug to connect to the line level equipment. The
PHANTOM power is not provided.
11. CONTACT INPUT
It is a terminal that can be connected with emergency broadcasting system to receive contact closure in an
emergency. If a contact closure signal is input (both terminals are connected), the MIX/GROUP/AUX output
of the mixer is all cut off automatically. If contact closure input is released (both terminals are disconnected),
all the signals are output again.
※ The GROUP/MIX/SOLO level meter is normally operated without being stopped even if the
MIX/GROUP/AUX output is blocked when contact closure is input.
12. MIX OUTPUT
It is a terminal to output mix audio signals (XLR Female Jack). Use the XLR (1: GND, 2: HOT, 3: COLD)
connector to connect to the amplifier or powered speaker.
■Rated Output Level: 0 dBu
13. AC INLET (POWER INPUT)
It is a terminal to connect the provided AC power cable.

PROFESSIONAL AUDIO MIXER
14 MX-1646D
How to Operate Effector / Playback / Record
1. How to Set Mode
①Press the MODE button to change the encoder switch mode.
②There are 3 kinds of modes: FX (Effector Control), TRACK (Track Control), and FOLDER (Folder Control).
③The default mode is set to FX. If USB memory or SD card is mounted, you can change the mode in the
order of FX -> TRACK -> FOLDER -> FX.
④The LED indicator allows you to check the mode.
[Table 1: Encoder Switch Mode Function]
2. How to Control Digital Effector
①There are 16 kinds of effectors. Please refer to the following [Table 2: Types of Digital Effectors].
②You can select the type of effector in the FX mode and check the current effect number through the LED
number indicator.
③Turn the ENCODER switch to move to the effector number that you want to select. The effector number
blinks.
M
O
O
D
E
Small hall
Big hall
Room
Church
Gated
Reverse
Chapel
Spring
Phaser
Flanger
Echo
Chorus
Early Reection
Big Ambience
Stereo Delay
Slap-back Delay
PUSHTO
SELECT
MIX
DIGITAL EFFECTS
G 3,4G 1,2
FX
SD CARD
FX PROGRAM NO.
0
M
O
GITAL EFFECTS
S
D CAR
D
O
D
E
Slap back
Delay
SELECT
G 3,
4
G
1
,
2
4
3
,
4
Mode Function
Control
USB/SD
Not mounted
USB/SD
mounted Stop/Play Record
FX Effector Control ○ ○ ○ ○
TRACK Track Control ○ ○
FOLDER Folder Control ○ ○

PROFESSIONAL AUDIO MIXER
15
MX-1646D
④Press the ENCODER switch to select the effector.
⑤If you don’t select any effector for a certain time after turning the ENCODER switch, it returns to the
previously selected effector number.
⑥Use the EFFECTOR MIX button to apply your desired effect to the MIX, G1, G2, and G3, G4 outputs.
⑦User the EFFECTOR OUTPUT VOLUME to adjust the volume of effector output.
[Table 2: Types of Digital Effectors]
3. How to Select Digital Audio
①You can mix the PC AUDIO signal to the STEREO 3 channel by
pressing the PC AUDIO ON/OFF switch.
②You can mix the SD/USB playback signal to the STEREO 4 channel
by pressing the SD/USB ON/OFF switch.
③Select the SD/USB selection switch to select your desired memory to
use during playing/recording.
④Use the SD/USB VOL to adjust the SD/USB playback output level.
No. Program Function
01 Small hall Reverb Effect, Small hall (1.5 sec)
02 Big hall Reverb Effect, Big hall (2.8 sec)
03 Room Reverb Effect, Room (1.8 sec)
04 Church Reverb Effect, Church (7 sec)
05 Reverse Reverse Reverb Effect (1.2 sec)
06 Gated Gated Reverb Effect (0.8 sec)
07 Chapel Reverb Effect, Chapel (3 sec)
08 Spring Reverb Effect, Spring (2 sec)
09 Phaser Phaser Effect
10 Flanger Flanger Effect
11 Echo Echo Effect
12 Chorus Chorus Effect
13 Early Reflection Early Reflection Effect
14 Big Ambience Big Ambience Effect
15 Stereo Delay Stereo Delay Effect
16 Slap-back Delay Slap-back Delay Effect
ST 4
SD/USB
ON
OFF
ON
OFF
ST 3
PC AUDIO
ON
OFF
ON
OFF
SD/USB
SD
VOL
USB
0

PROFESSIONAL AUDIO MIXER
16 MX-1646D
4. How to Use USB Memory and SD Card
①You can use your USB memory or SD card to play / record.
②In case both USB memory and SD card are mounted, press the SD/USB selection switch to select which
one you want to use for playing / recording.
③Carefully check the direction when inserting the USB memory or SD card.
④When inserting the SD card, push it in until it clicks.
⑤For more detailed information about supported USB/SD memory specifications, refer to the following
[Table 3: USB/SD Memory Support Specifications].
⑥When you insert a USB memory or SD card, files and folders are automatically sorted. Files and folders
are sorted in the following method. For detailed information, refer to the following
[Image 1: File / Folder Sorting Method].
⑦When the memory is connected normally and the sorting sequence is completed, the LED of the STOP
button lights up and it is in the PLAY mode.
※Caution: If a lot of files are stored in the USB/SD memory, it may take some time until the LED of the
STOP button lights up and the PLAY mode is operated.
⑧Folder 1 is the root folder. If you add folder(s), folders are sorted starting from 2.
⑨If a folder does not have supported audio file, the corresponding folder is not displayed.
[Table 3: USB/SD Memory Support Specifications]
SD CARD
S
D CAR
D
Type Specifications
USB Interface USB 1.1 supported, USB Hub not supported
SD Card Interface SD, SDHC supported
Memory Format FAT16, FAT32
Maximum Memory Capacity 32GB (FAT), multi-partition not supported
Maximum Sound Source File Size 2 GB
Maximum File / Folder Name 128 bytes
Folder Structure (Tree Structure) Up to 16 layer (Tree Structure); up to 260 characters for path
name including file name
WAV Playback
Extension wav
Sample Rate 8k, 16k, 32k, 11.025k, 22.05k, 44.1k, 12k, 24k, 48kHz
Format 16 bit PCM
MP3 Playback
Extension mp3
Sample Rate 8k, 16k, 32k, 11.025k, 22.05k, 44.1k, 12k, 24k, 48kHz
Bit Rate 8 ~ 320kbps
WAV Recording
Extension wav
Sample Rate 44.1kHz
Format 16 bit PCM

PROFESSIONAL AUDIO MIXER
17
MX-1646D
※File / Folder Sorting Rules
1. If there are fewer than 100 files per folder, the playback order is automatically sorted.
2. When sorting, 14 characters from the front of the file name are compared and sorted in ascending
order by number and alphabetical order.
3. If the playback order is important, naming files by adding numbers in front of each file name such as
001 and 002. If the number is 1, 2, 3, 10, and 11, then sort the files in the order of 1, 10, 11, 2,
and 3.
4. Audio files of different extensions with the same file name are sorted in the order of MP3 and WAV.
5. If there are more than 101 files per folder, the playback order is arranged according to the FAT rule
(memory save order).
[Image 1: File / Folder Sorting Method]
5. How to Change Play / Record Mode
①Play Mode: You can play the file in the USB memory or SD card.
②Record Mode: You can record the MIX output signal of the mixer in the USB memory or SD card.
③Press the REC button to switch between Play mode and Record mode.
④For the BUTTON LED indication according to each status, refer to [Table 4: BUTTON LED Indication by
Status].
M
O
O
D
E
Root
Folder
(1)
A. mp3 (1)
B. mp3 (2)
C. mp3 (3)
A
Folder
(2)
A. mp3 (1)
B. mp3 (2)
C. mp3 (3)
B
Folder
(3)
001. mp3 (1)
002. mp3 (2)
003. mp3 (3)
C
Folder
(4)
A. txt
B. xls
C.wav (1)
E
Folder
(6)
1. wav (1)
11. wav (2)
2. wav (3)
D
Folder
(5)
A. mp3 (1)
A. wav (2)
A. wav (3)
RECORD
Folder
(7)
RECORD.WAV (1)
RECORD1.WAV (2)
RECORD2.WAV (3)

PROFESSIONAL AUDIO MIXER
18 MX-1646D
[Table 4: BUTTON LED Indication by Status]
6. PLAY Mode: How to Control Play
①When the playable / recordable memory (USB or SD) is inserted normally and ready to play, then the
STOP button lights up.
②Press the PLAY / PAUSE button to play the current track in the current folder.
③Press the PLAY / PAUSE button during playback to pause.
④Press the PLAY / PAUSE button during pause to play from the paused position.
⑤Press the STOP button during playback or pause to stop playing.
⑥All the music files saved in the current folder are played repeatedly.
7. PLAY Mode: How to Control Track
①Press the MODE button to change into TRACK mode.
②You can check the current track number in the current folder on the LED number indicator.
③The track number is displayed up to 99 per folder. If there are more than 99 tracks, then the number is
continuously displayed as 99.
④Turn the encoder switch clockwise to move to the next track.
⑤Turn the encoder switch counter-clockwise to move to the previous track.
⑥If you move a track during play or pause, then the selected track is played after moving to the tack.
⑦If you move a track during stop, it stops after moving to the track.
8. PLAY Mode: How to Control Folder
MO
DE
MO
O
DE
Button LED PLAY Mode RECORD Mode
STOP PLAY PAUSE STANDBY READY RECORDING
PLAY/PAUSE Off On Blinking Off Off On
STOP On Off Off On Blinking Off
REC Off Off Off On On On
MODE
E
E
E
PUSHTO
SELECT
MODE
E
E
E
PUSHTO
SELECT
Table of contents
Other Inter-m Music Mixer manuals

Inter-m
Inter-m MX-880E User manual

Inter-m
Inter-m MX-1424 User manual

Inter-m
Inter-m CMX-842 User manual

Inter-m
Inter-m MX-1646 User manual

Inter-m
Inter-m MX-1646 User manual

Inter-m
Inter-m IMX-824 User manual

Inter-m
Inter-m CA-8320 User manual

Inter-m
Inter-m MX-1243 User manual

Inter-m
Inter-m MX-1243 User manual

Inter-m
Inter-m MX-1243 User manual

Inter-m
Inter-m CA-6220 User manual

Inter-m
Inter-m PC-800A User manual

Inter-m
Inter-m MX-1242A User manual

Inter-m
Inter-m LM-6414 User manual

Inter-m
Inter-m IMX-416 User manual

Inter-m
Inter-m CA-5115D User manual

Inter-m
Inter-m IMX-824 User manual

Inter-m
Inter-m LM-9228 User manual

Inter-m
Inter-m RMX-1426 User manual

Inter-m
Inter-m CMX-1264 User manual