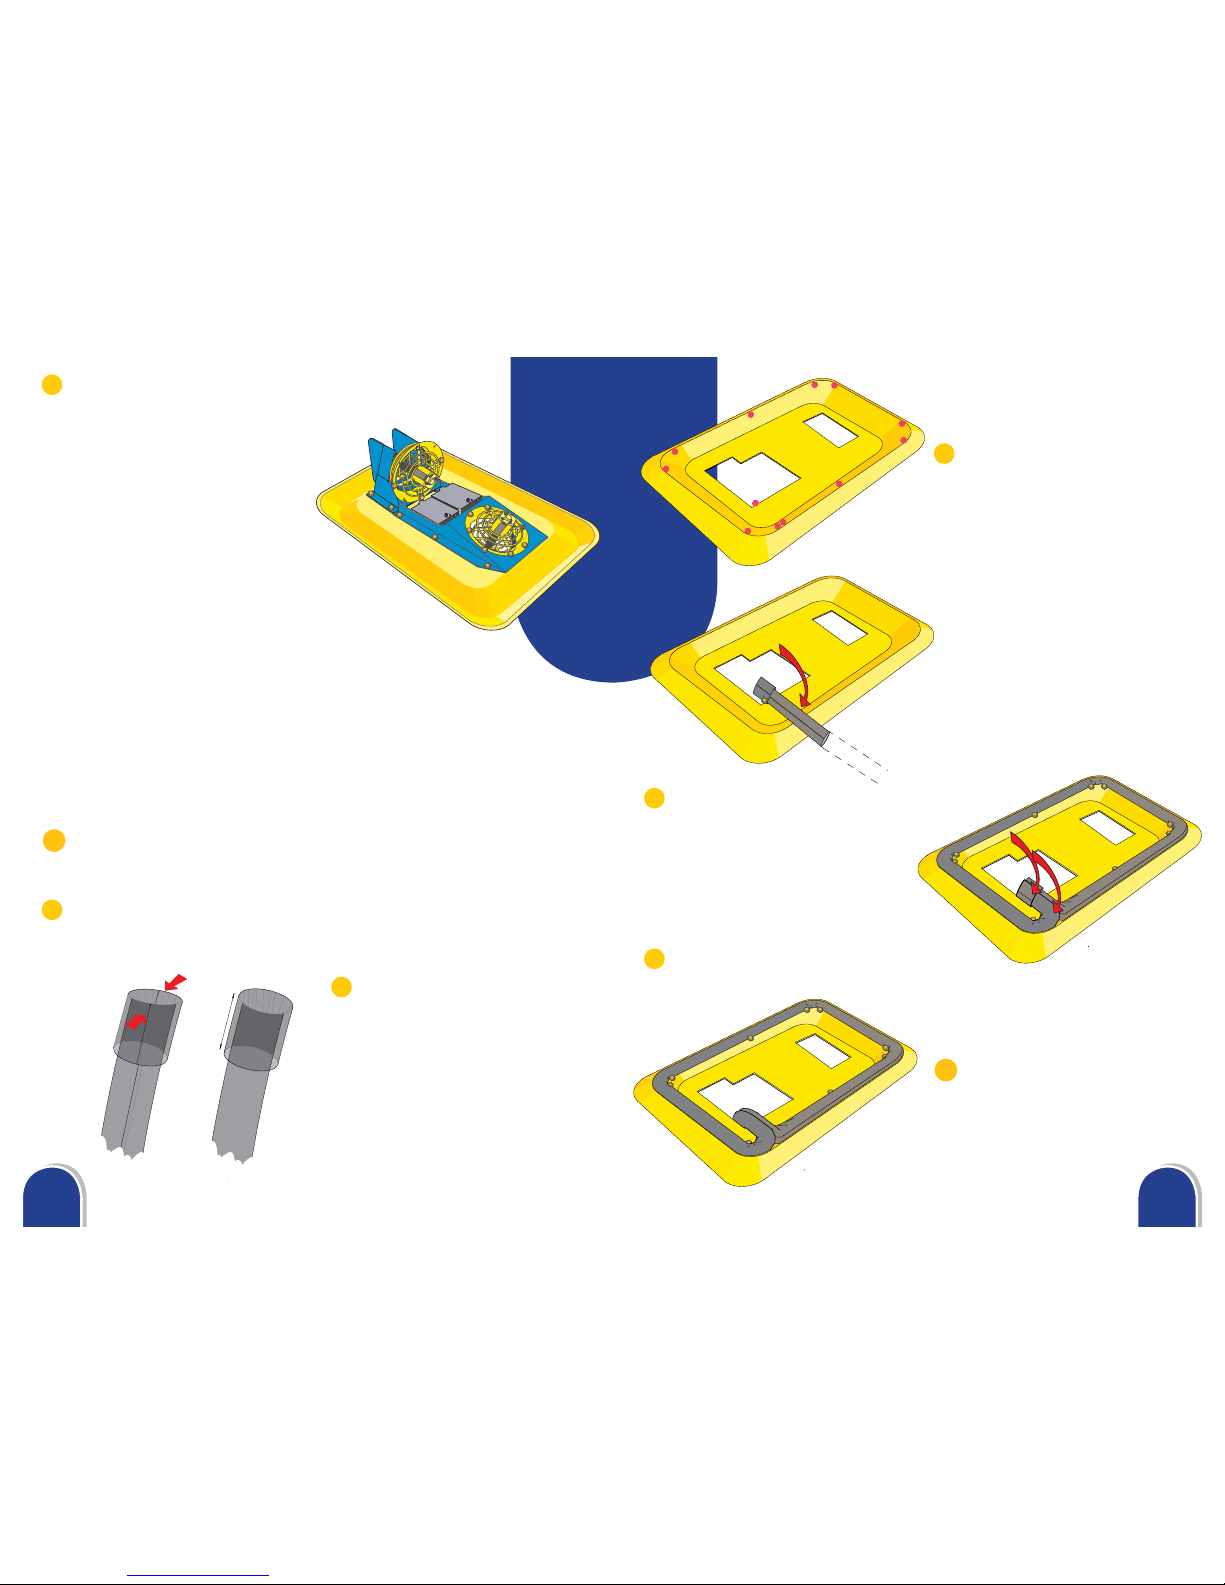
Take the black polythene tube and turn back
the first 30mm of one end so that it looks
like a roll-neck jumper.
1
The polythene tube has a seam
down one side, and this must be re-
positioned in the centre. To achieve
this, inflate the tube by blowing into
one end whilst holding the other end
closed, then gently squeeze the tube
together so that the two creases align.
2
Just turn on the switch on the battery
box and place the hovercraft on a
smooth surface. Shiny floors are the
best surfaces, but the hovercraft should
work on short-pile carpets as well.
To control your hovercraft, you can attach
the string. Use a brass fastener to attach
the string just ahead of the battery box. Your
hovercraft should follow you like an obedient
dog! You can stow the string in the cabin if
you want the hovercraft to fly free, and you
can tape the string to the floor if you want
the hovercraft to travel in circles.
You will notice, however, that the hovercraft
is not very good at going over rough surfaces
or obstacles. This is why most hovercraft are
fitted with a ‘skirt’.
Fly your hovercraft
It is important that your hovercraft is
correctly balanced [known as the ‘trim’].
Switch on the fan and run your hovercraft on
a table at eye level. Prevent it from moving,
but do not hold it down. The gap between
the table and the craft should be the same
front-to-back and side-to-side. Adjust this
gap by moving the battery box slightly
towards the higher side.
Hovercraft ‘trim’
A hovercraft skirt provides a flexible
extension to the bottom of the craft so
that, when an obstacle is encountered, the
skirt will flex and pass over the obstacle,
allowing the hovercraft to go on it’s way.
The skirt is like a very low pressure balloon
which extends all around the bottom of the
hovercraft, preventing the escape of the air
which lifts the hovercraft, which is sealed
inside the walls created by this balloon. The
air pressure in the skirt has to be very low
– if the pressure were too high, the hovercraft
would just bounce off obstacles.
The skirt can be fitted either directly to the
hovercraft, or you can fit it to the spare
polystyrene tray, making it easier to remove
when you want to fly your hovercraft
without it.
Fitting a skirt to
your hovercraft
Turn the tray or hovercraft upside down,
position the end of polythene tube as
shown, and fix in position with a paper
fastener through the centre of the rear edge
of the tray. The paper fastener should just go
through the left edge of the tube.
3
www.interplayuk.com
14 15
Working carefully to avoid kinks, folds
or twists in the tube, fix the edge of the
tube to the underside of the tray using
one paper fastener in each corner, and one
in the centre of each long side of the tray.
4
When you get all the way round the tray,
fix the right edge of the tube to the same
paper fastener that you used to start fixing
the tube. Carefully trim the free end of the
tube, and roll it back 30mm in the same
manner as the other end.
5