manuals.online logo
Brands
  1. Home
  2. •
  3. Brands
  4. •
  5. Inter-Play
  6. •
  7. Toy
  8. •
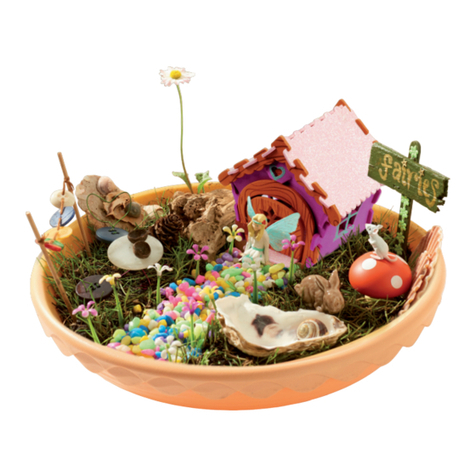
  9. Inter-Play Fairy Garden User manual

Inter-Play Fairy Garden User manual

Other kits in the
My Fairy Garden Range
Make an enchanting
fairy garden that is
sure to attract
fairies to your
home!
INSTRUCTIONS
G
a
r
d
e
n
A
n
d
r
e
n
a
®
See our full range of toys and gifts at:
www.interplayuk.com
Designed and manufactured by:
Interplay UK Ltd.
Unit D, Meter House, Fieldhouse Lane,
Marlow, Buckinghamshire. SL7 1LW.
Please retain our address for future reference.
Copyright ©2018 Interplay UK Ltd.
Product Code FG001 v1.0 2018
Made in China.
Original concept by
Andrena Baxter WARNING!
For Ages 4 years +
Not suitable for children under 36
months due to small parts that may
represent a choking hazard.
None of the accessories in this kit
should be allowed to come into
direct contact with foodstuffs.
Wash hands after use.
Young children will need the help
and supervision of an adult.
Introduction
Fairies are everywhere but not
everyone can see them. They love
nature so can be found wherever
flowers and plants grow. You can
invite fairies into your home by
creating your very own magical
garden they will love to live in.
This kit includes the items you need
to make a beautiful place for your
fairy to live. Once built, you can make
it even more special by adding your
own decorations.
1. Add Soil to the Fairy Garden Bowl
Fill the bowl nearly to the top with some
sieved garden soil or multi-purpose
compost available from garden centres.
The soil or compost should be damp but
not too wet. Firm the soil down to make
a smooth and stable surface.
Creating Your Fairy Garden
1 x Fairy Garden Bowl
1 x Fairy Figure
1 x Dormouse Figure
1 x Shell (Water Feature)
1 x Fairy House
1 x Clothes Line with Posts & Pegs
1 x Blanket (for Clothes Line)
1 x Packet of Grass Seed
1 x Coloured Gravel
1 x Dormouse Flower House
1 x Fairy Stars
Fairy Flowers
Colour Booklet
CONTENTS
Please Note:
You will need some soil or
compost (not included in this kit)
2
1
3
4
5
2. Assemble the Fairy Cottage
To assemble the Fairy Cottage see the
construction guide below. Place the
cottage on the soil close to the rim of
the bowl with the door facing into the
centre of the garden.
1
2
3
4
5
Slide the two windows
into place.
Clip the door frame into
the Fairy Cottage, slide
up to locate into place.
Clip the door into the
door frame hinge.
Push the stalk into the
roof and twist until it
locks.
Place the roof onto the
house.
Your Fairy Garden House
is now complete!
Assembly Instructions
®Page 3Page 2
8. Add the Flowers and Dormouse
House
Place the Dormouse House into your garden.
Next plant the flowers from the kit by
pushing the stems into the soil.
4. Make a Path
Use the multi-coloured gravel
to make a path from the cottage
door to the opposite rim
of the bowl.
5. Hang Out the Washing
In a spare area of the garden place the
washing line poles about 8cm apart. Make
the washing line by cutting the cord to
length and tying it to the poles. Then
hang out the blanket using the pegs.
6. Sow the Lawn
Evenly scatter all the grass seed over the
bare areas of soil. Carefully sprinkle water
over the seeds so that they are damp.
Be careful not to add too much water.
GRASS
SEED
GRASS
SEED
3. Add the Water Feature
Make a small indentation in the soil the size
of the shell in the kit (you can use a spoon as
a spade). Place the shell in the hollow so that
the sides are level with the soil.
®
7. Assemble the Dormouse House
Slide the stem up through the
petals.
Push the cap onto the stem to
secure.
1
2
1
2
Page 5Page 4
Depending on the temperature, the grass will
take about 1 or 2 weeks to start growing.
Place the garden in plenty of light (a window
sill is ideal) and check every day to ensure the
soil does not dry out. Sprinkle more water on
the seeds if needed. When the grass begins
to grow, keep the soil moist but don’t add
too much water as it will make a very muddy
garden! It will take a few days for the grass
to grow into a lawn. To keep it looking nice,
occasionally trim the grass with a pair of
safety scissors.
The great thing about fairy gardening is
that you can add your own features and
decorations to make your fairy feel really
special.
Fir Cones
Fir cones look great in the garden and
you can also make them into fine looking
trees by using a stick for a tree trunk.
Fences and Gates
You can make fences or gates from
twigs tied together with cotton.
Trees
You can make great looking trees from
twigs or small branches.
Real Plants and Flowers
You can add real plants or flowers to your garden by planting
them in the soil. It’s best to use small plants like daisies.
They should keep well as long as they are watered regularly.
You could also try burying a small pot plant in the soil.
You can add all sorts of things to your garden.
You could add some pebbles, shiny objects, snail shells, sea
shells, dolls house furniture… in fact anything that will
make your garden look special and your fairy feel at home.
Caring for your Fairy Garden
Things you can try
®
9 . Finishing Touches
Carefully pour a little water into the shell to
make the fairy pond. Water is important to
fairies, so make sure that you wash the shell
regularly and keep it topped up with clean
water.
The Garden is now ready for your fairy to
move in. Place her in the garden, maybe next
to the pond where she can make some wishes.
Finally, sprinkle some of the fairy dust over
the garden to add a little bit of fairy magic!
Your Fairy Garden is now finished, but you
don’t have to stop there because you can
make the garden look even more special by
adding your own decorations and plants…
FairyGarden - TwigTree
Page 7Page 6

Other Inter-Play Toy manuals

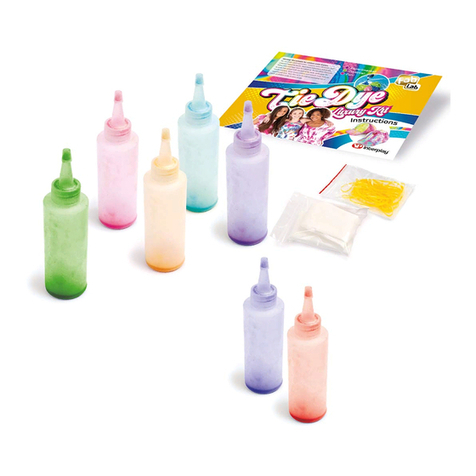
Inter-Play FAb Lab Tie Dye Kit User manual

Inter-Play

Inter-Play FAb Lab Tie Dye Kit User manual

Inter-Play Hovercraft User manual

Inter-Play

Inter-Play Hovercraft User manual

Inter-Play Fairy Garden Belle User manual

Inter-Play

Inter-Play Fairy Garden Belle User manual

Popular Toy manuals by other brands

Jamara 40 0180 manual

Jamara

Jamara 40 0180 manual

Hobbytrain BLS E-Lok Ae 6/8 manual

Hobbytrain

Hobbytrain BLS E-Lok Ae 6/8 manual

Mega Construx Call of Duty FDY73 instructions

Mega Construx

Mega Construx Call of Duty FDY73 instructions

KidKraft Mosaic Magnetic Play Kitchen with EZ Kraft... manual

KidKraft

KidKraft Mosaic Magnetic Play Kitchen with EZ Kraft... manual

The Cool Tool PLAYMAT instruction manual

The Cool Tool

The Cool Tool PLAYMAT instruction manual

Faller 130253 manual

Faller

Faller 130253 manual

LEGO MindStroms Bug Book 9735 Building instructions

LEGO

LEGO MindStroms Bug Book 9735 Building instructions

Skynetic Trainer King user manual

Skynetic

Skynetic Trainer King user manual

Helipal MJXRC X600 X-Series instruction manual

Helipal

Helipal MJXRC X600 X-Series instruction manual

Mattel Barbie N6285-0520 instructions

Mattel

Mattel Barbie N6285-0520 instructions

Smoby 39170 quick start guide

Smoby

Smoby 39170 quick start guide

Silverlit Nano Falcon user guide

Silverlit

Silverlit Nano Falcon user guide

Hasbro Electronic Deluxe B.E.N. 6641 instruction manual

Hasbro

Hasbro Electronic Deluxe B.E.N. 6641 instruction manual

Hobbico REVELL 05119 manual

Hobbico

Hobbico REVELL 05119 manual

Fisher-Price Jump 'n Dunk Basketball manual

Fisher-Price

Fisher-Price Jump 'n Dunk Basketball manual

Paper Replika BOEING PT-17 STEARMAN manual

Paper Replika

Paper Replika BOEING PT-17 STEARMAN manual

Philips SCD910/00 user manual

Philips

Philips SCD910/00 user manual

MS Composit MS Hornet II MS-700 Assembly instruction

MS Composit

MS Composit MS Hornet II MS-700 Assembly instruction

manuals.online logo
manuals.online logoBrands
  • About & Mission
  • Contact us
  • Privacy Policy
  • Terms and Conditions

Copyright 2025 Manuals.Online. All Rights Reserved.