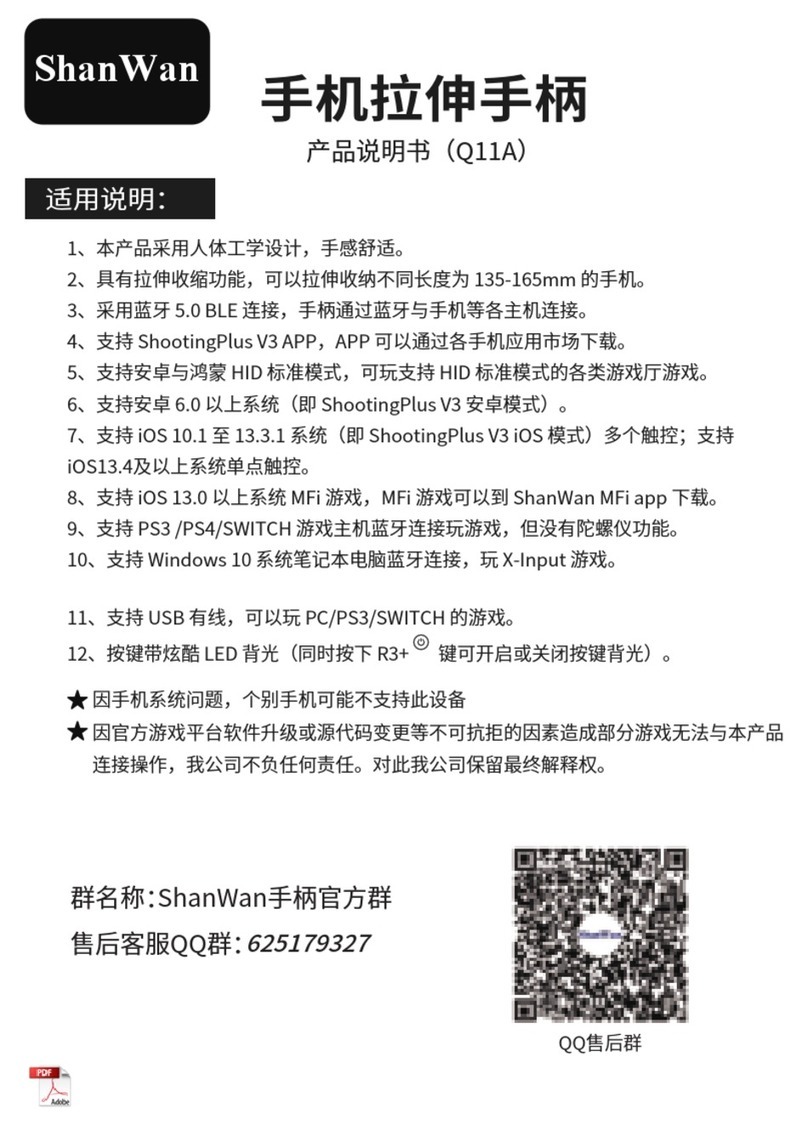
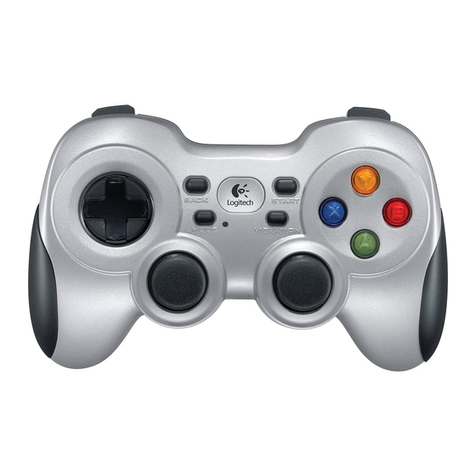
INTERACT BARRACUDA 2 User manual

BARRACUDA
z
English
SV-1133
el
INTRODUCTION
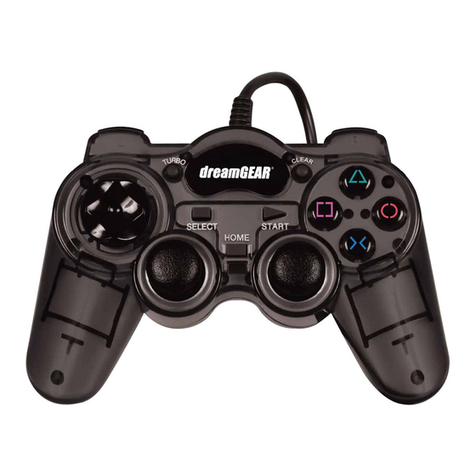
The
BARRACUDA
2
is
a
17-button
dual
analog,
dual
vibration
gamepad
for
use
with
the
PlayStation™
game
console.
The
2
thumb
controlled
analog
sticks
give
you
better
control
and
comfort.
In
any
one
of
3
control
modes
(Standard
Digital
Pad,
Dual
Analog
Joystick,
Dual
Analog
Gamepad),
the
BARRACUDA
2
allows
you
to
program
the
10
fire
buttons
and
the
digital
direction
pad
(14
programmable
buttons
total)
to
create
the
ideal
button
configuration
and
programmed
combination
moves
for
each
game.
The
BARRACUDA
2
is
ergonomically
designed
to
fit
your
hand
and
meets
the
demands
of
the
most
challenging
PlayStation
games
available
on
the
market
today.
1

Your
BARRACUDA
2
package
should
include
the
BARRACUDA
2
controller,
instruction
manual,
registration
card
and
warranty
card.
If
you
are
missing
any
of
these
items,
please
contact
InterAct
Accessories’
Consumer
Services
Department
at
(410)
785
4064.
Please
take
this
time
to
fill
out
your
registration
card
so
you
can
receive
updates
and
information
about
new
products
from
InterAct.
BUTTON
DESCRIPTIONS
The
BARRACUDA
2
is
the
ultimate
controller
for
the
PlayStation™
game
console,
and
lets
you
program
the
10
fire
buttons
and
the
digital
direction
pad
(for
a
total
of
14
programmable
buttons)
to
meet
your
needs.

.
The
digital
direction
pad
represents
©,>
Jf
VY.
These
four
directional
buttons
can
be
programmed
in
the
same
way
as
the
other
programmable
buttons.
This
is
especially
useful
for
those
games
which
require
only
LEFT
and
RIGHT
controls.
.
Buttons
X,
O,
A,
O,
are
the
four
default
fire
buttons
and
are
programmable.
.
Buttons
L1,
L2,
R1,
R2
are
set
to
the
default
fire
buttons
and
are
programmable.
.
Left
and
Right
Analog
Control
Sticks
—
each
control
stick
contains
two
axes
(X
and
Y
axis)
and
an
integral
button
(L3
and
R3).
The
integral
buttons
are
activated
by
pushing
down
(into
the
controller)
on
the
analog
control
sticks.
The
function
of
the
sticks
and
integral
buttons
work
differently
depending
on
the
mode
that
the
controller
is
set
to.
(Please
refer
to
the
MODE
SWITCH
section
for
more
information).
.
The
SELECT
button
is
a
standard
selection
button.
.
The
START
button,
aside
from
starting
and
pausing
a
game,
is
also
used
as
a
“space”
when
programming
a
sequence
of
fire
buttons
(e.g.
combination
moves).
.
The
PROGRAM
button
is
used
to
activate
the
programming
function.
Pressing
the
PROGRAM
button
will
cause
the
PROGRAM
LED
to
start
flashing.
Pressing
it
again
will
turn
off the
PROGRAM
function.
.
The
AUTO-FIRE
switch
will
set
all
fire
buttons
(except
the
directional
control
pad)
to
auto-fire
when
pressed.
Slide
the
AUTO-
FIRE
switch
to
OFF
to
disable
the
auto-fire
function.
.
The
MODE
SWITCH
A)
MODE
1
B)
MODE
2
C)
MODE
3
MODE
MODE
MODE
|
|'OO
+
||
oo
|
KOO

A)
Standard
Digital
Pad
Mode
(Mode
“+”)
-
simulates
the
traditional/
digital
game
pad
configuration.
The
L&R
integral
buttons
do
not
function
in
this
mode.
The
10
fire
buttons
and
the
digital
direction
pad
are
fully
programmable
and
they
can
be
programmed
as
a
series
of
button
presses.
In
this
mode,
the
digital
direction
pad
control
is
also
simulated
by
the
left
and
the
right
analog
control
sticks.
B)
Analog
Joystick
Mode
(Mode
“IY’)
-
simulates
Sony’s
Dual
Analog
Joystick.
The
L&R
integral
button
default
settings
are
U
and
L2
respectively.
The
10
fire
buttons
and
the
digital
direction
pad
can
be
programmed
as
any
other
individual
fire
button
(Button
Relocation
Function).
Unlike
the
fully
programmable
function
(as
utilized
in
Mode
“+”),
combination
moves
can
NOT
be
programmed
into
a
single
button,
instead
each
button
can
be
programmed
to
perform
the
function
of
any
other
singular
button.
C)
Analog
Pad
Mode
(Mode
“OO”)-
simulates
Sony’s
Analog
Pad.
The
L&R
integral
buttons
default
to
L3
and
R3,
and
they
can
also
be
programmed.
The
10
fire
buttons
and
the
digital
direction
pad
can
be
programmed
as
any
other
individual
fire
button
(Button
Relocation
Function).
Unlike
the
fully
programmable
function
(as
utilized
in
Mode
“+”),
combination
moves
can
NOT
be
programmed
into
a
single
button,
instead
each
button
can
be
programmed
to
peso
the
function
of
any
other
singular
button.
10.The
Axis
Swap
Switch
will
swap
the
functions
of
the
two
analog
sticks
and
integral
buttons
from
left
to
right
or
from
right
to
left.
This
allows
for
maximum
control
for
both
left
and
right
handed
users.
When
you
slide
the
switch
to
“L
-
R”,
the
two
analog
control
sticks
and
integral
buttons
will
function
the
same
as
Sony’s
Analog
Joystick
and
Sony’s
Analog
Pad.
When
you
slide
the
switch
to
“
R
-
L”,
the
left
analog
control
stick
and
integral
button
will
function
the
same
as
the
right
analog
control
stick
and
integral
button
of
Sony’s
controllers
(and
vice
versa).
R-L
_L-R
©
)
*
The
Axis
Swap
Switch
is
at
the
back
of
your
BARRACUDA
2
4

VIBRATION
FEATURE
The
BARRACUDA
2
features
dual
vibration
technology
with
two
motors.
This
feature
will
only
function
if
it
is
supported
by
the
game
that
you
are
playing.
The
vibration
may
be
strong
or
slight
while
playing
a
Dual
Shock™
compatible
game.
PROGRAMMING
THE
BARRACUDA
2
There
are
10
programmable
buttons
and
a
programmable
4-way
digital
direction
pad
(for
a
total
of
14
programmable
buttons)
on
the
BARRACUDA
2.
The
SELECT,
START,
and
PROGRAM
buttons
are
not
programmable.
The
fourteen
buttons
mentioned
above
are
programmable
as
follows
for
each
mode:
a)
Standard
Digital
Pad
Mode
(“‘+”)-
FULLY
PROGRAMMABLE
-
You
can
program
a
series
of
button
presses
into
a
single
button
thereby
enabling
you
to
activate
any
special/combination
moves
offered
for
certain
games.
Each
button
can
be
programmed
to
a
minimum
of
one
and
a
maximum
of
40
button
presses/steps.
Analog
Pad
Mode
(“OO”)&
Analog
Joystick
Mode
(“II’”)-
BUTTON
RELOCATION
FUNCTION
-
You
can
program
any
of
the
14
programmable
buttons
to
perform
the
function
of
any
other
button.
This
allows
you
to
customize
the
BARRACUDA
2’s
button
configuration
to
maximize
control
in
any
game.
In
these
modes
(unlike
the
Standard
Digital
Pad
Mode),
multi-button
combination
moves
can
NOT
be
programmed
to
a
single
button.
The
BARRACUDA
2
utilizes
a
dynamic
memory
allocation
that
allows
the
most
efficient
use
of
memory.
This
use
of
memory
allows
you
to
program
multiple
button
presses
into
an
individual
button,
allowing
complex
combination
moves
to
be
pulled
off
with
the
press
of
a
single
button
(Standard
Digital
Pad
Mode
only).
This
memory
is
also
non-
volatile
which
means
that
the
BARRACUDA
2
stores
your
customized
settings
and
combination
moves
even
when
the
controller
is
unplugged
or
the
console
is
turned
OFF.
b
wa

The
total
number
of
button
presses/steps
that
can
be
stored
in
your
BARRACUDA
2
is
40.
For
example,
if
you
have
programmed
25
steps.
into
a
single
button,
there
will
only
be
15
remaining
available
steps.
Simple
Programming
To
program
your
BARRACUDA
2,
follow
these
instructions:
a)
Press
the
PROGRAM
button
until
two
“Beeps”
are
heard.
This
sound
means
the
program
function
is
ON.
The
PROGRAM
LED
will
also
flash
to
indicate
that
the
programming
function
is
active.
b
4
Select
the
button
to
be
programmed
(destination
button)
by
pressing
that
button
until
the
PROGRAM
LED
stops
flashing
and
is
constantly
lit.
The
BARRACUDA
2
will
generate
a
single
“Beep”,
informing
you
that
the
button
input
has
been
accepted.
c)
Press
the
series.
of
buttons
that
you
wish
to
program
into
the
destination
button
until
you
are
finished.
Each
valid
button
pressed
is
acknowledged
by
a
single
“Beep”
and
the
PROGRAM
LED
will
blink
once.
*
NOTE:
Programming
more
steps
than
allowed
will
cause
the
BARRACUDA
2
to
emit
3
quick
“Beeps”
and
the
PROGRAM
LED
will
flash
rapidly.
The
BARRACUDA
2
will
not
accept
further
input,
but
all
previous
memory
settings
will
be
retained.
d
Vee
When
finished
programming,
press
the
PROGRAM
button
again
until
two
“Beeps”
are
heard.
The
PROGRAM
LED
will
extinguish
at
this
time.
e)
To
program
another
button,
simply
repeat
steps
a)
through
d).
Pressing
the
SELECT
button
will
have
no
effect
during
the
program
mode.
The
BARRACUDA
2
will
not
function
for
gameplay
while
you
are
programming
the
unit.
Some
games
may
require
certain
timing
between
button
presses
for
special
moves.
The
BARRACUDA
2
can
do
this
-
see
the
Advanced
Programming
section
below
for
more
information.

Advanced
Programming
*
NOTE:
The
Advanced
Programming
is
only
available
in
the
Standard
Digital
Pad
Mode
(Mode
“+”’).
The
ability
to
implement
some
special
moves
successfully
depends
very
much
on
the
timing
control.
Button
Hold
Time
and
No
Button
Time
are
the
crucial
factors
for
many
special
moves.
To
work
around
this
challenge,
the
BARRACUDA
2
is
equipped
with
a
simple
way
to
enable
you
to
set
these
two
time
settings.
Button
Hold
Time
is
the
length
of
time
during
which
a
button
is
kept
pressed.
No
Button
Time
is
the
length
of
time
or
“space”
during
which
no
button
is
pressed
before
the
next
button
is
pressed.
Programming
Button
Hold
Time
~
In
some
games,
the
special
moves
require
a
particular
fire
button
to
be
held
for
a
certain
amount
of
time.
The
BARRACUDA
2
allows
you
to
program
this
time
into
the
combination
by
programming
the
same
button
press
a
number
of
times
into
the
same
button.
Begin
by
starting
the
program
function:
For
example,
the
procedures
for
programming
the
L3
button
to
simulate
pressing
©
for
a
period
of
time,
then
pressing
W,
then
pressing
™,
then
pressing
®,
and
then
pressing
O+0,
simultaneously
is
shown
below:
a)
Press
the
PROGRAM
button
until
two
“Beeps”
are
heard
indicating
that
the
programming
function
is
ON.
The
PROGRAM
LED
will
flash
indicating
that
the
programming
function
is
active.
b)
Press
the
L3
button
until
a
single
“Beep”
is
heard.
At
the
same
time,
the
PROGRAM
LED
will
stop
flashing
and
becomes
illuminated.
This
indicates
that
the
button
input
has
been
accepted.
c)
Press
the
©
button
until
a
single
“Beep”
is
heard.
d)
Repeat
procedure
(C)
three
times.
e)
Press
the
¥
button
until
a
single
“Beep”
is
heard.
f)
Press
the¥
button
and
®
button
simultaneously
until
a
single
“Beep”
is
heard.

g)
Press
the
>
button
until
a
single
“Beep”
is
heard.
h)
Press
the
O
button
and
the
UO
button
simultaneously
until
a
single
“Beep”
is
heard.
i)
Press
the
PROGRAM
button
until
two
“Beeps”
are
heard.
The
above
programming
example
gives
a
Button
Hold
Time
for
the
L3
button
of
about
a
quarter
of
a
second.
Although
this
hold
time
could
be
fine
for
most
games,
it
may
be
too
long
or
too
short
for
some
others.
The
length
of
hold
time
can
be
adjusted
by
adding
or
reducing
the
number
of
€
buttons
programmed
in
procedure
(d)
above.
*
NOTE
-
Make
sure
that
the
Axis
Swap
Switch
is
set
to
the
“L
-
R”
(default)
position
during
the
above
programming
procedure.
Otherwise,
the
L3
functions
that
were
just
programmed
will
now
be
located
in
the
integral
button
on
the
right
stick
(R3).
Both
the
integral
buttons
and
the
analog
control
stick
functions
are
swapped
when
the
Axis
Swap
Switch
is
utilized.
Extend
Function
The
L1, L2,
R1,
R2
&
START
buttons
can
be
utilized
for
programming
in
an
Extend
function.
This
can
extend
the
duration
of
the
button
hold
time
of
the
last
step
entered
to
simplify
the
programming
procedures
and
save
memory
space.
The
way
to
select
this
function
is
shown
below:
I.
Press
R2
&
START
buttons
at
the
same
time
=
duration
of
1
.
repetition
of
the
last
step.
Il.
Press
R1
&
START
buttons
at
the
same
time
=
duration
of
2
repetitions
of
the
last
step.
IU.
Press
L1
&
START
buttons
at
the
same
time
=
duration
of
4
repetitions
of
the
last
step.
IV.
Press
L2
&
START
buttons
at
the
same
time
=
duration
of
8
repetitions
of
the
last
step.

For
example,
if
you
want
to
program
the
duration
that
the
O
button
is
held
to
be
ten
times
that
of
the
standard
button
hold
time
you
would
need
to
do
the
following:
After
programming
the
O,
button
into
the
desired
button
(but
while
still
in
the
programming
mode):
i)
Press
L2
&
START
at
the
same
time
to
increase
the
button
hold
time
by
eight
times,
then
iit)
Press
R1
&
START
at
the
same
time
to
increase
the
duration
by
an
additional
two
count.
The
total
Extend
action
will
now
be
the
equivalent
of
10
times
the
standard
button
hold
time.
NOTE:
The
Extend
function
does
not
repeat
the
last
step
in
the
program,
but
instead
increases
the
duration
of
time
that
the
last
step
in
program
is
“held”.
Programming
Hold
Button
In
some
games,
the
special
moves
may
require
that
the
fire
buttons
be
kept
pressed
while
pressing
a
combination
of
other
button
presses.
This
type
of
special
move
can
also
be
easily
implemented
with
the
BARRACUDA
2.
The
following
example
shows
the
procedures
for
programming
the
L3
button
as
“Hold
R1”
and
at
the
same
time,
pressing
¥
button
and
then
pressing
button.
a)
Press
the
PROGRAM
button
until
two
“Beeps”
are
heard,
indicating
that
the
programming
function
is
ON.
The
PROGRAM
LED
will
be
flashing
indicating
that
the
programming
function
is
active.
Press
the
L3
button
until
a
single
“Beep”
is
heard.
The
PROGRAM
LED
will
stop
flashing
and
shine
constantly,
which
indicates
that
the
button
input
has
been
accepted.
b
Ve
c)
Press
the
R1
button
and
¥
button
simultaneously
until
a
single
“Beep”
is
heard.
d
eZ
Press
the
R1
button
and
U
button
simultaneously
until
a
single
“Beep”
is
heard.

e)
Press
the
PROGRAM
button
until
two
“Beeps”
are
heard.
The
PROGRAM
LED
will
go
out.
Programming
the
No-Button
Time
In
normal
programming,
there
is
no
time
interval
incorporated
between
consecutive
steps.
However,
some
special
moves
may
require
that
there
is
at
least
some
time
interval
between
two
consecutive
steps
during
which
no
button
is
pressed.
In
order
to
assure
such
special
moves
can
be
implemented,
the
BARRACUDA
2
is
equipped
with
a
programmable
“space”
period
-
which
is
defined
as
the
time
interval
between
two
consecutive
steps
in
which
no
button
is
pressed.
The
START
button
represents
one
“space”
period
during
programming.
NOTE:
The
No-Button
Time
is
most
commonly
referred
to
as
the
‘Neutral
Position”
in
most
fighting
games.
The
following
example
shows
the
procedures
for
programming
the
R1
button
as
the
special
move:
®,
(neutral),
¥,
&,
U.
The
above
special
move
cannot
be
achieved
by
normal
programming
procedures
as
described
before,
but
it
can
be
achieved
by
using
the
following
advanced
programming
procedures
utilizing
the
“space”
button.
a)
Press
the
PROGRAM
button
until
two
“Beeps”
are
heard,
indicating
that
the
programming
function
is
ON.
The
PROGRAM
LED
will
flash
indicating
that
the
programming
function
is
active.
b)
Press
the
R1
button
until
a
single
“Beep”
is
heard.
The
PROGRAM
LED
will
stop
flashing
and
shine
constantly,
indicating
that
the
button
input
has
been
accepted.
c)
Press
the
®
button
until
a
single
“Beep”
is
heard.
d)
Press
the
START
button
until
a
single
“Beep”
is
heard.
e)
Press
the
¥
button
until
a
single
“Beep”
is
heard.
f)
Press
the
¥
button
and
®
button
simultaneously
until
a
single
“Beep”
is
heard.
10

|
|
|
g)
Press
the
U
button
until
a
single
“Beep”
is
heard.
h)
Press
the
PROGRAM
button
until
two
“Beeps”
are
heard.
The
PROGRAM
LED
will
go
out.
The
ability
to
implement
such
special
moves
successfully
depends
on
the
user’s
familiarity
with
the
special
move’s
timing.
However,
using
such
programming
techniques
enable
almost
any
special
moves
to
be
programmed
successfully.
You
can
simply
adjust
the
timing
by
programming
in
more
or
less
“spaces”
(by
pressing
the
START
button
several
times
in
succession
to
add
a
longer
Neutral
period).
NOTE:
The
START
button
cannot
be
used
to
program
a
“space”
for
the
very
first
step.
USING
THE
DYNAMIC
MEMORY
ALLOCATION
In
the
Sony
Analog
Stick
Mode
(“IT’’)
and
Sony
Analog
Pad
Mode
(“OO”),
each
button
can
only
be
programmed
to
function
like
any
other
button.
(i.e.
Button
Relocation).
Therefore,
the
memory
space
for
each
button
is
fixed
to
one.
In
the
Conventional
Pad
Mode
(“+”),
each
programmable
button
can
be
programmed
as
a
series
of
button
presses.
The
minimum
is
one
button
press
and
the
maximum
is
40
button
presses
in
one
programmed
combination.
However,
in
this
mode
the
maximum
number
of
button
presses
programmed
into
a
button
is
not
limited
to
40
(only
the
total
number
of
button
presses
programmed
to
ALL
14
buttons
is
fixed
at
40).
The
DYNAMIC
MEMORY
ALLOCATION
technique
allows
up
to
104
button
presses
to
be
programmed.
DEFAULT
BUTTON
RESET
With
the
PlayStation™
game
console’s
power
set
to
OFF,
press
and
hold
the
L2,
R1
and
O
buttons.
Turn
the
power
ON
while
keeping
the
buttons
pressed.
After
about
two
seconds,
the
default
setting
will
be
restored
and
confirmed
by
3
consecutive
beeps.
1]

*
NOTE:
All
previously
programmed
information
will
be
lost!
OR
Simply
follow
the
programming
instructions
and
reprogram
each
button
as
itself.
For
example,
to
return
the
X
button
to
the
X
function,
press
the
PROGRAM
button
(two
“Beeps”
will
be
heard),
then
press
the
button
(you
will
hear
a
single
“Beep”).
Then,
press
the
button
a
second
time
(another
“Beep”
will
sound)
and
then
press
the
PROGRAM
button
again
(two
“Beeps”
will
be
heard).
This
will
return
the
button
to
its
original
default
setting.
AUTO
FIRE
FUNCTION
Slide
the
Auto-Fire
switch
to
ON
to
activate
the
auto-firing
function.
This
will
create
a
continuous
firing
function
on
all
of
the
buttons
(this
does
not
include
the
digital
directional
controls)
as
long
as
that
button
is
pressed.
Simply
slide
the
auto
fire
switch
to
OFF
to
disable
the
Auto
Fire
function.
Programmed
special
moves
can
also
use
auto-fire.
However,
in
some
games,
using
the
Auto-Fire
function
on
programmed
buttons
may
not
work
properly
as
the
timing
from
one
step
to
the
next
step
is
too
short.
In
this
case,
you
may
add
a
few
“spaces”
(START
button)
at
the
end
of
a
programmed
step
to
enable
the
special
move
to
be
auto-fired
when
it
is
|
desired
to
use
the
Auto-Fire
function
for
programmed
buttons.
CARE
FOR
THE
UNIT
&
TROUBLESHOOTING
The
BARRACUDA
2
is
an
electronic
unit,
and
should
be
treated
with
care
when
handling.
InterAct
Accessories
recommends
that
you
do
not
disconnect
or
connect
the
BARRACUDA
2
to
your
PlayStation™
game
console
when
the
system
is
switched
on.
We
also
recommend
that
you
do
not
store
the
unit
in
direct
sunlight
or
at
extreme
temperatures,
or
spill
any
liquids
on
the
unit.
Finally,
do
not
open
the
case
of
the
BARRACUDA
2.
Maintenance
and
servicing
should
be
done
by
InterAct
Accessories
only.
12

If
your
BARRACUDA
2
stops
working
or
cannot
be
reprogrammed
properly,
please
check
the
following:
a)
Make
sure
the
BARRACUDA
2
is
plugged
in
firmly
to
your
PlayStation™
game
console.
b)
Be
sure
that
the
BARRACUDA
2
is
not
in
PROGRAM
mode.
The
BARRACUDA
2
will
not
work
for
game
playing
when
in
the
programming
mode.
Finish
the
programming
procedures
to
resume
to
gameplay.
If
your
BARRACUDA
2
stops
working
for
any
reason,
please
contact
InterAct
Accessories
through
the
following
means:
Phone
:
(410)
785
4064
Monday
through
Friday,
9:00am
to
8:00pm
EST
Email
:
Support
@
gameshark.com
World
Wide
Web
:
http://www.interact-acc.com
Mailing
Address
:
InterAct
Accessories,
Inc.
ATTN:
CUSTOMER
SERVICE
10999
McCormick
Road,
Hunt
Valley,
MD
21031
PlayStation™
is
a
trademark
of
Sony
Computer
Entertainment
of
America.
13

FCC
Advisory
Statement
NOTE:
This
equipment
has
been
tested
and
found
to
comply
with
the
limits
for
a
Class
B
digital
device
pursuant
to
Part
15
of
the
FCC
Rules.
These
limits
are
designed
to
provide
reasonable
protection
against
harmful
interference
in
a
residential
installation.
This
equipment
generates,
uses
and
can
radiate
radio
frequency
energy
and,
if
not
installed
and
used
in
accordance
with
the
instructions,
may
cause
harmful
interference
to
radio
communications.
However,
there
is
no
guarantee
that
interference
will
not
occur
in
a
particular
installation.
If
this
equipment
does
cause
harmful
interference
to
radio
or
television
reception,
which
can
be
determined
by
turning
the
equipment
off
and
on,
the
user
is
encouraged
to
try
to
correct
the
interference
by
one
or
more
of
the
following
measures:
-
Reorient
or
relocate
the
receiving
antenna.
-
Increase
the
separation
between
the
equipment
and
the
receiver.
-
Connect
the
equipment
to
an
outlet
on
a
circuit
different
from
that
which
the
receiver
is
connected.
-
Consult
the
dealer
or
an
experienced
radio/TV
technician
for
_
help.
Any
changes
or
modifications
not
expressly
approved
by
the
party
responsible
for
compliance
could
void
the
user’s
authority
to
operate
the
equipment.
Where
shielded
interference
cables
have
been
provided
with
the
product
or
specified
additional
components
or
accessories
elsewhere
defined
to
be
used
with
the
installation
of
the
product;
they
must
be
used
in
order
to
ensure
compliance
with
FCC
regulations.
14

—
o
rer
GA
EE
SIE
TELE
LT
TE
ESE
EEE
SEED
I
AEE
EES
ESET
EEE
EE
ET
RITE
EOE
ERENT
ST
RAAT
NEED
RO
ERY
AE
SPER
OR
EEE
a
TIN
=
INTERACT
GAME
PRODUCTS
Francais
SV-1133
BARRACUDA
—
VA
IMZER/
ae
ay
hre
vei
INTRODUCTION
Le
BARRACUDA
2
est
une
manette
de
jeu
4
17
boutons,
dual
analogique,
dual
vibration
a
utiliser
avec
la
console
de
jeux
PlayStation™.
Les
2
manches
analogiques
commandés
au
pouce
vous
donnent
un
meilleur
controle
et
confort.
Dans
l'un
des
3
modes
de
commande
(Manette
Standard
Digitale,
Manche
Analogique,
Manette
Dual
Analogique)
le
BARRACUDA
2
permet
de
programmer
les
10
boutons
de
tir
et
la
manette
digitale
de
direction
(14
boutons
programmables
au
total)
vous
permet
de
créer
la
configuration
de
boutons
idéale
et
la
combinaison
programmée
de
mouvements
idéale
pour
chaque
jeu.
Le
BARRACUDA
2
a
un
design
ergonomique
pour
s’
adapter
4
votre
main
et
il
satisfait
les
demandes
de
la
plupart
des
jeux
de
défi
pour
PlayStation
actuellement
dans
le
commerce.
iS

Votre
ensemble
BARRACUDA
2
devrait
contenir
le
contréleur
BARRACUDA
2,
un
manuel
d’
instructions,
une
carte
d’enregistrement
et
une
carte
de
garantie.
Sil’un
de
ces
éléments
s’avére
manquant,
veuillez
contacter
le
service
Aprés-Vente
InterAct
Accessories
au
(410)
785
4064.
Veuillez
pendre
quelques
minutes
et
compléter
la
carte
d’enregistrement
afin
de
recevoir
les
mises-a-jour
et
les
informations
sur
les
nouveautés
InterAct.
DESCRIPTION
DES
BOUTONS
Le
BARRACUDA
2
est
la
derniére
née
des
commandes
pour
console
de
jeux
PlayStation™
et
elle
vous
permet
de
programmer
10
boutons
de
tir
et
la
manette
digitale
de
direction
(pour
un
total
de
14
boutons
programmables)
pour
répondre
4
vos
besoins.
16

.
Le
manette
directionnel
regroupe
les
directions
©, >,
®
et
¥.
Vous
pouvez
programmer
ces
quatre
boutons
directionnels
de
la
méme
facon
que
les
autres
boutons
programmables.
Cette
possibilité
est
particuliérement
intéressante
pour
les
jeux
qui
n’utilisent
que
les
directions
GAUCHE
et
DROITE.
.
Les
boutons
X,
O,
4,
O
sont
les
quatre
boutons
de
tir
par
défaut
et
sont
programmables.
.
Les
boutons
L1, L2,
R1,
R2
sont
liées
aux
boutons
de
tir
par
défaut
et
sont
programmables.
.
Manches
Analogiques
Gauche
et
Droit
-
chaque
manche
de
commande
a
deux
axes
(axes
des
X
et
des
Y)
et
un
bouton
intégré
(L3
et
R3).
Les
boutons
intégrés
sont
activés
en
poussant
vers
le
bas
(dans
la
commande)
sur
les
manches
de
commande
analogique.
La
fonction
des
manches
et
des
boutons
intégrés
différe
en
fonction
du
mode
dans
lequel
la
commande
est
réglée
(veuillez
vous
référer
a
la
section
MODE
SWITCH
pour
plus
d’
information).
5.
Le
bouton
SELECT
est
un
bouton
de
sélection standard.
6.
Le
bouton
START
sert
bien
sfir
pour
lancer
la
partie,
mais
est
aussi
utilisé
pour
créer
un
“espace”
lors
de
la
programmation
d’une
séquence
de
boutons
de
tir
(par
ex,
dans
des
mouvements
combinés).
.
Le
bouton
PROGRAM
est
utilisée
pour
activer
la
fonction
de’
programmation.
Lorsque
vous
appuyez
sur
le
bouton
PROGRAM,
le
temoin
LED
de
PROGRAMMATION
commence
4
clignoter.
Appuyez
de
nouveau
sur
le
bouton
pour
désactiver
la
fonction
PROGRAMMATION.
.
Le
bouton
AUTO-FIRE
est
utilisé
pour
sélectionner
la
fonction
de
tir
automatique
pour
toutes
les
boutons
de
tir
(sauf
les
boutons
du
bloc
contréleur
de
direction).
Mettez
le
bouton
AUTO-FIRE
en
position
OFF
pour
désactiver
la
fonction
de
tir
automatique.
\
ie

9.
Le
MODE
SWITCH
A)
MODE
1
B)
MODE
2
C)
MODE
3
MODE
MODE
MODE
+
||OO
+
||00
+
|]|00
A)
Mode
Manette
Digitale
Standard
(Mode
“+”)
-
Il
simule
une
configuration
standard
de
manette
de
jeux
traditionnelle/digitale.
Les
boutons
intégrés
L
&
R
sont
inopérants
dans
ce
mode.
Les
10
boutons
de
tir
et
la
manette
digitale
de
direction
sont
totalement
programmables
dans
ce
mode
et
ils
peuvent
étre
programmés
comme
une
série
de
pressions
sur
les
boutons.
Dans
ce
mode,
la
manette
digitale
de
direction
est
également
simulée
par
les
manches
de
commande
analogique.
B)
Mode
Manche
Analogique
(Mode
“II’)
-
Il
simule
la
Manette
Dual
Analogique
Sony.
Les
réglages
par
défaut
des
boutons
intégrés
L
&
R
sont
o
et
L2
respectivement.
Les
10
boutons
de
tir
et
la
manette
digitale
de
direction
peuvent
étre
programmés
comme
tout
autre
bouton
de
tir
individuel
(Bouton
Fonction
Relocation).
Contrairement
a
la
fonction
totalement
programmable
(comme
dans
le
Mode
“+”),
des
combinaisons
de
mouvements
NE
PEUVENT
PAS
étre
programmées
par
un
seul
bouton,
mais
chaque
bouton
peut
étre
programmé
pour
effectuer
une
fonction
de
tout
autre
bouton
simple.
C)
Mode
Manette
Analogique
(Mode
“O
©”)
-
II
simule
la
Manette
Analogique
Sony.
Les
boutons
intégrés
L
&
R
correspondent
par
défaut
4
L3
et
R3
et
ils
peuvent
également
étre
programmeés.
Les
10
boutons
de
tir
et
la
manette
digitale
de
direction
peuvent
étre
programmés
comme
tout
autre
bouton
de
tir
individuel
(Bouton
Fonction
Relocation).
Contrairement
4
la
fonction
totalement
programmable
(comme
dans
le
Mode
“+”),
des
combinaisons
de
~
mouvements
NE
PEUVENT
PAS
étre
programmées
par
un
seul
bouton,
mais
chaque
bouton
peut
étre
programmé
pour
effectuer
une
fonction
de
tout
autre
bouton
simple.
18

moaned
11.Le
Commutateur
d’Echange
d’Axe
permet
d’interchanger
les
fonctions
des
deux
manches
analogiques
et
des
boutons
intégrés,
de
la
gauche
vers
la
droite
et
vice
versa.
Cela
permet
aux
joueurs
gauchers
comme
aux
droitiers
d’utiliser
au
mieux
la
manette.
Lorsque
vous
placez
le
commutateur
sur
“L
R”
(gauche
droite),
les
deux
manches
analogiques
et
les
boutons
intégrés
peuvent
étre
utilisés
comme
ceux
du
Manche
Analogique
de
Sony
et
du
Manette
Analogique
de
Sony.
Lorsque
vous
placez
le
Commutateur
sur
“R
L”
(droite
gauche),
le
manche
de
contréle
analogique
et
le
bouton
intégré
gauches
fonctionnent
de
la
méme
facon
que
le
manche
de
contréle
analogique
et
le
bouton
intégré
droits
des
manettes
Sony
(et
vice
versa).
R-L
L-R
P
*
Le
Commutateur
d’Echange
d’Axe
(Axis
Swap
Switch)
est
au
dos
de
votre
BARRACUDA
2
FONCTION
GRONDEMENT
Le
BARRACUDA
2
est
pourvu
de
la
technologie
dual
vibration
avec
deux
moteurs
de
grondement.
Cette
caractéristique
ne
fonctionnera
que
si
elle
est
supportée
par
le
jeu
auquel
vous
jouez.
Le
grondement
peut
Etre
fort
ou
doux
lorsque
vous
jouez
avec
un
jeu
compatible
Dual
Shock™,
PROGRAMMATION
DU
BARRACUDA
2
Le
BARRACUDA
2
est
équipé
de
10
boutons
programmables
et
d’un
manette
directionnel
digital
4
directions
(14
boutons
programmables
en
tout).
Les
boutons
SELECT,
START
et
PROGRAM
ne
sont
pas
programmables.
Les
quatorze
boutons
précités
sont
programmables
dans
chaque
mode
de
la
facon
décrite
ci-dessous:
a)
Mode
Manette
Digitale
Standard
(“+”)
-
TOTALEMENT
PROGRAMMABLE
-
Vous
pouvez
programmer
une
série
de
pressions
sur
les
boutons
en
un
seul
bouton
et
ainsi
permettre
d’
activer
tous
mouvements
combinés/spéciaux
offerts
par
certains
jeux.
Chaque
bouton
peut
étre
programmé
4
un
minimum
de
un
et
un
maximum
de
40
pressions
sur
les
boutons/étapes.
19

b)
Mode
Manette
Analogique
(“OO”)
&
Mode
Manche
Analogique
(“I”)
-
FONCTION
DE
DEPLACEMENT
DES
BOUTONS
-
Par
programmation,
vous
pouvez
déplacer
sur
|’un
quelconque
des
14
boutons
la
fonction
de
l’un
des
autres
boutons.
Cela
vous
permet
de
personnaliser
selon
vos
désirs
la
configuration
des
boutons
du
BARRACUDA
2
pour
contréler
du
mieux
possible
les
différents
jeux.
Sur
ces
modes
(a
la
différence
du
Mode
Manette
Digitale
Standard),
vous
NE
pouvez
PAS
programmer
de
mouvements
a
combinaison
multi-boutons
sur
un
seul
bouton.
Le
BARRACUDA
2
posséde
un
systéme
dynamique
d’
attribution
de
mémoire
permettant
d’utiliser
la
mémoire
de
la
fagon
la
plus
efficace
possible.
Cette
utilisation
de
la
mémoire
vous
permet
de
programmer
de
multiples
actions
de
boutons
sur
un
bouton
unique
(pour
le
Mode
Manette
Digitale
Standard
seulement).
Cette
mémoire
est
aussi
non-volatile,
ce
qui
signifie
que
votre
BARRACUDA
2
conserve
en
mémoire
vos
configurations
et
combinaisons
personnalisées
méme
aprés
avoir
débranché
la
manette
ou
aprés
avoir
éteint
la
console.
Le
BARRACUDA
2
peut
mémoriser
un
nombre
total
de
40
étapes.
Si
vous
avez,
par
exemple,
programmé
25
étapes
sur
un
seul
bouton,
il
ne
vous
restera
donc
plus
que
15
étapes.
Programmation
Simple
Suivez
les
instructions
suivantes
pour
programmer
votre
BARRACUDA
2:
a)
Appuyez
sur
le
bouton
PROGRAM
et
attendez
les
deux
“bips”
sonores.
Ces
bips
confirment
l’activation
de
la
fonction
de
programmation.
Le
témoin
LED
PROGRAM
clignotera
pour
confirmer
|’
activation
de
cette
fonction.
b)
Sélectionnez
le
bouton
a
programmer
(bouton
destination)
en
appuyant
sur
le
bouton;
le
témoin
s’arrétera
de
clignoter
et
restera
allumé.
Le
BARRACUDA
2
émettra
un
“bip”
pour
confirmer
que
le
bouton
a
été
acceptée.
.
20
This manual suits for next models
1
Table of contents
Languages:
