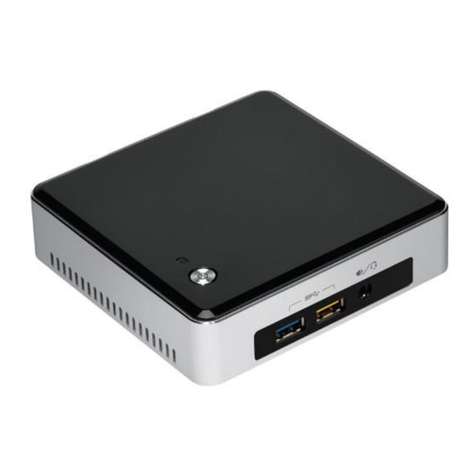
Internet Video & Imaging ViewCommander-Edge 3500 User manual

ViewCommander-Edge
3500 & 3700
Setup Guide
Download the Full
ViewCommander User Manual
From ViewCommander.com

ii
The information in this manual is subject to change without notice. Internet Video & Imaging, Inc.
assumes no responsibility or liability for any errors, inaccuracies, or omissions that may appear in this
manual.
Note: Some product features included in this manual may not be available in all
product versions.
Copyright © 2013-2019 Internet Video & Imaging, Inc. All Rights Reserved.
Part No. UMEDG-190125

iii
Table of Contents
Table of Contents.................................................................................................................................... iii
Connecting to ViewCommander-Edge for the First Time.....................................................................4
Power.....................................................................................................................................................4
Windows Logon......................................................................................................................................4
Monitor, Keyboard, and Mouse...........................................................................................................4
Network...............................................................................................................................................4
Configuring ViewCommander-Edge.......................................................................................................5
The Write Filter.......................................................................................................................................5
When to Use the Write Filter...............................................................................................................5
Configuring Your IP Address..................................................................................................................6
Configuring Wi-Fi....................................................................................................................................7
Bandwidth Management..........................................................................................................................8
Accessing ViewCommander-Edge Via the Internet ............................................................................ 10
Via Windows Remote Desktop (RDP)..................................................................................................11
Video Storage......................................................................................................................................... 13
Factory Reset......................................................................................................................................... 14
Accessing ViewCommander-Edge Remotely......................................................................................15

4
Connecting to ViewCommander-Edge for the First Time
Power
Power up the ViewCommander-Edge (the Edge) by first connecting the supplied 12
Volt power supply to the power connector in the back of the Edge unit. Then plug the
AC adapter into an AC outlet.
ViewCommander-Edge is configured to boot-up when power is supplied. This is useful
if the power should cycle while the Edge unit is deployed.
Windows Logon
To login to Windows, either connect a Monitor/Keyboard/Mouse to the Edge unit, or
connect the Edge unit to a network
Monitor, Keyboard, and Mouse
Simply connect a Monitor/Keyboard/Mouse to the Edge unit and log into it like a
desktop computer.
Network
Connect an Ethernet cable to the RJ45 jack in the back of the Edge unit to log
into it via Windows Remote Desktop. See Via Windows Remote Desktop (RDP)
on Page 11.
The Edge is shipped with a pre-configured IP address. Please see the
supplemental document that was shipped with your ViewCommander Edge for
specific network information and logon password information.

5
Configuring ViewCommander-Edge
The ViewCommander-Edge will need to be configured with your specific settings
before it is deployed. A Write Filter has been implemented on the Edge to ensure the
system starts in the same state every time.
The Write Filter
ViewCommander Edge uses a Write Filter to ensure system integrity. This causes all
changes made to the C: drive to be reset whenever the machine reboots. Whenever
you need to make a permanent change to your ViewCommander Edge system, we
recommend the following procedure:
1. Launch the ViewCommander Utility.
2. On the Write filter tab, click “Enter Maintenance Mode”
3. The computer will restart and boot into Maintenance Mode.
4. Make the changes you want to save.
5. Launch the ViewCommander Utility.
6. On the Write filter tab, click on “Enter Protected Mode”.
7. Your computer will reboot, and your changes will be saved.
When to Use the Write Filter in Maintenance Mode
Enter Maintenance Mode when making changes to Windows itself, such as your
Window’s password or IP Address.

6
DO NOT use Maintenance Mode to save changes to ViewCommander.
ViewCommander’s settings are saved to the D: drive, which is not Write Filter-
protected.
Configuring Your IP Address
To set the IP Address of your system:
•Right click on the ‘Network’ icon on the Windows Desktop and select
‘Properties’.
•Click ‘Change Adapter Settings’ in the left column.
•Right click on the ‘Bridge’ icon on and select ‘Properties’.
•Double click on “Internet Protocol Version 4 (TCP/IPv4)’
•Change the IP address settings as required.
This will be the internal address used by your router or modem for port forwarding. It is
recommended this setting not be modified via Remote Desktop, as you may be unable
to reconnect after any changes.

7
Configuring Wi-Fi
ViewCommander Edge can create its own Wi-Fi network, so that you can connect
locally without using a data plan. You can use the ViewCommander Utility to configure
this network as needed, on the Wi-Fi tab:
Enter a desired network name (SSID) and password, then check “Enable Wi-Fi” and
press Save. Note that changes to the SSID and Password need to be entered while
the Write Filter is in Maintenance Mode. Changes to the Enable Wi-Fi check box will
persist if set in Maintenance Mode or Protected Mode.
Once Wi-Fi is enabled, the Edge unit will have a local address of 192.168.137.1. This
address does not interfere with your normal network configuration.

8
Bandwidth Management
ViewCommander-Edge includes some built-in features to help manage bandwidth
use. In ViewCommander, under the Video tab for each camera, is an “Edge Settings”
button.
When “Restrict Client Bandwidth” is checked, ViewCommander will retransmit video at
a lower quality and framerate when accessed remotely. The framerate is controlled by
the “Max Frames per Second” box, while the quality and resolution are adjusted to
keep each frame under the size limit set by the “Max Kilobytes per Frame” box. Note
that while these options reduce bandwidth use, they are per-connection. Each
connection to the ViewCommander-Edge system will use as much bandwidth as it is
allowed; bandwidth is not divided amongst active connections.
The Schedule Access Times schedule prevents ViewCommander from transmitting
video at all outside of specified times. This is useful to prevent unauthorized use of
bandwidth.
The Image Scaling drop-down menu allows ViewCommander to recompress images
to a smaller resolution based on your desired image size. The scaling only takes place
when ViewCommander is accessed remotely, and the recordings on the
ViewCommander-Edge will not be scaled down.

9
The Web View settings allow ViewCommander to override the Outgoing Bandwidth
Settings under certain circumstances. If “Motion is detected” is checked,
ViewCommander will send a full-speed, high-quality stream whenever a motion event
is triggered. If “User requests acceleration” is selected, a “Turbo” button appears on
the Remote Web Access’ Live Video page which requests the high-quality stream in
15 second intervals.

10
Accessing ViewCommander-Edge Via the Internet
By default, ViewCommander Edge is set to use port 51080 for Remote Web Access.
You will need to configure your router to forward port 51080 to the ViewCommander
Edge device, after which you can access ViewCommander through any web browser.
ViewCommander-Edge has a few features in its web interface that the normal version
of ViewCommander does not. The Live Video page gains a “Turbo” button, which
allows users to temporarily speed up video if the ViewCommander-Edge is slowing it
to conserve bandwidth.
The System Settings page also gains an “Edge Settings” tab to allow remote
configuration of setting not present in the base version of ViewCommander.

11
These settings, also accessible in ViewCommander itself on the ViewCommander-
Edge, allow users to restrict bandwidth use, limit access times to the system itself, and
configure ViewCommander to transmit video at a higher framerate either when motion
is detected or on demand.
Via Windows Remote Desktop (RDP)
If you need to access the desktop of your ViewCommander Edge device, Windows
Remote Desktop (RDP) is preconfigured to use port 51389. We recommend using
Remote Desktop with the admin option, which is available by opening a command
prompt on your PC and entering “mstsc /admin”, and pressing enter.
Then enter your IP address into the RDP window:

12
And login when prompted.

13
Video Storage
ViewCommander-Edge is designed to save video to your external USB supplied hard
drive. These drives can either by HDD or SSD drives.
When you insert your new USB hard drive for the first time, you will need to use the
Write Filter to commit its drivers and drive letter, so that it will be the same whenever
the machine reboots. To manually assign a drive letter, open the start menu, right-click
on “Computer” and choose “Manage”.
In the Computer Management window, choose “Disk Management”, then right-click on
the USB Hard Drive and choose “Change Drive Letter and Paths…”

14
In the window that opens, press the “Change…” button, then chose a drive letter and
hit “OK”.
IMPORTANT: Use the Write Filter to commit your changes when you’re done. See
The Write Filter on page 5
Run ViewCommander, and make this the ‘default archive drive’in the System
Settings.
Factory Reset
To reset the ViewCommander-Edge unit back to its factory settings, connect a video
monitor and keyboard to the Edge and power up the device.
Click the restore option during the 5-second boot-up windows that displays before the
booting of Windows.
Wait a few seconds until you see the command prompt.
Type “restore” at the command prompt.
Type ‘exit’ when you see the command prompt again and wait for the Edge to reboot
and re-configure itself.
ViewCommander Edge will have the same settings (IP address, password, etc..) as
when it shipped.
ViewCommander specific settings should remain intact.

15
Accessing ViewCommander-Edge Remotely
This example illustrates how to remotely access ViewCommander-NVR located on a private network. This example can
also be applied to remotely accessing IP cameras located on private networks.
Remote Client –This is an application on the client computer (PC, laptop, mobile phone) such as a web browser. The
client in this example is a web browser used to connect to the NVR.
Router - Your router allows network traffic from the LAN to access data from a WAN (such as the Internet), and vice
versa. Your router has two IP addresses:
•The WAN IP Address (also called a public, Internet, or external IP address) is the IP address assigned to your
router by your Internet service provider (Cable modem, DSL, wireless card, etc...). Use this address when
connecting to the NVR from outside your LAN.
•The LAN IP Address (also called a private or internal IP address) is an IP address that only computers on your
Internal LAN can connect to.
NVR –In this example, the NVR is a software program on a computer in your local network you want to access from
outside your LAN.
In order for the Remote Client to connect to the NVR, the network traffic must pass through the Router. For security
reasons, most routers do not allow public traffic to pass through and connect to devices located on your private network.
To allow this, you must enable “Port Forwarding” on your router. Consult your router manual for instructions on how to
change the Port Forwarding settings (also called Network Address Translation or NAT).
When you enable Port Forwarding on the router, the router needs to know a few things:
•The port number to forward. This must match the listening port on the NVR. Port 80 is the default for web traffic.
(see ‘useful tips’ below)
•The IP address of the NVR. The IP address of the NVR should be a static IP address.
•Type of traffic (TCP and/or UDP). Choose TCP for most NVR’s and IP cameras.
Quick this steps:
1) Assign the NVR a static IP Address. (192.168.1.51 in this example)
2) Configure NVR to use any port number you choose. (Port 51080 in this example)
3) Log into the router and enable port forwarding. Forward the port number (from step 2) to the IP address of the
NVR (step 1)
4) Log into the router to determine the Public (WAN) IP address. You can also use sites like http://whatismyip.com
from the NVR PC.
5) If connecting from outside your local network, use the Public (WAN) IP Address and Port combination to access
your NVR. In this example enter : http://66.189.8.1:51080
6) If connecting from inside your local network, use the Private (LAN) IP Address and Port combination to access
your NVR. In this example enter : http://192.168.1.51:51080
Some useful tips:
•Port 51080 is the web port. You can use it, but be aware that some ISP’s block non-standard ports. Also, the
NVR may be picked up by search engines. Additionally, automated bots can attempt to break into your system.
Port values higher than 1024 are recommended.
•You should enable password protection for the NVR.
•If your Internet service provider does not assign you a static WAN IP address, you can use Dynamic DNS
services such as dyndns.org to monitor IP address changes. You can then use an easy name to access your
NVR, such as http://mynvr.dyndns.org:51080.
Public / Wide Area Network (WAN) Private/ Local Area Network (LAN)
Router
66.189.8.1 192.168.1.1
WAN IP (external) LAN IP (Internal)
Public IP Private IP
Forward port 51080 to 192.168.1.51
NVR
192.168.1.51
Static LAN IP address
Listening on port 51080
Remote Client
Web Browser
Connect to:
http://66.189.8.1:51080

16
For technical support, please visit:
ViewCommander.com/support
This manual suits for next models
1
Table of contents
Other Internet Video & Imaging DVR manuals
