InTouch ROSSMONT Waver Master WR-2CH User manual

1
OWNER'S MANUAL
Waver
TAKE CONTROL
Waver Master WR-2CH

2
ENGLISH
INTRODUCTION
Dear Customer, thank you for choosing this highend product, designed, assembled and
tested in Italy.
Waver is the new wireless controller for Rossmont aquarium equipment with the unique
capability to adjust in speed synchronous motors powered at Mains voltage.
With the new app Rossmont inTouch (free download on Google Play / Apple Store)
reefers can live a real reef simulation experience.
With the aim of continuous improvements, Rossmont R&D Dept will continue to develop
new rmware version.
Keep your app always up to date and follow us on our socials to get the latest news.
If you enjoyed with the app, we invite you to leave us a positive feedback. 5 star
feedbacks help us growing and give you better products day by day.
For any doubt or information, we invite you to contact our customer service RCS
We ask you to read the following instructions to appreciate the product in all its potential.
A copy of this manual is included under HELP section within the app or it’s freely
downloadable from our website www.rossmont.com under
SUPPORT -> DOWNLOAD area section.
DATA LABEL INFORMATIONS
A. Model name
B. Product code
C. Input voltage (must correspond to your Mains voltage)
D. Rated Output voltage (must correspond to the connected device)
E. Max total load (maximum power absorption sum of applicable devices)
F. Product Serial ID

3
PRODUCT SAFETY GUIDE
• IMPORTANT: Prior to any operation you must verify the integrity of all parts of the
product, especially the cords and plug/sockets.
• To prevent any accidental electric shock, make sure the product is positioned in a
safe and dry place, protected from water, humidity, calcium and/or salt deposits.
• Before using this product, check the data label on the bottom of the product and
verify that the operating voltage corresponds to your Mains voltage.
• The product is intended for internal use only.
• Do not install near any heat sources such as radiators, heat register, stoves, or other
apparatus that produces heat.
• It’s possible to use the device at a temperature not higher than 35°C/95°F
• This device is compatible with Rossmont products only.
• This device is intended for use as an aquarium equipment only.
• Do not connect any device which is not specically intended for use with Waver
otherwise the warranty is voided.
• Do not attempt to power another Waver unit connecting it to the product cord
extensions sockets.
• Clean only with dry cloth.
• Unplug any electrical appliance connected to your aquarium before putting your
hands in water.
• It’s strongly recommended the wall socket is positioned at a higher level than the
tank to prevent the risk of water damages to electrical system. If this is not possible,
verify the lowest part of the cable is lower than the wall socket position: DRIP LOOP.
• In case the plug/socket were wet, please disconnect the general switch.
• Do not lift the product by the cord. Disconnect and connect the unit only by
grasping the plug.
• It’s necessary to power the product through a residual current
circuit-breaker system with a rated current not exceeding 30mA.
• Do not connect the appliance if the power cord or one of the
extension cables is frayed or damaged. In this case it’s necessary
to replace the entire unit without trying to repair it.
• The product is not intended for use by people with reduced
sensory, physical or mental, unless they are close supervised
and instructed by a person responsible for their safety.
• The controller is not a toy: do not allow children to play with it
• This guide will give you instructions for Waver device only. For Mover pumps or any
other Rossmont product please refer to the dedicated instruction manual
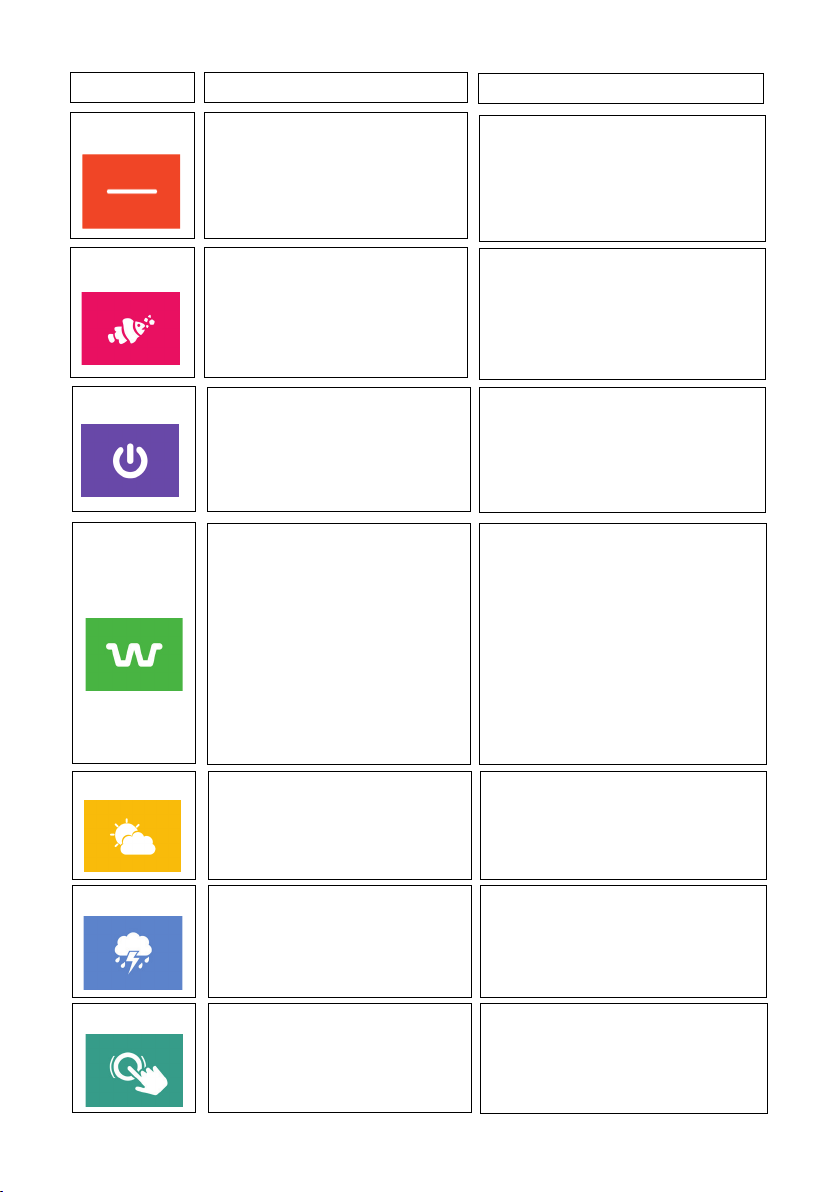
• ATTENTION: MAX 1 device per Channel

4
MAINTENANCE
The product doesn’t require any particular maintenance but it’s important to keep
surfaces clean
especially from humidity or dust deposits which could inuence the correct operation of
the
capacitive touch button.
To keep the surfaces clean, it’s enough to pass a soft dry cloth.
Do not use any kind of solvent or abrasive paper.
It’s recommended to clean the surface/environment where the product is positioned.
Do noy use the protection grid on the MX Models pumps with Waver
PARTS DESCRIPTION
NOTE: to hard reset the Waver, tap and hold the touch button for 15 seconds, or via App
under : WAVER MENU - > SETTINGS - > FACTORY RESET
FRONT
A. Capacitive touch button
B. White LED
C. Channels Blue LEDs
D. Power supply cable
E. Extension cables with
socket
REAR
F. 4x Service screws
(Warning: DO NOT try to open or
it voids warranty!)
G. Device data label
H. 4x holes for mounting screw

5
1. Plug the Waver power cord into wall socket
2. Initially white LED rests xed for 5 sec and after the system does an auto-checkup
and the 3 LEDs will pulse. Wait until the white central LED is stable.
3. Download “Rossmont inTouch” App on Google Play or App Store
4. Open the app and click on “CREATE NEW AQUARIUM”
5. Select “SETTINGS” to check the list of available WiFi networks
6. Connect to Waver’s WiFi network (“Rossmont 10###...”)
IMPORTANT (for Android device only): Starting from Android 6 in some devices a pop-up
windows appears saying that WiFi has no internet access. Conrm it to stay connected to
Waver’s network or it won’t be possible to proceed.
7. Go back to the App and click on “NEXT”
NOTE: The application checks the rmware installed in the Waver. If the Waver has an
old WEB APP rmware, the app performs automatically the migration. The update is not
performed by clicking on “ACCESS EXISTING AQUARIUM”
8. Click on “GO TO HOME”
9. Assign a name to the Aquarium and click on “NEXT”. You can customize the home
background by taking a picture or by choosing an image from your own gallery.
NOTE: the picture will be not saved in the Waver but only in the device. When you access
from another device you can set a new background or leave the factory one
10. It’s possible to customize Username and Password, otherwise click on “SKIP”
NOTE: by factory default Username: rossmont Password: waver
11. Allow Rossmont inTouch to access the device location (GPS)
12. After that you can set your Waver in Infrastructure mode, otherwise click on “SKIP”.
NOTE: Infastructure mode allows you to include your Waver into your WiFi network and
then be able to control it while connected to your network (see section: Infrastructure
mode)
Once you’ ve completed the login procedure the main screen will appear.
FIRST SETUP – Create new aquarium

6
NOTE: In case of migration from the previous WEB APP to the new application rmware,
the old software will no longer be reachable.
All data in the Waver will be reset. You need to CREATE A NEW AQUARIUM.
Click on ACCESS EXISTING AQUARIUM only if:
- you have already created an aquarium and you want access to the Waver with a
different or multiple tablet/ smartphone
- app has been deleted
- aquarium has been deleted from device
ACCESS EXISTING AQUARIUM
1. Click on “ACCESS EXISTING AQUARIUM”
2. Choose Waver connection mode (direct access or infrastructure mode)
1. Click on “SETTINGS” to connect to
Waver’s WiFi network
2. Return to the App and click on
“NEXT”
3. Enter Username and Password
previously customized. Default
conguration Username: rossmont
Password: waver
4. Click on “CONNECT”
5. You can set your Waver into
Infrastructure mode, otherwise click
on “SKIP”
MANUAL
AUTOMATIC
DIRECT ACCESS
1. Click on “SETTINGS” to connect to
own home WiFi network
2. Return to the App and click on
“NEXT”
3. Choose Waver connection mode
(manual or automatic)
INFRASTRUCTURE MODE
1. Enter the IP address assigned to the
Waver for infrastructure mode
2. Enter Username and Password
previously customized. Default
conguration Username: rossmont
Password: waver
3. Click on “CONNECT”
1. Click on “SCAN”
2. Select the aquarium name you
want to connect from the list of
available aquariums
3. Enter Username and Password.
Default conguration Username:
rossmont Password: waver

7
ADD A NEW DEVICE
To add a new Rossmont device:
1. Select WAVER MENU in the bottom bar
2. Click on “SETUP” and click on CH1 channel icon
3. Choose the proper icon and model of device plugged into Waver’s corresponding
channel.
IMPORTANT: don’t select a different model than the one actually connected.
4. Assign a description and customize the graph colour (optional) which will help you to
recognize the product in case of multiple devices connected.
5. Click on “ADD DEVICE”
6. Repeat same operations for channel CH2 if there’s one
NOTE: you can customize the description and the colour in any moment by clicking on
“MANAGE” icon
To delete the device click on “MANAGE” and select “DELETE”
ADD A ROSSMONT RISER DEVICE
1. Choose Riser connection mode: Sump mode or Surface mode.
2. With Sump mode set the minimum power % for own Riser pump (calibration
function). Neither point on chart nor preset can be set below this level.
NOTE: Calibration function allows you to set the minimum ow rate for your aquarium.
You can quickly get into feeding mode keeping your pump in continuous operation, in
this way food intake is reduced into the sump and there isn’t any air insertion in the main
tank.
3. Click on “SAVE”.

8
NOTE: when adding a new device, that works at maximum power for 5 seconds, then the
speed is automatically set at 20% stable power.
To schedule your pumps during the day click on “GRAPH” (in the bottom bar).
The vertical axis shows the relative % of the speed of the pumps while the horizontal axis
shows the
time of the day.
The program is automatically repeated every day.
The vertical red line show the current time.
You can enlarge the chart by clicking on the “HIDE” icon above it.
Each device is indipendent and you can see its own graph selecting the product’s icon
(on the right of the graph).
To set the power of the pump during the day you can simply create a curve adding points
or using preset or by combination of both things (hybrid system).

9
To add a point “double tap” the chart.
To edit a point hold it down and drag it.
To delete the point “double tap” on it.
You can add maxiumum 20 points per device.
Once completed operations on the graph, click on “SAVE” (top left) to apply the
program.
You can show on/off the graph curve of the other device by clicking on the eye icon.
The ZOOM icon (above the chart) allow you to operate in a shorter time period
of the chart. If the zoom is in ON mode you can zoom in or out any area of the graph.
Return to zoom OFF mode to edit points.
To reset the channel curve select it and click on “RESET” icon above the graph
NOTE: the minimum speed (%) that can be assigned is 1%.
To turn off a single channel:
• Apply a preset OFF (see PRESET section)
• With REAL TIME button (in the HOME) by sliding the green bar under the channel you
want to turn off.
PRESET
Presets are conceived to bypass the curve of the graph without the need to edit the
points.
Each preset has its own function and congurable parameters and it can be added, edit
or deleted in any
moment.
All presets are adjustable in duration by setting the START TIME and the END TIME
You can add maxiumum 10 preset per channel.
The table below shows the 7 different presets:

10
FIXED
The pump is operated at a stable
speed POWER: pump speed %
PRESET DESCRIPTION ADJUSTABLE PARAMETERS
FISH MODE Speed is set to minimum power.
Mover: 1%
Riser: minimum power is set by
calibration.
-
OFF
RANDOM
The channel is totally switched off.
At the end of preset the pump will
be operated at maximum power
for a few seconds then it follows the
graph
Automatic transitions from MIN to
MAX with random durations from 10
sec to 10 minutes. It simulates the
weather change process.
-
% MIN: pump speed % at minimum
% MAX: pump speed % at maximum
CYCLE
STORMY
TAP WAVE
Loop alternations from min to max
power. Minimum pulse duration:
0,2 sec.
Automatic transitions from MIN to
MAX with random durations from
0,5 sec to 10 sec. It simulates the
high water movement during a
storm.
Wave creation in real time by tap
the screen to dene the rhythm of
the pulse.
% MIN: pump speed % at minimum
% MAX: pump speed % at maximum
1/100 sec: values from 0,01 sec to 1,00
sec
1 sec: values from 1 to 100 sec
x10 sec: values from 10 to 1000 sec
T MIN (sec): duration in seconds for
stable speed at MIN level
T MAX (sec): duration in seconds for
stable speed at MAX level
T RISE (sec): transition time in seconds
to pass from MIN to MAX
T FALL (sec): transition time in seconds
to pass from MAX to MIN
% MIN: pump speed % at minimum
% MAX: pump speed % at maximum
% MIN: pump speed % at minimum
% MAX: pump speed % at maximum

11
ADD A PRESET
1. Click on “CHART” (in the bottom bar) then click on “PRESET” (top right)
2. Choose preset type.
3. Setup the start time and the end time
4. Adjust parameter (accordingly to the chosen preset)
5. Select the device
NOTE: Presets can be assigned to more than one pump simultaneously by agging the
box of the corresponding name.
Some presets can also operate inverted (in case of presets assigned to more than one
channel): by agging “INVERTED” box, the selected pump will work opposed to the other
one.
6. Once the customization of a preset is completed, click on “SAVE” button to apply it
on the graph.
Active presets are shown in the chart by columns with the same colour of the preset, in
the selected time of the day.
To edit a preset click on the coloured preset bar in the graph or click on “MANAGE
ACTIVE PRESETS” (in the preset list).
Once customization is completed click on “SAVE”.
To delete a preset, go to “MANAGE ACTIVE PRESETS” (in the preset list) and then click on
bin icon.

12
EXAMPLE
Add a CYCLE preset to create different wave effect.
• Click on CHART -> PRESET
• Select CYCLE preset
• Set start time: 12:00
end time: 15:30
Min: 1%
Max: 100%
set value between 1/100 sec
Tmin (0,06 sec)
Tmax (0,06 sec)
Trise (0,25 sec)
Tfall (0,25 sec)
NOTE: These values change accordingly
to the desidered wave effect.
(You can see some examples in our
YouTube channel).
• Select the pump(s) on wich
you want to apply the preset
and click on SAVE
• Select INVERTED to one
channel if you want to it works
inverted
Some tips to create waves:
- The higher is the MIN% - MAX%
difference (es.1% - 100%) the better is the
wave effect
- TRISE e TFALL (0,10 sec is the minumum
value). We would suggest you to don’t
set a value lower than 0,25 sec
NOTE: These values change accordingly
to the length of the tank and pump
model.

13
Main screen with chart and quick commands.
QUICK COMMANDS
In the main screen you can nd 6 icons which allow you to quickly access to some
features
TEST MODE
VOICE
COMMANDS
REAL TIME
FEED MODE
MAX POWER
OFF
This mode lets you check whether the pumps have
been set as you desired.
By clicking this button the whole 24h program will be
reproduced in 5 minutes.
After this period the unit automatically follows the
program.
This icon allows you to check the power % of your
device in real time and to turn on/off a single channel.
NOTE: The real time function doesn’t show the active
preset but it refers only to the graph.
It sets all connected devices to the minimum power
(1%) .
NOTE: this function has a standard duration of 5
minutes, then the unit automatically continues the
program.
It sets all connected devices to the maxiumum power
(100%).
It turns off all connected devices.
This function allows you to interact with your Waver
using your voice.
See VOICE COMMANDS section

14
IMPORTANT: to activate this function you must authorize app to access to smartphone/
tablet microphone.
NOTE for Android devices: you must previously enable Google voice search and
language must be available ofine to be used in direct mode.
1. Click on VOICE COMMANDS icon
2. Wait for the recording pop-up and say one of the following commands:
To apply a voice command to a single channel, say the name of channel followed by
the desired command.
Eg. Channel 1 max power / Channel 2 at 40% / Channel 1 off
MAX POWER FISH FOOD
OFF FIXED ##% (e.g. xed 20%)
SETUP: add, delete or edit devices.
SETTINGS: update rmware, update rmware WiFi, reset Waver to the factory default
VOICE COMMANDS

15
1. Click on WAVER MENU -> SETTINGS
-> UPDATE FIRMWARE
2. With application open, minimize the
app and manually disconnect from
Waver’s network to connect to any
network with internet access (home
wi or mobile network)
3. Return to the application maximizing
it, click on CHECK FOR UPDATES to
check for the latest available FW. It
will be shown above.
4. Click on DOWNLOAD LATEST
FIRMWARE to download the
rmware le in your device.
5. Reconnect to Waver’s WiFi network
and click on UPLOAD FIRMWARE TO
WAVER to install the update le.
6. The Firmware update will
automatically start
NOTE: with Apple devices, once the
update bar is completed click on START
UPDATE
IMPORTANT: after this step all the LEDs
will turn off for approx 2 min, after that
all the LEDs switch ON for a similar time.
Now the rmware is ashing the internal
memory. During the update don’t
unplug the Waver and wait with the
loading page open.
7. Waver will reboot. Wait until the
white LED stay ON and stable or until
the program starts again.
8. Manually disconnect from Waver’s
WiFi network then reconnect to it.
DEVICE CONNECTED IN DIRECT MODE
FIRMWARE UPDATE
This updates the internal ash memory of device.
The rmware contains all the hardware instructions and it’s important to keep this
updated with the latest version approved by Rossmont.
New rmware versions could contain improvements for existing products, bug xes, and/
or the required informations to drive new Rossmont devices.
We suggest to make a data backup before this update using import/export function. (see
IMPORT/EXPORT section).
NOTE: the update takes approx 3-4 min
1. Click on WAVER MENU -> SETTINGS
-> UPDATE FIRMWARE
2. Click on CHECK FOR UPDATES to
check the latest available FW. It will
be shown above.
3. Click on DOWNLOAD LATEST
FIRMWARE to download the
rmware le in your device.
4. Click on UPLOAD FIRMWARE TO
WAVER to install the update le.
5. The Firmware will automatically start
updating.
NOTA: con dispositivi Apple una volta
completata la barra di caricamento
cliccare su START UPDATE
IMPORTANT: after this step all the LEDs
will switch off for approx 2 min, after that
all the LEDs switch ON for a similar time.
Now the rmware is ashing the internal
memory. During the update don’t
unplug the Waver and wait with the
loading page open.
6. Waver will reboot. Wait until the
white LED stays ON and stable or
until the program restarts.
DEVICE CONNECTED IN INFRASTRUCTURE
MODE

16
1. Click on WAVER MENU -> SETTINGS
-> UPDATE Wi FIRMWARE
2. With application open, minimize the
app and manually disconnect from
Waver’s network to connect to any
network with internet access (home
wi or mobile network)
3. 3. Open app maximizing it and click
on CHECK FOR UPDATES to check
the latest WiFi FW available.
4. Click on DOWNLOAD LATEST
FIRMWARE to download the
rmware le in your device.
5. Reconnect to the Waver’s WiFi
network and click on UPLOAD
FIRMWARE TO WAVER to install the
update le.
IMPORTANT: During the update don’t
unpug the Waver and wait with the
loading page open.
6. Wait until the white LED stays ON
and stable or until the program
restarts
7. Manually disconnect from Waver’s
WiFi network then reconnect to it.
DEVICE CONNECTED IN DIRECT MODE
FIRMWARE WIFI UPDATE
This updates the WiFi module of the device.
NOTE: with Apple devices you have to include Waver in infrastructure mode or it won’t be
possible to update.
NOTA: the update takes approx 3-4 min
With this update custom settings are maintained.
1. Click on WAVER MENU -> SETTINGS
-> UPDATE FIRMWARE WIFI
2. Click on CHECK FOR UPDATES to
check the latest available FW WiFi
3. Click on DOWNLOAD LATEST
FIRMWARE to download the
rmware le in your device.
4. Click on UPLOAD FIRMWARE TO
WAVER to install the update le.
IMPORTANT: During the update don’t
unplug the Waver and wait with the
loading page open.
5. Wait until the white LED stays ON
and stable or until the program
restarts.
DEVICE CONNECTED IN INFRASTRUCTURE
MODE
FACTORY DEFAULT CONFIGURATION (Hard Reset)
It resets the unit to factory default conguration.
All data in Waver will be reset including the aquarium name.
If the Waver was setted in infrastructure mode, it will be reset to the direct connection.
The name of the Waver’s Wi will appear again on the available Wi networks.
User and password are reset to:
Username: rossmont
Password: waver

17
It lets access to Waver settings.
It’s a direct WiFi connection between the Waver unit and Smartphone/Tablet .
To access to the Waver you have to connect to the Waver’s WiFi network.
(Rossmont10###..)
DIRECT ACCESS
The Waver unit isa included into home network (WiFi router required)
It allows to connect to the Waver while staying connected to own home network.
NOTE: The infrastructure mode lets you include several units of Waver in your Home
network.
INFRASTRUCTURE MODE
DIRECT ACCESS/INFRASTRUCTURE MODE
It allows to choose the Waver connection mode.

18
1. Click on SETUP (on the bottom) and
click on direct access/ infrastructure.
2. Choose infrastructure mode
3. Choose AUTOMATIC MODE
4. Select the home network from the
list of the networks available and
type the password.
With Apple devices type the name of
home network (SSID), and the security
type (usually WPA/ WPA2)
5. Connect to your home network
6. Go back to the App and click on
SCAN
Access to your aquarium
NOTE: The infrastructure mode lets you
include multiple units of Waver in your
home network.
To add more then one Waver in
infrastructure mode follow the previous
istructions and add a new aquarium
AUTOMATIC MODE
SET UP WAVER IN INFRASTRUCTURE MODE
1. Check the CLASS ID of your home
network (usually 0,1 or 2) on the
advanced settings of the network.
E.g. Modem IP = 192.168.0.1, where
0 is the class ID of the modem.
2. Connect to Waver’s wi
3. Open the App and select SETUP (on
the bottom)
4. Click on DIRECT ACCESS/
INFRASTRUCTURE and choose
INFRASTRUCTURE MODE.
5. Choose MANUAL MODE
6. Select your home network from the
list of the available networks and
type the password.
With Apple devices type the name of
home network (SSID), the security type
(usually WPA/WPA2)
7. On the IP address of the Waver
replace the 9 with the class ID of the
router/ modem previously checked
E.g. Modem IP = 192.168.0.1, Waver IP =
192.168.0.75
8. Click ENABLE INFRASTRUCTURE
MODE and minimize the app.
9. Connect your smartphone/ tablet to
your home network
10. Open the App and select your
aquarium
NOTE: The infrastructure mode lets you
include multiple units of Waver in your
home network.
To add multiple units of Waver in
infrastructure mode, in addition to
class ID (9) it’s necessary to edit the last
number group (75 by default) that must
be different for each unit in the network.
E.g. Modem IP = 192.168.1.1
Waver 1 = 192.168.1.75
Waver 2 = 192.168.1.83
Waver 3 = 192.168.1.102
MANUAL MODE

19
IMPORT/EXPORT THE GRAPH
It allows to save a copy of your settings, import them on another device or sharing them
with anyone
NOTE: with Android devices backup will be stored into your Google Drive account, while
with Apple devices into iCloud account
To export the graph:
1. Select SETUP (on the bottom)
2. Select IMPORT/EXPORT
With Android device, on the rst export, choose the account where you want to save the
le.
3. Click on EXPORT
Only for Android device: it’s possible to custom the name of the le and the choose the
destination folder
4. Then click on SAVE
To import a graph:
1. Select SETUP (on the bottom)
2. Select IMPORT/EXPORT
3. Click on IMPORT
4. Select the le and IMPORT
DELETE AQUARIUM
This function deletes an aquarium via App but it won’t delete any le inside Waver
storage.
You can delete the aquarium either from section MY AQUARIUMS, by holding for a
sec the icon of your aquarium then a pop-up will appear asking whether to delete the
aquarium.
To reacquire aquarium data, when you open the app click on ACCESS EXISTING
AQUARIUM
VERSION CONTROL
It lets you see which app, rmware and Wi version are installed on the Waver.
The App Rossmont inTouch lets you manage multiple devices with just one interface.
By clicking on MY AQUARIUMS on the HOME page it’s possible to see all the Wavers
installed.
To add a new Waver click on the icon + on the bottom right.
NOTE: If you access to Waver by another tablet/ smartphone, click on ACCESS EXISTING
AQUARIUM and choose the type of connection set on the Waver (direct access or
infrastructure)

20
The Waver unit has a buit-in safe touch button for some operations. By tapping and
holding it, the white LED on the center of the unit ashes every second.
NOTE: It’s important to keep the area of the button clean from dust or humidity which
could compromise the correct button responsiveness.
IMPORTANT: don’t use the touch button if the surface is humid or if your hands are wet,
that could cause a false-record on the touch bringing Waver to auto reset.
Touch button functions:
2 sec FEED MODE
It brings all the connected pumps at minimum
level for the feeding operation. It’s set for a
standard duration of 5 minutes then the unit
automatically goes back to program. To
manually quit this mode tap & hold again the
touch button for 1 second.
TAP & HOLD TIME FUNCTION DESCRIPTION
6 sec OFF
It’s conceived for pumps maintenance.
It turns off the output current on channels
without shutting down the whole unit. While
this function is active it’s possible to unplug the
connected devices from the extension cables.
15 sec HARD RESET It resets the unit to factory default.
All data in the Waver will be reset.
QUICK
HARD RESET It resets the unit to factory default conguration.
All data in the Waver will be reset.
1 sec in the rst 5
sec after plug the
Waver power cord
into wall socket.
TOUCH BUTTON
Table of contents
Languages:
Popular Controllers manuals by other brands

Panasonic
Panasonic FP2 Series Technical manual

Sollae Systems
Sollae Systems CIE-M10A user manual

Topcon
Topcon FC-2500 Quick reference guide

nVent RAYCHEM
nVent RAYCHEM HWAT-ECO V5 Installation, operation and maintenance manual

MT-Propeller
MT-Propeller ATA 61-07-60 Operation and installation manual

Gude
Gude Expert Net Control 2304 manual