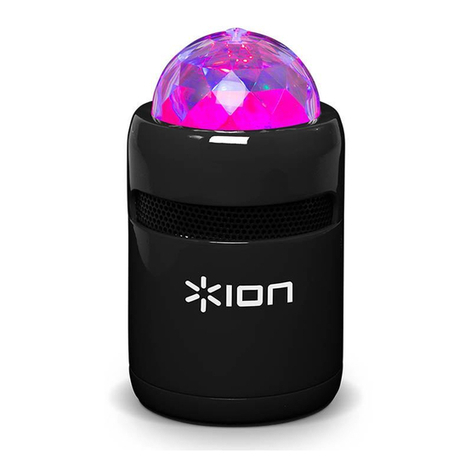
ION Holiday Party Plus User manual

Holiday Party Plus
Quickstart Guide English ( 3 – 9 )
Guía de inicio rápido Español ( 10 – 17 )
Guide d’utilisation rapide Français ( 18 – 25 )
Guida rapida Italiano ( 26 – 33 )
Schnellstart-Anleitung Deutsch ( 34 – 41 )
Snelstartgids Nederlands ( 42 – 49 )

2

3
Quickstart Guide (English)
Introduction
Make sure all items listed in the Box Contents are included in the box.
Box Contents
Holiday Party Plus
Flat Surface Stand
Remote Control
Light Limiting Ring
Quickstart Guide
Safety & Warranty Manual
Support
For the latest information about this product (documentation, technical specifications, system
requirements, compatibility information, etc.) and product registration, visit ionaudio.com.
For additional product support, visit ionaudio.com/support.

4
Safety Instructions
•Not recommended for set-up or installation by children. As with all electrical products,
exercise caution during handling and use to reduce the risk of electric shock. If the
power cord is damaged, it must be replaced by the manufacturer, its service agent or
similarly qualified persons in order to avoid a hazard.
•Do not secure the wiring of the product with staples or nails, and do not place the wiring
on sharp hooks or nails.
•Do not place or immerse in water or other liquids. Not for use in heavy rain.
•The light is very bright. Do not look directly into the dome light.
•Do not sit, stand, or apply pressure on the dome light.
•Place the power cord away from driveways or walkways to prevent tripping and damage
to the power cord.
•It is safe to operate the unit in snow and rain.
•If using this product in wet environments, we strongly recommend using Ground Fault
Circuit Interrupter (GFCI) protection on the circuit(s) or outlet(s).
•Remove Holiday Party Plus from the lawn before mowing or weedwhacking.
•Never operate this product if it has a damaged cord or plug, if it is not working properly,
if it has been dropped or damaged, or if it has been dropped into water. Contact ION
Audio to return the product to a service center for examination and repair.
•Do not close doors or windows on the power cord as this may damage the wire
insulation.
•Do not shake.
•Keep the light and power cord away from heaters or other heat sources.
Correct Disposal of This Product: This marking indicates that this product
should not be disposed with other household wastes throughout the EU. To
prevent possible harm to the environment or human health from uncontrolled
waste disposal, recycle it responsibly to promote the sustainable reuse of
material resources. To return your used device, please use the return and
collection systems or contact the retailer where the product was purchased. They
can take this product for environmentally safe recycling.

5
Quick Setup
1. For optimal coverage, place the light at 15 feet from the distance you are trying to
illuminate. This will provide coverage for an area 80’ (24.4 m) wide by 50' (15.2 m) high.
2. Grasp the stake to insert Holiday Party Plus into the ground. Alternatively, if using
Holiday Party Plus on a flat surface, unscrew the thumbscrew to remove the stake, and
attach the stand in its place.
3. Connect the power cord into a standard wall socket or extension cord rated for outdoor
use. Unplug when not in use.
4. Turn the thumbscrew to loosen, angle the fixture either up or down, and tighten the
thumbscrew at the desired projection angle/area. If the lights are spilling onto a
neighboring house or structure, try placing the light closer to the object you want to
illuminate.
5. Press and release the Power button on the top of Holiday Party Plus to power on. Press
and hold the Power button for 2 seconds to power off.
Note: In the event the remote control is lost, the Power button allows for cycling through the
light modes by quickly pressing and releasing the Power button. However, individual color
selection must be performed with the remote control.
Note: The darker the area the light is being used in, the brighter the projection. Try to stay
away from areas with street lights and other bright lights.

6
Features
1. Remote Control Sensor: Aim the remote
control here to adjust the options.
2. Thumbscrew: Loosen and tighten this at
the angle you want the light to be
projected.
Note: Attach the included Light Limiting
Ring to reduce the overall spread of the
lights.
3. Stake: Place this into the ground to secure
Holiday Party Plus.
4. Flat Surface Stand: Attach this by
unscrewing the thumbscrew, remove the
stake, and replace the stake with the stand.
5. Dome: This projects the different colored
lights.
6. Power Button: Press and release to power
on. Press and hold for 2 seconds to power
off. In the event the remote control is lost,
the Power button allows for cycling through
the light modes by quickly pressing and
releasing the Power button. However,
individual color selection must be
performed with the remote control.
7. Light Limiting Ring: Align the groove on
the ring with the sensor and snap in place
using some force. This will limit the overall
coverage of the lights up to 30%, useful for
preventing light from spilling onto a
neighbor’s house.
5
1
3
6
2
7

7
Remote Control
Use the remote control to start/stop the motor, set the light timer, select individual colors, and
power the unit on/off. Point the remote control at the front sensor on the dome light and press
the button of the option you would like to select. See the diagram for button descriptions.
Note: Before using the remote control for the first time, pull out the tab attached to the battery
compartment. To change the remote control battery, follow the diagram located on the back of
the remote control. Use a 3V DC CR2025 lithium button cell battery for replacement.
•ALL ON/OFF = Switches the colors on or off.
•R On/Off = Switches the red color on or off.
•G On/Off = Switches the green color on or off.
•B On/Off = Switches the blue color on or off.
•W On/Off = Switches the white color on or off.
•P On/Off = Switches the purple color on or off.
•O On/Off = Switches the orange color on or off.
•R Only = Switches only the red color on.
•G Only = Switches only the green color on.
•B Only = Switches only the blue color on.
•W Only = Switches only the white color on.
•P Only = Switches only the purple color on.
•O Only = Switches only the orange color on.
•Still = See the Light Modes section for Mode details.
•Fades = See the Light Modes section for Mode details.
•Flash = See the Light Modes section for Mode details.
•Spin = See the Light Modes section for Mode details.
•Show = See the Light Modes section for Mode details.
•Timer = Selects how long the lights will stay on (2, 4, 6, 8
hours or always on). The lights will also turn back on at the
same time each day (24 hour timer).
•Power On/Off = Puts the unit to sleep (all lights and motor are
off).
W
W

8
Light Modes
Select from one of the light modes using the remote control. Individual color buttons can be de-selected to
have only the colors you want displayed without interrupting the mode.
Still: When Holiday Party Plus is first turned on, it will default to Still. In this mode, all 6 colors are on, and the
lights are static (no motion). At any time, a color can be selected to toggle that color on or off. Pressing All Off
will turn all colors off. Then, select which colors you wish to illuminate.
Fades: Press this button to create fading effects at various speeds. Press this button repeatedly to cycle
through the following different speeds:
•Slow Fade: The colors fade in a sequence slowly from one color to the next. At any time, individual
colors can be toggled on or off.
•Medium Fade: The colors fade in a sequence slowly from one color to the next with a transition time
of 2-3 seconds. At any time, individual colors can be toggled on or off.
•Fast Fade: The colors fade in a sequence quickly from one color to the next with a transition time of
1-2 seconds. At any time, individual colors can be toggled on or off.
•Very Fast Fade: The colors fade in a sequence quickly from one color to the next with a transition
time of 0.5-1 second. At any time, individual colors can be toggled on or off.
Flash: Press this button to create flash effects at various speeds. Press this button repeatedly to cycle through
the following different speeds:
•Slow Flash: The lights will blink on and off for 3 seconds, then switch to a new color combination
abruptly. At any time, individual colors can be toggled on or off.
•Medium Flash: The lights will blink on and off for 1.5 seconds, then switch to a new color
combination abruptly. At any time, individual colors can be toggled on or off.
•Fast Flash: The lights will blink on and off for 0.5 seconds, then switch to a new color combination
abruptly. At any time, individual colors can be toggled on or off.
•Ultra Fast Flash: The lights will blink on and off for 0.1 seconds, then switch to a new color
combination abruptly. At any time, individual colors can be toggled on or off.
Spin (Motion): When this button is pressed, the motor will turn ON/OFF.
Show Mode (Random): This mode will cycle through the various modes described above at various speeds.
9
Appendix (English)
Technical Specification
Specifications are subject to change without notice.
Trademarks & Licenses
ION Audio is a trademark of ION Audio, LLC, registered in the U.S. and other countries. All other product names,
company names, trademarks, or trade names are those of their respective owners.
Dimensions
(Depth x Width x Height)
4.9” x 7.4” x 11.9”
124 mm x 189 mm x 301 mm
Weight 2.6 lbs.
1.2 kg
Power 100-240V~50/60Hz 20W 350mA
Remote Control Batter
y
3V DC CR2025 lithium button cell battery
Remote Control Range 32 feet
10 m
Operating Temperature Range -4°F – 113°F (-20°C – 45°C)
Water Resistance Class IPX4
LEDs (9) 3-watt LEDs (2 red, 2 green, 2 white, 1 blue, 1 orange, 1 purple)
LED Coverage Area Up to 4000 sq. ft. from 15 ft. distance (80 x 50 ft.)
Up to 372 sq. m from 4.6 m distance (24.4 x 15.2 m)

10
Guía de inicio rápido (Español)
Introducción
Asegúrese de que todos los artículos indicados en Contenido de la caja estén incluidos en
ella.
Contenido de la caja
Holiday Party Plus
Soporte para superficies planas
Control remoto
Anillo limitador de luz
Guía de inicio rápido
Manual sobre la seguridad y garantía
Soporte
Para obtener la información más reciente acerca de este producto (documentación,
especificaciones técnicas, requisitos de sistema, información de compatibilidad, etc.) y
registrarlo, visite ionaudio.com.
Para obtener soporte adicional del producto, visite ionaudio.com/support.

11
Instrucciones de seguridad
•No se recomienda que sea instalada por niños. Al igual que con todos los productos eléctricos,
tenga cuidado al manipularla y utilizarla para reducir el riesgo de descarga eléctrica. Si el cable
de corriente se daña, debe ser reemplazado por el fabricante, su agente de servicio o persona
calificada similar a fin de evitar riesgos.
•No sujete el cableado del producto con grapas o clavos y no lo coloque sobre ganchos filosos
o clavos.
•No lo coloque ni sumerja en agua u otros líquidos. No lo use bajo la lluvia intensa.
•La luz es muy brillante No mire directamente a la luz del domo.
•No se siente, pare o aplique presión sobre la luz del domo.
•Aleje el cable de corriente de veredas y accesos vehiculares para evitar los tropiezos y los
daños al cable de corriente.
•Es seguro operar la unidad bajo la nieve y lluvia.
•Si utiliza este producto en ambientes húmedos, le recomendamos enfáticamente contar con la
protección de un disyuntor diferencial (GFCI) en el/los circuito(s) o toma(s) de corriente.
•Quite la Holiday Party Plus del pasto antes de cortarlo o podarlo.
•Nunca opere este producto si tiene un cable o enchufe dañado, si no está funcionando
correctamente o si se ha caído o dañado, o si se lo ha dejado caer en el agua. Contáctese con
ION Audio para retornar el producto un centro de servicio con fines de examinación y
reparación.
•No cierre las puertas o ventanas si los atraviesa el cable de corriente ya que esto puede dañar
el aislamiento del cable.
•No lo sacuda.
•Mantenga la luz y el cable de corriente alejados de calefactores u otras fuentes de calor.
Disposición final correcta de este producto: Esta marca indica que ese producto no
debe desecharse junto con otros desperdicios domésticos en toda la Unión Europea.
Para evitar posibles daños al medio ambiente o a la salud humana debidos a la
disposición final sin control de los residuos, recíclelo responsablemente a fin de
promover la reutilización sustentable de los recursos materiales. Para devolver su
producto usado, use los sistemas de devolución o recolección o póngase en contacto
con el comercio minorista donde adquirió dicho producto. El mismo puede recibir este
producto para un reciclado ambientalmente seguro.

12
Instalación rápida
1. Para una cobertura óptima, coloque la luz a 15 pies de la distancia que intentar iluminar.
Esto brindará un área de cobertura de 24,4 m (80 pies) de ancho por 15,2 m (50 pies) de
alto.
2. Sujete la estaca para insertar la Holiday Party Plus en la tierra. Como alternativa, si utiliza
el Holiday Party Plus en una superficie plana, afloje el tornillo de mariposa para quitar la
estaca y sujete el soporte en su lugar.
3. Conecte el cable de corriente a una toma de corriente estándar de pared o a una
extensión de cable apta para exteriores. Desenchúfela cuando no esté en uso.
4. Gire el tornillo de mariposa para aflojar el accesorio de iluminación, inclínelo para arriba
o por abajo y ajuste el tornillo de mariposa según el ángulo/área de proyección deseada.
Si las luces se están proyectando sobre una casa o estructura vecina, intente acercar la
luz al objeto que desea iluminar.
5. Pulse y suelte el botón Power (encendido) en la parte superior de la Holiday Party Plus
para encenderla. Mantenga pulsado el botón Power durante 2 segundos para apagarla.
Nota: En el caso de extraviar del control remoto, el botón Power permite alternar por los
modos de iluminación pulsando y soltando rápidamente dicho botón. Sin embargo, la
selección del color individual debe realizarse con el control remoto.
Nota: Cuanto más oscura el área sobre la que se utiliza la luz, más brillante será la proyección.
Intente evitar áreas con alumbrado público u otras luces brillantes.

13
Características
1. Sensor control remoto: Apunte el control
remoto hacia aquí ajustar las opciones.
2. Tornillo de mariposa: Aflójelo y ajústelo
según el ángulo en el que desea proyectar
la luz.
Nota: Coloque el anillo limitador de luz
incluido para reducir el ángulo de
dispersión de las luces.
3. Estaca: Colóquela en el suelo para sujetar
la Holiday Party Plus.
4. Soporte para superficies planas: Sujételo
aflojando el tornillo mariposa, quite la
estaca y reemplácela con el soporte.
5. Domo: Este domo proyecta las luces de
diferentes colores.
6. Botón de encendido: Púlselo y suéltelo
para encender la unidad. Manténgalo
pulsado durante 2 segundos para apagarla.
En el caso de extraviar del control remoto,
el botón Power permite alternar por los
modos de iluminación pulsando y soltando
rápidamente dicho botón. Sin embargo, la
selección del color individual debe
realizarse con el control remoto.
7. Anillo limitador de luz: Alinee la muesca
del anillo con el sensor y encájelo en su
lugar aplicando un poco de fuerza. Este
anillo limitará el área abarcada por las luces
hasta un 30%, lo cual resulta de utilidad
para evitar que las luces lleguen a casas
vecinas.
5
1
3
6
2
7

14
Instrucciones del control remoto
Utilice el control remoto para encender/apagar el motor, Ajuste el temporizador de la luz, seleccionar
los colores individuales y encender/apagar la unidad. Apunte el control remoto al sensor delantero del
domo de luces y pulse el botón de la opción que desea seleccionar. Consulte las descripciones de
los botones en el diagrama.
Nota: Antes de utilizar el control remoto por primera vez, extraiga la lengüeta fijada al compartimiento
de las pilas. Para cambiar la batería del control remoto, siga el diagrama ubicado en el reverso del
mismo. Utilice una pila de celda tipo botón de litio CR2025 de 3V CC como reemplazo.
•ALL ON/OFF = Enciende y apaga los colores.
•R ON/OFF = Enciende y apaga el color rojo.
•G ON/OFF = Enciende y apaga el color verde.
•B ON/OFF = Enciende y apaga el color azul.
•W ON/OFF = Enciende y apaga el color blanco.
•P On/Off = Enciende y apaga el color púrpura.
•O On/Off = Enciende y apaga el color naranja.
•R Only = Enciende solo el color rojo.
•G Only = Enciende solo el color verde
•B Only = Enciende solo el color azul.
•W Only = Enciende solo el color blanco.
•P Only = Enciende solo el color púrpura.
•O Only = Enciende solo el color naranja.
•Estático = Consulte los detalles de cada modo en la sección
Modos de luz.
•Desvanecimiento = Consulte los detalles de cada modo en la
sección Modos de luz.
•Parpadeo = Consulte los detalles de cada modo en la sección Modos de luz.
•Giro = Consulte los detalles de cada modo en la sección Modos de luz.
•Show = Consulte los detalles de cada modo en la sección Modos de luz.
•Timer = Selecciona el tiempo que la luz permanecerá encendida (2, 4, 6, u 8 horas o siempre).
Las luces también volverán a encenderse cada día a la misma hora (temporizador de 24 horas).
•POWER ON/OFF = coloca la unidad en modo de ahorro de energía (todas las luces y el motor
se apagan).
W
W

15
Modos de luz
Seleccione uno de los modos de luz utilizando el control remoto. Los botones de color
individuales se pueden des-seleccionar para dejar solamente aquellos colores que desea que
se muestren sin interrumpir el modo.
Estático: Cuando el Holiday Party Plus se enciende por primera vez, entrará por defecto al
modo Estático. En este modo, los 6 colores se encienden y las luces permanecen estáticas
(no se mueven). En cualquier momento se puede seleccionar un color para encenderlo o
apagarlo. Al pulsar “All Off” (todo apagado) se apagan todos los colores. Luego, seleccione
los colores que desea encender.
Desvanecimiento: Pues este botón para crear efectos de desvanecimiento a diversas
velocidades. Pulse este botón varias veces para alternar entre las siguientes velocidades:
•Desvanecimiento lento: Los colores se desvanecen en una secuencia lenta de un
color al siguiente. En cualquier momento se pueden encender o apagar los colores
individuales.
•Desvanecimiento medio: Los colores se desvanecen en una secuencia lenta de un
color al siguiente con un tiempo de transición de 2-3 segundos. En cualquier
momento se pueden encender o apagar los colores individuales.
•Desvanecimiento rápido: Los colores se desvanecen en una secuencia rápida de un
color al siguiente con un tiempo de transición de 1-2 segundos. En cualquier
momento se pueden encender o apagar los colores individuales.
•Desvanecimiento muy rápido: Los colores se desvanecen en una secuencia rápida
de un color al siguiente con un tiempo de transición de 0,5-1 segundos. En cualquier
momento se pueden encender o apagar los colores individuales.

16
Parpadeo: Pues este botón para crear efectos de parpadeo a diversas velocidades. Pulse
este botón varias veces para alternar entre las siguientes velocidades:
•Parpadeo lento: Las luces parpadearán durante 3 segundos y luego cambiarán a una
nueva combinación de colores abruptamente. En cualquier momento se pueden
encender o apagar los colores individuales.
•Parpadeo medio: Las luces parpadearán durante 1,5 segundos y luego cambiarán a
una nueva combinación de colores abruptamente. En cualquier momento se pueden
encender o apagar los colores individuales.
•Parpadeo rápido: Las luces parpadearán durante 0,5 segundos y luego cambiarán a
una nueva combinación de colores abruptamente. En cualquier momento se pueden
encender o apagar los colores individuales.
•Parpadeo muy rápido: Las luces parpadearán durante 0,1 segundos y luego
cambiarán a una nueva combinación de colores abruptamente. En cualquier
momento se pueden encender o apagar los colores individuales.
Giro (movimiento): Cuando se pulsa este botón, el motor se encenderá/apagará.
Modo show (aleatorio): Este modo alternará entre los diversos modos descriptos
anteriormente a diversas velocidades.

17
Especificaciones técnicas
Especificaciones sujetas a cambio sin previo aviso.
Dimensiones
(Profundidad x Ancho x Alto)
4,9 x 7,4 x 11,9 pulg.
124 mm x 189 mm x 301 mm
Peso 2,6 lbs.
1,2 kg
Suministro eléctrico 100-240 V ~ 50/60 Hz 20W 350mA
Pilas del control remoto Pila CR2025 de litio tipo botón de 3 V CC
Alcance del control remoto 10 m
32 pies
Rango de temperaturas
operativas -4°F – 113°F (-20°C – 45°C)
Clase resistente al agua IPX 4
LED (9) LED de 3 W (2 rojos, 2 verdes, 2 blancos, 1 azul,
1 naranja, 1 púrpura)
Área de cobertura de LED
Hasta 4000 pies cuadrados desde 15 pies de distancia (80
x 50 pies.)
Hasta 372 metros cuadrados desde 4,6 metros de
distancia (24,4 x 50 m.)

18
Guide d’utilisation rapide (Français)
Présentation
Veuillez vous assurer que tous les articles énumérés dans le Contenu de la boîte de ce guide
sont inclus dans la boîte.
Contenu de la boîte
Holiday Party Plus
Support pour surface plane
Télécommande
Bague de limitation de l'étendue du faisceau
Guide d’utilisation rapide
Consignes de sécurité et informations concernant la garantie
Assistance
Pour les toutes dernières informations concernant la documentation, les spécifications
techniques, la configuration requise, la compatibilité et l’enregistrement du produit, veuillez
visiter ionaudio.com.
Pour de l’assistance supplémentaire, veuillez visiter ionaudio.com/support.

19
Consignes de sécurité
•Il n’est pas recommandé que l’installation soit faite par des enfants. Comme avec tous les
appareils électriques, faire preuve de prudence lors de la manipulation et de l’utilisation du
produit afin de réduire le risque de décharge électrique. Si le cordon d’alimentation est
endommagé, il doit être remplacé par le fabricant, un service de réparation ou une personne
qualifiée afin d’éviter tout risque.
•Ne pas fixer le câblage du produit avec des agrafes ou des clous, et ne pas placer le câblage
sur des crochets ou des clous pointus.
•Ne pas immerger dans de l’eau ou autres liquides. Ne pas utiliser sous une forte pluie.
•La lumière est très brillante. Ne pas regarder directement dans la lumière du dôme.
•Ne pas s'asseoir, se tenir debout ou exercer une pression sur le dôme.
•Placer le câble d'alimentation loin des allées ou des trottoirs afin d’éviter de trébucher et
d'endommager le câble d'alimentation.
•Il est sécuritaire de faire fonctionner l'appareil sous la neige et la pluie.
•Lorsque ce produit est utilisé dans un environnement humide, nous recommandons fortement
d'utiliser un disjoncteur de fuite à la terre sur le circuit ou la prise secteur.
•Retirer le Holiday Party Plus de la pelouse avant de faire l’entretien de la pelouse.
•Ne jamais utiliser le produit si le câble (ou la fiche) est endommagé, s'il ne fonctionne pas
correctement, s'il est endommagé ou s'il est tombé dans l'eau. Contacter ION Audio pour
retourner le produit à un centre de service pour inspection et réparation.
•Faire attention de ne pas coincer le câble d'alimentation dans les portes ou les fenêtres, car
cela pourrait endommager l'isolant du câble.
•Ne pas secouer.
•Garder la lumière et le câble d'alimentation loin des radiateurs ou autres sources de chaleur.
Mode d’élimination approprié de ce produit : Ce marquage indique que ce produit ne doit pas être
éliminé avec les autres déchets ménagers. Par mesure de prévention pour
l'environnement et pour la santé humaine, veuillez recycler l’appareil de façon responsable afin de
contribuer à la réutilisation durable des ressources matérielles. Pour retourner votre appareil usagé,
veuillez utiliser les systèmes de retour et de collecte ou contactez le détaillant où le produit a été
acheté. Ils peuvent procéder au recyclage du produit en toute sécurité.

20
Installation
1. Pour une couverture optimale, placez le projecteur à 4,5 m de l’objet que vous souhaitez
éclairer. Cela couvrira une superficie de 24,4 m de largeur par 15,2 m de hauteur.
2. Saisissez le projecteur Holiday Party Plus par le piquet afin de l’insérer dans le sol. Si
vous désirez utiliser le projecteur Holiday Party Plus sur une surface plane, dévissez la
vis de serrage pour retirer le piquet et insérez le support.
3. Branchez le câble d'alimentation sur une prise secteur standard ou un câble
prolongateur pour usage extérieur. Débranchez-le lorsque vous n’utilisez pas le
projecteur.
4. Tournez la vis de serrage pour desserrer le piquet et modifier l’angle d’inclinaison vers le
haut ou vers le bas, puis resserrez la vis lorsque l'angle/la zone de projection souhaitée
est obtenue. Si le projecteur éclaire une maison ou une structure voisine, essayez de
placer le projecteur plus près de l'objet que vous souhaitez éclairer.
5. Appuyez et relâchez la touche d'alimentation sur le dessus du Holiday Party Plus afin le
mettre sous tension. Maintenez la touche d’alimentation enfoncée pendant 2 secondes
afin de le mettre hors tension.
Remarque : Dans le cas où la télécommande serait perdue, vous pouvez enfoncer et relâcher
rapidement la touche d'alimentation afin de parcourir les modes d’éclairage. Cependant, la
sélection individuelle des couleurs ne peut être effectuée qu’avec la télécommande.
Remarque : Plus la zone à éclairer est sombre, plus lumineuse sera la projection. Évitez les
zones près des lampadaires et autres lumières claires.
Table of contents
Other ION Dj Equipment manuals
Popular Dj Equipment manuals by other brands

Chauvet Professional
Chauvet Professional Ovation F-55FC user manual

Prolights Tribe
Prolights Tribe VERSAPAR user manual

STARVILLE
STARVILLE LED Flash LF12 user manual

Antari
Antari S-500XL user manual

thomann
thomann Wild Wash 132 LED RGB DMX user manual

Native Instruments
Native Instruments TRAKTOR AUDIO 2 MK2 user manual