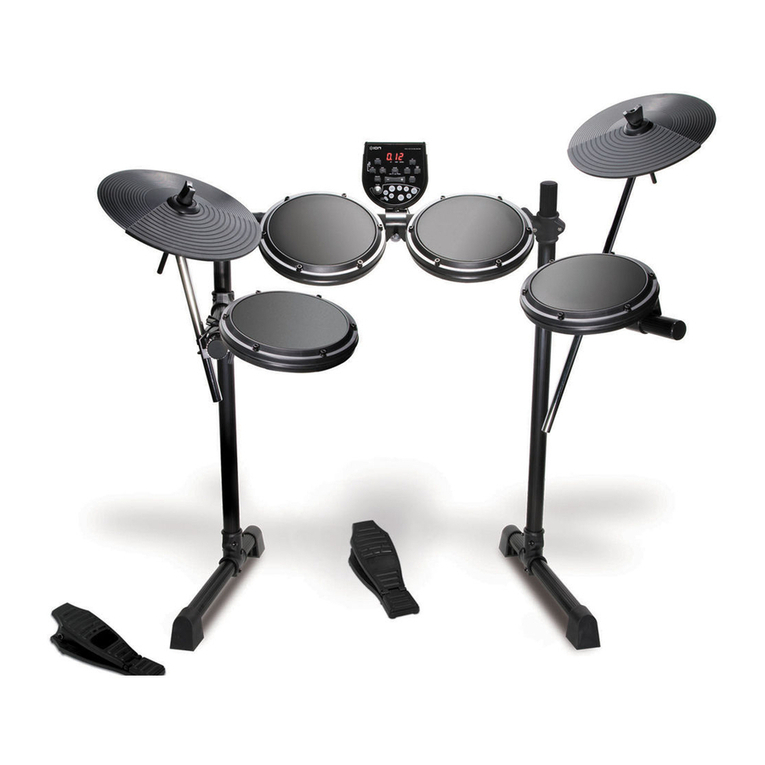
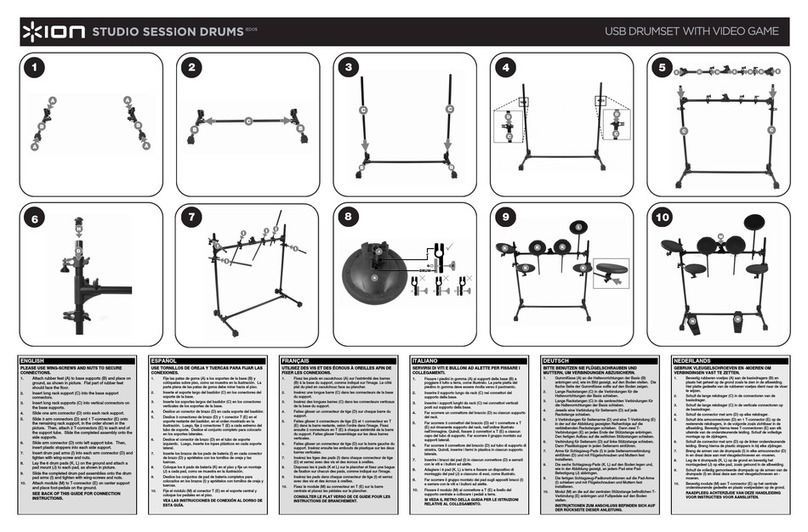
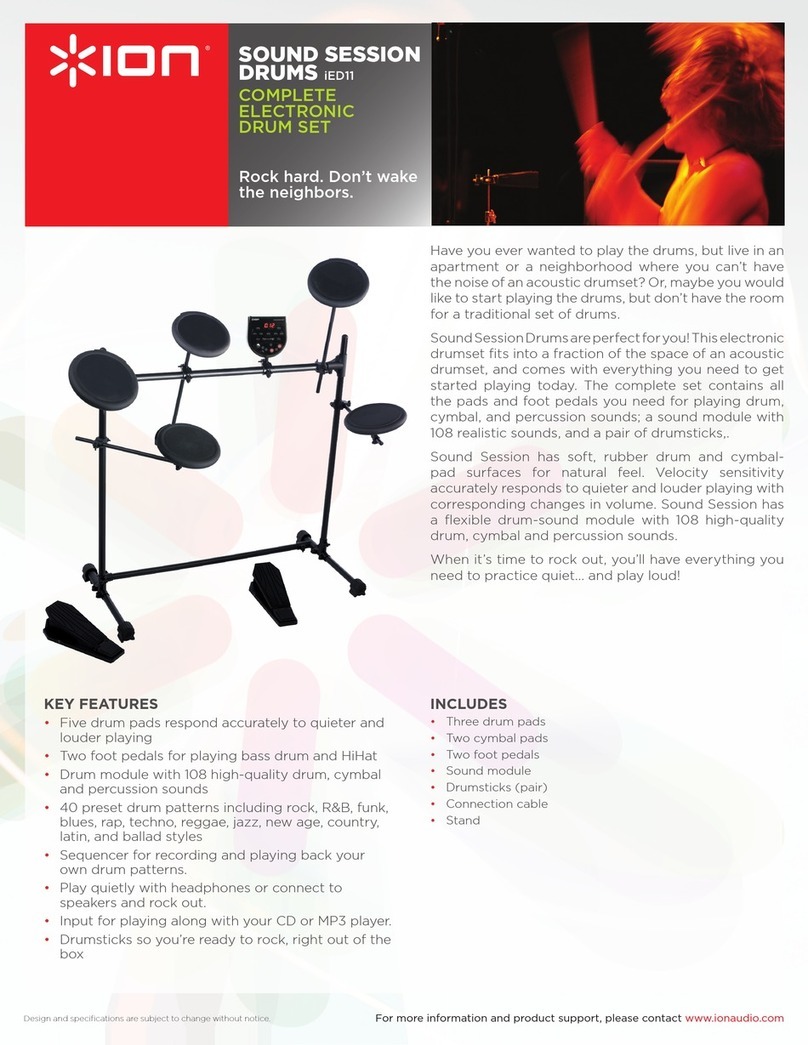
ION IED05 Mounting instructions

SOFTWARE MANUAL
ENGLISH ( 1 – 10 )
ESPAÑOL ( 11 – 20 )
FRANÇAIS ( 21 – 30 )
ITALIANO ( 31 – 40 )
DEUTSCH ( 41 – 50 )
NEDERLANDS ( 51 – 60 )

1
INTRODUCTION
Welcome to VR Drum! VR Drum was designed to work exclusively with Studio Session Drums, allowing you to turn your
computer into a high-quality drum software and interactive game. With VR Drum, you can play drum sounds directly from your
Studio Session Drums, create and edit your own drum kits, play along to the included music content or play the interactive
game. In addition, you can record your entire performance as an MP3 file.
Before you dive into the software, please take a moment to read through this guide in order to get the most out of VR Drum and
Studio Session Drums.
SOFTWARE INSTALLATION
1. To install the software, please insert the included CD into your computer’s CD-ROM drive.
2. You will see a splash screen automatically appear on your monitor. If the splash screen does not automatically appear,
browse the CD contents and double-click the Install.exe file.
3. To begin the installation process, click on INSTALL DRUM AND GAME SOFTWARE.
4. Please be patient as the installation begins. This may take a minute.
5. Follow the on-screen instructions to complete the installation.
6. Once the software has been installed, you can start it by going to Start -> All Programs -> VR Drum -> VR Drum (XP), or
Start -> VR Drum -> VR Drum (Vista).
ATTENTION VISTA USERS
For superior performance, we highly recommend downloading and installing the free ASIO4ALL driver. Installing this driver is
quick and easy and will vastly enhance the way you experience studio session drums and VR Drum
To install the free asio4all driver, follow the instructions below: (Internet connection required)
1. Click DOWNLOAD ASIO4ALL DRIVER. You will be directed to www.asio4all.com.
2. Click on the latest ASIO4ALL driver to download it.
3. Once you have downloaded the file, locate and double-click it to begin the installation.
4. Follow the on-screen instructions to install the driver.
5. You are done! You can now start VR Drum and take advantage of enhanced performance.
NOTE: To experiment with different performance settings, double-click the asio4all icon on your desktop. We recommend
using a 256 buffer size setting for best performance.

2
MAIN SOFTWARE INTERFACE
When you first start VR Drum, you will see the screen displayed on top:
This is the main application “shell”, which allows you to access all of the software features directly from this interface.
1. VRD – Press this button to enter VRD; with VRD, you can load and play drum sounds with the pads, as well as load songs
from the included MP3 collection to play along. You can also record your performance as a notation file or an MP3.
2. GAME – Press this button to enter the GAME; this application is a fun, interactive way to learn to play the drums and test
your skills.
3. SOUND BANK – Press this button to enter the SOUND BANK; this allows you to create custom drum banks, either with the
included sounds, your own sounds, or a mixture of both!
4. MP3 BANK – Press this button to enter the MP3 BANK; here, you can audition and organize the included music, as well as
any of your favorite MP3s, into collections to play along with.
5. UPDATE – Press this button to update VR Drum. Updating ensures that you are always up to speed with the latest content
and version of the application. Please note that an Internet connection and your product’s serial number are required for an
update.
6. HELP – Press this button to view the documentation included with the software.
7. SCREEN – Press this button to select your preferred viewing configuration. You can either view the application in
“Windowed” or “Full Screen” mode.
8. EXIT – Press this button to exit VR Drum.

3
VRD
VRD allows you to load and play different banks of drum sounds. With the built-in audio player on the bottom of the screen, you
can also play along to the included songs or any of your favorite MP3s. And to top it all off, you can record your performance,
along with the music, to an MP3 file!
When you click on VRD, you will see the window displayed on top:
DEVICE SETTINGS
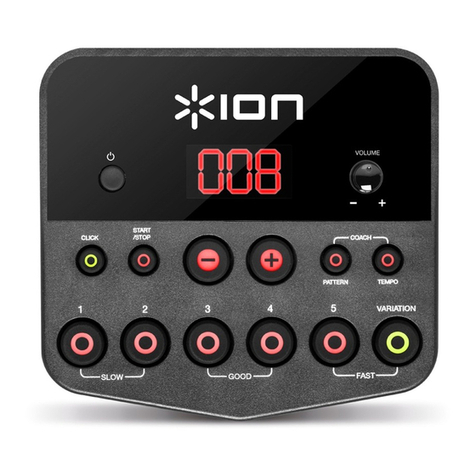
These are the settings for the iDM05 USB module. Remember that this module needs to be connected to your computer for the
drum kit to work with the software.
1. SEARCH – Press this button to tell the application to connect to the iDM05 module.
2. MIDI IN – If the module has been successfully connected, you will see “iDM05 MODULE” displayed here. If the module has
not yet been connected, you will see “CONNECT MODULE”.
3. MIDI OUT – By default, the application will output the data (i.e. drum hits) from your performance through the MIDI
OUTPUT on the back of the iDM05 module. Note that it is not necessary to have this output connected to anything.
However, you can connect this output to an additional MIDI device, such as a drum machine or sampler, if you would like to
trigger additional sounds. If your computer is equipped with additional MIDI outputs (for example, if you have a MIDI
interface connected), you can use the up and down arrows to select a different MIDI output.
4. CONNECT
5. CHANNEL – This is the MIDI Channel that will be used to communicate drum hits from the module to the software. Note
that the module is always sending its data on MIDI Channel 10. Therefore, please ensure that this setting is set to 10,
otherwise the software will not function properly.
6. SENSITIVITY – This setting describes how “sensitive” the drum kit is. In other words, this specifies how the drum kit reacts
to how hard you hit the pads. For example, if striking the drum pads lightly does not produce any sound, you can increase
the sensitivity.

4
7. RECOVER - Press this button to restore the default sensitivity and MIDI channel settings.
8. SAVE – Press this button to save your preferred device settings as a .dvs file for later use.
9. LOAD – Press this button to load any device settings you may have saved earlier.
SOUND BANK
10. BANK NAME – Displays the name of the currently selected sound bank.
11. BANK UP / DOWN – Use these buttons to browse through the available sound banks.
12. USER / VRD BANKS – Press this button to toggle between “User” and “VRD” sound banks. “VRD” sound banks are
default factory banks of drum sounds and kits. “User” sound banks can be created and saved by going to the SOUND
BANK option on the main interface.
DRUM SOUND PARAMETERS
When a sound bank is loaded, the corresponding drum sounds will appear in this section:
13. NOTE NUMBER – Drum hits are communicated to the software via MIDI Note Numbers. Every drum sound is triggered by
a corresponding Note Number, sent from the drum pad. The number displayed in this field is the MIDI Note Number which
will be output as you strike the corresponding drum pad. Please note that this is for reference only; it is useful to know this
information if you are controlling external devices, such as samplers and drum machines, connected to the MIDI OUTPUT
of the iDM05 module.
14. VELOCITY – This meter shows how hard the corresponding pad is struck.
15. VOLUME – You can use the up and down arrows next to this box to adjust the level of the corresponding sound. This way,
you can “dial in” the perfect volume for each drum sound.
MUSIC PLAYER / RECORDER
This built-in audio player / recorder allows you to play along with songs from the included music collection or from your own MP3
database, and record your performance simultaneously.
16. SONG – Press this button to load a song. Browse for an MP3 and select open to load it.
17. COLLECTION – Press this button to load a collection of songs. You can either load one of the included collections, or
create a collection of your own by going to MP3 BANK on the main software interface.
18. PLAY – Press this button to play the loaded song or collection.
19. PAUSE – Press this button to pause playback.
20. STOP – Press this button to stop playback.
21. PREV – Press this button to go to the previous song, if a collection has been loaded.
22. NEXT – Press this button to go to the next song, if a collection has been loaded.
23. MUSIC VOLUME – Use these up and down arrows to adjust the volume of the music, relative to the volume of the drums.
24. REC – Press this button to record the music and your drum performance as an MP3 file. When you press this button, the
loaded song will automatically begin playing. If you wish, you can also record your drum performance without music (see
“REC. MODE button description below).
NOTATION CONTROLS
In addition to the included collection of songs, we have also provided drum notation for each song. This notation is the
sequence of drum hits in the original song. With the included music collection, songs will be loaded with their associated
notation counterparts. When you play a song, the associated notation will play simultaneously. You can choose to mute or
unmute the notation, depending on your preference. Sometimes you may wish to only hear your playing, while other times you
may want to reference the notation to get an idea about the original drum parts. This notation is also used to generate the visual
cues in the GAME. In other words, these drum parts are what you have to play to score points in the GAME.
25. MUTE / UNMUTE – Press this button to mute or unmute the notation file. Muting will prevent the original drum parts from
playing through your speakers.
26. LOAD – By default, each song from the included collection will load along with its associated notation file; you don’t have to
manually load the notation files. If you have recorded your own performance, however, you can load the notation data by
clicking LOAD and selecting the saved notation file.
27. SAVE – Press this button after you record your performance to save the notation data of your performance.
28. REC. MODE – Press this button to toggle between the two available record modes – “Free Record” or “MP3 Record”. In
MP3 Record mode, you can record your performance along with the music loaded in the audio player. In Free Record
mode, you can record your performance without any music.
5
GAME
1. SEARCH – Press this button to tell the application to connect to the iDM05 module.
2. MIDI IN – If the module has been successfully connected, you will see “iDM05 MODULE” displayed here. If the module has
not yet been connected, you will see “CONNECT MODULE”.
3. RECOVER
4. SONG – Press this button to load one of the included songs. Please note that only the included songs can be used for
playing the game.
5. COLLECTION – Press this button to load a collection of songs into the game. You can either load one of the included
collections, or create a collection of your own by going to MP3 BANK on the main software interface.
6. PLAY – Press this button to play the loaded song or collection.
7. STOP – Press this button to stop playback.
8. PREV – Press this button to go to the previous song, if a collection has been loaded.
9. NEXT – Press this button to go to the next song, if a collection has been loaded.
10. MUSIC VOLUME – Use these up and down arrows to adjust the volume of the music, relative to the volume of the drums.
11. VISUAL CUES – These descending lines represent the drum hits you have to play and correspond to the drum sounds
pictured below.
12. TARGET MARK – To score points, hit the drum corresponding to the visual cue when the visual cue reaches this yellow
line. If you strike the corresponding drum pad while its cue is in the target mark, you will be awarded points.
13. PLAY MODE – Press this button to toggle between two different modes: “Player” or “Auto”. In “Player” mode, the
supporting drum parts will be muted and you can strike the pads when the visual cues reach the target mark to score points.
In “Auto” mode, the supporting drum parts will sound when the visual cues hit the target mark; this lets you hear the entire
drum part you have to play. Please note that while in “Auto” mode you will not be awarded any points when you strike the
pads.

6
14. SCORE – This is your game score. To accumulate points, hit the corresponding drum when its visual cue reaches the
target mark.
15. TOP 10 – Click this button to view the top 10 high scores.
16. EXIT – Press this button to quit the game.
HOW TO PLAY THE GAME
1. Make sure that the iDM05 module is connected to your computer and that “iDM05 MODULE” appears in the lower left
corner of the screen (2).
2. Click PLAY (6) to begin playing the first song from the included music collection. If you have created your own custom
collections, you may load the by clicking the COLLECTION button (5).
3. The music will begin playing and you will see the visual cues descend from the top of the screen to the bottom. When each
cue reaches the yellow TARGET MARK (12), strike the corresponding pad. The pad is indicated in the circle below the
visual cue.
4. When you strike the right pad at the right time, the visual cue will disappear as it passes the TARGET MARK.
5. To hear how your playing is supposed to sound, click the PLAY MODE button to change to “Auto” mode.
6. Use the PREV (8) and NEXT (9) buttons to skip tracks.

7
THE SOUND BANK
The Sound Bank is where you can create, modify or delete drum kits.
1. SOUNDS – This is a list of the included drum sounds. To audition a sound, simply click on its name.
2. BANK LIST – This is a list of the included drum banks. A drum bank is a collection of drum sounds which make up a virtual
“drum kit”. You can add, delete and modify these drum kits as you wish,
3. BANK NAME – To rename or add a new bank, type the desired name in this field.
4. ADD BANK – Press this button to add the custom bank to the bank list.
5. DEL BANK – Press this button to delete the bank selected in the bank list.
6. SWIFT FUNCTION
7. DEFAULT – If you accidentally delete some of the default factory banks, you can press this button to restore the bank list to
its factory setting. Please note that this action will delete any additional banks you may have created.
8. SAVE – Press this button to save your changes.
9. EXIT – Press this button to exit the Sound Bank.
HOW TO CREATE CUSTOM KITS USING THE INCLUDED SOUNDS
Creating new kits with the included sounds is quick and easy:
1. Type the name of your custom kit in the BANK NAME field (3).
2. Press the ADD BANK button (4) to add this bank to the bank list.
3. Locate this bank in the list and double-click it to show its sounds. Since this is a newly created bank, all of the sounds will
display “Tone-Mute”.

8
4. Click on the “Tone-Mute” fields to see which drum pad each of these fields corresponds to. The drum pad on the graphic
above the bank list will light up repeatedly to show you which pad will control this sound.
5. To load a sound into the selected slot, select a desired sound from the SOUNDS list (1) on the left and press the >> button.
6. Continue this process to load the rest of the sounds into your custom kit.
IMPORTANT: Please note that the STUDIO SESSION DRUMS kit features single-zone drum pads only. In other words,
you will not be able to access drum sounds assigned to the snare rim, ride or crash bell (these drum sounds are indicated
by an outlined square in the graphic).
NOTE: The drum kit will be muted while you are in the Sound Bank.
HOW TO IMPORT ADDITIONAL SOUNDS FOR BUILDING KITS
In addition to the included sounds, you can also use any other drum sound in the .wav format to build your custom kits. To
import additional .wav drum sounds into the sound list:
1. Exit the Sound Bank screen.
2. Use your Windows Explorer to locate the .wav drum sounds you wish to import.
3. Copy all of these files into C:/VR Drum/SoundBank.
4. Now, start the Sound Bank again and you should see all of these files in the SOUNDS list on the left. You can now use
these sounds to create your own custom drum kits!

9
MP3 BANK
This is where you can create your own custom music collections to play along to.
1. MP3 FILES – This is the database of included music you can use to build your collections.
2. AUTO PLAY – Check this box if you would like the software to automatically begin playing the selected song.
3. COLLECTION – This is the name for the current collection.
4. MP3 LIST – Song titles added to the collection will appear here.
5. >> - Press this button to add the selected song to the collection.
6. << - Press this button to remove the selected song to the collection.
7. UP / DOWN – Use these arrows to move the selected song up or down in the track order.
8. PLAY – Press this button to play the song selected in the MP3 list.
9. STOP – Press this button to stop playback.
10. PREV – Press this button to go to the previous song in the collection.
11. NEXT – Press this button to go to the next song in the collection.
12. LOAD – Press this button to load a previously-created collection.
13. SAVE – Press this button to save the current collection.
14. EXIT – Press this button to exit MP3 Bank.
HOW TO CREATE A CUSTOM COLLECTION USING THE INCLUDED MUSIC
To create a collection using the included sounds, follow these steps:
1. Enter the name of your collection in the COLLECTION field (3).
2. Select each song you wish to add to the collection and press >> (5). The songs will appear in the MP3 LIST (4).
TIP: To select multiple songs at once, hold the CTRL key on your keyboard while clicking on the song titles.
3. Use the UP / DOWN arrows (7) to order the list as you wish.
4. When you are finished, press the SAVE button (13) to save your collection.
5. You can now exit MP3 Bank and go to VRD or GAME to use your collection.

10
HOW TO IMPORT YOUR OWN MP3 MUSIC FILES FOR CREATING CUSTOM COLLECTIONS
In addition to the included music, you can also import your favorite MP3 music files for creating a custom collection:
1. Exit MP3 Bank by clicking the EXIT button (14).
2. Use your Windows Explorer to locate your MP3 files.
3. Copy these files into C:/VR Drum/MP3Bank.
4. Now, start MP3 Bank again and you should see all of your songs in the MP3 FILES list on the left. You can now use these
songs in your custom collections!
NOTE: The included music content comes with drum notation counterparts, which are used to generate the visual cues
and drum parts in the GAME and VRD. If you create custom collections with your own music, you will not see any visual
cues or hear any drum parts when playing these songs in VRD or the GAME.
UPDATE
UPDATE allows you to update VR Drum through the Internet. Updating your software regularly ensures that you are always up
to date with the latest software features and content. Please note that an Internet connection is required.
HOW TO UPDATE YOUR SOFTWARE
1. Enter your product’s serial number in the serial number field (1).
2. Make sure that your computer is connected to the Internet and press the UPDATE button (2) to begin the update process.
3. If there are any available updates, they will be automatically installed.
4. When you are finished, click the EXIT button to close the UPDATE screen.
HELP
To access the detailed software manual (this document), click the HELP button on
the main software interface.

11
INTRODUCCIÓN
¡Bienvenido a VR Drum! VR Drum fue diseñado para funcionar exclusivamente con Studio Session Drums, lo que permite
convertir su computador en un software y juego interactivo de batería de alta calidad. Con VR Drum, puede reproducir sonidos
de batería directamente desde su Studio Session Drums, crear y editar sus propios kits de batería, tocar junto con el contenido
de música incluido o jugar al juego interactivo. Además, puede grabar su sesión completa como un archivo MP3-
Antes de zambullirse en el software, tómese un momento para leer esta guía a fin de obtener lo máximo de su VR Drum y
Studio Session Drums.
INSTALACIÓN DEL SOFTWARE
1. Para instalar el software, inserte el CD incluido en el lector de CD-ROM de su computadora.
2. Aparecerá automáticamente en su monitor una pantalla de inicio. Si esta pantalla no aparece automáticamente, examine
el contenido del CD y haga doble clic en el archivo Install.exe.
3. Para comenzar el proceso de instalación, haga clic en INSTALLAR.
4. Sea paciente mientras comienza la instalación. Esto puede demorar un minuto.
5. Siga las instrucciones de la pantalla para terminar la instalación.
6. Una vez instalado el software, debe iniciarlo yendo a Start -> All Programs -> VR Drum -> VR Drum [Inicio > Todos los
programas > VR Drum] (XP), o Start -> VR Drum -> VR Drum (Vista).
AVISO PARA USUARIOS DE VISTA
Para lograr un rendimiento superior, recomendamos especialmente descarga e instalar el driver gratuito ASIO4ALL. Instalar
este driver es fácil y rápido y mejorará significativamente la manera en que experimentará sus tambores de sesión de estudio y
VR Drum. Para instalar el driver gratuito asio4all, siga estas instrucciones: (Se requiere conexión a Internet).
1. Haga clic en el botón DESCARGAR ASIO4ALL DRIVER. Se le dirigirá directamente a www.asio4all.com.
2. Haga clic en el driver ASIO4ALL más reciente para descargarlo.
3. Una vez descargado el archivo, localícelo y haga doble clic en él para comenzar la instalación.
4. Siga las instrucciones de la pantalla para instalar el driver.
5. ¡Ya está terminado el trabajo! Puede iniciar ahora VR Drum y aprovechar las mejoras del funcionamiento.
NOTA: Para experimentar con ajustes de funcionamiento diferentes, haga doble clic en el icono de asio4all de su
escritorio. Recomendamos usar un ajuste de tamaño de buffer de 256 para lograr el mejor rendimiento.

12
INTERFAZ PRINCIPAL DEL SOFTWARE
Cuando instale VR Drum por primera vez, verá la pantalla ilustrada a la derecha.
Éste es el “shell” principal de la aplicación, que le permite acceder a todas las características del software directamente desde
esta interfaz.
1. VRD – Pulse este botón para entrar a VRD. Con VRD, es posible cargar y tocar sonidos de batería con los pads, así como
cargar temas de la colección MP3 incluida para reproducir al mismo tiempo. Puede también grabar su interpretación como
archivo de notación o MP3.
2. JUEGO – Pulse este botón para entrar al JUEGO. Esta aplicación es una manera divertida e interactiva para aprender a
tocar la batería y probar sus habilidades.
3. BANCO DE SONIDOS – Pulse este botón para entrar al BANCO DE SONIDOS, que le permite crear bancos de batería
personalizados, ya sea con los sonidos incluidos, sus propios sonidos o una mezcla de ambos.
4. BANCO MP3 – Pulse este botón para entrar al BANCO MP3, donde puede escuchar y organizar la música incluida, como
también cualquier de sus MP3 favoritos, en colecciones para reproducir al mismo tiempo que toca.
5. ACTUALIZAR – Pulse este botón para actualizar VR Drum. La actualización asegura que usted esté siempre a la parte
del contenido y la versión más recientes de la aplicación. Tenga en cuenta que para la actualización se requiere una
conexión a Internet y el número de serie de su producto.
6. AYUDA – Pulse este botón para ver la documentación incluida con el software.
7. PANTALLA – Pulse este botón para seleccionar su configuración de visualización preferida. Puede ver la aplicación en
modos de “ventanas” o “pantalla completa”.
8. SALIR – Pulse este botón para salir de VR Drum.

13
VRD
VRD le permite cargar y reproducir diferentes bancos de sonidos de batería. Con el reproductor de audio incorporado del pie
de la pantalla, puede tocar también al mismo tiempo que los temas incluidos o cualquiera de sus MP3 favoritos. Y lo mejor de
todo; ¡puede grabar su interpretación, junto con la música, en un archivo MP3!
Cuando haga clic en VRD, verá la ventana que se ilustra a la derecha:
AJUSTES DEL DISPOSITIVO
Estos son los ajustes correspondientes al módulo USB iDM05. Recuerde que este módulo debe estar conectado a la
computadora para que el kit de batería funcione con el software.
1. BUSCAR – Pulse este botón para indicar a la aplicación que se conecte al módulo iDM05.
2. ENTRADA MIDI – Si el módulo se conectó exitosamente, aparecerá aquí “iDM05 MODULE”. Si el módulo no se conectó
aún, aparecerá “CONNECT MODULE” (Conectar módulo).
3. SALIDA MIDI – Por defecto, la aplicación entrega los datos (es decir, los golpes de tambor) de su ejecución a través de la
MIDI OUTPUT (Salida MIDI) de la parte trasera del módulo iDM05. Tenga en cuenta que no es necesario tener esta salida
conectada a ningún dispositivo. No obstante, puede conectarla a un dispositivo MIDI adicional, tal como una caja de ritmos
o muestreador, si desea disparar sonidos adicionales. Si su computadora está equipada con salidas MIDI adicionales (por
ejemplo, si tiene conectada una interfaz MIDI), puede usar las flechas ascendente y descendente para seleccionar una
salida MIDI diferente.
4. CONNECT
5. CANAL – Es el canal MIDI que se usa para comunicar los golpes de tambor desde el módulo al software. Tenga en
cuenta que el módulo envía siempre sus datos por el canal MIDI 10. Por lo tanto, asegúrese de que este parámetro esté
configurado a 10, porque de lo contrario el software no funcionará correctamente.
6. SENSIBILIDAD – Este ajuste describe cuán “sensible” es el kit de batería. En otras palabras, especifica cómo reacciona el
kit de batería a la fuerza con que golpea los pads. Por ejemplo, si al golpear levemente los pads de batería no se produce
ningún sonido, puede aumentar la sensibilidad.

14
7. RECUPERAR – Pulse este botón para restaurar la sensibilidad por defecto y los parámetros de ajuste de canales MIDI.
8. GUARDAR – Pulse este botón para guardar los ajustes preferidos de su dispositivo como archivo .dvs para uso posterior.
9. CARGAR – Pulse este botón para cargar los ajustes del dispositivo que puede haber guardado anteriormente.
BANCO DE SONIDOS
10. NOMBRE DEL BANCO – Muestra el nombre del banco de sonidos seleccionado en este momento.
11. BANK ARRIBA / ABAJO – Use estos botones para navegar por los bancos de sonidos disponibles.
12. BANCOS DEL USUARIO / VRD – Pulse este botón para conmutar entre los bancos de sonidos “del usuario” y “VRD”. Los
bancos de sonidos “VRD” son bancos de sonidos y kits de batería predeterminados de fábrica. Los bancos de sonido
“User” (del usuario) pueden crearse y guardarse yendo a la opción SOUND BANK de la interfaz principal.
PARÁMETROS DE LOS SONIDOS DE BATERÍA
Cuando se carga un banco de sonidos, los sonidos de batería correspondientes aparecen en esta sección:
13. NÚMERO DE NOTA – Los golpes de tambor se comunican al software mediante números de nota MIDI. Cada sonido de
batería es disparado por un número de nota correspondiente, enviado por el pad de batería. El número mostrado en este
campo es el número de nota MIDI que se producirá cuando usted golpee el pad correspondiente. Tenga en cuenta que
esto es sólo para referencia y resulta útil conocer esta información si está controlando dispositivos externos, tales como
muestreadores y cajas de ritmo, conectadas a la salida MIDI del módulo iDM05.
14. VELOCIDAD – Este instrumento muestra con qué fuerza se golpeó el pad correspondiente.
15. VOLUMEN – Puede usar las flechas ascendente y descendente contiguas a esta casilla para ajustar el nivel del sonido
correspondiente. De esta manera, puede “ajustar” el volumen perfecto para cada sonido de batería.
REPRODUCTOR Y GRABADOR DE MÚSICA
Este reproductor y grabador de audio incorporado le permite tocar al mismo tiempo que se reproducen los temas de la
colección musical incluida o de su propia base de datos MP3, así como grabar su interpretación simultáneamente.
16. TEMA – Pulse este botón para cargar un tema. Navegue a un MP3 y seleccione abrir para cargarlo.
17. COLECCIÓN – Pulse este botón para cargar una colección de temas. Puede cargar una de las colecciones incluidas o
crear una colección propia yendo al BANCO MP3 de la interfaz principal del software.
18. REPRODUCIR – Pulse este botón para reproducir el tema o colección cargados.
19. PAUSA – Pulse este botón para hacer una pausa en la reproducción.
20. PARAR – Pulse este botón para detener la reproducción.
21. ANTERIOR – Pulse este botón para ir al tema anterior, si se cargó una colección.
22. SIGUIENTE – Pulse este botón para ir al tema siguiente, si se cargó una colección.
23. VOLUMEN DE LA MÚSICA – Use estas flechas ascendente y descendente para ajustar el volumen de la música, en
relación con el volumen de los tambores.
24. GRABAR – Pulse este botón para grabar la música y su interpretación de batería como archivo MP3. Cuando pulsa este
botón, el tema cargado comienza a reproducirse automáticamente. Si lo desea, también puede grabar su interpretación de
batería sin música (vea la descripción del botón “MODO DE GRABACIÓN más abajo).
CONTROLES DE NOTACIÓN
Además de la colección de temas incluida, hemos provisto también notación de batería para cada tema. Esta notación es la
secuencia de golpes de tambor del tema original. Con la colección musical incluida, los temas se cargan con sus contrapartes
de notación asociadas. Cuando usted toca un tema, la notación asociada se reproducirá simultáneamente. Puede elegir
silenciar o no la notación, según su preferencia. A veces puede ser conveniente que oiga sólo su ejecución, mientras que otras
veces puede ser conveniente hacer referencia a la notación para tener una idea acerca de las partes de batería originales.
Esta notación se usa también para generar los cue visuales en el JUEGO. En otras palabras, estas partes de batería son las
que usted tiene que tocar para anotar puntos en el JUEGO.
25. SILENCIAR / ANULAR SILENCIAMIENTO – Pulse este botón para silenciar o no el archivo de notación. El silenciamiento
impide que las partes de batería originales se reproduzcan en sus altavoces.
26. CARGAR – Por defecto, cada tema de la colección incluida se carga junto con su archivo de notación asociado y no es
necesario cargar manualmente dichos archivos. No obstante, si grabó su propia interpretación, puede cargar los datos de
notación haciendo clic en LOAD y seleccionando el archivo de notación guardado.
27. GUARDAR – Pulse este botón después de grabar su interpretación para guardar los datos de notación de la misma.
28. MODO DE GRABACIÓN – Pulse este botón para conmutar entre los dos modos de grabación disponibles: “Free Record”
(Grabación libre) o “MP3 Record” (Grabación MP3). En modo de grabación MP3, puede grabar su interpretación junto con
la música cargada en el reproductor de audio. En el modo de grabación libre, puede grabar su interpretación sin ninguna
música.

15
JUEGO
1. BUSCAR – Pulse este botón para indicar a la aplicación que se conecte al módulo iDM05.
2. ENTRADA MIDI – Si el módulo se conectó exitosamente, aparecerá aquí “iDM05 MODULE”. Si el módulo no se conectó
aún, aparecerá “CONNECT MODULE” (Conectar módulo).
3. RECOVER
4. TEMA – Pulse este botón para cargar uno de los temas incluidos. Tenga en cuenta que sólo pueden usarse para el juego
los temas incluidos.
5. COLECCIÓN – Pulse este botón para cargar una colección de temas en el juego. Puede cargar una de las colecciones
incluidas o crear una colección propia yendo al BANCO MP3 de la interfaz principal del software.
6. REPRODUCIR – Pulse este botón para reproducir el tema o colección cargados.
7. PARAR – Pulse este botón para detener la reproducción.
8. ANTERIOR – Pulse este botón para ir al tema anterior, si se cargó una colección.
9. SIGUIENTE – Pulse este botón para ir al tema siguiente, si se cargó una colección.
10. VOLUMEN DE LA MÚSICA – Use estas flechas ascendente y descendente para ajustar el volumen de la música, en
relación con el volumen de los tambores.
11. CUES VISUALES – Estas líneas descendentes representan los golpes de tambor que debe tocar y corresponden a los
sonidos de batería abajo ilustrados.
12. MARCA OBJETIVO – Para anotar puntos, golpee el tambor correspondiente al cue visual cuando el mismo llegue a esta
línea amarilla. Si golpea el pad de batería correspondiente mientras su cue está en la marca objetivo, se le otorgarán
puntos.

16
13. MODO DE REPRODUCCIÓN – Pulse este botón para conmutar entre dos modos diferentes: “Player” (Reproductor) o
“Auto”. En modo “Player”, las partes de batería de soporte se silencian y usted puede golpear los pads cuando los cues
visuales llegan a la marca objetivo para anotar puntos. En modo “Auto”, las partes de batería de soporte suenan cuando
los cues visuales golpean la marca objetivo. Esto le permite oír la parte de batería completa que tiene que tocar. Tenga
en cuenta que mientras está en modo “Auto”, no se otorgan puntos cuando golpea los pads.
14. PUNTAJE – Es su puntaje en el juego. Para acumular puntos, golpee el tambor correspondiente cuando su cue visual
llegue a la marca objetivo.
15. 10 MEJORES – Haga clic en este botón para ver los 10 mejores puntajes.
16. SALIR – Pulse este botón para salir del juego.
CÓMO JUGAR
1. Asegúrese de que el módulo iDM05 esté conectado a su computadora y que aparezca “iDM05 MODULE” en la esquina
inferior izquierda de la pantalla (2).
2. Haga clic en PLAY (6) para comenzar a reproducir el primer tema de la colección musical incluida. Si creó sus propias
colecciones personalizadas, puede cargarlas haciendo clic en el botón COLLECTION (5).
3. La música comenzará a reproducirse y verá que los cues visuales descienden desde la parte superior a la parte inferior de
la pantalla. Cuando cada cue llega a la MARCA OBJETIVO (12) amarilla, golpee el pad correspondiente. El pad se indica
en el círculo que está debajo del cue visual.
4. Cuando golpee el pad correcto en el momento correcto, el cue visual desaparece cuando pasa por la MARCA OBJETIVO.
5. Para escuchar cómo se supone que debería sonar su interpretación, haga clic en el botón PLAY MODE para cambiar al
modo “Auto”.
6. Use los botones PREV (Anterior) (8) y NEXT (Siguiente) (9) para saltear pistas.

17
BANCO DE SONIDOS
El banco de sonidos es donde usted puede crear, modificar o eliminar kits de batería.
1. SONIDOS – Es una lista de los sonidos de batería incluidos. Para escuchar un sonido, simplemente haga clic en su
nombre.
2. LISTA DE BANCOS – Es una lista de los bancos de batería incluidos. Un banco de batería es una colección de sonidos
que constituye un “kit de batería” virtual. Es posible agregar, eliminar y modificar estos kits de batería como desee.
3. NOMBRE DEL BANCO – Para cambiar el nombre o agregar un banco nuevo, escriba en este campo el nombre deseado.
4. AGREGAR BANCO – Pulse este botón para agregar el banco personalizado a la lista de bancos.
5. ELIMINAR BANCO – Pulse este botón para eliminar el banco seleccionado en la lista de bancos.
6. SWIFT FUNCTION
7. VALOR POR DEFECTO – Si elimina accidentalmente algunos de los bancos predeterminados de fábrica, puede pulsar
este botón para restaurar la lista de bancos a su valor por defecto. Tenga en cuenta que esta acción eliminará todos los
bancos adicionales que pueda haber creado.
8. GUARDAR – Pulse este botón para guardar sus cambios.
9. SALIR – Pulse este botón para salir del banco de sonidos.
CÓMO CREAR KITS PERSONALIZADOS USANDO LOS SONIDOS INCLUIDOS
Crear kits nuevos con los sonidos incluidos es fácil y rápido:
1. Escriba el nombre de su kit personalizado en el campo BANK NAME (3).
2. Pulse el botón ADD BANK (4) para agregar este banco a la lista de bancos.
3. Localice este banco en la lista y haga doble clic en él para mostrar sus sonidos. Puesto que éste es un banco recién
creado, en todos los sonidos aparece “Tone-Mute” (Silenciamiento de tono).

18
4. Haga clic en los campos “Tone-Mute” para ver a qué pad de batería corresponde cada uno de los campos. El pad de
batería del gráfico de arriba de la lista de bancos se enciende repetidamente para indicarle qué pad controlará este sonido.
5. Para cargar un sonido en la ranura seleccionada, elija el sonido deseado en la lista SOUNDS (1) de la izquierda y pulse el
botón >>.
6. Continúe este proceso para cargar el resto de los sonidos en su kit personalizado.
IMPORTANTE: Tenga en cuenta que el kit STUDIO SESSION DRUMS ofrece sólo pads de batería de una zona. En otras
palabras, no podrá acceder a los sonidos de batería asignados al snare rim, ride o crash bell (estos sonidos de batería
están indicados con un recuadro cuadrado en el gráfico).
NOTA: El kit de batería se silencia cuando usted está en el banco de sonidos.
CÓMO IMPORTAR SONIDOS ADICIONALES PARA CONSTRUIR KITS.
Además de los sonidos incluidos, puede usar también cualquier otro sonido de batería en formato .wav para construir sus kits
personalizados. Para importar sonidos de batería .wav adicionales a la lista de sonidos:
1. Salga de la pantalla del banco de sonidos.
2. Use el Windows Explorer (Explorador de Windows) para localizar los sonidos de batería .wav que desea importar.
3. Copie todos estos archivos en C:/VR Drum/SoundBank.
4. Ahora, inicie el banco de sonidos otra vez y deberá ver todos estos archivos en la lista SOUNDS (Sonidos) de la izquierda.
¡Puede usar ahora estos sonidos para crear sus propios kits de batería personalizados!

19
BANCO MP3
Es aquí donde usted puede crear sus propias colecciones musicales personalizadas para tocar al mismo tiempo que ellas.
1. ARCHIVOS MP3 – Es la base de datos de la música incluida que usted puede usar para construir sus colecciones.
2. REPRODUCCIÓN AUTOMÁTICA – Marque esta casilla si desea que el software comience automáticamente a reproducir
el tema seleccionado.
3. COLECCIÓN – Es el nombre de la colección actual.
4. LISTA MP3 – Aparecen aquí los títulos de los temas agregados a la colección.
5. >> - Pulse este botón para agregar el tema seleccionado a la colección.
6. << - Pulse este botón para eliminar el tema seleccionado de la colección.
7. ARRIBA / ABAJO – Use estas flechas para mover el tema seleccionado hacia arriba o abajo en el orden de las pistas.
8. REPRODUCIR – Pulse este botón para reproducir el tema seleccionado en la lista MP3.
9. PARAR – Pulse este botón para detener la reproducción.
10. ANTERIOR – Pulse este botón para ir al tema anterior de la colección.
11. SIGUIENTE – Pulse este botón para ir al tema siguiente de la colección.
12. CARGAR – Pulse este botón para cargar una colección creada anteriormente.
13. GUARDAR – Pulse este botón para guardar la colección actual.
14. SALIR – Pulse este botón para salir del banco MP3.
CÓMO CREAR UNA COLECCIÓN PERSONALIZADA USANDO LA MÚSICA INCLUIDA
Para crear una colección usando los sonidos incluidos, siga estos pasos:
1. Introduzca el nombre de su colección en el campo COLLECTION (3).
2. Seleccione cada tema que desee agregar a la colección y pulse >> (5). Los temas aparecerán en la LISTA MP3 (4).
CONSEJO: Para seleccionar varios temas a la vez, mantenga pulsada la tecla CTRL de su teclado mientras hace clic en
los títulos de los mismos.
3. Use las flechas ASCENDENTE y DESCENDENTE (7) para ordenar la lista como desee.
4. Cuando termine, pulse el botón SAVE (13) para guardar su colección.
5. Puede salir ahora del banco MP3 e ir a VRD o GAME para usar su colección.
Other manuals for IED05
1
Table of contents
Languages:
Other ION Drum manuals

ION
ION PRO SESSION DRUMS User manual

ION
ION DISCOVER DRUMS User manual

ION
ION IED04 User manual

ION
ION IED04 Instruction manual

ION
ION Drum Rocker User manual

ION
ION DISCOVER KEYBOARD USB User manual

ION
ION Redline User manual

ION
ION iED01c Instruction manual

ION
ION Electronic Drum Kit User manual

ION
ION iED004 User manual

ION
ION DISCOVER DRUMS User manual

ION
ION IED01 Technical document

ION
ION PRO SESSION Installation guide

ION
ION DISCOVER DRUMS 2 User manual

ION
ION IED05 User manual

ION
ION DISCOVER KEYBOARD USB User manual

ION
ION iDM02 User manual

ION
ION DISCOVER DRUMS User manual

ION
ION PRO SESSION User manual

ION
ION SOUND SESSION iED11 User manual