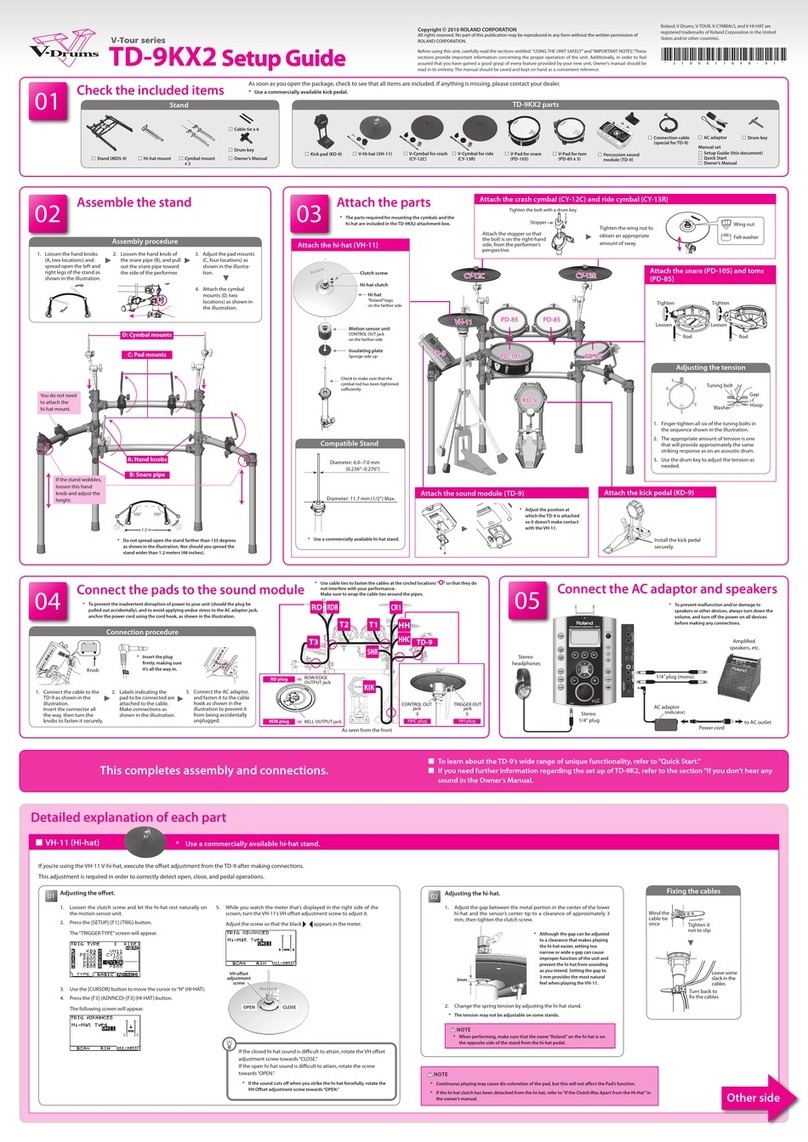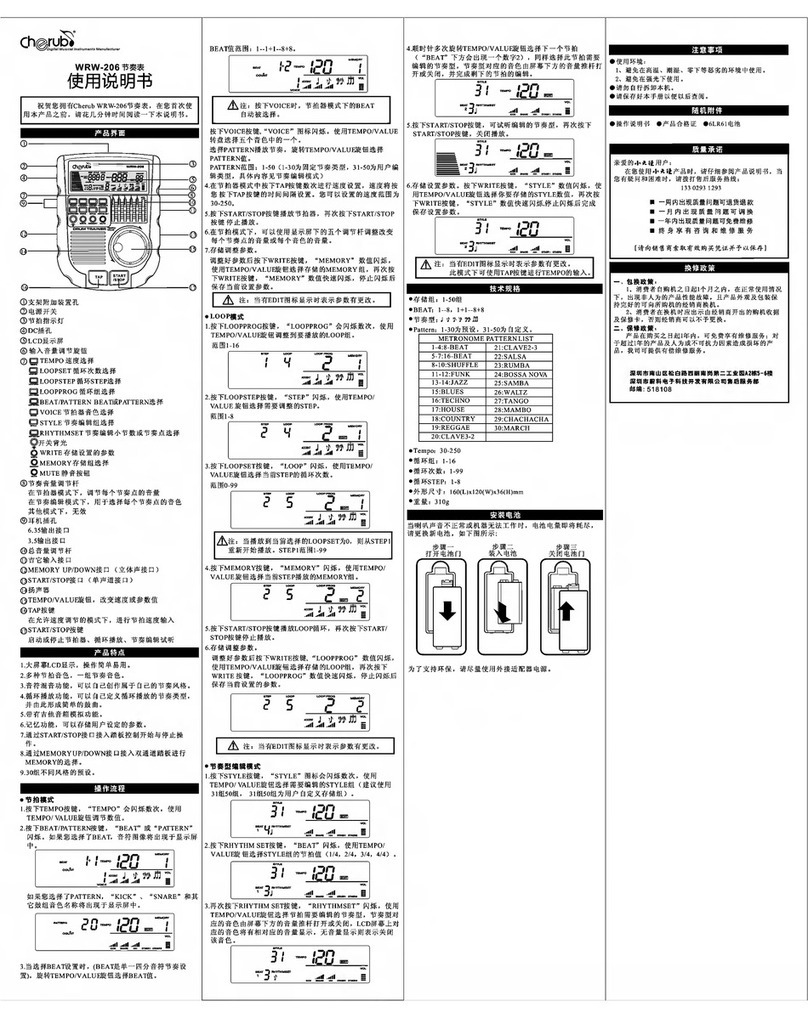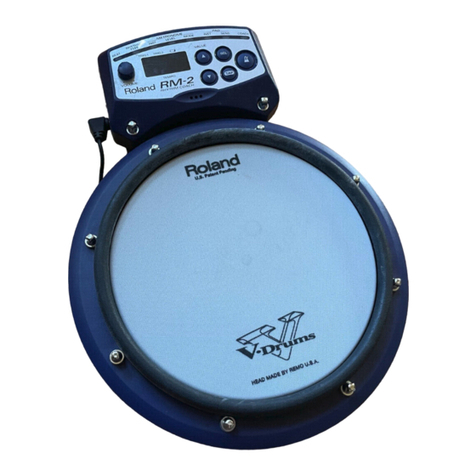
Setting Up
Réglages d’installation
セッティングについて
Aufstellung
Disposizione
Colocación
Conguração
设置
설치
Установка
※Cymbals, drum stool, foot pedal, and stands are sold separately.
※Les cymbales, tabouret, pédale, et des stands sont vendus séparément.
※シンバル・ドラム椅子・フットペダル・スタンド類は別売りです。
※Becken, Hocker, Fußmaschinen und Ständen werden separat verkauft.
※
Platillos, taburete de la batería, pedal, y soportes se venden por separado.
※Piatti, seggiolino, pedale, e stand sono venduti separatamente.
※Os pratos, banqueta, pedais e estantes são vendidos separadamente.
※铙钹、鼓座、踏板、和支架另售。
※심벌, 드럼 스툴, 페달 및 스탠드는 별도로 판매됩니다.
※ Тарелки, барабан стула, ножная педаль, и подставки продаются отдельно.
Cymbal
Cymbale
シンバル
Becken
Plato
Piatto
Prato crash
铙钹
심벌
Тарелка
e
w
q
y
r
t
q
w
q
y
w
r
e
t
q
w
e
rt
y
u u i
Drum Head Tightening Procedure
First, lightly tighten all the hoop bolts two turns each. Then, in a diagonal fashion following the numerical
order shown in the diagram below, begin to more firmly tighten each bolt a little at a time. As a guide during
tightening, the space between the hoop qan the shell wshould be the same everywhere.
New Drum Head Conditioning
For new drums, it may take some time to break in the head and shell. A properly stretched head will have a
good sound. Periodically check for proper tension by firmly pressing on the middle of the head. It is
possible to feel areas where the drum head is not correctly stretched.
Méthode de tension des peaux
Serrez tout d’abord tous les boulons du cercle de serrage de deux tours. Serrez ensuite progressivement
les boulons dans un ordre entrecroisé et en suivant la séquence indiquée dans l’illustration suivante. Pour
obtenir une tension égale, utilisez l’astuce suivante: l’espace entre le cercle de serrage qet le fût wdoit
être identique sur toute la circonférence.
Rodage des nouvelles peaux
Pour des nouvelles peaux et des nouveaux fûts, il faut parfois une certaine pé riode de rodage avant que la
peau ne s’accommode au fût. Pour qu’un fût sonne au mieux de sa forme, il est vital de tendre la peau de
manière égale. Vérifiez régulièrement la tension en appuyant fermement sur toute la surface de la peau
pour repérer les points qui nécessitent d’être retendus.
●ヘッドの張りかたについて
まずすべての締めボルトを2回転ほどずつ軽く仮留めしてください。次に、締めボルトを対角線状
に(イラストの番号順に)、締め付けていきます。このとき、それぞれのフープqとシェルwのクリ
アランスがすべて同じになるように、小刻みに締め付けてください。
●ヘッドのなじませかた
新品のドラムでは、ヘッドとシェルをなじませてください。ヘッドの中央を強く押すことにより、
ヘッドも適度に伸びてよく鳴るようになります。また、手の感触で締めの弱い箇所もわかります。
Spannen der Felle
Drehen Sie die Reifenschrauben der Reihe nach um zwei Windungen an. Befolgen Sie anschließend die in
der Abbildung angegebene Reihenfolge zum Festdrehen der Schrauben. Achten Sie darauf, daß der
Abstand des Reifens qzum Fell wan allen Stellen gleich ist.
Vorbereitung neuer Felle
Bei neuen Kesseln dauert es etwas, bis sich das Fell auf den Kessel schmiegt. Eine Trommel klingt nur bei
einem optimal gespannten Fell überzeugend. Kontrollieren Sie die Spannung in regelmäßigen Zeitabständen,
indem Sie die Fellmitte hinunterdrücken. Dabei spüren Sie sofort, wo die Spannung zu lasch ist.
Procedura di accordatura della pelle
Innanzitutto, serrare leggermente tutti i bulloni del cerchio di due giri. Successivamente, iniziare a serrare più a
fondo, in senso diagonale e nell’ordine numerico indicato nello schema, un bullone per volta. Come riferimento
per I’accordatura, lo spazio tra cerchio q
q
fusto
w
deve essere uguale in tutti i punti.
Preparazione della nuova pelle
Nei tamburi nuovi, il rodaggio di pelle e fusto può richiedere del tempo. Una pelle tesa correttamente produce un
buon suono. Controllare periodicamente che la tensione sia corretta premendo con decisione nel centro della
pelle. In tal modo è possibile sentire le zone in cui la pelle non è tesa correttamente.
Proceso de tension del parche
En primer lugar, tense levemente todos los tornillos del aro dos veces cada uno. Seguidamente, en
diagonal y siguiendo el orden numérico que se muestra en el diagrama siguiente, apriete más firmemente
pero poco a poco cada tornillo. Como guía durante el proceso de tensado, tenga en cuenta que el espacio
entre el aro qy el cuerpo wdebe mantenerse igual en todas partes.
Acondicionamiento de parches nuevos
En baterías nuevas, puede llevar cierto tiempo acoplar el parche y el cuerpo. Un parche bien tensado es
sinónimo de un buen sonido. Revise periódicamente la tensión haciendo una fuerte presión en el centro del
parche. Así se pueden percibir las zonas donde la tensión del parche no es la correcta.
Procedimento de aperto da pele
Primeiro, aperte ligeiramente todos os parafusos do aro duas voltas cada. Logo, seguindo a ordem
numérica mostrada no diagrama abaixo, comece a apertar cada parafuso com mais firmeza, um pouco de
cada vez, em um padrão diagonal. Como um guia para o aperto, o espaço entre o aro qe o casco w
deve ser igual em todos os lugares.
Amaciamento da nova pele
Para novas baterias, pode demorar um pouco para amaciar a pele e o casco. Uma pele estendida
adequadamente produzirá um som bom. Verifique periodicamente a tensão adequada pressionando
firmemente o meio da pele. É possível sentir áreas onde a pele não esteja estendida adequadamente.
鼓头拧紧方法
后先将所有箍螺栓分别拧紧2圈。然后,按照下图所示的数字顺序,对角地对各螺栓一
次只稍微拧紧一点点。作为拧紧时的指南,箍q和壳体w之间的间隙每处都要一样。
新鼓头的调整
对于新鼓,头部和壳体的磨合可能需要一些时间。绷紧得恰到好处的鼓头将会有很好
的声音。紧紧压住鼓头的中心,定期检查张力是否适当。可能会感觉到鼓头没有正确
绷紧的部位。
드럼 헤드 체결 절차
먼저 모든 후프 볼트를 각각 두 바퀴씩 돌려 가볍게 조입니다. 그런 다음 대각선 방향으로 아래 그림에
표시된 번호 순서대로 각 볼트를 한 번에 조금씩 더 단단히 조이기 시작합니다. 체결하는 동안 후프 q 와
쉘 w 사이의 공간이 모두 동일해야 합니다.
새 드럼 헤드 조절
새 드럼의 헤드와 쉘을 길들이는 데에는 어느 정도 시간이 걸립니다. 헤드가 적절히 골고루 당겨져야 좋은
소리가 나므로, 주기적으로 헤드의 중앙을 강하게 눌러 장력이 적절한지 확인하십시오. 감촉으로 제대로
당겨지지 않은 부분을 알 수 있습니다.
Процедура затягивания барабанного пластика
Сначала затяните на два оборота все болты на ободе. Затем прочно затяните болты по одному
крест-нaкрест в порядке, указанном цифрами на рисунке ниже. Bо время затягивания
расстояние между ободом q и корпуcом w должно быть везде одинаковым.
Доведение нового барабанного пластика до нужного состояния
Пластик и корпус некоторых новых барабанов требуют приработки. Правильно растянутый
пластик будет производить отличный звук. Bремя от времени проверяйте натяжение пластика, c
ильно нажав пaльцем по центру. Tак можнo почувствовать, где пластик неправильно натянут.
Note
If left for an extended time inside of an automobile, exposed to direct sunlight, or exposed to high
temperatures, the wrap covering (polyvinyl chloride sheet) can become deformed or the drum‘s
performance can be ruined.
Do not leave the drums in places with high temperature or high humidity.
Si la feuille de protection d’enveloppement (feuille en chlorure de polyvinyle) est laissée dans une
voiture pendant de longs moments, exposée directement au soleil ou exposée à de hautes
températures, elle risque d’être déformée ou les performances de la batterie peuvent être détruites.
Ne pas laisser la batterie dans les lieux à haute température ou humidité élevée.
Nota
Si se deja durante un período de tiempo prolongado en el interior de un automóvil, expuesta a la
luz directa del sol, o expuesta a altas temperaturas, puede deformarse la funda (lámina de cloruro
de polivinilo) o verse afectado adversamente el rendimiento de la batería.
No deje la batería en lugares en los que la temperatura sea alta o haya mucha humedad.
Floor Tom Assembly
Montage du tom basse
フロアタムの組み立てかた
Zusammenbau der Standtom
Montaggio del timpano
Montaje del timbal de suelo
Montagem do surdo
落地嗵鼓总成
플로어 톰 조립
Сборка напольного тома
qJust as you did on the bass drum, put the head wand then the hoop eonto
the tom shell q, attach the floor tom bolts rand tighten. Use the tuning key
tthroughout, and tighten each bolt a little at a time in a diagonal fashion.
(Refer to the “Drum Head Tightening Procedure” for complete instructions
on tightening the drum head.)
wInstall the floor tom legs y. To firmly stabilize the assembly, make sure the legs
extended outward at right angles to the circumference of the drum.
qComme vous l’avez déjà fait pour la grosse caisse, placez la peau wpuis le
cercle de serrage esur le fût du tom q, fixez les boulons rdu tom basse et
serrez ces derniers. Utilisez uniquement la clé de serrage tet serrez
progressivement chaque boulon dans un ordre entrecroisé. (Pour en savoir
plus sur la procédure de tension des peaux, voyez la section “Mé thode de
tension des peaux”.)
wInstallez les pieds du tom basse y. Pour que le tom basse soit bien stable,
veillez à ce que les extrémités des pieds s’étendent vers l’extérieur à angle droit
par rapport au fût.
qバ ス ド ラ ム 同 様 、シ ェ ル qに 、ヘ ッ ド w、フ ー プ eの 順 番 で 重 ね 、フ ロ ア タ ム 締 め ボ
ルトrを取り付けて締め付けます。すべて、チューニングキー tを 使 用 し ま す 。フ
ロ アタム 締 め ボ ルト rは、少しずつ対角線状に締め付けていきます。(「 ヘ ッ ド の
張りかたについて」をご参照ください。)
wフロ アタム 脚 yを 取 り 付 け ま す 。フ ロ ア タ ム 脚 は 、安 定 性 を よ く す る た め 、真 上 か ら
見て円周に対し直角に外に出るように取り付けます。
qLegen Sie, wie bei der Bassdrum, das Fell wund den Reifen eauf den
Kessel q, drehen Sie die Schrauben rhinein und ziehen Sie sie an.
Verwenden Sie hierfür von Anfang an den Stimmschlüssel tund drehen Sie
die Schrauben rüberkreuz allmählich immer fester. (Weitere Hinweise zum
Spannen der Felle finden Sie unter „Spannen der Felle“.)
wBringen Sie die Beine yan der Standtom an. Um die größtmögliche Stabilität
zu gewährleisten, sollten Sie das ausladende Ende in einem rechten Winkel
zur Standtom nach außen drehen.
qCome per la grancassa, disporre la pelle wquindi il cerchio esul fusto del
timpano q; fissare i bulloni rdel timpano, quindi serrare. Nel corso
dell’operazione, utilizzare la chiavetta di registrazione t, serrando
gradualmente ogni bullone rin senso diagonale (fare riferimento alla
“Procedura di accordatura della pelle” per ottenere istruzioni complete
sulla tensione della pelle).
wMontare i piedini del timpano y. Per la massima stabilità dell’insieme,
accertarsi che i piedini si allarghino ad angolo retto rispetto alla circonferenza
del tamburo.
qAl igual que en el proceso de montaje del bombo, ponga el parche wy
después el aro esobre el cuerpo del timbal q, coloque firmemente los
tornillos rdel soporte del timbal y apriételos. Utilice siempre el afinador ty
apriete los tornillos poco a poco y en diagonal. (Consulte las “Instrucciones
sobre cómo asegurar el parche del bombo” para fijarlo adecuadamente).
wInstale los pies del soporte del timbal y. Para estabilizar firmemente el
montaje, asegú rese de extender los pies siguiendo los ángulos adecuados de
la circunferencia del tambor.
qExatamente como você fez para o bumbo, coloque a pele we, em seguida, o
aro eno casco qdo tom, instale os parafusos do surdo r e aperte-os. Use
a chave de afinação tpara apertar cada parafuso um pouco de cada vez,
em um padrão diagonal. (Consulte o “Procedimento de aperto da pele”
para as instruções completas sobre o aperto da pele.)
wInstale as pernas do surdo y. Para estabilizar o conjunto firmemente,
certifique-se de que as pernas estejam estendidas para fora em ângulos retos
em relação à circunferência da bateria.
q如同低音鼓的做法一样,将头部w放好,然后将箍e装于嗵鼓壳
q上,将落地长鼓螺栓r装上并拧紧。用调谐键t对角地拧紧各
螺栓,一次只拧紧一点点。(关于拧紧鼓头的详细说明,请参看
“鼓头的拧紧方法”。)
w将落地长鼓脚y装上。要使装配稳定,必须使脚与鼓周成直角向
外延伸。
q베이스 드럼 작업과 같이 헤드 w 그리고 후프 e 순서로 톰 쉘 q 에 넣고
플로어 톰 볼트 r 를 부착한 다음 조입니다. 튜닝 키 t 를 사용하여 각 볼트를
대각선 방향으로 한 번에 조금씩 조입니다. (드럼 헤드 체결에 대한 자세한
설명은 '드럼 헤드 체결 절차'를 참조하십시오.)
w플로어 톰 다리 y 를 설치합니다. 안정된 균형을 위해 드럼의 둘레에서 다리가
직각으로 바깥 쪽을 향하도록 합니다.
qКак и в случае с бас-барабаном, поместите пластик w, а затем обруч e
на корпус тома q, прикрепите болты напольного тома r и затяните.
Наденьте настроечный ключ и затяните слегка один за одним болты
крест-накрест. (Полные инструкции по натягиванию барабанного
пластика см. в разделе “Процедура натягивания барабанного
пластика”.)
wУстановите ножки напольного тома y. Чтобы обеспечить устойчивость
сборки, убедитесь, что раздвинутые ножки находятся под правильными
углами по отношению к окружности барабана.
qAdjust the length of the bass drum legs so that the front of the bass drum qis slightly raised (about one finger).
wMake sure the foot pedal wis flat on the floor.
eThe height of the drum stool eshould be set so that the knee is a little lower than the upper thigh when the
player’s foot is on the foot pedal and the heel is raised.
r The hi-hat rshould be 5 to 7 inches higher than the snare drum t, keep a 1 to 2 inch space between the
upper and lower cymbals and tilt the lower cymbal slightly.
tThe height of the floor tom yshould be set about the same as that of the snare drum and a one foot space
should be kept between the floor tom and snare drum.
This completes the basic setup of the drum equipment.
qAjustez la longueur des pieds de grosse caisse de façon que l’avant de la grosse caisse qsoit légèrement
surélevé (environ un doigt).
wVérifiez que la pédale west bien à plat sur le sol.
eRéglez la hauteur du tabouret ede sorte que le genou se situe légèrement plus bas que le haut de la cuisse
lorsque le pied du batteur repose sur la pédale et que son talon est relevé.
rVeillez à placer le charleston r12,5 à 17, 5 cm plus haut que le sommet de la caisse claire tet à conserver
un espace de 2,5 à 5 cm entre les cymbales charleston supé rieure et infé rieure. De plus, pour obtenir un
meilleur son, inclinez légèrement la cymbale infé rieure.
tLe tom basse ydoit être réglée à environ la même hauteur que la caisse claire et un espace d’environ 30 cm
doit être laissé entre le tom basse et la caisse claire.
Cea informations couvrent l’installation de base des éléments de votre batterie.
qバ スドラムqは、前側が少し(指1本ぐらい)浮くように、バスドラム脚の長さを調節して置きます。
wフット ペ ダ ル wは必ず、床に水平にセットします。
eドラムスツールeは、ペダルに足を乗せ、かかとを上げたときに股がやや前さがりになるような高さにします。
rハイハット rは、スネアドラムtより10 〜15 cm高く、3〜5cm の 間 隔を開 けて下のハイハットシンバルを傾けて
セットしま す。
tフロ アタム yは、スネアドラムとほぼ同じ高さに、スネアドラムとの間に片足が入るようにセットします。
以上がセッティングの基本です。
qRichten Sie die Länge der Bassdrum-Beine so ein, dass die Bassdrum qvorne ein wenig (etwa einen Finger
breit) höher ist.
wKontrollieren Sie, ob die Fußmaschine wflach auf dem Boden liegt.
eStellen Sie die Höhe des Hockers eso ein, daß sich lhr Knie bei hinuntergedrücktem Pedal etwas unter
dem Oberschenkel befindet und daß sich der Hacken hebt.
r
Die HiHat rmuß sich ungefähr 12 bis 18 cm über der Snare tbefinden. Bei geöffneter HiHat muß der Abstand
zwischen dem oberen und unteren Becken ca. 3 bis 5 cm betragen. Das untere Becken sollte leicht geneigt werden.
tDie Höhe der Standtom ysollte in etwa mit der Snare übereinstimmen, und der Abstand zwischen
Standtom und Snare sollte etwa 30 cm betragen.
Ihr Schlagzeug ist nun ordnungsgemäß aufgestellt
qRegolare la lunghezza delle gambe della grancassa in modo la parte anteriore di questa qsia leggermente
sollevata (circa di un dito).
wAccertarsi che il pedale wpoggi completamente sul pavimento.
eL’altezza del seggiolino edeve essere regolata in modo che il ginocchio si trovi poco più in basso rispetto
alla coscia, quando il musicista poggia il piede sul pedale con il tallone sollevato.
rIl charleston r deve trovarsi di 10-20 cm più in alto del rullante t; mantenere una distanza di 2-5 cm tra
piatto superiore ed inferiore, inclinare leggermente il piatto inferiore.
tL’altezza del timpano ydeve essere la stessa del rullante e la sua distanza dal rullante di circa 30 cm.
La disposizione di base della batteria è quindi completata.
qAjuste la longitud de los pies del bombo de manera que la parte frontal del bombo qquede ligeramente
elevada (un dedo aproximadamente).
wAsegúrese de que el pedal westé en posición completamente horizontal en el soporte.
eLa altura del taburete de la batería edebe situarse de forma que la rodilla esté ligeramente más baja que el
muslo superior cuando el pie del intérprete esté colocado en el pedal y tenga levantado el talón.
rEl charles rtiene que estar entre 5 y 7 pulgadas por encima del tambor t. Mantenga una separación de 1
a 2 pulgadas entre los platillos superior e inferior e incline ligeramente el platillo inferior.
tLa altura del timbal de suelo ydeberá ser aproximadamente la misma que la de la caja y deberá dejarse un
espacio de un pie entre el timbal de suelo y la caja.
Esta es la colocación básica de la batería.
qAjuste o comprimento das pernas do bumbo de forma que a frente do bumbo qfique ligeiramente elevada
(cerca de um dedo).
w Certifique-se de que o pedal westeja nivelado no chão.
eA altura da banqueta edeve ser definida de forma que o joelho fique um pouco mais baixo do que a parte
superior da perna quando o pé do baterista estiver no pedal com o calcanhar elevado.
r O prato hi-hat rdeve ficar 10 a 15 cm mais alto do que a caixa t. Além disso, mantenha um espaço de 3 a
5 cm entre os pratos superior e inferior, e incline o prato inferior ligeiramente.
tA altura do surdo y deve ser ajustada para a mesma altura da caixa, devendo-se deixar o espaço de um pé
entre o surdo e a caixa.
Isso completa a configuração básica da bateria.
q调节低音鼓腿的长度使低音鼓的正面w稍微升起(约1/2")。
w确认踏板w平放于地板上。
e鼓座e的高度要设定得当演奏者的脚踩在踏板上并抬起脚跟时膝盖稍低于大腿。。
rhi-hatr要比响弦鼓t的顶部高5-7英寸。在hi-hat的上部饶钹与下部饶钹之间要保持1-2
英寸的空隙。此外,还要使下部饶钹稍微倾斜。
t落地长鼓y的高度应设定成与响弦鼓大致相同并在落地长鼓和响弦鼓之间留下一只脚大
小的空间。
这适用于鼓设备的基本设置。
q베이스 드럼 다리의 길이를 조절하여 베이스 드럼 q 의 앞쪽이 약간 올라가도록 합니다(손가락 하나 정도).
w풋 페달 w 이 바닥에 편평하게 있는지 확인합니다.
e드럼 스툴 e 의 높이는 연주자가 발을 풋 페달에 놓은 상태에서 발꿈치를 올렸을 때 무릎이 허벅다리보다
약간 아래로 내려오도록 설치해야 합니다.
r하이 햇 r 은 스네어 드럼 t 보다 5~7인치 정도 높아야 합니다. 상부 및 하부 심벌 사이 공간을 1~2인치
정도로 유지하고 하부 심벌을 약간 기울입니다.
t플로어 톰 y 은 스네어 드럼과 거의 같은 높이로 설치되어야 하고, 플로어 톰과 스네어 드럼 사이에는 발
하나가 들어갈 정도의 공간을 두어야 합니다.
드럼 장비 기본 설치 단계를 마칩니다.
qОтрегулируйте длину ножек бас-барабана таким образом, чтобы передняя часть бас-барабана qбыла
немного приподнята (примерно на ширину одного пальца).
wУбедитесь, что ножная педаль w плоско лежит на полу.
eСтул e для барабанщика следует выставить на такую высоту, чтобы колено барабанщика находилось
немного ниже верхней части бедра, когда его нога расположена на ножной педали, а пятка приподнята.
rТарелки хай-хэт r должны находиться на 5-7 дюймов выше малого барабана t. Между верхней и
нижней тарелкой должно быть 1-2 дюйма, причем нижняя должна быть слегка наклонена.
tВысота напольного тома y должна быть примерно такой же, как высота малого барабана, а между
напольным томом и малым барабаном должно быть пространство для одной ноги.
На этом основной процесс установки барабанов завершается.
〒 430-8650 静岡県浜松市中区中沢町10-1
Remarque
Bei längerer Aufbewahrung im Auto, direkter Sonneneinstrahlung oder hohen Temperaturen kann der
Schutzfilm (Polyvinylchloridblatt) sich verziehen und das Instrument seinen Klangcharakter einbüßen.
Bewahren Sie die Trommeln nicht an Orten auf, wo sie hohen Temperaturen oder hoher
Luftfeuchtigkeit ausgesetzt sind.
Anmerkung
Se lo strumento viene lasciato per molto tempo in un’automobile esposta a luce solare diretta o a
temperature elevate, il foglio (in cloruro di polivinile) che la avvolge può deformarsi e le
prestazioni della batteria possono scadere.
No deje la batería en lugares en los que la temperatura sea alta o haya mucha humedad.
Note
Nota
주의
Se a bateria for deixada durante um período prolongado dentro de um automóvel, ficar exposta à
luz direta do sol, ou ficar exposta a altas temperaturas, a cobertura (folha de cloreto de polivinila)
pode deformar-se ou o desempenho da bateria pode deteriorar-se.
Não deixe a bateria em lugares com alta temperatura ou alta umidade.
注意
长时间将鼓置于汽车内、暴露于直射阳光下或放置在高温中可能会使鼓的外部防护层(聚
氯乙烯薄板)变形,甚或严重影响其音质。
请不要将鼓置于高温或潮湿的地方。
장시간 동안 차량 실내에 보관하거나 직사광선 및 고온에 노출되는 경우, 랩 커버링(PVC 시트)이 변질되거나
드럼 성능이 떨어질 수 있습니다.
드럼을 고온 또는 습기가 많은 장소에 두지 마십시오.
Примечание
Если надолго оставить барабан в автомобиле под действием прямых солнечных лучей или
высоких температур, может деформироваться пластик (поливинилхлорид)_барабана или
резко ухудшиться качество его звучания.
Не оставляйте барабаны в местах, подверженных воздействио высоких температур или
высокой влажности.
保护环境
如果需要废弃设备时,请与本地相关机构联系,获取正确的废弃方法。
请勿将设备随意丢弃或作为生活垃圾处理。
制造商:雅马哈株式会社
制造商地址:日本静冈县滨松市中区中泽町 10-1
进口商:雅马哈乐器音响(中国)投资有限公司
进口商地址:上海市静安区新闸路 1818 号云和大厦 2 楼
原产地:中国
产品标准编号 : QB/T 2838
注意
車の中に長時間放置されたり、直射日光にさらされたり、高温になる場所に置かれると、ラップカバー ( ポ
リ塩化ビニルシート ) が変形したり、ドラムの性能が損なわれることがあります。
ドラムを温度や湿度の高い場所に置かないでください。
RYDEEN2016A2sideB0513.pdf12016/05/1316:52:31
