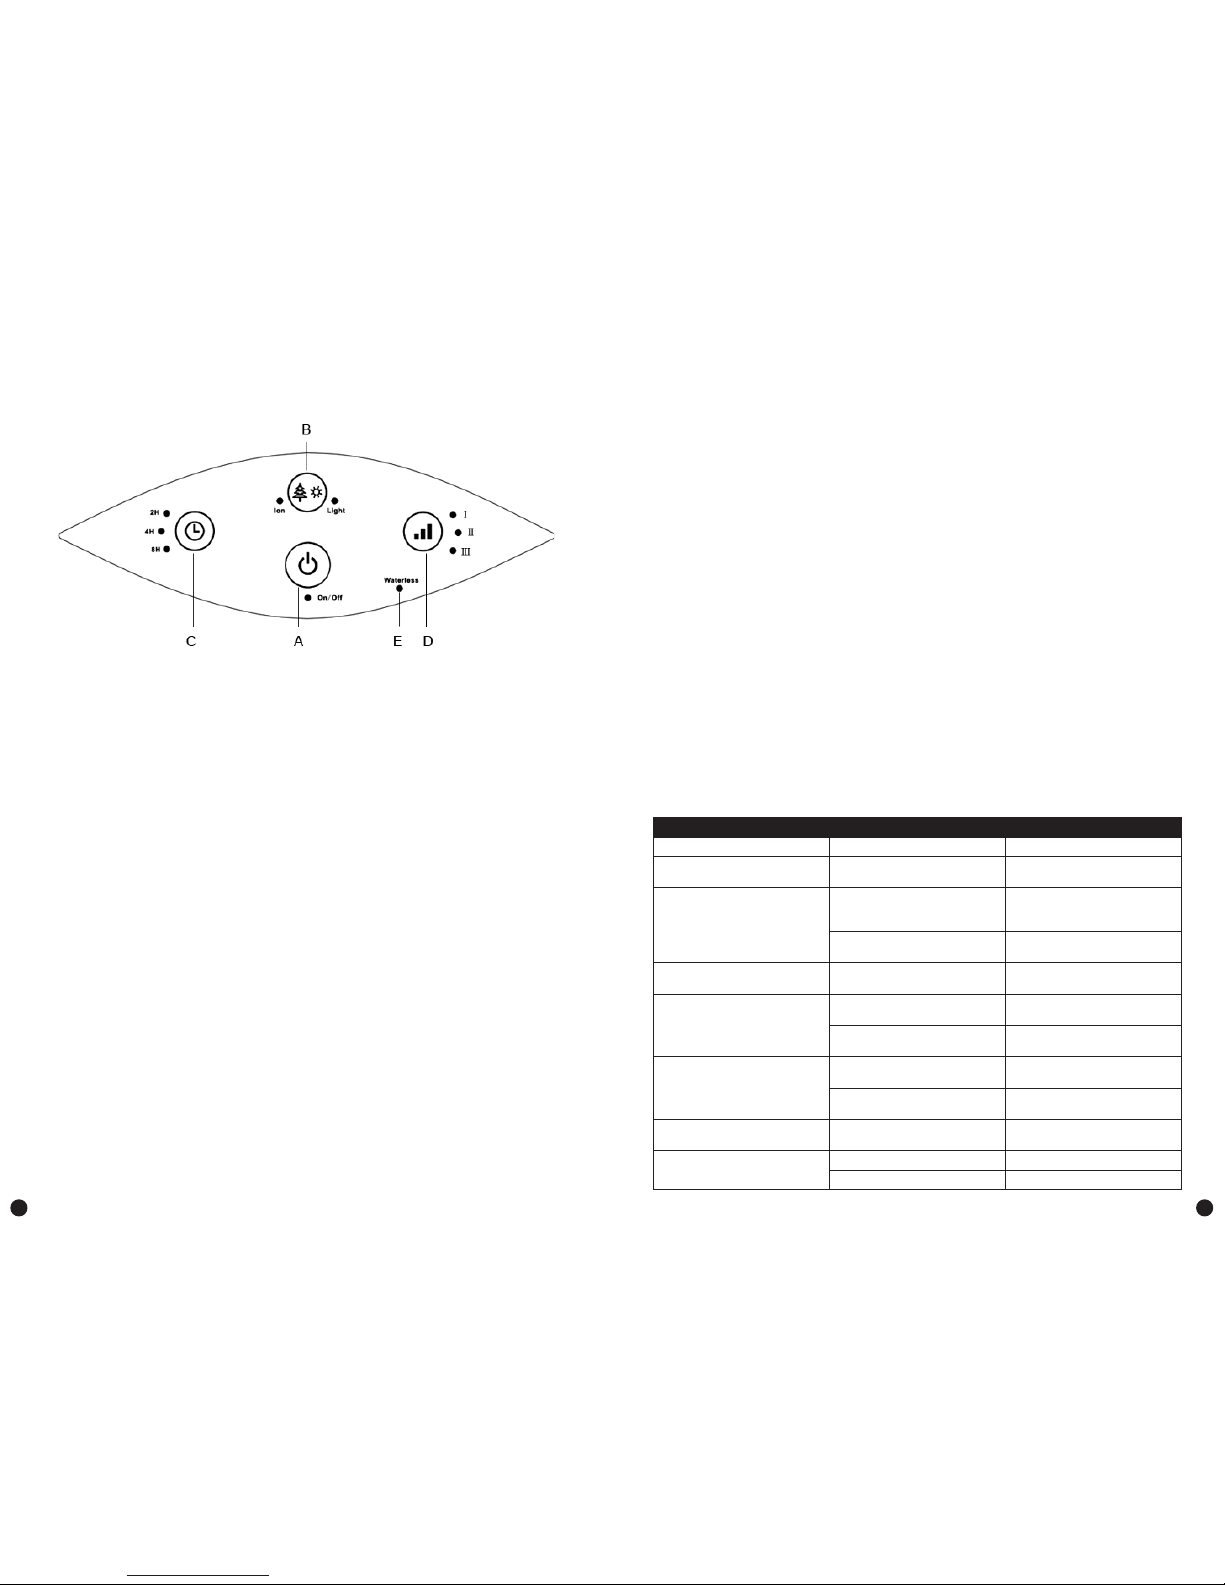
CONTROL PANEL AND OPERATION
A) On/off switch
Press button A to turn the unit on and off.
B) Ioniser/night light
The ioniser is set to automatically start running once the unit is switched on. Press button B once to
turn the night light on; press it a second time to turn the ioniser off, and; press it a third time to turn
both the ioniser and the night light off.
C) Timer setting
Press button C to set the timer to either 2 hours, 4 hours or 8 hours.
D) Mist emission setting
Press button D to adjust between low (I), medium (II), and high (III) mist emission. We recommend
setting it to low mist emission for night use.
E) Waterless warning
The indicator light (E) will be red when the water tank needs relling.
Attention: If condensation forms on your window or walls, please turn the unit off.
CLEANING AND MAINTENANCE
In winter, the lack of humidity can dry out your skin and cause nasal irritation, frequent colds, sore
throats and other respiratory conditions. Humidiers provide relative humidity to protect our health.
To get the most benet from the humidier and avoid product failure, please follow all maintenance
instructions carefully. These steps are essential to prevent microorganisms from growing in the water
within the humidier.
A) Daily maintenance
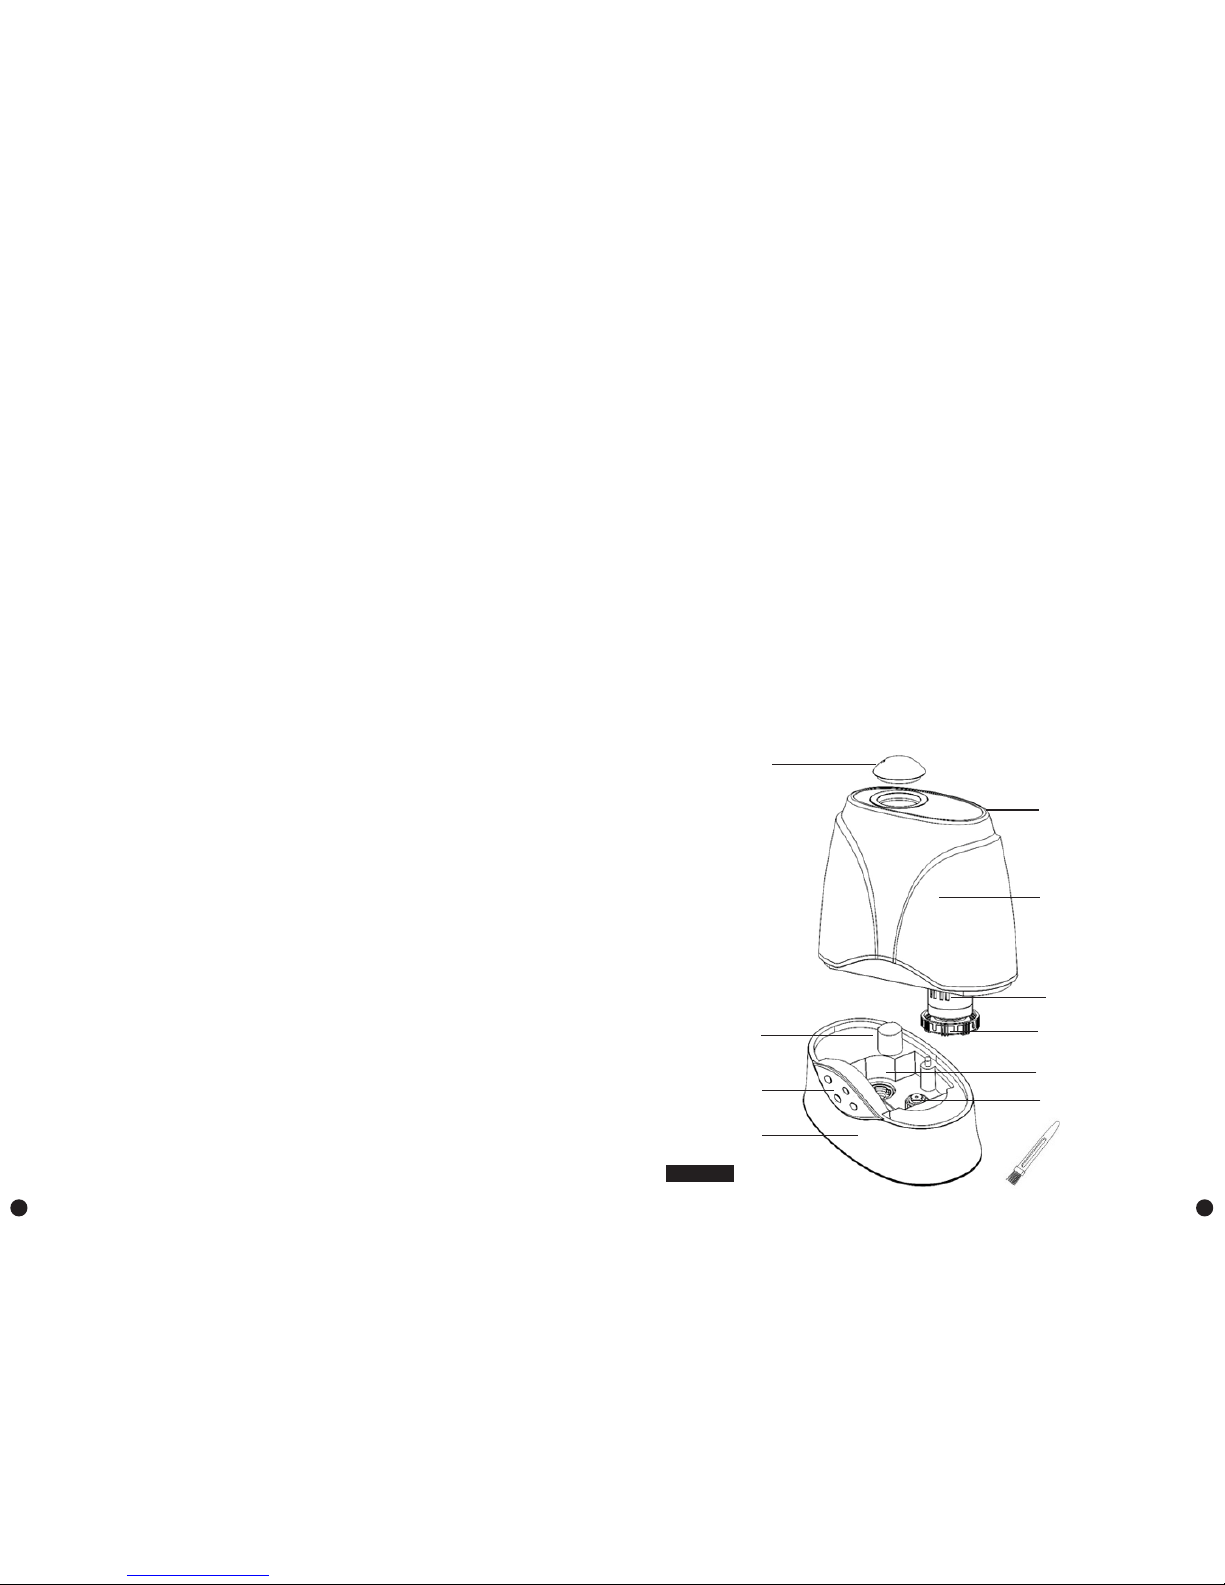
1. Before cleaning, turn the power off and unplug the unit from its electrical outlet.
2. Remove the water tank from the base of the unit.
3. Carry the water tank to a sink, then drain and rinse the water tank thoroughly to remove any
sediment or dirt. Wipe clean and dry it with a clean soft cloth or paper towel.
4. Rell the water tank with cool tap water as instructed in the Pre-Operating Instructions.
B) Weekly maintenance
1. Repeat steps 1-3 above.
2. Pour one cup of white vinegar (about 200ml) into the base in the main body and leave for about
15 minutes. Then, wipe off the scale (especially in the transducer) with the soft brush.
3. Wipe off the scale and white vinegar solution using a clean soft cloth.
C) Maintenance caution
1. Never submerge the main body in water.
2. Do not use any solvents or aggressive cleaning agents to clean the unit.
3. Clean the internal parts with a soft cloth.
4. Use only the brush provided to clean the transducer. This should be done once a week.
5. Use only the soft bristle portion of the brush when cleaning.
6. Change the water in the water tank at least once a week to ensure that water is not left standing
more than one week.
D) Storing the humidier
1. Clean the unit as described above and dry thoroughly.
2. Preferably, store the unit in its original box.
3. Avoid exposing the unit to high temperatures.
E) Replacement of the lter cartridge (Optional)
Replace the lter cartridge every 6 months as follows:
1. Unplug the unit before removing the water tank. Do not touch the water in the main body during
operation.
2. Turn the water tank upside down and unscrew the water tank cap. The lter cartridge is attached
to the inside of the cap.
3. Remove the old lter cartridge and insert the new lter cartridge.
4. Screw the tank cap tightly onto the water tank and replace the water tank onto the main body.
Additional note: The main material of the lter cartridge is grain resin.
TROUBLESHOOTING INSTRUCTIONS
If your humidier is not working correctly please check the following causes:
Problem Probably cause Solution
Unit not operating Power cable not plugged in Plug in power cable
Power light is on, but there is no
mist output
No water in water tank Fill tank with water
Water mist produces an unpleasant
smell.
New machine Open the water tank, empty it and
leave it in a shady and cool place
for 12 hours
Dirty water or the water has been
left in the water tank for too long
Clean the water tank and rell with
fresh, cool water
The power light is on, but the
humidier doesn’t work
Too much water in the tank Pour away some water from the
tank
Mist output volume is low The transducer is dirty Clean transducer using vinegar and
a soft brush
Dirty water or the water has been
left in the water tank for too long
Clean the water tank and rell with
fresh, cool water
Abnormal noise Resonance in water tank when
water is insufcient
Fill tank with water
Unit is on an unstable or uneven
surface
Move the unit to a stable, at
surface
Can’t open tank cap / very tight
tank cap
Over tightened Add liquid soup to cap gasket to
ease it open
Water is leaking from the unit Tank cap too loose Tighten tank cap
Base not emptied during rell Remove tank. Empty base and rell.
3 4