0908 EN
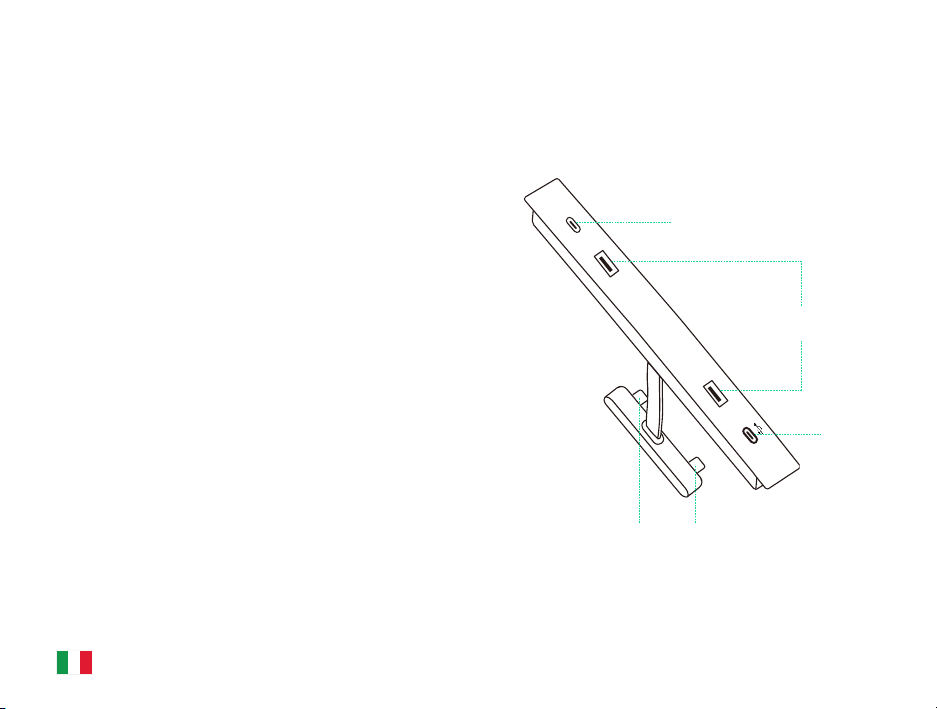
Powering the USB Hub
Connecting the USB Hub
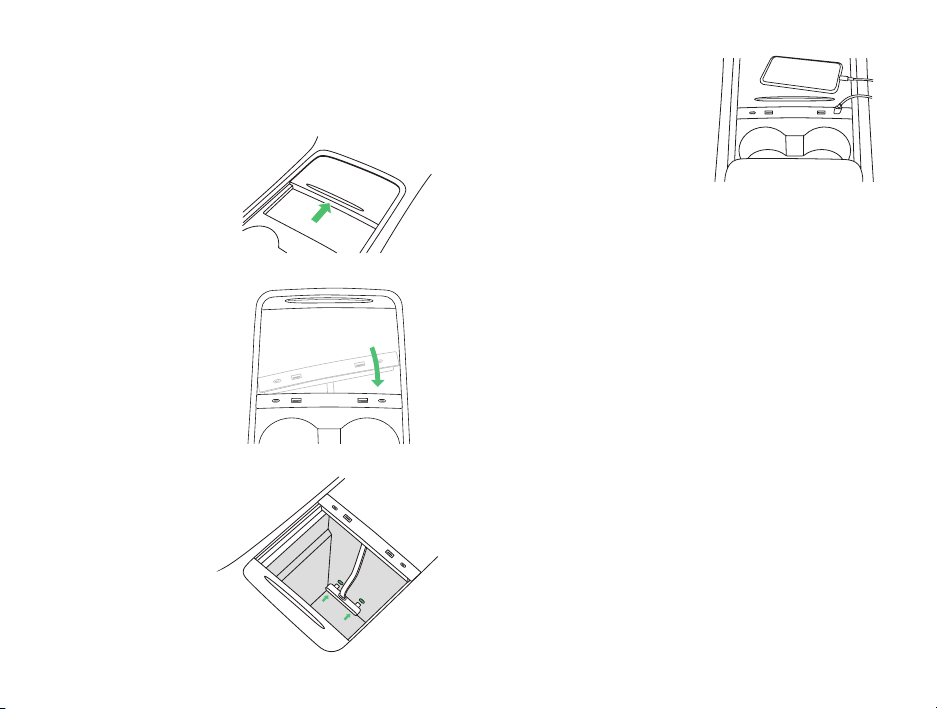
02 Installing the Terus USB Hub
1. Slide open the front
storage compartment
cover.
2. Insert the USB hub
on a diagonal. Then
straighten the hub
and slide it into place
so it sits flush against
the center console.
3. Connect the hub
to the two existing
USB-C ports.
4. Plug in your
devices and you’re
ready to go!
To power the USB hub, the vehicle must
be awake.
Instances when the vehicle is considered
awake include whenever the low voltage
battery is being charged or is in use,
during HV charging, when the vehicle is
communicating with the mobile app, when
using features such as Summon, or
when features such as Preconditioning,
Keep Climate On, Dog Mode, Camp Mode,
Sentry Mode, etc. are enabled.
*Leaving a device plugged into the USB Hub does not
deplete the low voltage battery.
*Data transfer for streaming music, playing games,
navigation, or other purposes is only possible via the
USB-C I/O port (where available).