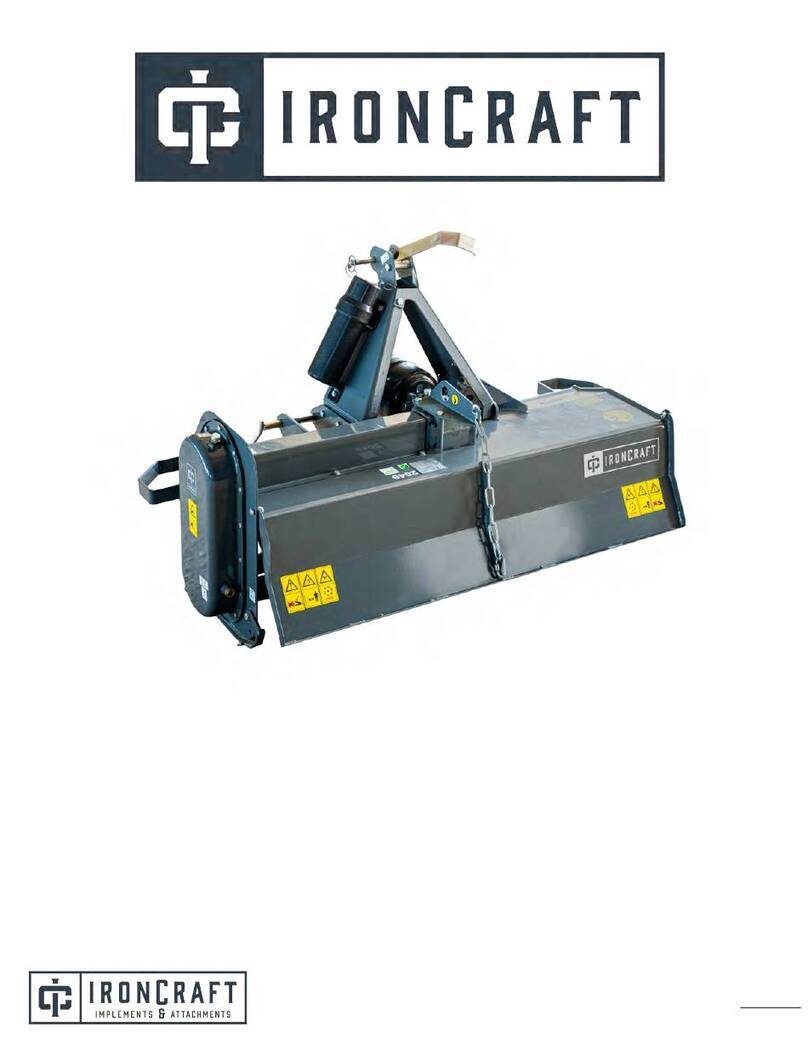
IronCraft VH90 Series User manual

T
Ju
l
y 2022
Rotary Tillers
VH90 - Series
Operation Manual


Congratulation for purchasing your newIronCraft rotary tiller!
This tiller has been designed and manufactured following all safety andquality requirements
needed for a safe and satisfactory use over time.
Acareful reading ofthis manual will permit you to familiarize with your newequipment, and
will provide you all the tools needed to use it safely.
Aproper maintenance and knowledge of the safety rules of use will allow to
obtain the best performance and a long service life of the machine.
The Safety Alert
Symbol
used throughout this manual and on
s
af
et
y
decals
of
the machineindicates the presence
of
potential hazard to
t
h
e
operator. When you see this symbol, be alert and carefully read
t
h
e
message that follows
i
t
.
The Safety Alert Symbol is used in conjunction with following Signal Words, according to the
degree of possible injuries that may result operating the implement:
D
A
N
GE
R
Indicates
an
i
mm
i
nent
l
y
hazardous
s
i
t
ua
t
i
o
n
that,
if
not
a
v
o
i
ded,
will
result
i
n
death
or
s
e
ri
o
us
i
njury
.
WA
R
N
IN
G
Indicates
a
po
t
e
nt
i
a
ll
y
hazardous
s
i
t
ua
t
i
o
n
that,
if
not
a
v
o
i
ded,
could result
i
n
death
or
s
e
ri
o
us
i
njury
,
and
i
nc
l
ude
s
hazards
that are
exposed
when
guards
are
removed.
It may
a
l
s
o
be used
t
o
a
l
e
rt
a
ga
i
ns
t
unsafe pra
c
t
i
c
e
s
.
C
A
UT
IO
N
Indicates
a
po
t
e
nt
i
a
ll
y
hazardous
s
i
t
ua
t
i
o
n
that,
if
not
a
v
o
i
de
d
,
may
re
s
u
l
t
i
n
m
i
no
r
or
m
o
de
ra
t
e
i
njury
.
It may
a
l
s
o
be used to
a
l
e
rt
a
ga
i
ns
t
unsafe pra
c
t
i
c
e
s
.
IM
P
O
R
T
A
N
T
Indicates
i
ns
t
ruc
t
i
o
ns
or
procedures that,
if
not
observed,
can cause
damage
to
equipment o
r
e
nv
i
ro
nm
e
nt
.
NO
TE
Indicates
he
l
pful
i
nform
a
t
i
o
n.
READ,
UNDERSTAND,
and
FOLLOW
the safety
messages
fo
ll
o
w
i
ng
the Safety
Al
e
rt
Sy
m
bo
l
a
nd
Si
gna
l
Words.
F
a
il
ure
to comply w
i
t
h
safety
messages
could result
i
n
serious
bo
di
l
y
i
njury
or
de
a
t
h.

TO THE PURCHASER
This manual contains valuable information about IronCraft ROTARY TILLER.
It has been carefully prepared to give you helpful suggestions for
operating, adjusting, servicing repair parts.
Keep this manual in a convenient place for quick and easy reference. Study it
carefully. You have purchased a dependable and sturdy tiller, but only by proper
care and operation can you expect to get the service and long life designed and
built into it.
RIGHT-HAND AND LEFT-HAND sides are determined by watching fromthe tractor
side.
Sometime in the future your tiller may need new parts to replace those
are worn or broken. If so, go to nearest IronCraft dealer and provide him the
model and part number.
Customer information
Name ____________________________________________________________
Purchased from_____________________________________________________
Purchased date______________________________________________________
Model No.__________________________________________________________
Serial No.___________________________________________________________

TABLE
OF CONTENTS
Contents
1.
ABOUT
THIS
M
A
NU
AL
....................................................................1
2.
INTRODUCTION
...................................................................................1
2.1.
TILLER
IDENTIFICATION.............................................................................. 1
2.2. INTENDED USE ............................................................................................... 2
2.3. MAIN PARTS DESCRIPTION......................................................................... 3
2.4. ILLER SPECIFICATIONS................................................................................ 4
3.
SAFETY
................................................................................................5
3.1. GENERAL SAFETY INSTRUCTION ............................................................. 5
3.2. EQUIPMENT SAFETY INSTRUCTIONS....................................................... 6
3.3. OPERATING SAFETY INSTRUCTIONS....................................................... 7
3.4. TRANSPORTING SAFETY INSTRUCTIONS ............................................... 8
3.5. MAINTENANCE SAFETY INSTRUCTIONS ................................................ 9
3.6. STORAGE SAFETY INSTRUCTIONS ........................................................... 9
3.7. SAFETY LABELS........................................................................................... 10
SAFETY LABELS
POSITION
AND
D
ES
C
R
I
P
TI
O
N
...........................................................10
4.
SET UP
................................................................................................14
4.1. LOWER HITCHES POSITIONING ............................................................... 14
4.2. CONNECTING TO THE TRACTOR............................................................. 15
4.3. DRIVELINE INSTALLATION ...................................................................... 15
DRIVELINE LENGTH
CHECK ............................................................................................16
4.4. TRACTOR-TILLER STABILITY .................................................................. 17
5.
OPERATING
.......................................................................................18
5.1. START UP ....................................................................................................... 18
5.2. OPERATING INSTRUCTIONS ..................................................................... 19
5.3. ADJUSTMENTS.............................................................................................. 20
LOWER CLEVISES ADJUSTMENT
......................................................................................20
FRICTION CLUTCH ADJUSTMENT
....................................................................................20
SKIDS ADJUSTMENT
...........................................................................................................21
REAR BOARD ADJUSTMENT
.............................................................................................22
GEAR BOX SPEED ADJUSTMENT
......................................................................................23
5.4. STOPPING AND DISCONNECTION............................................................ 24
5.5. TRASPORTING .............................................................................................. 25

6.
MAINTENANCE
..................................................................................25
6.1. BLADES REPLACEMENT ............................................................................ 25
6.2. GEARBOX LUBRICATION .......................................................................... 26
6.3. SIDE CASE LUBRICATION.......................................................................... 27
6.4. BEARING HOUSING LUBRICATION......................................................... 28
6.5. DRIVESHAFT MAINTENANCE................................................................... 29
7.
STORAGE
...........................................................................................30
8.
SCRAPPING
........................................................................................30
9.
TROUBLESHOOTING
.........................................................................31
10.
TORQUEVALUESTABLE
...................................................................33
11.
WARRANTY
.......................................................................................33
12.
PARTS INFO...................................................................................35

VH90 Rotary T
ill
ers
1
1.
ABOUT
THIS
M
A
NU
AL
The
operator
must read the
m
a
nua
l
for a correct
understanding
of the
hazards
that may
present
when
o
pe
ra
t
i
ng
the
t
ill
e
r,
as w
e
ll
as for
o
bt
a
i
n
o
pt
i
m
um
performance
from the
m
a
c
hi
ne
.
The
m
a
nua
l i
s
part of the
machine,
i
t
must be kept
i
n
good
c
o
ndi
t
i
o
n
and
re
m
a
i
n
w
i
t
h
the
m
a
c
hi
ne
even
i
n
case of
re
s
a
l
e
,
u
nt
il i
t
s de
m
o
li
t
i
o
n.
In case of
l
o
ss
or
damage, request
a new copy to
t
he
M
a
nufa
c
t
ure
r
or your De
a
l
e
r.
The
i
nform
a
t
i
o
n,
des
c
ri
p
t
i
o
ns
and
ill
us
t
ra
t
i
o
ns
i
n
this
m
a
nua
l
describes
the
state
of the product
a
t
the
t
i
m
e
of
i
t
s
pu
bl
i
c
a
t
i
o
n,
and may not reflect the product
i
n
the
fut
ure
.
The
M
a
nufa
c
t
ure
r
reserve
the right to make
d
e
s
i
gn
i
m
pro
v
e
m
e
nts
or
changes
i
n
spe
c
i
fi
c
a
t
i
o
n
s
w
i
t
ho
ut
i
nc
urri
ng
i
n
any
o
bl
i
ga
t
i
o
n
to
i
ns
t
a
ll
them on units
pre
v
i
o
us
l
y
s
o
l
d
.
Text,
ill
us
t
ra
t
i
o
ns
and
dr
a
w
i
ngs
of this
m
a
nua
l
cannot
be di
s
c
l
o
s
e
d
or
t
r
a
ns
m
i
tt
e
d,
i
n
w
ho
l
e
or
i
n
part, to third
part
i
e
s
w
i
t
h
o
ut
the written
pe
rm
i
ss
i
o
n
of the
M
a
nufa
c
t
ure
r.
All
r
i
g
hts
are
re
s
e
rv
e
d
.
2.
INTRODUCTION
2.1.
TILLER
IDENTIFICATION
Each
t
ill
e
r
i
s
pro
v
i
de
d
w
i
t
h
a plate for unique
i
dent
i
fi
c
a
t
i
o
n
(see
po
s
i
t
i
o
n
i
n
picture
be
l
o
w
)
,
s
ho
w
i
ng
the CE
m
a
rk
i
ng
together
w
i
t
h
fo
ll
o
w
i
ng
i
nform
a
t
i
o
n:
•
M
a
nufa
c
t
ure
r
name and
a
ddre
ss
•
Type of machine
(
"
T
Y
P
E
"
)
•
M
o
de
l
of machine
(
"
M
O
DE
L
"
)
•
Se
ri
a
l
number
("SERIAL N
o
.
"
)
•
Co
ns
t
ruc
t
i
o
n
year
(
"
Y
E
A
R
"
)
•
Machine w
e
i
ght
("MASS")
•
Speed
required
at
I
m
p
l
e
m
e
nt
Input
Co
nne
c
t
i
o
n
(
"
I
NPU
T
"
)
.
It's
recommended
to note down
all
data shown on the pl
a
t
e
:
Any
request
for
a
ss
i
s
t
a
nc
e
or
i
nform
a
t
i
o
n
regarding
the machine must be
directed
to
t
h
e
M
a
nufa
c
t
ure
r
or De
a
l
e
r
a
l
w
a
y
s
referring to the
m
o
de
l
and
s
e
ri
a
l
number
as shown on the pl
a
t
e
affixed to the
m
a
c
hi
ne
.

VH90 Rotary T
ill
ers
2
2.2. INTENDED USE
The IronCraft VH90-series tillers are designed specifically for soil tilling, andare intended tobe used for
preparing the seed bed - directly orafter plowing -, for shuffling stubble and crop residues, perform
mechanical weeding andbreak permanent pastures.
The tillers can be set up in different configuration, depending of the type of work required, through the
assembly of optional kits, and are compatible for the fitting with complementary machines (i.e. spreaders,
seeding machines).
They are
des
i
gned
to be
mounted
on
tractors
e
qu
i
pped
w
i
t
h h
y
dra
ul
i
c
lift
and
uni
v
e
rs
a
l
three
po
i
nt
hitch that can
support
the
i
m
pl
e
m
e
nt
w
e
i
ght
,
and driven by the power of the
tractor through
t
he
PTO
dri
v
e
sha
ft
.
The
tractors
used to
operate
the VH90 series
t
ill
e
rs
must have the
fo
ll
o
w
i
ng
re
qui
re
m
e
nts
:
Hitch
Category: 3-po
i
nt
Cat. II
s
t
a
nda
rd
PTO
:
540 RPM,
6
-s
pl
i
ne
,
1
3/8
Z6
Horsepower:
As per given in Technical Specification Sheet
D
A
N
GE
R
Any use of the machine other than the
i
nt
e
nded
use
i
s
non-intended
use, and
i
s
to be
c
o
ns
i
de
red
as
unauthorized
and
dangerous.
The
manufacturer assumes
no
liability
for
damage
r
e
s
ul
t
i
ng
fro
m
non-intended
us
e
.

VH90 Rotary T
ill
ers
3
2.3. MAIN PARTS DESCRIPTION
1.
Tiller deck 11
.
Rotor
sha
ft
2
.
Clevis (lower hitch)
12
.
T
i
nes
3
.
Lower hitch pin
13
.
Pa
rk
i
ng
s
t
a
nd
4
.
Upper hitch pi
n
14
.
Sk
i
ds
5
.
3-po
i
nt
bra
c
k
e
t
s
15
.
Cardan
dri
v
e
sha
ft
6
.
PTO
s
hi
e
l
d
16
.
Driveshaft
s
uppo
rt
7
.
Implement
Input
Co
nne
c
t
i
o
n
17
.
Front
ba
rri
e
rs
8
.
G
ea
rbo
x
18
.
Rear
guards
9
.
Side transmission case
19
.
Container for Manual
10.
Rear
l
e
v
e
li
ng
bo
a
rd
NO
TE
To make the
ill
us
t
ra
t
i
o
ns
more
c
l
ea
r,
some
i
m
a
ges
of this
m
a
nua
l
may refer to
machines
l
a
c
k
i
ng
o
f
some
components
(e.g. safety
de
v
i
c
e
s
and
ba
rri
e
rs
)
.
Unless
o
t
he
rw
i
s
e
i
ndic
a
t
e
d,
i
m
a
ges
shown
i
n
this
m
a
nua
l
refer to the
t
ill
e
r
1.75m
.

VH90 Rotary T
ill
ers
4
2.4. TILLER SPECIFICATIONS
VH90 SERIES
TILLER MODEL
VH90
Overall dimensions
mm
2425 x 1263 x 1085
Tilling width mm
2260
in
89"
Recommended
Tractor HP range
HP
80-95
3-point Hitch type
Cat. II, compat. Quick
Hitch II cat. ASAE
Frame off-set
in
0.17"
No. of Tines (L/C-
80x7)
No.
54
PTO Input speed
rpm
540
Rotor Shaft Speed
rpm
@540
214
Standard Tine
Construction
-
Curved / Square
Transmission type
-
Gear
Max Working
depth
in
9"
Rotor tube diameter
mm
89
Rotor Swing
Diameter
mm
521
Driveline safety
device
-
Slip clutch / Shear
Bolt
Weight (driveline
excluded)
Kg 706
lbs
1557

VH90 Rotary T
ill
ers
5
3.
SAFETY
Proper use of
equipment,
a strict
observance
of the safety
messages
li
s
t
e
d
be
l
o
w and
a
ppl
i
c
a
t
i
o
n
of
all
reasonable pra
c
t
i
c
e
s
to
a
v
o
i
d
any risks,
prevents
a
cc
i
dents
or
i
njury
,
a
ll
o
w
s
the
m
a
c
hi
ne
w
o
rk
i
ng
better
and
l
o
ng
e
r,
and
m
i
ni
m
i
z
e
the
fa
il
ure
s
.
The
manufacturer assumes
no
liability
for any
damage re
s
ul
t
i
ng
from not
a
ppl
y
i
ng
the
beha
v
i
o
ra
l
rules
i
ndic
a
t
e
d
i
nt
o
the
m
a
nua
l
.
3.1. GENERAL SAFETY INSTRUCTION
D
A
N
GE
R
The machine must be used only by
authorized
and w
e
ll
t
ra
i
ne
d
operators.
The
operator
must
ha
v
e
read and
understood
the
i
ns
t
ruc
t
i
o
ns
of this
m
a
nua
l
,
i
t
must make
adequate
pre
pa
ra
t
i
o
n
for
t
he
proper use of the machine and must
ho
l
d
a
dri
v
i
ng
li
c
e
ns
e
.
In case of doubt about the use of
t
he
machine
and/or
the
i
nt
e
rpre
t
a
t
i
o
n
of this
m
a
nua
l
,
the
operator
must
contact
the
M
a
nufa
c
t
ure
r
o
r
the De
a
l
e
r.
WA
R
N
IN
G
The
m
a
nua
l
must
a
l
w
a
y
s
re
m
a
i
n
w
i
t
h
the
machine.
In case of
l
o
ss
or
damage, request
a new
c
o
py
to the
M
a
nufa
c
t
ure
r
or your De
a
l
e
r.
WA
R
N
IN
G
Follow
s
t
ri
c
t
l
y the rules
prescribed
by the safety
p
i
c
t
o
gra
m
s
a
ppl
i
e
d
to the
m
a
c
hi
ne
.
WA
R
N
IN
G
Be sure that
all
safety
pictograms
are
l
e
gibl
e
.
If
pictograms
are worn, they must be
replaced
w
i
t
h
others
o
bt
a
i
ne
d
from the
M
a
nufa
c
t
ure
r,
and placed
i
n
the
po
s
i
t
i
o
n
i
ndic
a
t
e
d
by this
m
a
nua
l
.
D
A
N
GE
R
Before
us
i
ng
the
machine,
make sure that
all
safety
de
v
i
c
e
s
are
i
ns
t
a
ll
e
d
and
i
n
good w
o
rk
i
ng
c
o
ndi
t
i
o
ns
.
In case of
damages
of
s
hi
e
l
ds
,
replace them
i
mm
e
di
a
t
e
l
y
.
D
A
N
GE
R
Is
a
bs
o
l
ut
e
l
y forbidden to remove or
a
l
t
e
r
safety
de
v
i
c
e
s
.
D
A
N
GE
R
Before
s
t
a
rt
i
ng,
and during
o
pe
ra
t
i
o
n
of the
t
ill
e
r,
make sure there are no people or
a
ni
m
a
l
s
i
n
t
h
e
o
pe
ra
t
i
o
n
area:
the machine can project
m
a
t
e
ri
a
l
from the back, w
i
t
h
risks of serious
i
njury
o
r
de
a
t
h.
D
A
N
GE
R
Pay
m
a
x
i
m
um
a
tt
e
nt
i
o
n
to
a
v
o
i
d
any
a
cc
i
dent
a
l
contact
w
i
t
h
ro
t
a
t
i
ng
parts of the
m
a
c
hi
ne
.
D
A
N
GE
R
During
o
pe
ra
t
i
o
n,
adjustment,
m
a
i
nt
e
na
nc
e
,
re
pa
i
ri
ng
or
t
rans
po
rt
a
t
i
o
n
of the
machine,
t
he
operator
must
a
l
w
a
y
s
use
appropriate
Pe
rs
o
na
l
P
ro
t
e
c
t
i
v
e
Equipment
(
PP
E
)
.
D
A
N
GE
R

VH90 Rotary T
ill
ers
6
Do not
operate
the
i
m
pl
e
m
e
nt
whi
l
e
wearing
l
oo
s
e
fi
tt
i
ng
c
l
o
t
hi
ng
that can give rise
t
o
entanglement
i
n
parts of the
m
a
c
hi
ne
.
D
A
N
GE
R
Do not
operate
the
i
m
pl
e
m
e
nt
when
t
i
re
d,
not
i
n
good
c
o
ndi
t
i
o
n
or under the
i
nfl
ue
nc
e
of
a
l
c
oho
l
or
drugs
.
C
A
UT
IO
N
If the use of the machine
i
s
required
at night or
i
n
c
o
ndi
t
i
o
ns
of
reduced v
i
s
i
bi
li
t
y
,
use the
li
gh
t
i
ng
system
of the
tractor
and
po
ss
i
bly an
a
ux
ili
a
ry
li
g
ht
i
ng
s
y
s
t
e
m
.
3.2. EQUIPMENT SAFETY INSTRUCTIONS
WA
R
N
IN
G
Use the
t
ill
e
r
for
i
t
s
i
nt
e
nded
purpose
only.
Improper
use can
damage
the
t
ill
e
r
and cause
s
e
ri
o
us
i
njury
to
persons,
a
ni
m
a
l
s
,
or
de
a
t
h.
D
A
N
GE
R
The machine should be used by a
s
i
ngl
e
operator
dri
v
i
ng
the
t
ra
c
t
o
r.
WA
R
N
IN
G
Any
unauthorized
m
o
di
fi
c
a
t
i
o
n
of the machine may cause
problems
i
n
safety and
re
li
e
v
e
s
t
he
M
a
nufa
c
t
ure
r
from any
liability
for
damages
or
i
nj
uri
e
s
that may result to
operators,
third
part
i
e
s
and
o
bj
e
c
t
s
.
WA
R
N
IN
G
Before
us
i
ng
the
machine,
fam
ili
a
ri
z
e
y
o
urs
e
l
f
w
i
t
h
i
t
s
c
o
nt
ro
l
s
and
i
t
s
w
o
r
k
i
ng
c
a
pa
c
i
t
y
.
WA
R
N
IN
G
Do not
l
ea
v
e
the
t
ill
e
r
unattended
w
i
t
h
tractor
engine
runni
ng.
WA
R
N
IN
G
Do not
operate
t
ill
e
r
on too muddy, sandy or rocky
s
o
il
s
.
WA
R
N
IN
G
K
ee
p
the machine
c
l
ea
n
from debris and
fo
re
i
gn
objects
which may
damage
func
t
i
o
ni
ng
or
c
a
us
e
i
njury
.
WA
R
N
IN
G
Do not use the machine
if
the
category
of the
c
o
nne
c
t
i
ng
pins of the
t
ill
e
r
does not match that
o
f
the
tractor
hitch
s
y
s
t
e
m
.
WA
R
N
IN
G
Do not use the machine w
i
t
h
m
i
ss
i
ng
bo
l
t
s
,
screws, pins or safety pi
ns
.
WA
R
N
IN
G
Never use the machine to
transport
or
lift
people,
a
ni
m
a
l
s
or
o
bj
e
c
t
s
.
WA
R
N
IN
G
Make
c
e
rt
a
i
n,
by adding front
ba
ll
a
s
t,
that at
l
ea
s
t
20% of the
t
o
t
a
l
w
e
i
ght
(tractor,
i
m
pl
e
m
e
nt
and
ba
ll
a
s
t
)
i
s
on the front
a
x
l
e
of the
tractor,
to
ensure
s
t
a
bi
li
t
y
.

VH90 Rotary T
ill
ers
7
WA
R
N
IN
G
Before
engaging
the
tractor
PTO, make sure the
tractor
PTO
speed
i
s
set as
required
for the
t
ill
e
r
(540 rpm). Do not over
speed
PTO or machine
breakage
may
re
s
ul
t.
D
A
N
GE
R
Do not
operate
the
t
ill
e
r
if
the
driveshaft
i
s
damaged.
The
driveshaft
could be
subject
to
bre
a
k
a
ge
during
o
pe
ra
t
i
o
n,
c
a
us
i
ng
serious
i
njury
or
death.
Remove the
driveshaft
and replace
i
t
w
i
t
h
a
n
unda
m
a
ged.
3.3. OPERATING SAFETY INSTRUCTIONS
WA
R
N
IN
G
Before
us
i
ng
the
machine,
be sure to have
c
l
ea
red
the
o
pe
ra
t
i
ng
area from
o
bs
t
a
c
l
e
s
(s
t
o
nes
,
branches,
debris,
etc...).
Mark
all
the
o
bs
t
a
c
l
e
s
that
cannot
be
e
li
m
i
na
t
e
d
(e.g. by
means
fl
a
gs
)
.
D
A
N
GE
R
Never
engage
the
tractor
PTO
i
n
the
presence
of people
c
l
o
s
e
to the
driveshaft.
The body,
ha
i
r
o
r
c
l
o
t
hi
ng
of a
person
can get
caught
i
n
r
o
t
a
t
i
ng
parts,
c
a
us
i
ng
serious
i
njury
or
de
a
t
h.
D
A
N
GE
R
Before
engaging
the PTO and during
all
o
pe
ra
t
i
o
ns
,
make sure that no
person
or
a
ni
m
a
l
i
s
i
n
i
mm
e
di
a
t
e
area of
a
c
t
i
o
n
of the
machine.
Never use the
t
ill
e
r
if
people are
i
n
his w
o
rk
i
ng
a
re
a
.
D
A
N
GE
R
It's
a
bs
o
l
ut
e
l
y forbidden to
stand
near the
t
ill
e
r
w
i
t
h
m
o
v
i
ng
parts
.
WA
R
N
IN
G
The
operator
must
operate
t
ill
e
r
li
ft
i
ng/
l
o
w
e
ri
ng
only from the
dri
v
i
ng
seat of the
tractor.
Do
no
t
perform
li
ft
i
ng
maneuvers
on
s
i
de
or behind the
t
ra
c
t
o
r.
WA
R
N
IN
G
Before
m
a
k
i
ng
changes
i
n
di
re
c
t
i
o
n,
turns or
go
i
ng
i
n
reverse,
s
li
gh
t
l
y
lift
the
t
ill
e
r
from the
gro
und
after
disengaging
the power
take-off,
to
a
v
o
i
d
damage
to the
m
a
c
hi
ne
.
D
A
N
GE
R
In
presence
of
steep s
l
o
pes (greater
than 15
degrees)
the
tilling
a
c
t
i
o
n
may cause
i
ns
t
a
bi
li
t
y of
t
h
e
tractor,
w
i
t
h
risk of
t
i
p
pi
ng
and
consequent
serious
i
njury
or
death hazard.
Consult the
m
a
nua
l
fo
r
the
tractor
to
de
t
e
rm
i
ne
the
m
a
x
i
m
um
s
l
o
pe
that the
tractor
i
s
able to
de
a
l
w
i
t
h.
D
A
N
GE
R
Always
disengage
the PTO before
ra
i
s
i
ng
the
t
ill
e
r
,
and never
engage
the PTO w
i
t
h
the
t
ill
e
r
i
n
t
he
ra
i
s
e
d
po
s
i
t
i
o
n.
The machine
m
i
ght
throw
objects
at high
speed,
c
a
us
i
ng
serious
i
njury
or
de
a
t
h.
WA
R
N
IN
G
Never
l
ea
v
e
the driver's seat when the
tractor
i
s
turned
on. Before
l
ea
v
i
ng
the
tractor,
l
o
w
e
r
t
he
t
ill
e
r
to the
ground, disengage
the PTO,
i
ns
e
rt
the
pa
rk
i
ng
brake, stop engine and remove the k
e
y
from the
c
o
nt
ro
l
pane
l
.

VH90 Rotary T
ill
ers
8
D
A
N
GE
R
The PTO
s
hi
e
l
ds
of
tractor
and
i
m
pl
e
m
e
nt s
i
d
e
,
the
driveshaft
s
hi
e
l
d
i
ng
and the
dri
v
e
sha
f
t
re
t
a
i
ni
ng
c
ha
i
ns
must be properly
i
ns
t
a
ll
e
d
and
i
n
good
c
o
ndi
t
i
o
n,
to
a
v
o
i
d
risk of
e
nt
a
ngl
e
m
e
n
t
w
i
t
h
serious
i
njury
or
de
a
t
h.
D
A
N
GE
R
Before
engaging
the PTO of the
tractor,
a
l
w
a
y
s
make sure that the drive shaft
i
s
mounted
i
n
t
he
correct di
re
c
t
i
o
n,
and that
i
t
s
c
l
a
m
pi
ng
e
l
e
m
e
nts
are properly
connected
both to
tractor
s
i
de
a
nd
to
t
ill
e
r
s
i
de
.
WA
R
N
IN
G
Stop
o
pe
ra
t
i
ng
i
mm
e
d
i
a
t
e
l
y
if
blades strike a
fo
r
e
i
gn
object.
R
e
pa
i
r
all
damage
and make
c
e
rt
a
i
n
rotor and blades are
i
n
good
c
o
ndi
t
i
o
n
before
re
s
um
i
ng
o
pe
ra
t
i
o
n.
WA
R
N
IN
G
Always
disengage
the
tractor
PTO when the
driveshaft exceed
an angle of 10
degrees
up or
d
o
w
n
whi
l
e
o
pe
ra
t
i
ng.
An
e
x
c
e
ss
i
v
e
angle w
i
t
h
driveshaft ro
t
a
t
i
ng
can break the
driveshaft
and
c
a
us
e
fl
y
i
ng
pro
j
e
c
t
il
e
s
.
C
A
UT
IO
N
Avoid
c
l
ut
c
h'
s
o
v
e
rhe
a
t
i
ng caused
by too
l
o
ng
or
frequent
s
li
ppi
ng
of the
c
l
ut
c
h, s
i
nc
e
i
t
c
a
n damage
the
c
l
ut
c
h
components.
Before
c
he
c
k
i
ng
s
li
p
c
l
ut
c
h,
make sure
i
t
has
c
oo
l
e
d.
Clutch
c
o
ul
d
be
e
x
t
re
m
e
l
y hot and cause
severe burn.
C
A
UT
IO
N
Pro
l
o
nged
use of the
t
ill
e
r
can cause
o
v
e
rhe
a
t
i
ng
of the
gearbox.
Do not touch the
gearbox
duri
ng
use and
i
mm
e
di
a
t
e
l
y after,
i
t
could be
e
x
t
re
m
e
l
y hot and cause
severe
bur
n.
WA
R
N
IN
G
All
adjustment
o
pe
ra
t
i
o
n
s
on the
t
ill
e
r
must be
performed
by
qua
li
fi
e
d
and
t
ra
i
ne
d
operators,
w
i
t
h
the
tractor
engine off, the PTO
disengaged,
the
t
ill
e
r
l
o
w
e
red
to the ground or on security
s
t
a
nds
,
the
i
gni
t
i
o
n
key off and the
pa
rk
i
ng
brake
s
e
t.
3.4. TRANSPORTING SAFETY INSTRUCTIONS
WA
R
N
IN
G
Before
t
rans
po
rt
i
ng,
de
t
e
rm
i
ne
the
stopping
c
ha
ra
c
t
e
ri
s
t
i
c
s
of the
tractor
and
i
m
pl
e
m
e
nt
.
WA
R
N
IN
G
Transport
only at
speeds
where you can
m
a
i
nt
a
i
n
c
o
nt
ro
l
of the
e
qui
pm
e
n
t.
WA
R
N
IN
G
When
dri
v
i
ng
on
roads,
the
i
m
pl
e
m
e
nt
must be
i
n
transport
po
s
i
t
i
o
n
a
de
qua
t
e
l
y
ra
i
s
e
d
from
t
he
road
surface,
w
i
t
h
tractor
li
ft
i
ng
hy
dra
ul
i
c
s
l
o
c
k
e
d
so that the
t
ill
e
r
cannot
be
l
o
w
e
red
a
cc
i
dent
a
ll
y
.
D
A
N
GE
R
The
i
m
pl
e
m
e
nt
may be w
i
de
r
than the
tractor.
Pay
a
tt
e
nt
i
o
n
during
t
rans
po
rt
i
ng
to
pe
rs
o
ns
,
a
ni
m
a
l
s
or
o
bs
t
a
c
l
e
s
e
x
p
o
s
e
d.

VH90 Rotary T
ill
ers
9
WA
R
N
IN
G
When
turning,
use
extreme
care and reduce
tractor
spe
e
d.
WA
R
N
IN
G
Do not
operate
the
tractor
w
i
t
h
weak or faulty brakes or worn
t
i
re
s
.
C
A
UT
IO
N
Al
w
a
y
s
use
tractor
li
gh
t
i
ng
system
and
a
u
x
ili
a
r
y
li
gh
t
i
ng
system
for an
adequate
w
a
r
n
i
ng
to
o
p
e
r
a
t
o
r
s
of other v
e
h
i
c
l
e
s
,
e
s
p
e
c
i
a
ll
y when
t
r
a
n
s
p
o
r
t
i
ng
at
n
i
gh
t
or
i
n
c
o
nd
i
t
i
o
n
s
of
reduced v
i
s
i
b
ili
t
y
.
D
A
N
GE
R
In case of
t
ill
e
r
li
ft
i
ng
,
make sure that the
li
ft
i
ng
de
v
i
c
e
chosen
i
s
suitable to perform the
o
pe
ra
t
i
o
n
s
a
fe
l
y
,
and use only the
li
ft
i
ng
po
i
n
t
s
prescribed
on
t
ill
e
r.
3.5. MAINTENANCE SAFETY INSTRUCTIONS
WA
R
N
IN
G
All
m
a
i
nt
e
na
nc
e
and
rep
a
i
ri
ng
o
pe
ra
t
i
o
ns
must be
performed
by
qua
li
fi
e
d
and
t
ra
i
ne
d
o
pe
ra
t
o
rs
,
w
i
t
h
the
tractor
engine off, the PTO
disengaged,
the
t
ill
e
r
l
o
w
e
red
to the ground or on
s
e
curi
t
y
stands,
the
i
gni
t
i
o
n
key off and the
pa
rk
i
ng
brake
s
e
t.
WA
R
N
IN
G
Perform
re
pa
i
rs
and
replacements necessary
to the machine
us
i
ng
only
o
ri
gi
na
l
spa
r
e
parts
pro
v
i
de
d
by the
manufacturer
or your
de
a
l
e
r.
D
A
N
GE
R
Perform
m
a
i
n
t
e
n
a
n
c
e
o
p
e
r
a
t
i
o
n
s
a
l
w
a
y
s
u
s
i
ng
a
pp
r
o
p
r
i
a
t
e
P
e
r
s
o
n
a
l
P
r
o
t
e
c
t
i
v
e
E
qu
i
p
m
e
n
t
(
p
r
o
t
e
c
t
i
v
e
eye
g
l
a
ss
e
s
,
hard hat,
h
ea
r
i
ng
p
r
o
t
e
c
t
i
o
n
,
safety
shoes,
o
v
e
r
a
ll
and work
g
l
o
v
e
s
,
f
il
t
e
r
m
a
s
k
)
.
C
A
UT
IO
N
Before any
m
a
i
nt
e
na
nc
e
o
pe
ra
t
i
o
n,
make sure that the parts which may
become
hot during
use
(
fri
c
t
i
o
n
c
l
ut
c
h,
gear
box...)
have
c
oo
l
e
d.
WA
R
N
IN
G
Do not perform
re
pa
i
rs
that you do not know.
Always
fo
ll
o
w the
m
a
nua
l
i
ns
t
ruc
t
i
o
ns
and
i
n
case
o
f
doubt
contact
the
M
a
nufa
c
t
ure
r
or your
de
a
l
e
r.
D
A
N
GE
R
Do not
s
w
a
ll
o
w
fue
l
s
or
l
ubric
a
nts
.
In case of
a
cc
i
dent
a
l
contact
w
i
t
h
eyes, rinse w
e
ll
w
i
t
h
w
a
t
e
r
and consult a
do
c
t
o
r.
3.6. STORAGE SAFETY INSTRUCTIONS
WA
R
N
IN
G
Never
l
ea
v
e
the
tractor unattended
w
i
t
h
the
t
ill
e
r
i
n
li
ft
e
d
po
s
i
t
i
o
n.
Ac
c
i
dent
a
l
o
pe
ra
t
i
o
n
of
li
ft
i
ng
l
e
v
e
r
or a
hy
dra
ul
i
c
fa
il
ure
may cause
sudden
drop of unit w
i
t
h
i
nj
u
ry
or
death
by
c
rus
hi
ng.

10
VH90 Rotary T
ill
ers
D
A
N
GE
R
F
o
ll
o
w
i
ng
o
pe
ra
t
i
o
n,
or before
unhoo
k
i
ng
the
t
ill
e
r,
stop the
tractor,
set the
brakes, disengage
t
he
PTO,
l
o
w
e
r
the
attached
t
ill
e
r
to the
ground,
shut off the
e
ng
i
ne
,
remove the
i
gni
t
i
o
n
key and w
a
i
t
for
all
m
o
v
i
ng
parts to
s
t
o
p
.
WA
R
N
IN
G
Make sure
all
parked
machines
are on a hard,
l
e
v
e
l
surface and
engage
all
safety
de
v
i
c
e
s
.
C
A
UT
IO
N
Place
support
blocks under
t
ill
e
r
as
needed
to
prevent
unit from
t
i
ppi
ng
over onto a
c
hi
l
d
and/or
a
n
adult.
A
t
ill
e
r
that
t
i
ps
over can result
i
n
i
njury
or
de
a
t
h.
C
A
UT
IO
N
Store the unit
i
n
an area away from human
a
c
t
i
v
i
t
y
.
3.7. SAFETY LABELS
The safety
l
a
be
l
s
a
ppl
i
e
d
on the machine give
funda
m
e
nt
a
l
i
nform
a
t
i
o
n
for
us
i
ng
the
m
a
c
hi
n
e
s
a
fe
l
y
.
Make sure safety
l
a
be
l
s
are
i
n
good
c
o
ndi
t
i
o
ns
.
If
pictograms
are worn, they must be
replaced
w
i
t
h
others
o
bt
a
i
ne
d
from the
manufacturer
and placed
i
n
the
po
s
i
t
i
o
n
i
ndic
a
t
e
d
by this
m
a
nua
l
.
Make sure the safety
l
a
b
e
l
s
are
l
e
gibl
e
.
If
necessary,
w
i
pe
them by a
c
l
o
t
h,
w
i
t
h
soap and w
a
t
e
r.
SAFETY LABELS
POSITION
AND
D
ES
C
R
I
P
TI
O
N

VH90 Rotary T
ill
ers
11
1
D1090
Ca
re
ful
l
y read the
o
pe
ra
t
o
r’
s
m
a
nua
l
s
of
t
ill
e
r,
tractor
and
cardan
shaft before
us
i
ng
the
m
a
c
hi
ne
.
2
D1038
Disengage
the PTO, turn off the
tractor
e
ngi
ne
,
re
m
o
v
e
the key and
ensure
that
all
ro
t
a
t
i
ng
parts
ha
v
e
stopped
before
approaching
the
i
m
pl
e
m
e
nt
.
Read the
o
pe
ra
t
o
r’
s
m
a
nua
l
before
pe
rfo
rm
i
ng
a
n
y
m
a
i
nt
e
na
nc
e
o
pe
ra
t
i
o
n
.
3
D1095
Thrown or
fl
y
i
ng
objects
ha
z
a
rd.
K
ee
p
a safe
distance
from the
m
a
c
hi
ne
.

VH90 Rotary T
ill
ers
12
4
D1096
R
o
t
a
t
i
ng
knives:
severing of
l
o
w
e
r
li
m
b
s
ha
z
a
rd.
K
ee
p
a safe
distance
from the
m
a
c
hi
ne
.
5
D1078
Cut
t
i
ng
of fingers or hand
hazard.
W
a
i
t
unt
il
all
machine
components
ha
v
e
c
o
m
pl
e
t
e
l
y
stopped
before
touching
t
he
m
.
6
D1079
R
o
t
a
t
i
ng
gears:
fingers or hand
entanglement
ha
z
a
rd.
Do not open or remove safety
s
hi
e
l
ds
whi
l
e
engine
i
s
runni
ng.
7
D1097
Crushing
ha
z
a
rd.
Stay
c
l
ea
r
of draft
link
li
f
t
i
ng
range whi
l
e
i
n
o
pe
ra
t
i
o
n.
8
D1098
Implement
i
nput
dri
v
e
li
n
e
:
body
entanglement
ha
z
a
rd.
Do not open or remove safety
s
hi
e
l
ds
whi
l
e
engine
i
s
runni
ng.
9
D1099
Before
engaging
the
tractor
PTO, check
t
ha
t
rpm rate and
sense
of
ro
t
a
t
i
o
n
are
t
ho
s
e
prescribed
for the
i
m
pl
e
m
e
nt
.

VH90 Rotary T
ill
ers
13
10
D1122
F
i
ngers
/
ha
nds
crushing
h
a
z
a
rd.
K
ee
p
hands at safe
d
i
s
t
a
nc
e
from
the
m
a
c
hi
ne
.
11
D1082
Always
wear
pro
t
e
c
t
i
v
e
c
l
o
t
hi
ng
and
e
qui
pm
e
nt
appropriate
for the j
o
b:
hearing
pro
t
e
c
t
i
o
n
,
safety
shoes,
safety gl
o
v
e
s
,
safety
glasses
and
o
v
e
ra
ll
.
12
D1123
R
o
t
a
t
i
ng
dri
v
e
li
ne
:
body
entanglement hazard.
K
ee
p
a
w
a
y
.
Do not wear
l
oo
s
e
c
l
o
t
hi
ng,
j
e
w
e
l
r
y
,
or
ha
i
r
that
c
o
ul
d become entangled
w
i
t
h
the
dri
v
e
li
ne
.
Do not
operate
w
i
t
ho
ut
d
ri
v
e
li
ne
,
tractor
and
all
s
a
fe
t
y
s
hi
e
l
ds
i
n
place.
K
ee
p
all
bystanders
away from the
i
m
pl
e
m
e
nt
w
h
il
e
i
n
o
pe
ra
t
i
o
n.
Read the
o
pe
ra
t
o
r’
s
m
a
nua
l
s
of
dri
v
e
li
ne
,
tractor
a
nd
i
m
pl
e
m
e
nt
before
us
i
ng
the
m
a
c
hi
ne
.
13
D1124
R
o
t
a
t
i
ng
dri
v
e
li
ne
:
body
entanglement hazard.
K
ee
p
a
w
a
y
.
Do not wear
l
oo
s
e
c
l
o
t
hi
ng,
j
e
w
e
l
ry
,
or
ha
i
r
that
c
o
ul
d become entangled
w
i
t
h
the
dri
v
e
li
ne
.
Do not
operate
w
i
t
ho
ut
d
ri
v
e
li
ne
,
tractor
and
all
s
a
fe
t
y
s
hi
e
l
ds
i
n
place.
Damaged
or
m
i
ss
i
ng
parts
must be
re
pa
i
red
or
replaced
before
us
i
ng
the
dri
v
e
li
ne
.
Disengage
the PTO, turn off the
tractor
e
ngi
ne
,
re
m
o
v
e
the key and
ensure
that
all
ro
t
a
t
i
ng
parts
ha
v
e
stopped
before
approaching
the
i
m
pl
e
m
e
nt
.
Read the
o
pe
ra
t
o
r’
s
m
a
nua
l
s
of
dri
v
e
li
ne
,
tractor
a
nd
i
m
pl
e
m
e
nt
before
us
i
ng
the
m
a
c
hi
ne
.
14 D1006
Oil Level
15
D1007
Oil filling point

VH90 Rotary T
ill
ers
14
16
D1009
Drain Plug
17
D1008
Greasing point
18
D1083
Lifting point
4. SET UP
The
tiller is delivered fully
assembled
and
equipped
w
i
t
h
a
driveshaft
w
i
t
h
torque
li
m
i
t
e
r
(
c
l
ut
c
h
discs / Shear Bolt) and
re
l
a
t
e
d
o
pe
ra
t
i
ng
m
a
nua
l
.
When the machine is delivered
,
check that there
i
s
no
damage
to the
tiller
or
driveshaft.
In case
o
f
damage
or missing parts
i
mm
e
di
a
t
e
l
y
no
t
i
fy
the
manufacturer
or your
de
a
l
e
r.
4.1. LOWER HITCHES POSITIONING
The VH90
series tillers
are
d
e
s
i
gned
to be
mounted
on
tractors equipped
w
i
t
h:
•
3-po
i
nt
Hitch Category II (ISO 730
s
t
a
ndard)
;
•
Quick Hitch Category II
(
ASAB
E
St
a
ndard)
.
The
po
s
i
t
i
o
n
of the
l
o
w
e
r
hitches must be
adjusted
a
cc
o
rdingl
y
.
If the
tractor
i
s
equipped
w
i
t
h
a
3-po
i
nt
Hitch Category II (ISO 730
standard),
verify that the
l
o
w
e
r
c
l
e
v
i
s
e
s
show the pins
oriented
down (see figure), so that the
distance between
upper and
t
he
l
o
w
e
r
pins
i
s
24'' (610 mm
approx),
as
required
from the
s
t
a
nda
r
d.
This manual suits for next models
1
Table of contents
Other IronCraft Tiller manuals