Ironton AC1221 User manual

s
WARNING: Read carefully and understand all ASSEMBLY AND OPERATION INSTRUCTIONS
before operating. Failure to follow the safety rules and other basic safety precautions may result in serious
personal injury.
20 Gallon Oil-Free Electric
Air Compressor
Owner's Manual
Model # AC1221
READ AND SAVE THESE INSTRUCTIONS
Xxxxxx man v.190714

Thank you very much for choosing a Ironton® product!
For future reference, please complete the owner’s record below:
Serial Number/Lot Date Code:
Purchase Date:
Save the receipt, warranty, and this manual. It is important that you read the entire manual to become
familiar with this product before you begin using it.
This air compressor is designed for certain applications only. Northern Tooland Equipment is not responsible
for issues arising from modification or improper use of this product such as an application for which it was
not designed. We strongly recommend that this product not be modified and/or used for any application other
than that for which it was designed.
For technical questions, please call 1-800-222-5381.
Ironton
2
s

s
Air Compressor
Intended Use...................................................................................................................4
Packaging Contents.......................................................................................................4
Technical Specifications................................................................................................4
Safety Signal Words.......................................................................................................4
Important Safety Information ........................................................................................5
Prop 65............................................................................................................................5
Work Area Safety 5
Personal Safety 6
Air Compressor UseAnd Care 6
Specific Operation Warnings ........................................................................................7
Air Tool Cautions 7
Power Source Connection.............................................................................................8
Power Requirements 8
Grounding.......................................................................................................................8
Grounded Tools: Tools with 3-Prong Plugs 8
Extension Cords.............................................................................................................8
Main Parts of Air Compressor......................................................................................11
Getting Started ..............................................................................................................12
Assembly .......................................................................................................................12
Pre-Operation ................................................................................................................12
Before operating your air compressor: 12
General Overview..........................................................................................................12
Installation and Location 12
Before Each Use............................................................................................................13
Accessories...................................................................................................................13
Accessories for this unit are sold separately. 13
Operating Instructions..................................................................................................13
Drain Valve 14
Pressure Switch 14
Adjusting the air pressure 15
Shutting off your compressor 15
Cold Weather Starting 15
After Each Use 15
Daily shut-down 15
Maintenance...................................................................................................................16
Troubleshooting............................................................................................................17
Warranty.........................................................................................................................19
3 Xxxxxx man v.190714
CONTENTS

The Ironton® 20 Gallon Electric Oil-Free Air Compressor is ideal for inflating tires, air mattresses, pool
toys, and sports balls. The air compressor can be used for operating pneumatic tools including: air nailers,
impact wrenches, air ratchets, drills, and cutting tools. It’s the perfect air compressor for medium to heavy
automotive, farm, and shop-type applications. It features:
•
Maximum Efficiency: High performance pump provides 125 max. psi for longer tool runtimes.
•
Compact Power: Power and performance of a large compressor in a portable size.
•
Efficient Operation: Low maintenance, oil-free pump produces cleaner air fortools.
•Air compressor and tank
•Handle
•Wheels
•Owner’s Manual
TECHNICAL SPECIFICATIONS
PACKAGING CONTENTS
INTENDED USE
s
Ironton
Property
Specification
Model
AC1212
Lubrication Type
Oil free
Running Horsepower
1.5
Voltage
120
Hz-Single Phase
60
Minimum Branch Circuit Requirement
15 Amps
Fuse Type
Time Delay
Air Tank Capacity (Vertical)
20 gallons (75.7 liters)
Motor Speed
3,400 RPM
Maximum Operating Air Pressure
125 psi
Maximum Tank Air Pressure
150 psi
CFM @ 40 psi
4.18
CFM @ 90 psi
2.31
Fill Time: 0 psi To 40 psi
1 Minute + 47 Seconds
Fill Time: 0 psi To 90 psi
6 Minutes + 47 Seconds
Fill Time: 0 psi To 125 psi
10 Minutes + 35 Seconds
Recovery Time: 90 - 125 psi
3 Minutes + 28 Seconds
Cut In Operating Pressure
90 psi
Cut Out Operating Pressure
125 psi
Packaging Dimensions
18” x 18” x 43.5”
Item Dimensions (Inches)
24.4” x 20” x 41”
Tank Dimensions
24.6” Height x 15.16” Diameter
Watts At Cut Out / Amps At Cut Out
565 W / 5.3 A
Wheel Diameter
8”
Item Weight / Ship Weight
72.5 lbs / 78 lbs
SAFETY SIGNAL WORDS
The definitions below describe the level of severity for each signal word. Please read the manual and pay
attention to the following.
DANGER Indicates an imminently hazardous situation which, if not avoided, will result in death
or serious injury.
Indicates a potentially hazardous situation which, if not avoided, could result in
death or serious injury.
4
WARNING

WARNING
WARNING
CAUTION
s
Air Compressor
Indicates a potentially hazardous situation which, if not avoided, may result in minor
or moderate injury.
Notice indicates important information, that if not followed, may cause damage to
equipment.
WARNING
Work Area Safety
•Inspect the work area before each use. Keep work area clean, dry, free of clutter, and well-lit. Cluttered,
wet, or dark work areas can result in injury. Using the product in confined work areas may put you
dangerously close to cutting tools and rotating parts.
•Do not use the product where there is a risk of causing a fire or an explosion; e.g., in the presence
of flammable liquids, gases, or dust. The product can create sparks, which may ignite the flammable
liquids, gases, or dust.
•Do not allow the product to come into contact with an electrical source. The tool is not insulated and
contact will cause electrical shock.
•Keep children and bystanders away from the work area while operating the tool. Do not allow children to
handle the product.
•Be aware of all power lines, electrical circuits, water pipes, and other mechanical hazards in your work
area. Some of these hazards may be hidden from your view and may cause personal injury and/or
property damage if contacted.
•Keep your work area clean and well lit. Ensure floors are not slippery from wax or dust.
•The compressed air directly from your compressor is not safe for breathing. The air stream may contain
carbon monoxide, toxic vapors, or solid particles from the air tank. Breathing these contaminants can
cause serious injury or death. Never use air obtained directly from the compressor to supply air for
human consumption. The compressor is not equipped with suitable filters and in-line safety equipment
for human consumption.
•Never drill into, weld or make any modifications to the air tank or its attachments. Never attempt torepair
a damaged or leaking air tank. Replace with a new air tank.
•The air tank is designed to withstand specific operating pressures. Never make adjustments orparts
substitutions to alter the factory set operating pressures.
•Over inflation of tires could result in serious injury and property damage. NOTE: Air tanks, compressors
and similar equipment used to inflate tires can fill small tires very rapidly. Adjust pressure regulator on air
supply to no more than the rating of the tire pressure. Add air in small increments and frequently use the
tire gauge to prevent over inflation.
5 Xxxxxx man v.190714
IMPORTANT SAFETY INFORMATION
•Read and understand all instructions. Failure to follow all instructions may result in serious injury or
property damage.
•The warnings, cautions, and instructions in this manual cannot cover all possible conditions orsituations
that could occur. Exercise common sense and caution when using this tool. Always be aware of the
environment and ensure that the tool is used in a safe and responsible manner.
•Do not allow persons to operate or assemble the product until they have read this manual and have
developed a thorough understanding of how it works.
•Do not modify this product in any way.Unauthorized modification may impair the function and/or
safety and could affect the life of the product. There are specific applications for which the product was
designed.
•Use the right tool for the job. DO NOT attempt to force small equipment to do the work of larger
industrial equipment. There are certain applications for which this equipment was designed. This product
will be safer and do a better job at the capacity for which it was intended. DO NOT use this equipment
for a purpose for which it was not intended.
•Industrial or commercial applications must follow OSHA requirements.
Prop 65
This product can expose you to chemicals including DEHP, which is known to the State of California to
cause cancer and birth defects or other reproductive harm.
For more information go to www.P65Warnings.ca.gov.
NOTICE

s
Ironton
WARNING
Personal Safety
•Stay alert, watch what you are doing, and use common sense when operating the tool. Do not use the
tool while you are tired or under the influence of drugs, alcohol, or medication. A moment of inattention
while operating the tool may result in serious personal injury.
•Dress properly. Do not wear loose clothing, dangling objects, or jewelry. Keep your hair, clothing and
gloves away from moving parts. Loose clothes, jewelry, or long hair can be caught in moving parts. Air
vents on the tool often cover moving parts and should be avoided.
•Wear the proper personal protective equipment when necessary. Use ANSI Z87.1 compliant safety
goggles (not safety glasses) with side shields, or when needed, a face shield. Use a dust mask in dusty
work conditions. Also use non-skid safety shoes, hardhat, gloves, dust collection systems, and hearing
protection when appropriate. This applies to all persons in the work area.
•Work in an area with good cross ventilation. Read and follow the safety instructions provided on the
label or safety data sheets for the materials you are spraying. Always use certified safetyequipment:
NIOSH/OSHA respiratory protection or properly fitting face mask designed for use with your specific
application.
•Do not overreach. Keep proper footing and balance at all times.
•Remove keys or wrenches before connecting the tool to an air supply, power supply, or turning on the
tool. A wrench or key that is left attached to a rotating part of the tool may cause personal injury.
•Secure the work with clamps or a vise instead of your hand when practical. This safety precaution allows
for proper tool operation using both hands.
•Never touch any exposed metal parts on compressor during or immediately after operation. The
compressor will remain hot for several minutes after operation. Do not reach around protective shrouds
or attempt maintenance until the unit has been allowed to cool.
•The compressed air stream can cause soft tissue damage to exposed skin and can propel dirt, chips,
loose particles and small objects at high speed, resulting in property damage or personal injury. Never
point any nozzle or sprayer toward any part of the body or at other people oranimals.
CAUTION
Air Compressor Use And Care
•Do not force the air compressor. Products are safer and do a better job when used in the manner for
which they are designed. Plan your work and use the correct product for the job.
•Check for damaged parts before each use. Carefully check that the product will operate properly and
perform its intended function. Replace damaged or worn parts immediately. Never operate the product
with a damaged part.
•Do not use a product with a malfunctioning switch. Any power tool that cannot be controlled with the
power switch is dangerous and must be repaired by an authorized service representative before using.
•Disconnect the power/air supply from the product and place the switch in the locked or off position
before making any adjustments, changing accessories, or storing the tool. Such preventive safety
measures reduce the risk of starting the tool accidentally.
•Store the product when it is not in use. Store it in a dry, secure place out of the reach of children. Inspect
the tool for good working condition prior to storage and before re-use.
•Use only accessories that are recommended by the manufacturer for use with your product. Accessories
that may be suitable for one product may create a risk of injury when used with another tool. Never use
an accessory that has a lower operating speed or operating pressure than the toolitself.
•Keep guards in place and in working order. Never operate the product without the guards inplace.
•Do not leave the tool running unattended.
•Drain the moisture from the tank on a daily basis. A clean, dry tank will help preventcorrosion.
•Pull the pressure relief valve ring daily to ensure that the valve is functioning properly, and to clear the
valve of any possible obstructions.
•Toprovide proper ventilation for cooling, the compressor must be kept a minimum of 12 inches (31 cm)
from the nearest wall, in a well–ventilated area.
•Fasten the compressor down securely if transporting is necessary. Pressure must be released from the
tank before transporting.
•Protect the air hose and electric cord from damage and puncture. Inspect them weekly for weak or worn
spots and replace if necessary.
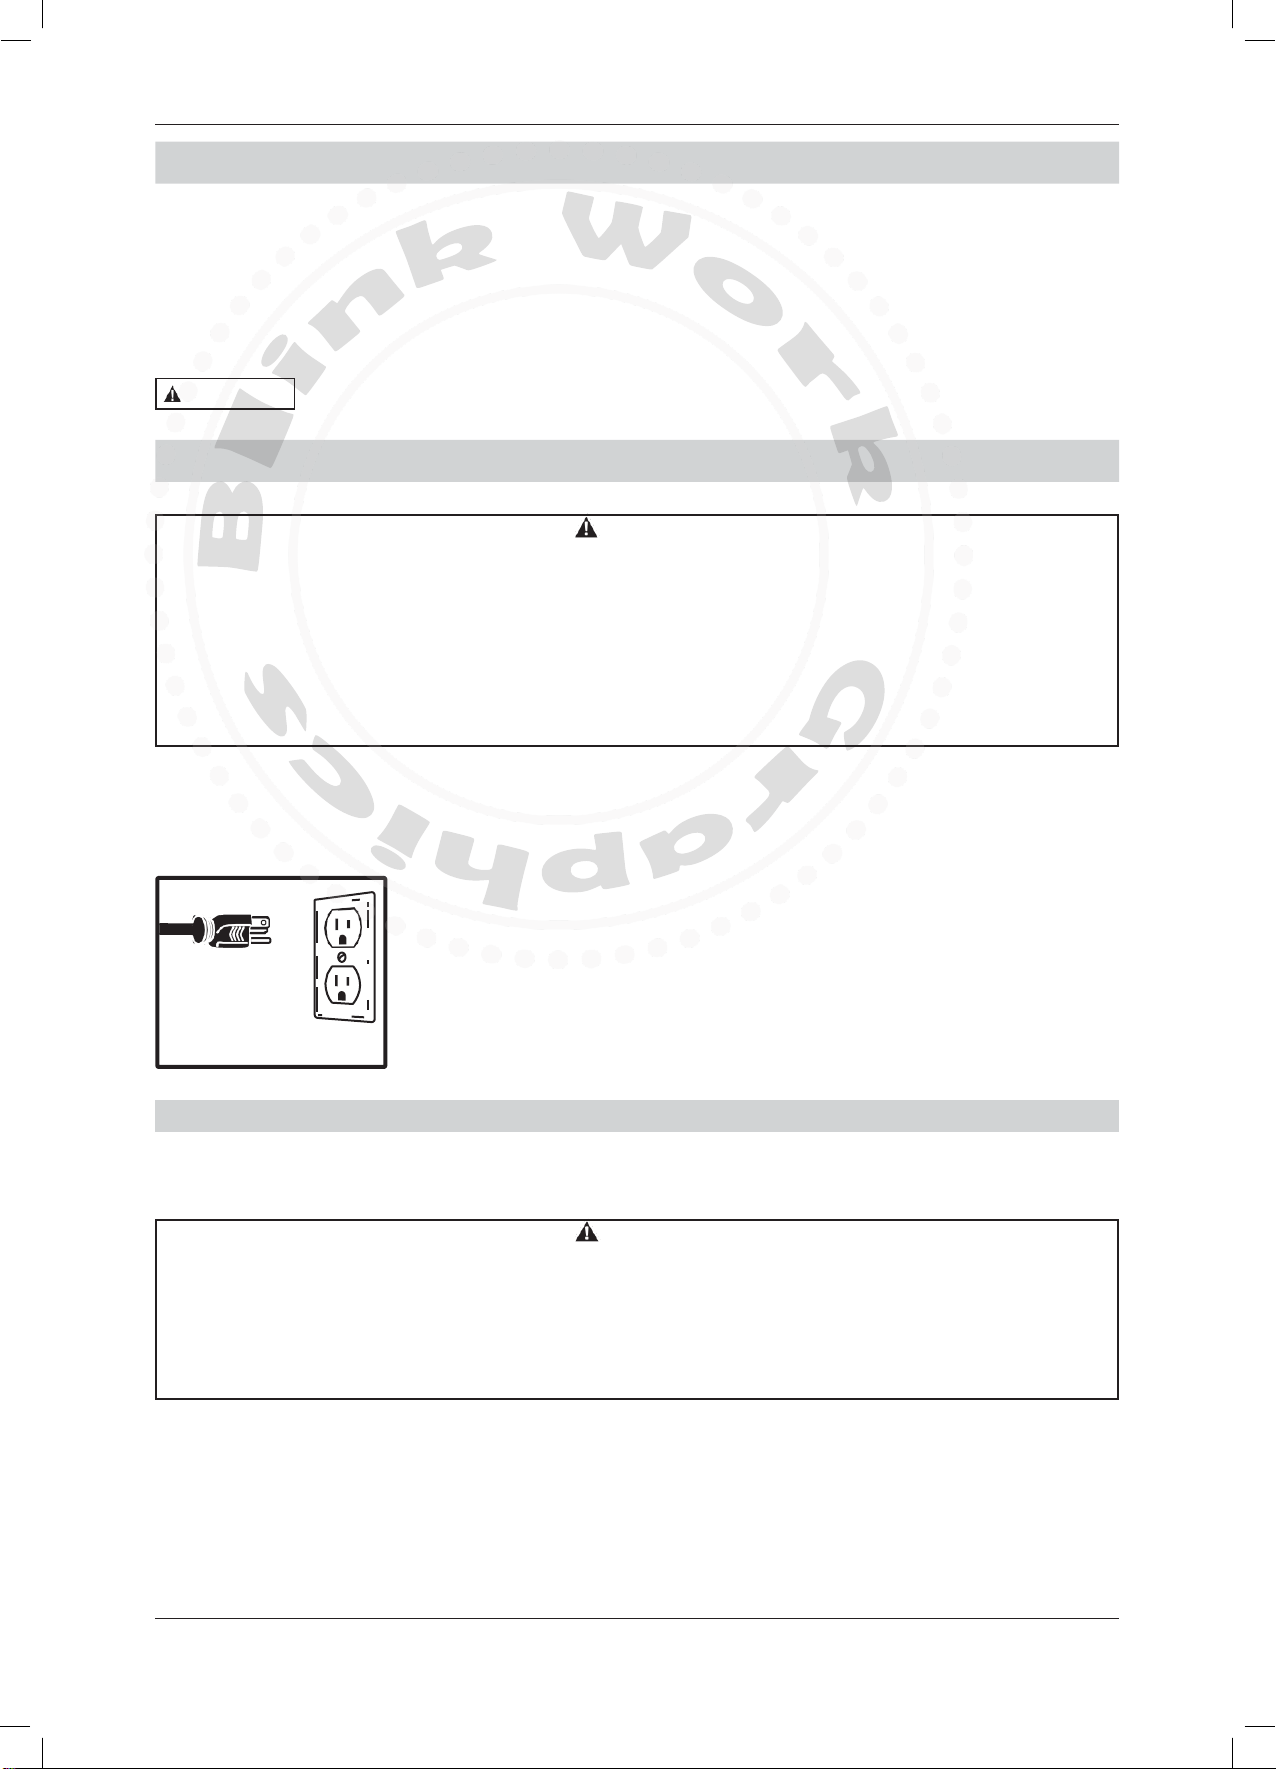
•Toreduce the risk of electric shock, do not expose to rain. Store indoors.
•Never operate the compressor if the power cord or plug are damaged. Takethe equipment to the
nearest Authorized Service Center and a specialized technician will replaceit.
6

7
Xxxxxx man v.190714
WARNING
s
Air Compressor
CAUTION
Air Tool Cautions
•DO NOTuse air tools that are rated below the maximum rating of the compressor. Select air tools, air
hoses, pipes, valves, filters and other fittings accordingly. DO NOT exceed manufacturer’s rated safe
operating pressures for these items.
•Make sure all hose connections are adequately secured to prevent tools or hose ends from being
accidentally disconnected.
•Remove adjusting keys or wrenches before turning the tool on. A wrench or key that is left attached to a
moving part of the tool may result in personal injury.
•Keep work area clean and well lit.
Cluttered or dark work areas invite accidents.
•Keep children away.
All children should be kept away from the work area. Never let a child handle a tool without strict adult
supervision.
•Store idle tools out of the reach of children and untrained persons.
Tools may be dangerous in the hands of untrained users.
•Do not operate any tool if under the influence of alcohol or drugs.
Read warning labels on prescriptions to determine if your judgment or reflexes are impaired while taking
drugs. If there is any doubt, do not attempt to operate.
•Do not force tool.
Use the correct tool for your application. The correct tool will do the job better and safer at the rate for
which it was designed.
•Do not use the tool if the switch does not turn it on and off.
Any tool that cannot be controlled with the switch is dangerous and must be repaired.
•Check for damage. Check your tool regularly. If part of the tool is damaged it should be carefully
inspected to make sure that it can perform its’ intended function correctly. If in doubt, the part should be
repaired. Refer all servicing to a qualified technician. Consult your dealer for advice.
•Maintain tools with care.
Keep tools sharp and clean. Properly maintained tools, with sharp cutting edges, are less likely to bind
and are easier to control.
SPECIFIC OPERATION WARNINGS
•Repairs attempted by unqualified personnel can result in serious injury or death by electrocution. Any
electrical wiring or repairs required on this product should be performed by authorized service center
personnel in accordance with national and local electrical codes.
•Failure to provide adequate grounding to this product could result in serious injury or death from
electrocution. Refer to Grounding Instructions paragraph in the Installation section. Make certain that
the electrical circuit to which the compressor is connected provides proper electrical grounding, correct
voltage and adequate fuse protection.
•Under some conditions and duration of use, noise from this product may contribute to hearingloss.
Always wear certified safety equipment: ANSI S12.6 (S3.19) hearing protection.
•Exceeding the pressure rating of air tools, spray guns, air operated accessories, tires and other
inflatables can cause them to explode or fly apart and could result in serious injury. Follow the
equipment manufacturer’s recommendation and never exceed the maximum allowable pressure rating
of attachments.
•Drain air tank daily or after each use. If air tank develops a leak, replace it immediately with a new air
tank or replace the entire compressor.

8
WARNING
CAUTION
s
Ironton
Power Requirements
This tool is designed to operate on a properly grounded 120 volt, 60 Hz, single phase alternating current
(AC) power source fused with a 15 amp time delayed circuit breaker. It is recommended that a qualified
electrician verify the ACTUAL VOLTAGE at the receptacle into which the tool will be plugged and confirm that
the receptacle is properly grounded. The use of the proper circuit size can eliminate nuisance circuit breaker
tripping when using your tool. Improper performance, and/or, damage to the tool will result if operated on
inadequate, or excessive power.
DO NOT OPERATE THIS TOOL if the ACTUAL power source voltage is less than 105
volts AC or greater than 132 volts AC.
Grounded Tools: Tools with 3-Prong Plugs
Tools marked with Grounding Required have a 3-wire cord and 3-prong grounding plug. The plug must be
connected to a properly grounded outlet. If the tool should electrically malfunction or break down, grounding
provides a low resistance path to carry electricity away from the user, reducing the risk of electric shock.
(See Figure 1.)
A
fig 1
The grounding prong in the plug is connected through the green wire inside the
cord to the grounding system in the tool. The green wire in the cord must be the
only wire connected to the tool’s grounding system and must never be attached
to an electrically live terminal.
Your tool must be plugged into an appropriate outlet, properly installed and
grounded in accordance with all codes and ordinances. The plug and outlet
B should look like those in the following illustration.
EXTENSION CORDS
●For optimum air compressor performance an extension cord should not be used unless absolutely
necessary.
●Grounded tools require a 3-wire extension cord.
●As the distance from the supply outlet increases, you must use a heavier gauge extension cord. Using
extension cords with inadequately sized wire causes a serious drop in voltage, resulting in loss of power
and possible tool damage.
●If you must choose between an electrical extension cord and a longer air hose, choose the latter. It is
far better for the life of the compressor. If necessary, care must be taken in selecting an extension cord
appropriate for use with your specific air compressor.
POWER SOURCE CONNECTION
GROUNDING
•This machine must be grounded while in use to protect the operator from electrical shock. This
compressor is equipped with an electrical cord that has an equipment grounding conductor and a
grounding plug. The plug MUST be plugged into a matching receptacle that is properly installed and
grounded in accordance with ALL local codes andordinances.
•DO NOT MODIFY THE PROVIDED PLUG. If it will not fit the receptacle, have the properreceptacle
installed by a qualified electrician.
•CHECK with a qualified electrician or service person if you do not completely understand the grounding
instructions, or if you are not sure the tool is properly grounded.
•USE A PROPER EXTENSION CORD. Make sure your extension cord is in good condition. When using
an extension cord, be sure to use one heavy enough to carry the current your product will draw. An
undersized cord will cause a drop in line voltage, resulting in loss of power and causeoverheating.
•Be sure your extension cord is properly wired and in good condition. Always replace a damaged
extension cord or have it repaired by a qualified person before using it. Protect your extension cords
from sharp objects, excessive heat and damp or wet areas.
WARNING

9
Xxxxxx man v.190714
s
Air Compressor
●The smaller the wire’s gauge number, the greater the capacity of the cord. For example, a 14-gauge
cord can carry a higher current than a 16-gauge cord. Minimum extension cord wire size is shown in the
following table:
Minimum Wire Size of Extension Cords
Nameplate AMPS Cord Length
25’ 50’ 100’ 150’
0-6 18 AWG 16 AWG 16 AWG 14 AWG
6-10 18 AWG 16 AWG 14 AWG 12 AWG
10-12 16 AWG 16 AWG 14 AWG 12 AWG
12-16 14 AWG 12 AWG NOT RECOMMENDED
●Maximum length of extension cord for this compressor should be 50 feet (15 meters). Minimum wire size
of extension cord should be 12 gauge.
●Use a heavy-gauge extension, since very thin or very long cord may cause voltage drop and result in
loss of power in the compressor and overheating. Select a properly grounded extension cord which will
mate directly with the power source receptacle and the air compressor power cord without the use of
adapters. Make certain that the extension cord is properly wired and in good electricalcondition.
●When using more than one extension cord to make up the total length, make sure each cord contains at
least the minimum wire size required.
●If you are using one extension cord for more than one tool, add the nameplate amperes and use the sum
to determine the required minimum cord size.
●If you are using an extension cord outdoors, make sure it is marked with the suffix W-A (W in Canada)to
indicate it is acceptable for outdoor use.
●Make sure your extension cord is properly wired and in good electrical condition. Always replacea
damaged extension cord or have it repaired by a qualified electrician before using it.
●Protect your extension cords from sharp objects, excessive heat, and damp or wet areas.

10
s
Ironton
Main Parts Description
A
Power Switch:
This controls the power to the motor and also the cut-in/ cut-out pressure
settings. This switch serves as the Auto-On/Off positions for the unit.
B
Tool Pressure Gauge:
Indicates the outgoing air pressure to the tool and is controlled by the
regulator.
C
Tank Pressure Gauge:
Indicates the reserve air pressure in the tank.
D
Tank Safety Valve:
Used to allow excess tank pressure to escape into the atmosphere. This
valve should only open when the tank pressure is above the maximum rated
pressure.
E
Regulator:
The air pressure coming from the air tank is controlled by the regulator.
Toincrease the pressure, turn the knob clockwise, and to decrease the
pressure, turn the knob counter-clockwise.
F
Tank Drain Valve:
Used to drain condensation from the air tank, located at bottom of tank.
G
Air Intake Filter:
Provides clean air to the pump and must always be kept free of debris.
Check on a daily basis or before each use.
H
Check Valve:
When the pump is not in operation, the valve closes to retain air pressure
inside the tank, an internal component.
I
Quick Connect:
Offers a quick release feature for attaching and removing the air hose.
J
Outlet Tube
Transfers pressurized air from the air compressor pump to the tank
K
Handle
For transportability
L
Handle Bolts
Allows attachment of handle & removal for storage
M
Wheels
Allow easy portability
N
Rubber Foot
Provides anti-vibration and stability
O
Air Tank
20 gallons (75.7 liters)
TANK SAFETY VALVE -
The safety valve automatically relieves pressure from the air tank in the event of excessive pressure
build up. Safety Valve is preset at factory. Do not attempt to make any adjustments to the safety valve.
Periodically pull the ring on the safety valve end to check that it is working properly.
PRESSURE -
Controlled by the red-tipped power switch which turns the air compressor on and off. When switch is
pulled up to the "Auto / On" position, the pressure switch is engaged and will start the compressor pump
automatically when tank pressure is below the factory-set minimum. The pressure switch continues
to monitor the pressure and turns the pump off when the pressure reaches the factory-set maximum.
Compressor is turned on. When pushed down, the pump is off
Always make sure that the compressor power switch is in the OFF position before
performing any maintenance or plugging the compressor into a power supply.
TANK DRAIN VALVE
(located on bottom of tank) - The tank drain valve can be opened to allow moisture and compressed air to be
released from the air tank.
The tank drain valve should always be opened slowly to avoid damage to equipment
and possible injury.
Further Functional Information
WARNING
NOTICE

Air Compressor
G A E
K
C
B
D I
H J
L L
O
M
M
F
fig.2 N
11 Xxxxxx man v.190714
11
MAIN PARTS OF AIR COMPRESSOR
s

s
Ironton
1. Unpack the air compressor.
2. Inspect the unit for damage. If the unit has been damaged in transit, contact the carrier and complete a
damage claim. Do this immediately because there are time limitations to damage claims.
3. Check the compressor’s serial label to ensure that you have received the model ordered, and that it has
the required pressure rating for its intended use.
4. Before operating your tool, check the contents of the box to make sure you have everything you will need.
Items included in the box:
●Air Compressor
●Handle and bolts
●2 Wheels, washers and nuts
●Owner’s Manual
NOTICE
NOTICE
Save packaging in case you need to return the compressor for servicing or repair.
ASSEMBLY
Before performing any assembly or maintenance, make sure compressor is turned off
and unplugged from the power supply.
Place compressor on level ground. It is designed to function properly at an incline of no greater than 15
degrees.
PRE-OPERATION
Before operating your air compressor:
●Inspect for damage before using the air compressor, make sure the air tank is not damaged, inspectall
parts for damage and check that all pipes and hoses are firmly connected.
●Do not use the air compressor if any damage is found. If damaged, have an authorized service center
inspect and test the air compressor to ensure that is working properly.
●Pull the ring on the safety valve before each use to make sure the valve is functional.
●Depending on the CFM draw of the tools being operated, your new air compressor can be used for
operating paint sprayers, air tools, grease guns, airbrushes, caulking guns, abrasive blasters, tire &
plastic toy inflation, spraying weed killer and insecticides, etc. Proper adjustment of the air pressure
regulator is necessary for all of these operations. Refer to the air pressure specifications provided with
the tool you are using.
GENERAL OVERVIEW
Installation and Location
Locate the compressor according to the following guidelines:
1. Position the compressor near a grounded electrical outlet.
2. The compressor must be at least 12 to 18 inches (31 - 45 cm) from any wall or obstruction which would
interfere with airflow, in a clean, well-ventilated area, to ensure sufficient air flow andcooling.
3. In cold climates, store portable compressors in a heated building when not in use; a temperature-
controlled area between 32° and 95° Fahrenheit (0 ° and 35 °C). This will reduce problems with the
motor starting and freezing from water condensation.
4. Remove the compressor from the carton and place it on the floor or a hard, level surface. Thecompressor
must be level to ensure proper drainage of the moisture in the tank.
5. The compressor is designed with heat dissipation fins which allow for proper cooling. Keep the fins (and
all other parts which collect dust or dirt) clean. A clean compressor runs cooler and provides longer
service. Do not place rags, containers or other material on top of the compressor. The air filter intake
should be free of any debris or obstructions. Check the air filter on a daily basis to make sure it is clean
and in working order.
12
GETTING STARTED

WARNING
s
Air Compressor
DUTY CYCLE: This air compressor pump is capable of running continuously. To prolong the life of your
air compressor, it is recommended that a 50%-75% average duty cycle be maintained; that is, the air
compressor pump should not run more than 30-45 minutes in any given hour.
Accessories for this unit are sold separately.
Your air compressor is supplied with a 1/4" push-connect air coupler (fig.3) . With a factory-installed air
coupler, your compressor is ready to accept air hoses
equipped with 1/4" male air connectors (fig 4).
Use only air hoses rated for use with
150 psi air pressure or higher.
To install any air hose equipped with a 1/4" male
connector (fig 4):
1. Simply push the "connector" or "plug" into the
fitting and it automatically engages.
2. Verify that air hose is securely connected to air
coupler by pulling on the air hose.
OPERATING INSTRUCTIONS
Daily start-up
1. Set the Power Switch to the OFF (0) position (A, fig.2).
2. Inspect the air compressor, air hose, and any accessories/tools being used for damage or obstruction. If
any of these mentioned items need repair/replacement, contact your local authorized dealer before use.
3. Close the drain valve (F,fig 2).
13 Xxxxxx man v.190714
Attaching an air hose
BEFORE EACH USE
•Risk of unsafe operation. Firmly grasp air hose in hand when installing or disconnecting to prevent hose
whip.
•Risk of unsafe operation. Do not use damaged or wornaccessories.
•Risk of bursting. Too much air pressure causes a hazardous risk of bursting. Check the manufacturer’s
maximum pressure rating for air tools and accessories. The regulator outlet pressure must never exceed
the maximum pressure rating.
ACCESSORIES
•Risk of bursting. If any unusual noise or vibration is noticed, stop the compressor immediately and have
it checked by a trained service technician.
WARNING
NOTICE

14
s
Ironton
4. Connect the air hose to the quick connect socket on the regulator assembly by inserting the quick connect
plug on the air hose into the quick connect socket. The quick connect socket collar will snap forward and
lock the plug into place, providing an air tight seal between the socket and plug. Torelease the air hose,
push the collar back on the quick connect socket.
5. Firmly grasp the hose prior to inserting it into the quick connect and when removing it from the quick
connect socket.
6. Plug the power cord into the proper receptacle.
7. Move the Power Switch to the ON (I) position (pull it up) and the compressor pump will start, building
pressure in the tank until cut-out pressure is reached and the unit shuts off automatically (A).
8. Adjust the regulator to a psi setting that is needed for your application and be sure it is within the
safety standards required to perform the task. If using a pneumatic tool, the manufacturer should have
recommendations in the manual for that particular tool on operating psi settings.
Drain Valve
●Make sure the tank drainage valve (fig.5) is closed and not in the open position.
fig.5
Pressure Switch
1. Check that the red pressure switch button is pushed down to the OFF position (fig 6).
2. Ensure that the power supply you are going to use
is operating normally.
3. Insert the power supply cord into the power supply
socket.
4. Turn the pressure switch on, pulling the red button
up to the ON position.
5. On the tank pressure gauge fig.2C), you can watch
pressure build in the tank until the pump stops at
the factory-set pressure, about 115 to 125 psi.
6. This first time running your compressor and
periodically thereafter, check for air leaks. If the
gauge indicates pressure is going down in the tank
or you hear leakage, you could apply soapy water
to all joints in the air transport piping. Tightenthese
joints if bubbles form.
fig.6

15
Xxxxxx man v.190714
Air Compressor
Adjusting the air pressure
Your air compressor is supplied with an air pressure
regulator. This regulator adjusts the air pressure
supplied to the tools through the hose.
●Toincrease air pressure, turn air regulator knob
(fig.7,E) clockwise.
●Todecrease air pressure, turn air regulator knob E
counterclockwise.
●Use the outlet pressure gauge (fig.7,B) to see the
resulting pressure.
Shutting off your compressor
1. Push the red pressure switch button down to the
OFF position (fig.6).
2. Unplug the compressor from the electrical power.
3. If not draining the tank, reduce tank pressure
through the air hose.
4. Drain the tank by slowly opening the drain valve
(fig.5). Place a catch basin under the valve to
protect the surface from water damage.
Cold Weather Starting
B
C
fig.7
Temperatures below freezing (32 °F / 0 °C) cause the metal parts of your air compressor to contract and that
makes starting more difficult. To assist the air compressor in starting in cold weather, follow these tips:
1. Try to keep the air compressor stored in temperatures above 32 °F (0 °C).
2. Open the air tank drain valve and release all air pressure from the air tank before attempting to start in
cold weather. (After air is released from air tank, close drain valve.)
3. Pull the ring on the safety valve before each use to make sure the valve is functional.
4. Plug the air compressor directly into a 120 volt electrical outlet. Do not use an extension cordwhen
starting your air compressor in cold weather.
After Each Use
Daily shut-down
1. Set the Power Switch to the OFF (0) position.
2. Unplug the power cord from the receptacle.
3. Set the outlet pressure to zero on the regulator.
4. Remove any air tools or accessories.
5. Open the drain valve allowing air to bleed from the tank. After all of the air has bled from the tank, close
the drain valve to prevent debris build-up in the valve.
•Risk of unsafe operation. Firmly grasp air hose in hand when installing or disconnecting to prevent hose
whip.
•Risk of bursting. Drain air tank daily. Water will condense in air tank. If not drained, water will corrode
and weaken the air tank causing a risk of air tank rupture.
WARNING
s

16
WARNING
NOTICE
s
Ironton
To ensure efficient operation and longer life of the air compressor unit, a routine
maintenance schedule should be followed. The following schedule is geared toward a
consumer whose compressor is used in a normal working environment on a daily basis.
Check the safety valve by performing these three steps:
1.
Plug the compressor in and run until shut-off
pressure is reached.
2.
Wearing safety glasses and hearing protection,
pull out on the safety valve ring to release pressure
from the tank.
3.
The safety valve should close automatically at
approximately at 40-50 psi. If the safety valve does
not allow air to be released when you pull out on
the ring, or does not close automatically, it must be
replaced.
STORAGE
To store the air compressor, be sure to do the
following:
1.
Turn the unit off and unplug the power cord from
the receptacle.
2.
Remove all air hoses, accessories, and air tools
from the air compressor.
3.
Perform the daily maintenance schedule.
4.
Open the drain valve to bleed all air from thetank.
5.
Close the drain valve.
fig.8
6.
Protect the electrical cord and air hose from damage (such as being stepped on or run over). Wind them
loosely around the compressor handle.
7.
Store the air compressor in a clean, cool, dry, safe, and indoor location.
MAINTENANCE
•
Risk of unsafe operation. Unit cycles automatically when power is on. When performing maintenance,
you may be exposed to voltage sources, compressed air, or moving parts. Personal injuries can occur.
Before performing any maintenance or repair, disconnect power source from the compressor and bleed
off all air pressure.
•
Risk of bursting. If the safety valve does not work properly, over-pressurization may occur, causing air
tank rupture or an explosion.
•
Risk of burn. Tubes, pump head, and surrounding parts are very hot; do not touch these.Allow
compressor to cool prior to servicing.
•
Risk from flying objects. Always wear certified safety equipment: ANSI Z87.1 eye protection (CAN/CSA
Z94.3 with side shields).
•
Risk from noise. Use ear protectionANSI S12.6 (S3.19) as air flow noise is loud when draining.
•
Risk of bursting. Water will condense in the air tank. If not drained, water will corrode and weaken the air
tank causing a risk of air tank rupture.
•
This compressor is equipped with an automatic reset thermal overload protector which will shut off the
motor if it becomes overheated. If the thermal overload protector is actuated, the motor must be allowed
to cool down before start-up is possible. NOTE: Toreset the motor overload, turn the power switch to the
OFF position and unplug the unit from the power outlet. Allow 10 minutes (minimum) for motor overload
cut-out to cool and reset. Unit can then be plugged in and re-started.
CHECKING THE SAFETY VALVE

17
Xxxxxx man v.190714
●Before each use,
1. check for any unusual noise or vibration.
2. be sure all nuts and bolts are tight.
●After each use, drain condensation from the air tank.
●Inspect air system for leaks by applying soapy water to all joints. Tighten these joints if leaks are
discovered.
Always inspect the compressor before use, and make sure it is in good working condition. Make sure all air
vents are clear. Check the power cable to make sure it is intact and free from cracks, bare wires etc. Avoid
using solvents when cleaning plastic parts, most plastics are susceptible to damage from the various types of
commercial solvents.
TROUBLESHOOTING
Monthly Maintenance
Daily Maintenance
s
Air Compressor
Trouble
Possible Cause
Corrective Action
Compressor will not start
1. Blown fuse or circuit breaker
tripped
1. Replace or reset fuse/circuit breaker
2. Loose electrical connections
2. Check wiring connections
Low pressure
1. Restricted air filter
1. Replace air filter
2. Defective check valve
2. Replace check valve
3. Air leak in safety valve
3. Check valve by pulling on ring. If
condition persists, replace valve
Safety valve releases
Defective pressure switch
Replace pressure switch
Pressure in tank falls
1. Air leaks at joints
1. Allow the compressor to build pressure
in the tank, to the max pressure if
possible. Spray or brush soapy water on
all air connections and look for bubbles.
Tighten leaky connections. Donot over-
tighten.
2. If the problem continues, contact
customer support for further advice.
Unloader valve leaks
when pump is not running
Unloader valve seal defective
Allow air in the air tank out until all
pressure is released. Remove the un-
loader valve plug and clean the valve
seal. If damaged, replace seal and
re-install.
Compressor stopped and
will not re-start
1. Thermal overload protector
has engaged due to motor
overheating
1. Check that the main supplied voltage
corresponds to the compressor
specifications. An inadequate extension
cord (too thin or too long) can cause
the motor to overheat due to voltage
drop. Excessive use (over 1 hour
continuous) can cause motor
overheating. Allow the motor to cool
down.
2. Motor windings burn-out
Contact customer support
Motor does not start
and makes a humming
sound
Capacitor burn-out
Contact customer support

18
For technical questions, please call 1-800-222-5381.
TROUBLESHOOTING
s
Ironton
Trouble
Possible Cause
Corrective Action
Motor does not start or starts
slowly
Low voltage electrical supply to
motor
Check that the main supplied voltage
corresponds to the compressor
specifications.
An inadequate extension cord (too thin
or too long) can cause the motor to
overheat due to voltage drop.
Check power quality at outlet
Compressor runs noisily and
metallic sounds are heard
Compressor will not come to
max pressure
Head gasket or reed valve dam-
aged.
Stop the compressor and contact
customer support
Compressor doesn’t provide
as much air as when new
and/or cuts off after a much
shorter time period.
1. Tank has reduced capacity due
to water retention
2. Pressure switch is out of
adjustment
1. Open drain valve to release water
2. Contact customer support
Pump unit does not stop
when the tank reaches maxi-
mum working pressure.
Defective or pressure switch out
of adjustment
Stop the compressor immediately (risk
of explosion) and contact customer
support

Air Compressor
This page intentionally left blank.
19 Xxxxxx man v.190714
s

Two year limited warranty
Distributed by
Northern Tool + Equipment Co., Inc.
Burnsville, Minnesota 55306
NorthernTool.com
Made in Vietnam
WARRANTY
Ironton
20
s
Table of contents
Popular Air Compressor manuals by other brands

AEROTECNICA COLTRI
AEROTECNICA COLTRI MCH-3/EM CNG Use and maintenance manual

DeWalt
DeWalt D55141 instruction manual

ULTIMATE SPEED
ULTIMATE SPEED UMK 10 A1 translation of original operation manual

Danfoss
Danfoss Turbocor TT-300 Service manual

Atlas Copco
Atlas Copco GA 160 VSD Instruction book

California Air Tools
California Air Tools CAT-30020C owner's manual

Slime
Slime 40047 instructions

Endress+Hauser
Endress+Hauser ISEmax compressed aircleaning unit operating instructions

Atlas Copco
Atlas Copco GA18 VSD Instruction book

Ingersoll-Rand
Ingersoll-Rand SS3 Owner’s Manual with Parts Lists

Truper
Truper COMP-60LB-D manual

Grizzly
Grizzly QUIET Series owner's manual