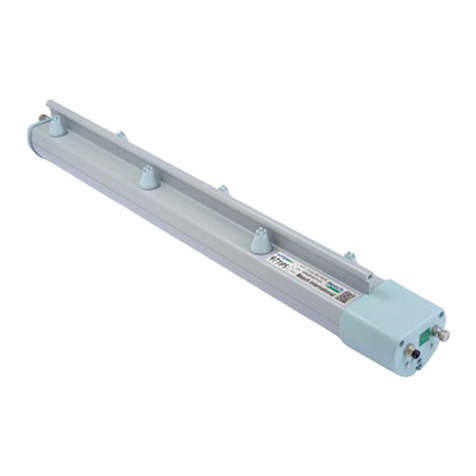
ITW Simco ION User manual

One-Point Ionizer with S Power Supply 5200199 Rev. F
INSTALLATION AND OPERATING INSTRUCTIONS
One-Point Ionizer
with S Power Supply

i5200199 Rev. F
One-Point Ionizer with S Power Supply
TABLE OF CONTENTS
1. SAFETY WARNINGS ............................................................................ 1
2. INSTALLATION .................................................................................. 2
One-point Ionizer Location ..................................................................................................2
Installation ............................................................................................................................2
Mounting the Power Supply .................................................................................................3
Cable Supports......................................................................................................................3
Grounding .............................................................................................................................3
Checking for Proper Operation ............................................................................................4
3. MAINTENANCE .................................................................................. 4
4. TROUBLESHOOTING ........................................................................... 4
5. WARRANTY...................................................................................... 5

15200199 Rev. F
One-Point Ionizer with S Power Supply
1. SAFETY WARNINGS
NOTE – Statements identified with a NOTE indicate precautions necessary to avoid
potential equipment failure.
CAUTION! – Statements identified with a CAUTION indicate potential safety
hazards.
NOTE – This equipment must be correctly installed and maintained. Adhere to the
following cautions for safe installation and operation:
1. Read the complete Operation Manual before operating. Failure to follow instructions
may result in damage to the ionizer and/or personal injury.
2. Disconnect line voltage to power supply before connecting high voltage cable.
3. A factory-qualified service technician must perform component service and repairs.
Please contact Simco-Ion Customer Service for information.

25200199 Rev. F
One-Point Ionizer with S Power Supply
2. INSTALLATION
Carefully remove the equipment from the carton and inspect the contents.
NOTE – If any damage has occurred during shipment, notify the local carrier at
once. A report should also be forwarded to Simco-Ion, 2257 North Penn Road,
Hatfield PA 19440. See Section 5 (Warranty) for Return Shipment information.
One-point Ionizer Location
Best locations are usually just ahead of places where static gives trouble.
The material to be neutralized should have a background of free air and not be in contact
with another surface as it passes the static ionizer, since static charges cannot be easily
neutralized from between two surfaces in intimate contact. Discharging of material in
intimate contact with a flat plate or board can often be done effectively by cutting a hole
in the plate or board and mounting the ionizer in this hole. Partial contact of the material
with a background surface may not interfere with effective static elimination; however,
this should be avoided as much as possible.
Static ionizers may be mounted with points facing in any direction, provided they face the
material to be discharged.
The casing of the one-point ionizer should not be less than 3/8” nor more than 3” from
the material to be discharged. For best operation, keep between ½” and 1”. The material
should not contact the ionizer.
Installation
Mount each ionizer to the machine by means of the mounting clamp provided. Wrap the
7/16” clamp around the ionizer and bolt clamp directly to a grounded machine frame or
to the perforated strip supplied and bolt the perforated strip to a grounded machine frame.
This process automatically grounds the casing that is necessary for proper operation. If the
mounting clamp is mounted to a non-metallic part of the machine frame or if other means
of supporting the ionizer is used involving insulating materials, attach a ground wire with
a ring lug to the bolt on the 7/16” clamp.
Run the high voltage ionizer cable in cable supports along the machine frame or wall to
the power supply. The cable should be kept at least ¼” away from the grounded machine
frame or other grounded surfaces.
Install the spring loaded cable connector on the high voltage cable as outlined on attached
instructions.
Plug the cable into one of the high voltage receptacles on the power supply and screw
the knurled plug into the plastic receptacle – FINGER TIGHT ONLY. The low voltage
wiring of the power supply terminates in a polarized 3-prong plug for connection into a

35200199 Rev. F
One-Point Ionizer with S Power Supply
corresponding AC receptacle of the voltage and frequency marked on the nameplate and
with a good electrical ground connection for the ground pin of the plug. If a grounded
socket is not available, either bolt the power supply to a well-grounded metal machine
frame or connect a heavy copper wire from the ground terminal on the rear of the power
supply to a well-grounded electrical conduit or to a cold water pipe.
To add a second one-point ionizer to an installation, pull the plastic plug off the second
high voltage receptacle on the power supply and connect the second one-point ionizer.
NOTE – When adding or removing ionizers or changing to any other type of ionizer
bar or equipment, be sure to check with Simco-Ion for instructions before
proceeding.
Mounting the Power Supply
Mount the power supply to the machine frame (preferable on the side away from the
operator) or to a convenient wall or post (preferably with the HV terminals down).
Cable Supports
Cable supports are used to guide the high voltage cables from the ionizers along the frame
of the machine to the power supply. Cable should always be kept at least ¼” away from
the grounded machine frame, parts, wall, and ceiling. If it must touch at any point, it
should be encased in protective plastic tubing available from Simco-Ion. To install the
cable supports, press the split bushing out of the metal support and apply the bushing to the
cable at the desired location. Mount the support, then press the bushing with cable back
into the support. Be sure that a cable support is located to remove all strain and motion
from the cable where it enters a static ionizer and the power supply.
Grounding
Frame of the Machine – it is essential for successful operation of the equipment that the
frame of the machine be electrically grounded, either through well grounded electrical
conduit, or by a heavy copper wire connecting the frame to a cold water pipe.
Ionizers – The metal casing must be grounded. If the casing is not grounded, personnel
may receive a shock by touching it and, in addition, the equipment will not function
properly. Grounding is automatic when metal mounting clamps and brackets support
the ionizers directly from the grounded metal machine frame. When the ionizers are
supported from wooden or other non-conductive members, a separate wire must connect
the mounting bracket on one end of the ionizer to a metal part of the grounded machine
frame or to a well grounded conduit or cold water pipe.
Power Supply – The power supply must be grounded either by bolting it to the grounded
machine frame or by attaching a heavy copper wire to the ground terminal and to a well
grounded electrical conduit or cold water pipe.

45200199 Rev. F
One-Point Ionizer with S Power Supply
Checking for Proper Operation
When the one-point ionizer had been connected to the power supply using the high voltage
cable, turn the power supply ON. Then use Simco-Ion’s voltage detector to check for
proper functioning of the emitter point and high voltage supply. Place the voltage detector
tip on the one-point ionizer’s emitter point. The voltage detector’s top will be illuminated
to indicate proper functioning of the emitter point.
3. MAINTENANCE
Turn equipment OFF before cleaning, removing ionizers from machine, or breaking any
ground connection. If metal filings or fragments fall into the tip of the ionizer, they are apt
to short circuit the unit and make it inoperative until the particles are removed. Loosen the
ionizer brackets and rotate the unit to face downward, tapping it to dislodge the particles.
Rotate the ionizer back into position and tighten the brackets. Compressed air may be
used to keep the inside of the ionizer clean. Periodic use of a soft brush or compressed air
will prevent the points from accumulating hardened balls of lint, grease, and other foreign
matter that reduce their sharpness and decrease efficiency. One easy way to remove built-
up deposits is to occasionally press a soft pencil eraser down over each point in turn and
twist slightly. Including the one-point ionizers in the regular procedure of cleaning the
machine will pay dividends in service and excellence of performance.
4. TROUBLESHOOTING
If equipment fails to function properly, check connections to be sure they are tight before
proceeding with the following tests.
NOTE – When the one-point ionizer is operating properly, no visual arcing should
occur. If the ionizer should arc constantly, check this particular unit for metal
fragments or other contamination that should be removed as outlined under
Maintenance above. When the voltage detector produces no light, the trouble is
either a defective ionizer or defective power supply.
To locate the faulty equipment:
1. Turn OFF current to power supply.
2. Disconnect all ionizers from the power supply by unscrewing knurled plugs from
plastic receptacles and pulling out high voltage cables.
3. After all ionizers have been unplugged, turn ON current to power supply and attach
a piece of insulated wire or cable to the ground terminal on the power supply.
4. Insert the other end of the wire into one of the plastic receptacles. As the conductor
approaches the screw at the back of the exposed hole, a spark should occur.

55200199 Rev. F
One-Point Ionizer with S Power Supply
5. If no spark occurs and no arcing is heard, the trouble is in the power supply. If a spark
does occur the fault is in one or more of the ionizers.
To find the faulty Ionizer or Ionizers:
1. Turn OFF current to power supply.
2. Insert the high voltage cable from one of the ionizers into the exposed hole of one of
the plastic receptacles and screw knurled plug FINGER TIGHT ONLY.
3. Turn on the current to the power supply.
4. Check the ionizer with the Simco-Ion voltage detector. If it does not light, this is the
faulty ionizer. If it does light, add the other ionizers to the power supply until the
voltage detector fails to light. The faulty ionizer should be replaced.
5. WARRANTY
This product has been carefully tested at the factory and is warranted to be free from
any defects in materials or workmanship. Simco-Ion will, under this warranty, repair
or replace any equipment that proves, upon our examination, to have become defective
within one year from the date of purchase.
The equipment being returned under warranty should be shipped by the purchaser to
Simco-Ion, 2257 North Penn Road, Hatfield PA 19440, transportation prepaid and insured
for its replacement cost. Prior to returning any goods for any reason, contact Simco-Ion
Customer Service at (215) 822-6401 for a Return Authorization Number. This number
must accompany all returned items.
This warranty does not apply when the equipment has been tampered with, misused,
improperly installed, altered, has received damage through abuse, carelessness, accident,
connected to improper line voltage, or has been serviced anyone other than an authorized
factory representative.
The warranty does not apply when Simco-Ion parts and equipment have been energized
by other than the appropriate Simco-Ion electrostatic charging generator or generator, or
when a Simco-Ion electrostatic charging generator or generator has been used to energize
other than Simco-Ion parts and equipment. Simco-Ion makes no warranty, expressed or
implied, nor accepts any obligation, liabilities, or responsibility in connection with the use
of this product other than the repair or replacement of parts stated herein.

One-Point Ionizer with S Power Supply 5200199 Rev. F
Simco-Ion
2257 North Penn Road
Hatfield, PA 19440
(215) 822-6401
(800) 203-3419
www.simco-ion.com
© 2015 Simco-Ion. Printed in the U.S.A.
Table of contents
Other ITW Air Ionizer manuals
Popular Air Ionizer manuals by other brands

water source
water source NMP-9000T user manual

Clear Water
Clear Water MineralPURE R-20 Installation & Care Manual

Sunx
Sunx ER-VS01 instruction manual

greenfan
greenfan 1600-01 Installation, operation and maintenance instructions

Perenio
Perenio IONIC SHIELD PEWOW01COVUK instructions

Meech
Meech 200 Series operating manual