Aquavolta Cavendish 2.0 Instructions for use

Owner’s Operation Manual
Alkaline Water Ionizer
SM-S112TL
Warning: Incorrect installation and/or operation
could void your valuable warranty
Please protect your investment!
READ THIS
MANUAL CAREFULLY
O
A
W
co
Pl
MA

02
Table of contents
Safety Precautions
Names And Functions
How to Use
Replacing Your Filter
Composition of Filter
How to measure pH
Counter Top Installation Instructions
Installation Instructions
Trouble Shooting Guide
Product Specifications
Name and functions of parts
Accessories(Needed for faucet installation)
How to install the faucet
How to use
Product Specifications
WARRANTY CARD
24/25
26
27/29
30/33
34
35
03/04
05/06
07/12
13/14
15
16
17
18/20
21/22
23
SM-H112TL
IO-600U

Safety precautions
If your machine becomes submerged in water, unplug the power cord from the wall
before removing your machine from the water.
This may result in electric SHOCK!
DO NOT USE your machine at voltages other than specified.
DO NOT PLUG in your machine where it will exceed the rating of outlet or electric wiring.
Failure to do so can result in fire, injury and / or damage to yourself, or wiring or machine!
NEVER touch the power cord or plug with wet hands
- This may result in electric SHOCK!
Ensure the power plug is firmly and properly inserted into the outlet
- This may result in electric SHOCK or FIRE!
DO NOT attempt to repair or service the machine yourself!
Make sure to use your machine only with potable water suitable for human consumption.
DO NOT run hot water through your machine.
DO NOT clean by pouring water over or spraying the machine.
Unplug your machine if you plan Not to use it for an extended period of time or turn
off the master power switch on the back of the unit.
Filter replacement may be necessary
03
Read the recommendations below before installing the ionizer
DO NOT MAKE A REPAIR YOURSELF! Attempting to do so will VOID your warranty!
Contact service center if the machine breaks down.
Protect your machine from freezing temperatures and direct sunlight.
Acidic water tubing must not be raised higher than the base of the product.

DO NOT close, bend, pinch, press or otherwise obstruct output ports or hoses.
If the appliance makes strange or unusual noises.If burning smells are detected,
unplug the power cord immediately and contact customer service
pH reagent liquid precautions
Some helpful tips
DO NOT expose the pH measuring reagent to extreme heat, flames or fire.
It is Combustible.
DO NOT store alkaline water in stainless steel, bronze or aluminum
containers. Glass or ceramic is best for storing your alkaline water, but you can
use high quality plastic container also.
Always try and keep your stored water cool and away from direct sunlight.
It is always best fresh out of the machine and ideal if consumed on a day to-day basis.
Save the box and Styrofoam your machine came packed in.
This will help if your machine needs to be transported at a later date.
If you are using your machine downstream of a reverse osmosis system or running
reverse osmosis water in your home, re-mineralization of the water will be needed.
Neither drink the pH reagent liquid, nor put it in the eyes or apply to the body.
If the liquid is ingested, induce vomiting immediately and call a doctor.
If the liquid gets in the eyes, flush immediately and thoroughly with cool water;
call a doctor.
If spilled or dropped on your body, wash if off immediately.
04
A / S
Within 1M, do not use the outlet hose to be longer than 1M
Make sure to keep the pH reagent liquid tightly closed and out of the reach of children.
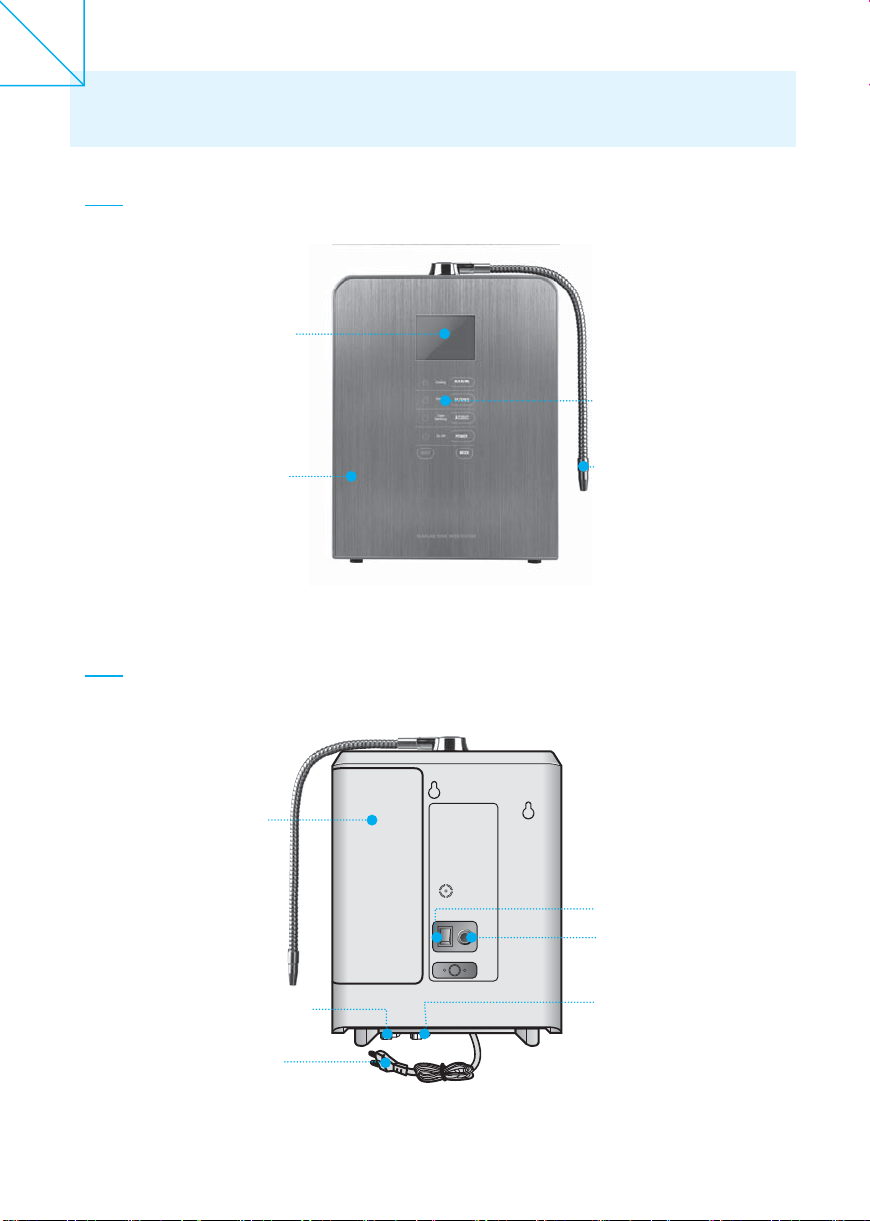
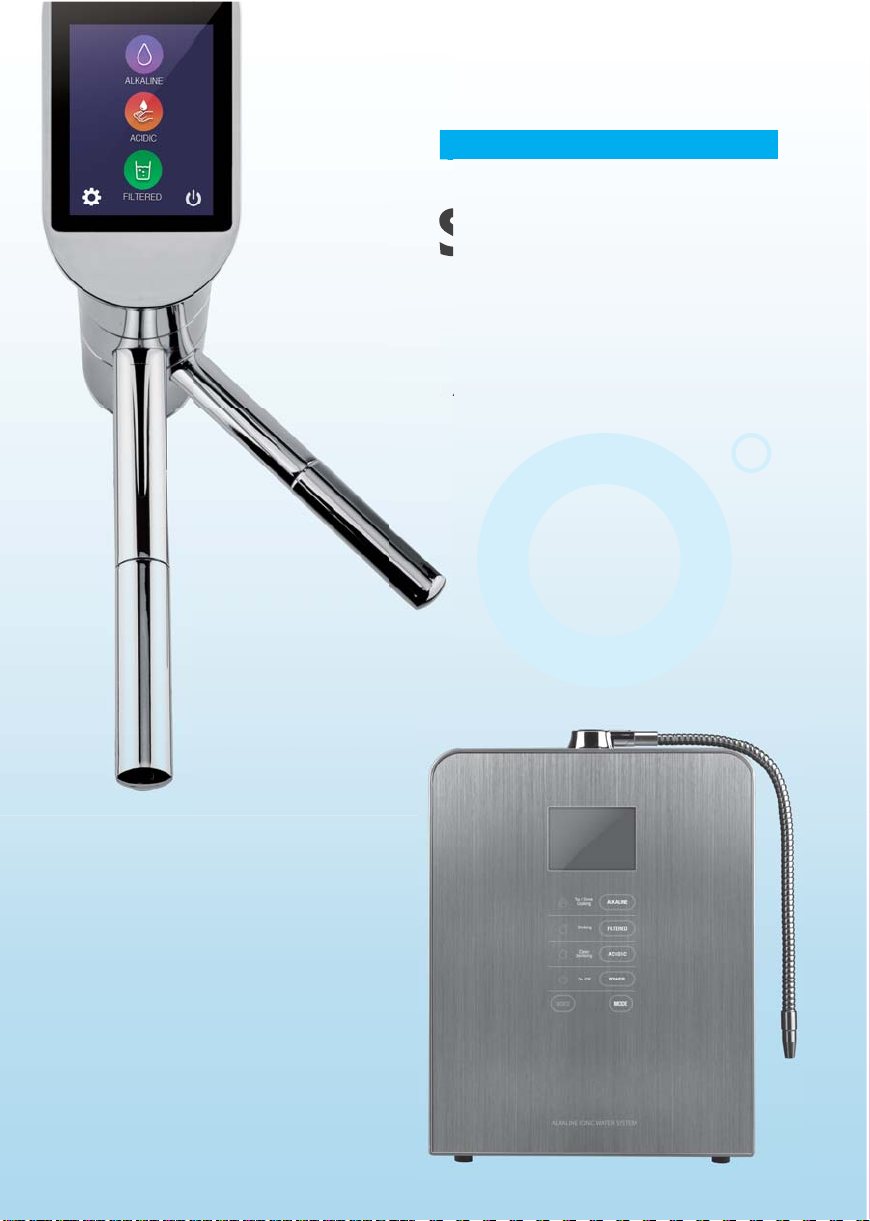
Names and functions
05
Front
Rear
Body
Function display panel
Flexible stainless
steel alkaline water
outlet.
Function button
Filter Cover
Power switch
Fuse holder
Acidic water
discharging hole
Water supplying hole
A/C power cord

06
Indicators / Controls
Displaying filter lifespan
Indicating total amount of filter use
Alkaline selection button
Button which is used when function of alkaline
water is selected
Setting display
Method to use lamp which is on when each
function is selected
Water purification button
Button which is used when function of water
purification is selected
Acidic selection button
Button which is used when function of acidic
water is selected
Power button
Button which is used when on/off
Setting button
Button which sets each function
Voice button (muting voice sound)
Function that can make voice sound on/off which
is made when each function is selected
Displaying water discharging time
Indicating time during which water is discharged
Displaying number of grade in use
Indicating number of grade in alkaline/acid and
purification currently in use
Displaying pH
Indicating pH for each grade
Displaying volume of supplied water
Indicating total water flow per minute
Alkaline2
pH
Filter
Flow
Running Time
9 .0
3888
1.6
00:00:14

NOTE
07
Initial operation
The water may initially come out discolored (light to charcoal gray) due to carbon
particulates in the new filter.
This is not harmful and is typical of all carbon filters. Allow the water to flow
for 2-3 minutes in the "Filtered" mode to flush all the carbon dust.
Power up your ionizer.
Turn on power switch on back side
after plugging power code into socket.
1
2
Start water flow through your ionizer.
- Press the
"POWER"
button which opens the internal valve in your ionizer.
- The Digital Filter Life Indicator will begin and you will hear your ionizer's "voice"
announcing the selected mode of operation.
How to use
OFF
ON
Signal sounds, initial screen appears and disappear
again which makes it stand-by status.
Alkaline2
pH
Filter
Flow
Running Time
9 .0
3888
1.6
00:00:14
er
r
3
38
38
8
88
88
k
te

08
NOTE
If alkaline water function is set previously, alkaline water used in previous step is
discharged
When drinking alkaline water
2
When pressing
"ALKALINE "
water selection
button, graphic lamp is on which
indicates character of alkaline water,
number of grade, and announcement
can be heard which informs
alkaline water grade.
Repeat steps 1-3 above, or with water already running through the machine then:
1
How to stop
12 3412 34
Alkaline2
pH
Filter
Flow
Running Time
9 .0
3888
1.6
00:00:14
e
e
e
2
2
2
2
e
Whenever you press alkaline
water selection button
repeatedly, it changes
number of grade.
Press the
"POWER "
button, water supply is
stopped and it is converted to
stand-by status automatically.
Stand-by mode status

09
NOTE
If acidic water function is set previously, alkaline water used in previous step is
discharged
When using acidic water
※This function is necessary when getting a lot of acidic water and using it for washing face or body.
※Acidic water is not drinking water. Be careful not to drink acidic water, confusing it with
alkaline water.
Repeat steps 1-3 above, or with water already running through the machine then:
1
2
When pressing
"ACIDIC"
water selection
button, graphic lamp is on which
indicates character of acidic water,
number of grade, and announcement
can be heard which informs
acidic water grade.
Whenever you press acidic
repeatedly, it changes
number of grade.
How to stop
Press the power button, water supply is
stopped and it is converted to
stand-by status automatically.
Stand-by mode status
12 3412 34
Acidic2
pH
Filter
Flow
Running Time
5 .8
3888
1.6
00:00:14
c
c
2
2
2
2
c

NOTE
If filtered water function is set previously, filtered used in previous step is
discharged
10
When drinking purified water
Repeat steps 1-3 above, or with water already running through the machine then:
1
2
When pressing
"FILTERED"
water selection button, graphic lamp is on which
indicates character of filtered water, number of grade, and announcement
can be heard which informs filtered water grade.
How to stop
Press the power button, water supply is
stopped and it is converted to
stand-by status automatically.
Stand-by mode status
Filtered
pH
Filter
Flow
Running Time
7 .0
3888
1.6
00:00:14

11
Volume adjusting function for voice information
Stand-by screen adjusting function
Press
"VOICE"
button for 3 to 5 seconds under stand-by mode.
Adjust volume by alkaline and acidic button. Volume consists of 0 to 10 steps.
1
2
If saving volume by pressing
"VOICE"
button, it is converted to stand-by screen.
10
SAVE : VOICE
EX IT : FILTER
UP : ALKALINE
DN : ACIDIC
Stand-by mode status
※If there is no additional operation after completing
volume adjustment, it is saved and converted to
stand-by status automatically after 10 seconds.
Stand-by mode status
After entering setting
"MODE"
screen by pressing setting button among stand-by
mode, set ON/OFF function for stand-by screen by pressing alkaline button.
Time Setting
Time ON/OFF
ON
NEXT : MODE
SAVE : VOICE
EX IT : FILTER
UP : ALKALINE
DN : ACIDIC

12
Time and date adjusting function
After entering time setting
"MODE"
screen by pressing setting button among
stand-by mode, select year, month, date, hour and minute by setting button
and adjust them by alkaline button and acidic button respectively.
1
2
When saving it by pressing
"VOICE"
button, it is converted to stand-by screen
automatically.
Time Setting
Year
2013
NEXT : VOICE
SAVE : VOICE
EX IT : FILTER
UP : ALKALINE
DN : ACIDIC
Stand-by mode status
※If there is no additional operation after completing
volume adjustment, it is saved and converted
to stand-by status automatically after 10 seconds.
Stand-by mode status

Replacing Your Filter
How to replace the filter
Open the filter cover.
When lifespan of filter comes to an end, graphic figure
of filter indicates 0000 and filter change icon flickers,
which is informing that it’s time to change filter.
Stop supplying water by turning power switch on
back side of product to OFF position.
IMPORTANT!
Stop operating product before replacing the filter
slide the cover to the left and remove it.
Remove the expired filter.
Taking hold of the filter securely with your right hand, press
the filter firmly down against the spring loaded mechanism
to disengage the top of the filter and then pull it toward you
and up to remove it.
The upper part of the filter is separated from
housing by pressing firmly down.
Once you have engaged the spring loaded
mechanism, you can then easily remove the
filter from the main body by pulling it toward you.
Remove filter with the same as method above.
13
1
2
3
Check for leakage by running water through your ionizer before replacing the
housing cover.

14
Once new filter is installed, rotate the filter until the arrow on
the filter is aligned with the arrow on the machine.
Your filter is equipped with a genuine chip. This chip communicates with
the machine how much water has flowed through the filter.
Make sure the arrow on
filter lines up with the
arrow on the machine!
Flush out the carbon dust.
Replace the filter cover.
The water flowing through will initially come out discolored
(light to charcoal gray) due to carbon particulates in the new
filter. It is not harmful.
Allow the water to flow for 2-3 minutes in the filtered mode
and this will flush all the carbon dust.
Insert the new filter into the compartment.
Remove the plastic caps covering both ends of the new filter.
Seat the large opening on the bottom of the filter cartridge
onto the base in the center of the filter cushion.
Push the filter down and into the housing
compartment ensuring the opening at the top
of the filter is seated properly into the fitting at
the top of the housing.
★
4
5
6
Please replace lter when any one of the owing occur:
- When severely polluted water has been run through the ionizer and filter
- Excessive odor in output water and/or severely decreased flow rate
- After prolonged period of inactivity of over 30 days

Composition of Filter
15
CAUTION
Effective period of filter use may differ greatly depending on season, usage, and
environment. (I.E. water pressure, quality, and amount of use)
Recommended period for changing filter
High Performance NSF Filter
Change filter when follow phenomena occur even filter change icon does not flicker.
- When water flows little because filter is blocked due to heavily contaminated water
- When water smells because seriously contaminated water is flowed in
- When lots of foreign substance in water (turbid water, invisible substance) is eliminated
in a short time
- When reusing it after you do not use it for a long time
REFERENCE
High Performance NUF Filter(Option)
Fiber Filter
Fiber Filter
Fiber Filter
Fiber Filter
UF
Activated Carbon
Calcium
Tourmaline
Activated Carbon
Silver Activated Carbon
Fiber Filter
Fiber Filter
Fiber Filter
Fiber Filter
Fiber Filter
Calcium
Calcium
Tourmaline
Mesh Gauze
Activated Carbon
It is better to use UF(Combined hollow fiber membrane) filter initially, with power
off, after making water of 20ℓ(1㎏f/㎠) flow for approx. 5 minutes at minimum
without fail, in order to eliminate hydrophilic substance.
(If water pressure is below 1㎏f/㎠, a time longer than 5 minutes is needed)

How to measure pH
16
- DO NOT consume water containing pH reagent.
- Keep the pH reagent Iiquid and color chart away from OPEN FLAMES!
- If contact with eyes, flush Iiberally with fresh water, and seek medical help.
- If ingested, induce vomiting, and seek medical help.
CAUTION
Fill the three test containers provided about 1/2 full
with alkaline, acidic, and H2 water each.
Add 2 or 3 drops of the pH reagent into the container
and stir if needed.
If the reagent and water are not mixed well, the
correct result may not occur, mix well.
Water quality and mineral content vary greatly in different Iocations and will directly
impact machine performance with respect to pH and hydrogen production.
The pH value is determined by matching the color on
the pH color chart provided.
A digital pH meter is more accurate than reagent.
IMPORTANT!
FILTERED
WATER
ALKALINE
WATER
ACIDIC
WATER
FILTERED
WATER
ALKALINE
WATER
ACIDIC
WATER

Counter Top Installation Instructions
Connecting to a Standard Faucet
Connecting to a Cold Water Valve
Make sure the arrow on the
dust pre-filter is pointing
the same direction as the
water flow.
WARNING!
Make sure the arrow on the
dust pre-filter is pointing
the same direction as the
water flow.
WARNING!
Dust Pre-Filter
Source Water
Source Water
Dust Pre Filter
Diverter
Valve
17
Inlet
T-Adapter
Outlet
Outlet
Inlet
Cold Water Valve

[Figure 4]
Diverter Valve
1
Remove aerator from faucet. Attach
diverter valve. Use sizing rings and
grommet if needed.
3
Push the 1/4 in. (PE) hose all the
way in the water inlet at the bottom
of the machine.
4
Connect stainless steel acid line
to the acidic outlet and allow it to
drain into your sink.
2
Connect 1/4 in.(PE) hose to the
diverter in "Figure 2". Shown above.
[Figure 1]
[Figure 5]
5
After finishing the connection of
"Figure 4" open the water supply
valve and adjust the water
pressure.
6
Check for leaks on all connections
after installation is completed.
[Figure 2]
Diverter
PE Hose
18
CAUTION
Before installing, shut o water supply.
Installation Instructions
Installation: Connecting to a Standard Faucet
[Figure 6]
inlet
[Figure 3]
outlet
inlet

inlet
[Figure 4]
CAUTION
19
2
Connect 1/4 in.(PE) hose to the
T-adapter in "Figure 2"
3
Push the 1/4 in.(PE) hose all the way
in the water inlet at the bottom
of the machine.
4
Connect stainless steel acid line to the
acidic outlet and allow it to drain into
your sink.
5
After finishing the connection of
"Figure 4" open the water supply
valve and adjust the water
pressure.
6
Check for leaks on all connections
after installation completed.
Installation: Connecting to a Cold Water Valve
Before installing, shut o water supply.
1
Loosen the nut of the cold water
valve.
[Figure 1]
[Figure 5]
Cold Water Valve
[Figure 2]
PE Hose
T-adapter
[Figure 3]
[Figure 6]
outlet
inlet

20
CAUTION
CAUTION
When using a Reverse Osmosis filter prior to the machine, you will need to verify
the R,O. storage tank pressure is 11-13 psi.
You will also need to remineralize the water to have at least 100 TDS in the water
for optimum performance.
You can purchase a TDS meter inexpensively.
Accessories
pH test kit
Water Spout
AC cord Fitting spanner Elbow Teflon tape
1/4 in. Water
Source Hose(250cm) Color chart
Manual
Manual Dust Pre-Filter
Diverter Valve
1/4 in. Water
Outlet Hose(120cm)
Acidic water tubing must not be raised
higher than the base of the product.
Within 1M,
do not use the outlet hose
to be longer than 1M
O
O
O
O
X
X
X
X
This manual suits for next models
1
Table of contents
Other Aquavolta Air Ionizer manuals
Popular Air Ionizer manuals by other brands

Panasonic
Panasonic ER-VW instruction manual

bossauto
bossauto IONIZER pro user manual

GPS
GPS GPS-iMOD Installation, operation & maintenance manual

AtmosAir
AtmosAir Matterhorn 1000 Series Installation, operation and maintenance guide

SMC Networks
SMC Networks IZS42 manual

greenfan
greenfan 1600-01 Installation, operation and maintenance instructions