ITW Simco-Ion Aerostat PC User manual

IONIZATION SOLUTIONS
Ionizing Air Blower
Aerostat®PC with Heater
User’s Manual

Aerostat PC Heater 5100625-M Rev 9
About Simco-Ion
Simco-Ion develops, manufactures and markets system solutions
to manage electrostatic charge. As the world's largest provider of
electrostatics management products and services, Simco-Ion
improves its customers' business results by providing a total
solution to their electrostatic discharge challenges. Simco-Ion
Technology Group is a division of Illinois Tool Works (ITW), located
in Alameda, California. For more information about Simco-Ion, visit
www.simco-ion.com or call +1 800-367-2452. Simco-Ion is
ISO 9001-2015 Certified.
Ion Systems’ logo is a registered trademark of
Simco-Ion, An ITW Company.
© 2020 Ion Systems. Printed in the USA.
© 2020 Simco-Ion

Aerostat PC Heater 5100625-M Rev 9
Important Safety Information
The use of improper input voltage may result in poor perfor-
mance or damage to the ionizer. This will also void the warranty.
This product is supplied with a 3-prong grounding plug, which
must be inserted in an appropriate, properly wired and
grounded receptacle. Do not defeat the electrical ground. For
safety, the use of extension cords is not recommended.
Do not use this Blower in an explosive environment. Poorly
maintained Ionizers could produce minuscule electric arcs
along the emitter. This may cause detonation in an explosive
environment. Read Section 2.3 Electrical before applying power
to the unit.
To avoid personal injury or damage to the equipment, do not
perform any maintenance other than that contained in these
instructions. Do not insert anything within the intake or outlet
grills.
There are no user-replaceable parts inside this blower other
than the emitter cartridge. Any unauthorized service will void
the warranty and may result in additional repair charges.
Contact your local Simco-Ion representative if the blower
requires service or repair.
For in-door use only in a non-condensing environment.
Before performing any recommended maintenance, be sure the
unit is powered off and unplugged.
Do not point the blower face any lower than 80° from horizontal.
Carefully read the following safety information before
installing or operating the equipment. Failure to follow
these safety warnings could result in damage to your
ionization system and/or voiding the product warranty.

Aerostat PC Heater 5100625-M Rev 9
Informations de Sécurité Importantes
L'utilisation d'une mauvaise tension d'entrée peut entraîner de
mauvais résultats ou de détérioration de l'ioniseur. Ce sera
également annuler la garantie.
Ce produit est fourni avec un 3-broches fiche de mise à la terre,
qui doit être insérée dans un accès approprié et correctement
câblé et mis à la terre prise. Ne pas défaire la mise à la terre
électrique. Pour des raisons de sécurité, l'utilisation de cordons
d'extension n'est pas recommandée.
Ne pas utiliser ce ventilateur dans un environnement explosif.
Mal entretenu ioniseurs pourrait produire infime arcs élec-
triques le long de l'émetteur. Cela peut provoquer de la détona-
tion dans un environnement explosif. Lisez la Section 2.3
Installation électrique avant d'appliquer la tension de l'unité..
Pour éviter tout risque de blessure ou de détérioration du ma-
tériel, n'effectuez aucune opération d'entretien autres que
celles contenues dans ces instructions. N'introduisez rien dans
le collecteur d'admission ou de sortie des barbecues.
Il n'y a aucune pièces remplaçables par l'utilisateur l'intérieur
cette soufflerie autres que l'émetteur cartouche. Tout service
non autorisé annulera la garantie et peut entraîner des charges
de réparation. Contactez votre représentant Simco-Ion si le
surpresseur requiert un entretien ou réparation.
Pour une utilisation sur porte uniquement dans une non-
condensation environnement.
Avant d'effectuer tout entretien recommandé, assurez-vous
que l'appareil est hors tension et débranchée.
Ne pointez pas le visage de soufflante inférieure à 80° de l'hori-
zontale.
Lisez attentivement les consignes de sécurité
suivantes avant d'installer ou d'utiliser l'équipement. Le
non-respect de ces avertissements peut entraîner des
dommages à votre système d'ionisation et/ou d'annuler
la garantie du produit.
Aerostat PC Heater 5100625-M Rev 9
Contents
1 Description .......................................................................... 1
1.1 Aerostat PC Ionizing Air Blower............................................................... 2
2 Installation ........................................................................... 4
2.1 Unpacking ................................................................................................ 5
2.2 Location ................................................................................................... 6
2.3 Electrical ................................................................................................. 7
3 Operation ............................................................................. 8
3.1 Controls & Indicators................................................................................ 9
4 Maintenance ...................................................................... 11
4.1 Cleaning & Adjustments......................................................................... 12
4.2 Emitter Cleaning .................................................................................... 13
4.3 Air Inlet & Outlet Cleaning...................................................................... 14
4.4 Air Filter Cleaning .................................................................................. 14
4.5 Ion Output Check...................................................................................15
4.6 Ion Balance Check.................................................................................16
4.7 Calibration.............................................................................................. 17
5 Specifications.................................................................... 18
6 Warranty & Service .......................................................... 22

Aerostat PC Heater 5100625-M Rev 9 2
1.1 Aerostat PC Ionizing Air Blower
Small and quiet running, yet uncompromising in performance,
Simco-Ion's Aerostat PC provides superior electrostatic discharge
times rates over a targeted work surface area. It provides optimum
protection from the destructive effects of ESD by neutralizing
potentially destructive surface charges in the work environment.
The Aerostat PC ionized air blower produces an airflow that is rich
in positive and negative ions. Directing the airflow on an object that
has an electrostatic charge will neutralize the charge. If the object
has a negative charge, it will draw positive ions from the airflow.
Conversely, if the object has a positive charge, it will draw negative
ions from the airflow. The air ions are attracted to the oppositely
charged object and neutralize the charge on the object.
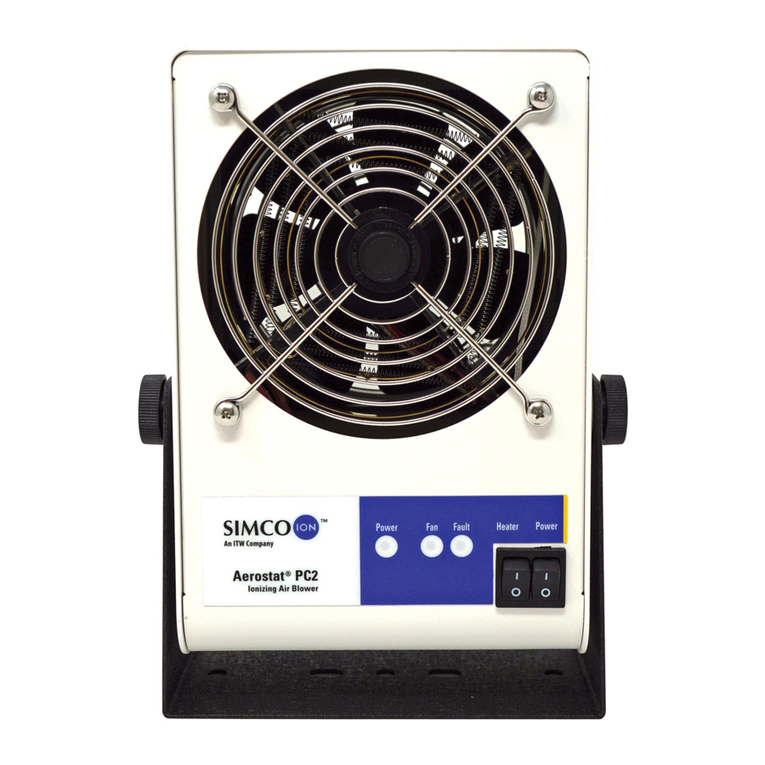
Figure 1. Aerostat PC Ionizing Air Blower
The Aerostat PC is a portable ionized air blower. It uses a small fan
to produce airflow. The volume of airflow is controlled by a variable
speed control which provides a wide range of airflow settings. The

Aerostat PC Heater 5100625-M Rev 9 3
low wattage heating element (where applicable) can be turned on at
any time for user comfort. The ionizing elements are energized with
a low current, high voltage transformer. The transformer contains a
current limiting resistor which enhances ionization stability and
provides for safety. The high voltage AC is applied to a circular
arrangement of ion emitter points, which results in an intense
alternating electric field at the tip of the emitter points. It is this
electric field that creates alternating polarity ions in the airflow. To
assure that the unit is working properly, the high voltage AC is
monitored by an ionization indicator lamp.
The Aerostat PC features a balancing circuit and built-in emitter
point cleaner. Using the point cleaner takes only seconds. Cleaning
the emitter points prevents the build-up of airborne debris. This
keeps your Aerostat PC working in top form for the life of the unit.
The Aerostat PC was designed for use with sensitive electronic
components, where electrostatic charge is a problem. The Aerostat
PC can also be used where static electricity causes problems such
as: attraction of dirt to product, misalignment of small parts due to
electrostatic "jumping" and undesirable adhesion of plastic films
due to electrostatic charge.
Features
• Small and portable
• Rapidly neutralizes static charges
• Covers an extended distance with ionized air
• Variable speed fan with wide range of air flow
• Low wattage heater for operator comfort (where applicable)
• Inherently balanced ion output
• Built-in ion emitter cleaner
• Ionization indicator lamp
• Durable, electrically grounded metal enclosure

Aerostat PC Heater 5100625-M Rev 9 5
2.1 Unpacking
Carefully remove the equipment from the carton and inspect all
contents. Empty the carton to insure that small parts are not
discarded. If any damage has occurred during the shipment, notify
the local carrier immediately. A report should also be forwarded to
Warranty for Return Shipment information.

Aerostat PC Heater 5100625-M Rev 9 6
2.2 Location
The Aerostat PC is designed for portable or permanent operations.
The bench stand can be used in a permanent location by bolting it
to a sturdy flat surface such as a wall or under a shelf. If the bench
stand is bolted in place, use ¼ inch diameter screws or bolts to
secure it.
For extremely dirty environments, an optional air filter may be
installed. The air filter consists of a filter retainer (part number
4710017) and an air filter element (part number 4100810, pack of
6).
The Aerostat PC should be placed approximately 1 to 3 feet from
the critical work area or objects to be neutralized. It should be
positioned to cover as much of the area as possible with the ionized
air stream. The air stream can be directed upward or downward by
tilting the unit in its stand. Tightening the lock knobs on each side of
the unit secures it in position.

Aerostat PC Heater 5100625-M Rev 9 7
2.3 Electrical
Depending on the ordering part number, the Aerostat PC requires
the following electrical power for proper operation.
The unit must be grounded for safe operation. Plug the supplied
power cord into a standard 3-terminal grounded receptacle. If an
extension cord is necessary, use only a 3-wire extension cord that
provides grounding.
Part Number Voltage Power Cord
4003367 120 VAC, 60 Hz North America
4003368 230 VAC, 50 Hz EUR (Schucko)
4008087 230 VAC, 50 Hz UK
4015566 230 VAC, 50 Hz China

Aerostat PC Heater 5100625-M Rev 9 9
3.1 Controls & Indicators
Activate the Aerostat PC by turning the FAN SPEED knob
clockwise, out of the OFF position. The IONIZATION INDICATOR
will illuminate to indicate the presence of ionized air. Set the airflow
as desired by adjusting the FAN SPEED knob. If warm air is
available / desired for operator comfort, set the WARM AIR switch
to the ON (1) position. The direction of the air stream can be
adjusted upward or downward by loosening the LOCK KNOBS,
tilting the unit and retightening the knobs. To clean the ion emitter
points, rotate the POINT CLEANER knob clockwise to the stop
(approximately one turn) and release.
Figure 2. Aerostat PC Identification
1. Emitter Point Cleaner Knob
2. Ionization Indicator
3. Warm Air Switch
4. Tilt Position Lock Knob
5. Fan Speed Control Knob

Aerostat PC Heater 5100625-M Rev 9 10
The Aerostat PC produces an ionized air stream that covers a
targeted area. The time required to neutralize a static charge on an
item in the air stream depends on many factors. Two important
factors are; distance to ionizer and air velocity. Air ions constantly
"neutralize" each other. Positive and negative ions are
electrostatically attracted to each other. When they contact, the
charge transfers and the ions "recombine". With high air velocity,
the air ions travel further before they "recombine". Setting the fan
speed as high as acceptable results in more rapid neutralization.
For fast neutralizing, the item should be held within 1 to 3 feet from
the Aerostat. For virtually instantaneous neutralization, the item
may be held as close as 6 inches.
When using the Aerostat in an electronics assembly area, the
ionized air stream should cover as much of the work area as
possible. Charged items introduced into the work area will be
neutralized and will remain neutral while in the ionized air stream.

Aerostat PC Heater 5100625-M Rev 9 12
4.1 Cleaning & Adjustments
The Aerostat PC has been designed with low maintenance in mind.
The only regular maintenance suggested is emitter point cleaning,
ion balance checking and ion output checking. Emitter point
cleaning takes only seconds with the point cleaner. The Aerostat PC
contains a balancing circuit that is inherently self-balancing. This
circuit compensates for dirt build-up on emitters, emitter point wear,
line voltage fluctuations and variations in air velocity. Scheduled
checking of the ion output and balance should be considered to
assure quality audit requirements.

Aerostat PC Heater 5100625-M Rev 9 13
4.2 Emitter Cleaning
To clean the ion emitter points: simply rotate the point cleaner knob
located at the center of the outlet grille clockwise to the stop
(approximately one turn) and release. The spring-loaded point
cleaning brush will return to its parking spot. Recommended
frequency of emitter point cleaning is every 160 hours of operation.
(Weekly for 24 hr/day operation, monthly for 8 hr/day operation.)

Aerostat PC Heater 5100625-M Rev 9 14
4.3 Air Inlet & Outlet Cleaning
The air inlet grille on the rear of the unit and the ionized air outlet
should remain clean to prevent restriction of air flow. They can be
cleaned with a soft brush or vacuum.
4.4 Air Filter Cleaning
Check the air filer regularly for dirt If the Aerostat PC is used on a
regular basis.
Remove the air filter from the rear of the unit by unsnapping the filter
retainer. Rinse the filter in plain water while gently squeezing. If the
dirt is stubborn, wash the filter in mild soap and water then rinse.
Blot the filter dry with paper towels and allow to dry. Install filter on
air inlet and secure by snapping the filter retainer in place.

Aerostat PC Heater 5100625-M Rev 9 15
4.5 Ion Output Check
To test the unit for ion output, the use of a charged plate monitor is
recommended. Discharge times can be measured and checked
against the Discharge Specification values in Section 5. If a charged
plate monitor is not available, but a static meter such as a Simco-
Ion handheld electrostatic field meter is available, ion output may be
checked with the following procedure. Take a piece of plastic and
rub it with cloth until a static charge can be read with the static
meter. Turn on the Aerostat PC. Hold the plastic one foot away from
the ionized air outlet for five seconds. Remove the plastic from the
ionized air stream and measure the static charge. The plastic
should be neutralized.
Do not insert objects through the unit's intake or outlet grilles
while in operation. Damage to the ionizer and/or personal
injury may result.
Do not try to verify operation of the unit by drawing a spark
from an ion emitter point. The design of the balancing circuit
makes the "spark test" inconclusive. Sustained grounding of
the ion emitters may damage the balancing circuit.
N'insérez pas d'objets dans l'unité de grilles d'entrée ou de
sortie en cours de fonctionnement. Dommage pour l'ioniseur
et/ou peut entraîner des blessures graves.
Ne pas essayer de vérifier le fonctionnement de l'unité en
dessinant une étincelle provenant d'un émetteur d'ions point.
La conception du circuit équilibrage rend le "contrôle
d'allumage" non concluantes. Mise à la terre soutenue des
émetteurs d'ions peut endommager le circuit l'équilibrage.
This manual suits for next models
4
Table of contents
Other ITW Air Ionizer manuals
Popular Air Ionizer manuals by other brands

Natural Choice
Natural Choice ION manual

GPS
GPS GPS-FC48-AC Start-Up Checklist

Real Spirit
Real Spirit Aqua-Ionizer Pro Deluxe owner's manual

Schumacher Electric
Schumacher Electric 1227 manual

ESD SYSTEMS
ESD SYSTEMS Eliminator Plus Installation, operation and maintenance

Core Insight
Core Insight AirStat 7110 user manual

Enso
Enso ePurifier instructions

GPS
GPS GPS-iMOD Installation, operation & maintenance manual

AirPlus
AirPlus DM-6000 Installation, operation and maintenance manual

Vessel
Vessel Stat-Clean F-6BF-E instruction manual

Real Spirit
Real Spirit AQUA-IONIZER PRO ionHealth Pro owner's manual

NRD
NRD P-2060 instruction manual