manuals.online logo
Brands
  1. Home
  2. •
  3. Brands
  4. •
  5. IV Produkt
  6. •
  7. Fan
  8. •
  9. IV Produkt Flexomix MIE-ID Installation guide

IV Produkt Flexomix MIE-ID Installation guide

IV Continuous product development may give rise to specification changes without notice.
Product sheet
Operation and MaintenanceFlexomix MIE-ID
2014-11-10 1 (3)
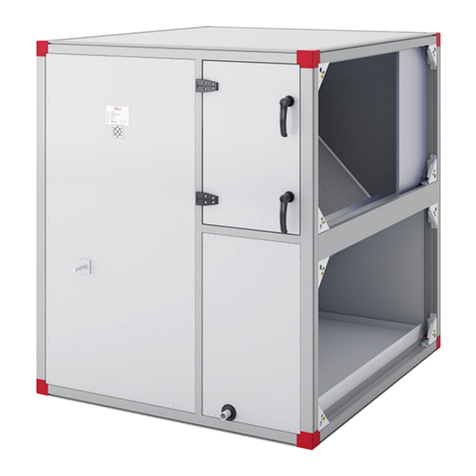
Inlet fitting (code MIE-ID)
The MIE-ID fitting is
designed
to be used
for inlets of
outdoor air
or extract air.
The fitting
consists of
dampers,
assembly
rails for
filter cassettes,
connection gable and a housing front section for
integration into the standard module (code EMM).
MIE-ID is fitted with deep-folded disposable filters
made of synthetic material in class G4, M5 or M6,
deep-folded disposable filters made of glass fibre
material in class F7-F9, deep-folded carbon filters with
integrated pre-filters in class C7 or a washable, knitted
aluminium filter.
•
The damper is manufactured from aluminium profiles
and complies with the requirements for corrosion class
C4 in accordance with
SS-EN ISO 12944-2.
• The damper blades are powered by plastic
cogwheels and a hose gasket made of silicon
rubber creates a seal between the blades.
• Tightness class 3 in accordance with SS-EN1751
(VVS AMA-98).
• Permitted temperature: -40 to +80˚C.
Permitted differential pressure: max. 1400 Pa.
• The filters are mounted on rails and can easily be
removed and replaced.
• Filter slide rails are available in acid-proof, stainless
steel.
• The filter slide rails are fitted with effective sealing
strips.
• The model FB filter inserts are locked with eccentric
rails.
• Measurement outlets are available for connecting
differential pressure gauge.
• The inlet is fitted as standard with a connection
gable.
Accessories for fitting
• Mounted damper (code KJST-04)
• Set of filters (code ELEF)
Filter section accessories
• Filter monitor, U-tube manometer (code MIET-FB-01)
• Filter monitor, Kytölä manometer (code MIET-FB-02)
•
Filter monitor, Magnehelic manometer (code MIET-
FB-03)
Insert damping (dB)
Octave band interme-
diate frequency (Hz) 63 125 250 500 1000 2000 4000 8000
G4 − − 1 2 3 3 5 6
M5, M6 2 3 6 8 14 17 19 21
F7-F9 3 3 6 8 14 17 19 21
Aluminium filter 1 1 1 2 3 3 5 6
C7 − − − 1 1 2 2 3
Technical data, size 950
Configuration
Damper
Required torque = 13 Nm
Filter
Size (cross-section) 950
No. of
filters
Dimensions (mm) No. of
bags/
filters
Filter
area, total
(m²)Filter type W × H Length
Bag filter G4 3
6
592 × 287
592 × 592
360
360
6
618,0
Bag filter M5 3
6
592 × 287
592 × 592
534
534
6
632,1
Bag filter M6 3
6
592 × 287
592 × 592
534
534
8
840,8
Bag filter F7–F9 3
6
592 × 287
592 × 592
534
534
10
10 49,8
Panel filter P4 3
6
292 × 596
596 × 596
48
48 – 2,7
Aluminium filter 3
6
287 × 592
592 × 592
25
25 – 2,7
Carbon filter C7 3
6
287 × 592
592 × 592
292
292 – 58,5
IV Continuous product development may give rise to specification changes without notice.
Product sheet
Operation and MaintenanceFlexomix MIE-ID
2014-11-102 (3)
Damper, Operation and Maintenance
Instructions
The function of the dampers is to control, block and
divert the air.
Faulty function gives rise to disturbances that may
result in serious problems. For example, if the outdoor
air damper does not close completely when the unit
stops, the air heating coil is likely to freeze.
If the damper is leaking, this results in increased
energy consumption because of leaks caused by ther-
mal buoyancy forces.
If the exhaust gas damper is leaking, the ventilation
effect is impaired and the air is heated for no benefit.
If the outdoor air damper does not open fully, the air flow
is reduced.
Inspection
1. Check function of the damper actuator.
2. Check the dampers for tightness when they are
closed. If not, adjust the damper actuator to make
the damper tight.
3. Check the sealing strips.
Cleaning
Clean the damper blades with a cloth. If they are severely
fouled, an environmentally friendly degreasing agent can
be used.
Filter types
Pre filter, fine filter and panel filter
Filters in class G4, M5 and M6 consist of deep-folder
filter bags mounted on a metal frame. The filter mate-
rial is synthetic fibre.
Filters in class F7, F8 and F9 consist of deep-folder filter
bags with a metal frame. The filter material is glass fibre.
Panel filter in class G4 (code P4) in synthetic fibre with
waxed cardboard frame (pre-filter).
Carbon filter with pre-filter
The class 7 filter consists of deep-folder filter bags con-
taining active carbon and an integrated class 7 pre-filter.
The filter is suitable for minimising the effect of, for exam-
ple, cooking smells and car exhaust fumes in comfort
systems.
Aluminium filter
The washable knitted aluminium filter is a smooth filter,
25 mm thick, and designed for use in air containing fats.
IV Continuous product development may give rise to specification changes without notice.
Product sheet
Operation and MaintenanceFlexomix MIE-ID
2014-11-10 3 (3)
Filter, Operation and Maintenance
Instructions
The air filters in a ventilation system are designed to pre-
vent dust and other impurities from entering the building.
They should also protect sensitive components inside
the unit, e.g. coils and heat exchangers, from exposure
to impurities.
The dust separation efficiency varies considerably
between various filter types. The dust collecting
efficiency also varies substantially. It is therefore
important to use filters of the same quality and
capacity when you replace them.
Dust separation class is specified with standard des-
ignations:
• Pre filter G4
• Medium filters M5 and M6
• Fine filters F7, F8 and F9
Higher digits denote a higher collecting efficiency. The
filter is designed for one-time use. If the filter becomes
fouled, the unit will lose capacity. The filter should there-
fore be changed if the pressure drop across it exceeds
the specified value.
It is important to stop the unit before changing filters to
prevent dust from coming loose and being drawn into
the unit. The inside surfaces of the filter section should
therefore also be cleaned when the filter is changed.
Inspection
Check the pressure drop across the filter. The pressure
drop is measured with a manometer connected to
measurement outlets. The measurement outlets are
connected to each side of the filter. If the filter has
reached its specified final pressure drop, it must be
changed.
Filter replacement
1. Shut down the unit via the control terminal and
lock the safety switch in the 0 position.
NB: The safety switch is not designed for start-
ing/stopping the unit. Always start and shut
down the unit by means of the control equip-
ment.
2. Wait until the fans have stopped, then open the
inspection door.
WARNING:
Positive pressure inside the unit, risk
of personal injury. Allow the pressure
to drop before you open the inspection
doors.
3. Release the eccentric rails.
Eccentric rails
4. Remove the old filter by pulling it towards you.
5. Clean the filter cabinets.
6. Install the new filter, press in the eccentric rails to
engage them and close the inspection door.
7. If there is a non-removable filter monitor: attach the
probes on each side of the filter.
8. Start the unit.
Cleaning
Vacuum and use a damp cloth to wipe clean the inside
of the filter section.
Other IV Produkt Fan manuals

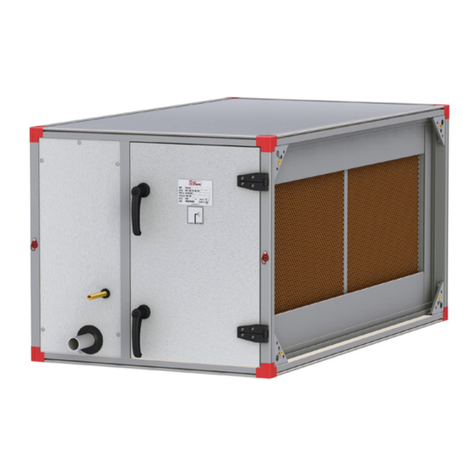
IV Produkt Flexomix MIE-FD User manual

IV Produkt

IV Produkt Flexomix MIE-FD User manual

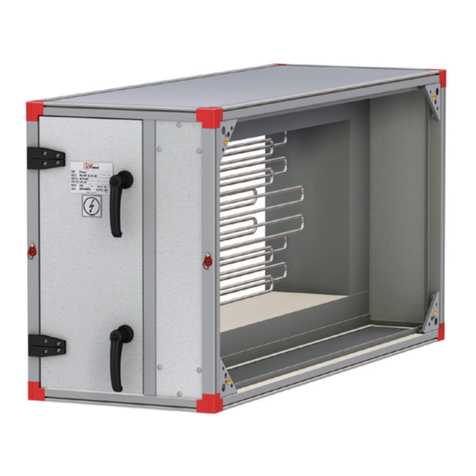
IV Produkt Flexomix MIE-EL Installation guide

IV Produkt

IV Produkt Flexomix MIE-EL Installation guide

IV Produkt Envistar Top Series Installation guide

IV Produkt

IV Produkt Envistar Top Series Installation guide

IV Produkt Flexomix MIE-EF Installation guide

IV Produkt

IV Produkt Flexomix MIE-EF Installation guide

IV Produkt Flexomix 060 Troubleshooting guide

IV Produkt

IV Produkt Flexomix 060 Troubleshooting guide

IV Produkt Flexomix EXP Installation guide

IV Produkt

IV Produkt Flexomix EXP Installation guide

Popular Fan manuals by other brands

Exido 271-015 Specifications

Exido

Exido 271-015 Specifications

Home Decorators Collection 51662 Use and care guide

Home Decorators Collection

Home Decorators Collection 51662 Use and care guide

airria AIRRIA-MU1000-0-075 installation manual

airria

airria AIRRIA-MU1000-0-075 installation manual

Harbor Breeze E-BDB52LABZ5BC4N manual

Harbor Breeze

Harbor Breeze E-BDB52LABZ5BC4N manual

Romlair CLS Installation and maintenance instructions

Romlair

Romlair CLS Installation and maintenance instructions

Hunter Captiva 21318 Owner's guide and installation manual

Hunter

Hunter Captiva 21318 Owner's guide and installation manual

SMAY NAF Operation and maintenance manual

SMAY

SMAY NAF Operation and maintenance manual

Monte Carlo Fan Company 5HV52XXXD Series Owner's guide and installation manual

Monte Carlo Fan Company

Monte Carlo Fan Company 5HV52XXXD Series Owner's guide and installation manual

Orbegozo SF 0245 instruction manual

Orbegozo

Orbegozo SF 0245 instruction manual

Duct Devil Ventductools E-VAC 4500 instruction manual

Duct Devil

Duct Devil Ventductools E-VAC 4500 instruction manual

Acorn AC-238 instruction manual

Acorn

Acorn AC-238 instruction manual

ARESA AR-1301 instruction manual

ARESA

ARESA AR-1301 instruction manual

Ebmpapst R4E310-AQ31-12 operating instructions

Ebmpapst

Ebmpapst R4E310-AQ31-12 operating instructions

Ruck Ventilatoren DHA P Series Assembly instruction

Ruck Ventilatoren

Ruck Ventilatoren DHA P Series Assembly instruction

Faber DUCT5 Installation instruction

Faber

Faber DUCT5 Installation instruction

RP LIGHTING 1060 installation manual

RP LIGHTING

RP LIGHTING 1060 installation manual

Honeywell PERFECT WINDOW ER150 owner's manual

Honeywell

Honeywell PERFECT WINDOW ER150 owner's manual

Minka Group minkaAire Contractor Series instruction manual

Minka Group

Minka Group minkaAire Contractor Series instruction manual

manuals.online logo
manuals.online logoBrands
  • About & Mission
  • Contact us
  • Privacy Policy
  • Terms and Conditions

Copyright 2025 Manuals.Online. All Rights Reserved.