J.E. Adams 9217 User manual
REV 6-11-20191
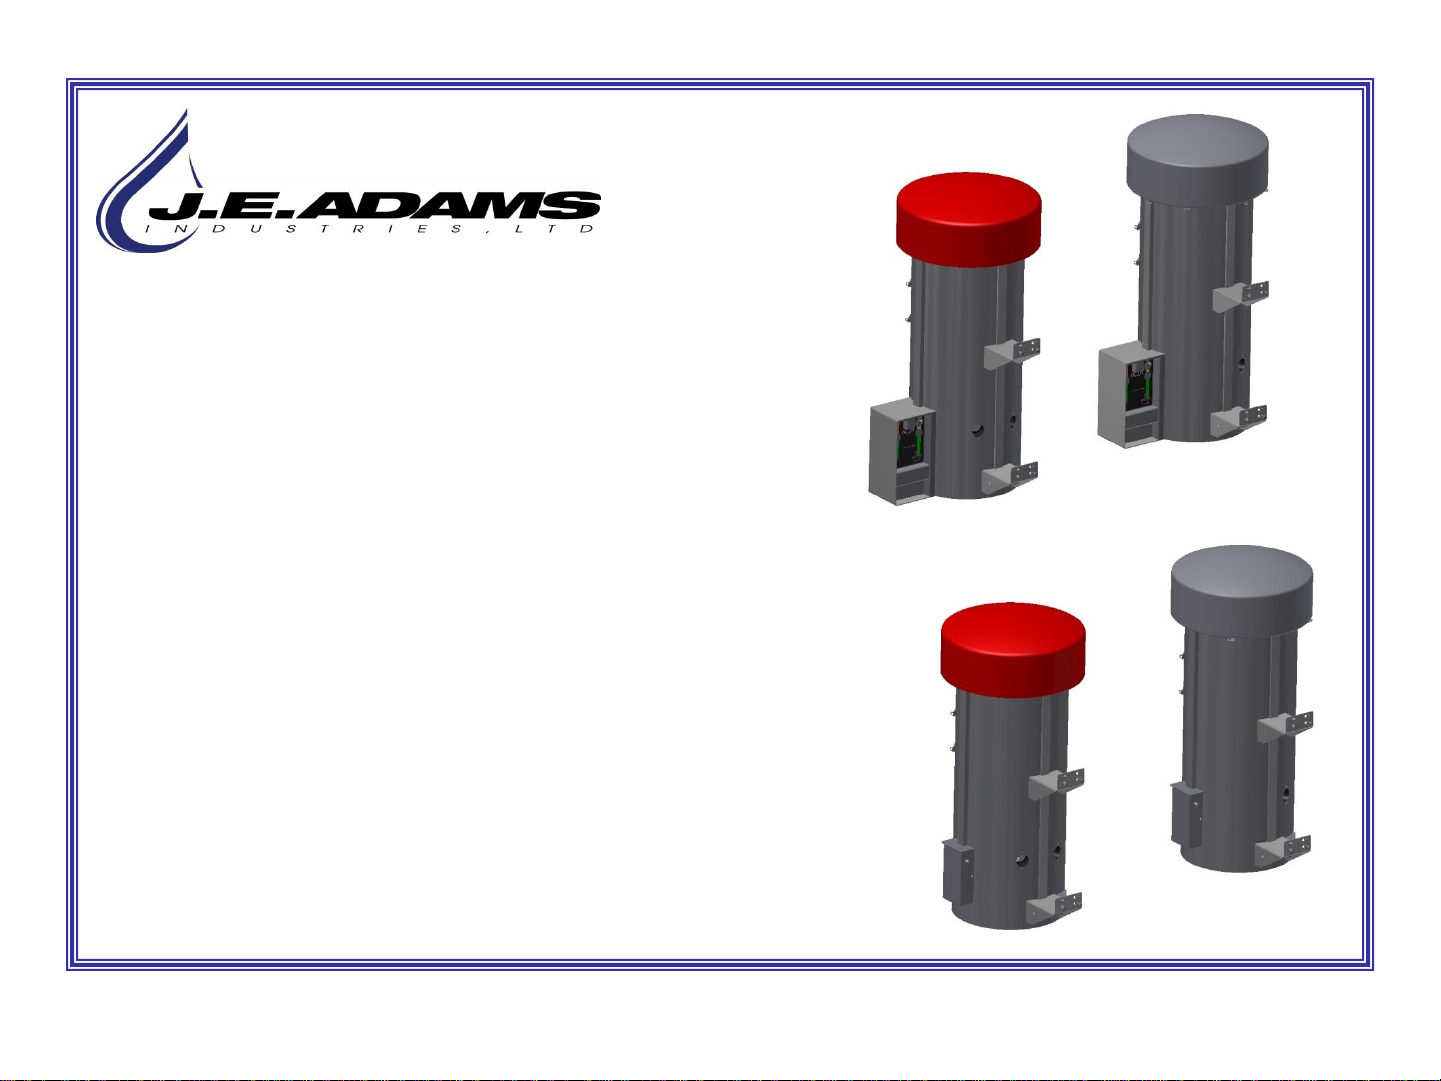
Models- 9217, 9218 Coin Operated & 9237 Push button
Dual and Single Hose, Post Mount Vacuums
Page 2 Product Information
Page 3-4 Product Dimensions
Page 5 Specifications
Page 6 Important Safety Instructions
Page 6-8 Installation
Page 9-10 Programming
Page 10 Operating
Page 10 Maintenance
Page 11 Troubleshooting
Page 12-19 Parts List
Page 20-21 Wiring Diagram

REV 6-11-20192
PRODUCT INFORMATION
Please take a moment to fill out the information below in order to aid us with any future sales
or service inquiries. Model number and serial number information can be found on the
serial tag located inside the control box and/or on the lower exterior of the can. Key
number can be found on the tag that comes attached to the keys. There may be more than
one key number depending on unit.
Please keep this information with your records.
MODEL#:____________________________
SERIAL#:____________________________
KEY NUMBER(S):_____________________
DATE PURCHASED:___________________
DISTRIBUTOR:_______________________
J.E. Adams Industries
1025 63rd Ave. S.W.
Cedar Rapids, IA 52404
1-800-553-8861
www.jeadams.com
REV 6-11-20193
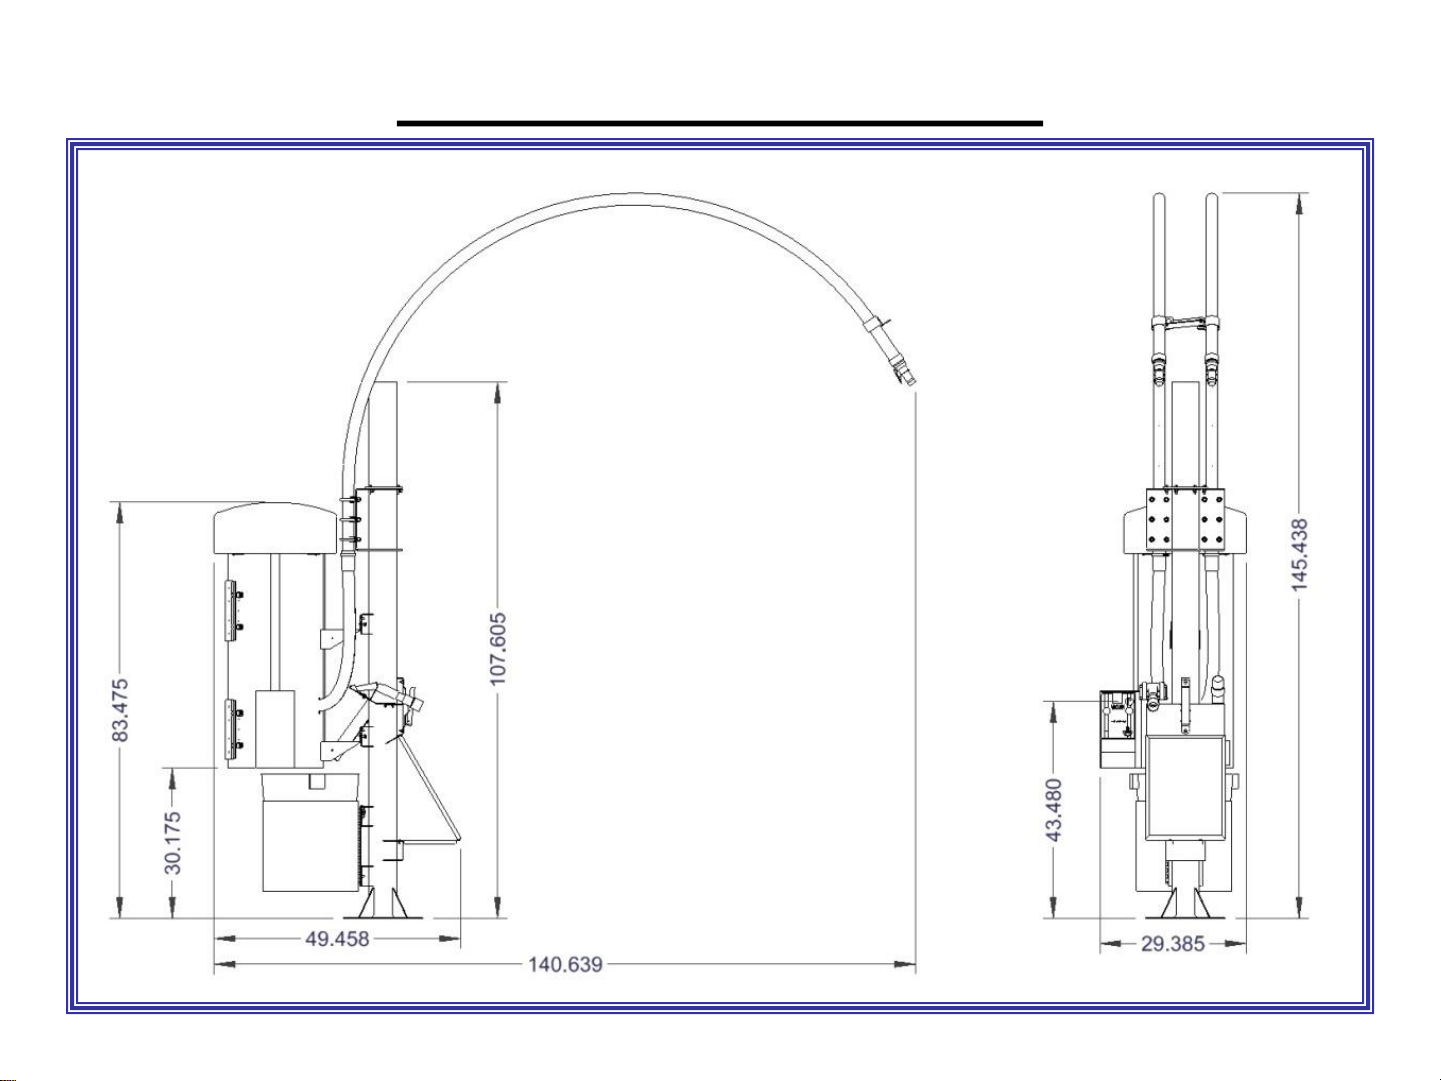
PRODUCT DIMENSIONS
.
9217 VAC

REV 6-11-20194
PRODUCT DIMENSIONS
.
9218 VAC

REV 6-11-20195
Specifications
Unit specifications: 3 MOTOR VACUUMS
Voltage: 120vac, 60hz
Amperage: (1) 30 amp service is required for this unit.
Weight: 140lbs with pallet attached.
Vac specifications:
Motors: (3) 120vac vacuum motors.
Fuses: (3) 10 amp inline fuses.
______________________________________________________________________________________________
Unit specifications: 3 MOTOR VACUUMS, 220V
Voltage: 220v, 50hz
Amperage: (1) 20 amp service is required for 3 motor units.
Weight: 140 lbs with pallet attached.
Vac specifications:
Motors: (3) 220vac vacuum motors .
Fuses: (3) 8 amp inline fuses.
Stainless steel or lighted dome options.
Push button or coin operated start.
Single hose or dual hose inlets.
Duty cycle time 4 minutes on, 4 minutes off.
NOTE: “UNIT INTENDED FOR COMMECIAL USE ONLY”
This manual suits for next models
2
Table of contents
Other J.E. Adams Vacuum Cleaner manuals


