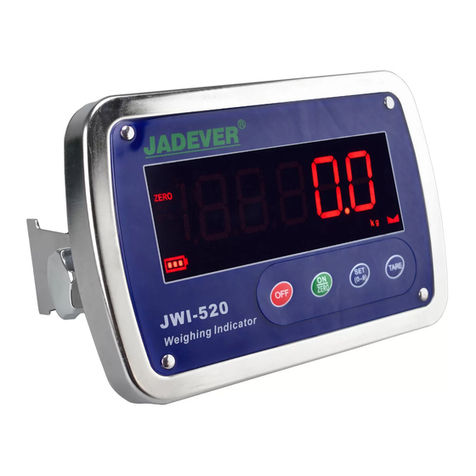
Jadever JIK-8 User manual

V03
JIK-8 User Manual 1
CONTENTS
PRECAUTIONS..................................................................................3
INSTALLATION..................................................................................4
FUNCTIONS
ZERO...........................................................................................10
TARE...........................................................................................11
PRE-TARE...................................................................................13
AUTO TARE................................................................................15
SELECTION OF WEIGHING UNIT .............................................17
UNIT IN USE AND INITIAL WEIGHING UNIT SETTING............17
ACCUMULATION................................................................. .......18
ACCUMULATION MODE.......................................................... ..20
MAX ACCUMULATION SETTING ............................................ ..21
SIMPLE COUNTING ................................................................... 22
PERCENTAGE............................................................................23
HI / LO CHECKING.....................................................................25
SERIAL NUMBER.......................................................................27
STARTING SERIAL NUMBER SETTING ...................................28
MAX SERIAL NUMBER SETTING .............................................29
TIME AND DATA SETTING......................................................... 30
PRINT..........................................................................................31
PRINT FORMAT SETTING ......................................................... 32
SPACE BETWEEN LINES WHEN PRINTING............................33
PRINTING MODE SETTING ....................................................... 34

V03
JIK-8 User Manual 2
SAMPLES OF BP-443D / EZ-2P PRINTING FORMAT ..............35
SAMPLES OF SH-24 PRINTING FORMAT................................36
SAMPLES OF SH-16 PRINTING FORMAT................................37
U-KEY Printing Format /PARAMETER SETTING.....................38
PARAMETER .....................................................................................40
Connect JIK-8 to JOW and LED....................................................... 42
CAPACITY / RESOLUTION SETTING...............................................43
DIVISION CONFIGURATION CHART................................................ 45
TESTING MODE.................................................................................46
ERROR MESSAGES..........................................................................47
LCD CHARACTERS .......................................................................... 48
CONNECTER .....................................................................................49
DATA PROTOCOL ............................................................................. 49
RELAY MODULE DIAGRAM .............................................................50
DUAL PLATFORM OPERATION CH1, CH2......................................51
PRODUCT SPECIFICATIONS...................................................................52
ASSEMBLY MANUAL OF JIK INDICATOR AND SUPPORT STAND......53
FIXING SCREW INSTRUCTION FOR JIK-XSX........................................54
SINGLE POINT CALIBRATION FOR WEIGHT ........................................55

V03
JIK-8 User Manual 3
【PRECAUTIONS】
The scale or indicator should always be used in an environment which is
free from excessive air currents, corrosives, vibrations, temperatures and
humidity extremes. These factors will affect displayed weight readings.
DO NOT use the scale or indicator
Next to open windows or doors causing drafts or rapid temperatures changes!
An operating temperature between -10 ~ 40 degree Celsius is
recommended.
Near air conditioning or heat ventilations!
Near vibrating, rotating or reciprocating equipment!
Near magnetic fields or equipment that generates magnetic fields!
On a rough work surface!
Leveling the scale
(when the indicator is connected to a platform)
Always adjust the scale to a level position with level adjusters until the bubbles
appear in the center circle of the level indicator!
Battery
Recharged the battery whenever the symbol is flashing; this indicates
that battery level is low. Charge the battery with the DC 9V / 1A adaptor
supplied with the indicator. And when the battery is charging, the LED is red
and when is fully charged the LED turns green. (it takes approximately 6
hours to charge battery completely)


V03
JIK-8 User Manual 5
Assemble the scale by the following steps (refer to the diagram
above)
1. Pull the load cell cable through pole holder (6) and upwards. Install
pole (5) into the pole holder (), and fix the pole with cross-headed
screws.
2. Pull load cell cable through indicator supporter (4) to connect to the
indicator.
3. Install Indicator supporter (4) and indicator stand (3) together.
4. Adjust the indicator to adequate viewing angle and tighten the screws
located on each side of the Indicator.
1
Load Cell (male)
connector(7 pin)
2
Load Cell ( female )
connector(7 pin)
3
Indicator Stand
4
Supporter between
frame and indicator
5
Pole
6
Pole holder
7
Platform


V03
JIK-8 User Manual 7
LCD display and explanation
LCD display
Explanation
Weighing unit in Kilograms or Grams unit
³=(52´VLJQ
Stable sign when the weight reading is stable
Piece counting function
Percentage function
Indication sign for insufficient unit weight, net weight,
tare, pre-tare, Hi-Lo limits, auto tare.
Operation message display
HI, OK and LO limits indication
Additional weighing units
Battery Power is weak
Explanation of each key
Posit
ion
keys
Main function
Secondary functions
Turns the indicator on
or off
1
To delete the
accumulation weights
or certain number of
accumulated weight
1. Change the digit when in
parameter mode (decreased)
2. Change the number when in
HI-LO checking mode
3. Setting of date & time
2
Accumulation
1. Change the digit when in
parameter model (increased)
2. Change the number when in
HI-LO checking mode
3. Press this key to enter the
testing mode
4. Change the setting of
accumulation mode


V03
JIK-8 User Manual 10
【ZERO 】
(1). The indicators zero point sign
is shown in the left diagram.
When the display is at zero, this
sign will appear.
(2). Press to return to zero
when the display is without the
sign.
(3). Now, the sign appear and the
scale is in zero point.
Remarks: The range of zero point is +/-
2% of the max capacity.
Example : the zero range of
60kg is +/- 1.2kg


V03
JIK-8 User Manual 12
(8). Remove all objects from the
weighing pan and wait for the
zero sign to appear.
(9). Press key.
(10). The NET and TARE signs will
disappear and the scale now
UHWXUQ¶VWRzero point.
Remarks:Weighing Range = Maximum
Range ±Tare Range


V03
JIK-8 User Manual 17
【SELECTION OF WEIGHING UNIT 】
Press key to select the
weighing unit in sequence as shown
on the left diagram.
Remarks:When using division 1g,
the unit will be shown as kg
when using division < 1g,the unit will
be shown as g
【UNIT IN USE AND INITIAL WEIGHING UNIT
SETTING 】
(1). Press and hold key without
release and turn on the scale.
Until display show then
release
(2). Press key for selection of
different weighing unit , there are
4 weighing units:kg、lb、pcs、﹪.
(3). Use key to select the
weighing unit to be (ON)(in used )
or (OFF){not in used } .


Table of contents
Other Jadever Measuring Instrument manuals
Popular Measuring Instrument manuals by other brands

Gas Clip Technologies
Gas Clip Technologies MGC Pump quick start guide

Milwaukee
Milwaukee MI405 user manual

Dickey-John
Dickey-John mini GAC Operator's manual

Westfalia
Westfalia Auto Code Getting started guide

Lippert Components
Lippert Components Tire Linc installation manual

Cordex
Cordex UT5000 user manual