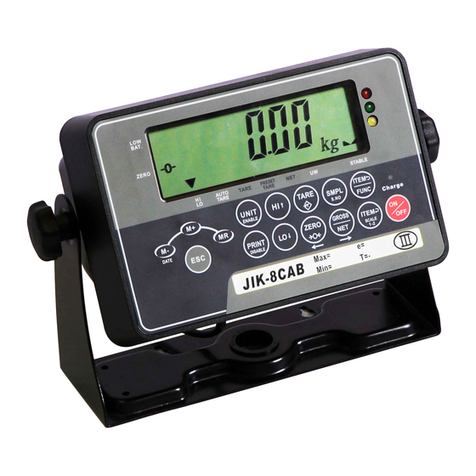
Jadever JWI-520 User manual

Content
1. Introduction……………………………………………………………… 1
2.Product Introduction
2-1 Specifications & Features………………………………………………..
1
3 Keyboard and indication meaning …………………………………
3-1 Keyboard…………………………………………………………………..
3-2 Indication meaning ………………………………………………………..
2
2
2
4.Operations
4-1 Power on and Power off……………………………………………..
4-2 Calibration………………………………………..................................
4-3 Zero………………………………………………………………………..
4-4 Weighing…………………………………………………………………
4-5 Tare………………………………………………………………………..
4-6 Power saving……………………………………………………………
4-7 Battery…………………………………………………………………….
4-8Charging…………………………………………………………………
4-9 Parameter setting………………………………………………………
3
3
3
4
4
4
4
4
5
5
5.Notes……………………………………………………………………
5-1 Normal notes………………………………………………………………
5-2 For sealed lithium battery……………………………………………….
7
7
7

1
1. Introduction
This manual contains installation and operation instructions for the JWI-520 weighing indicator. please
read the manual completely before installation and operation.
2. Product Introduction
2-1 Specifications & Features
2-1-1 Specification of JWI-520 Stainless Steel Indicator:
Model JWI-520
Version Lithium battery version Lead-acid battery version
Waterproof and dustproof grade IP68
Overall dimension (mm) 254×86×170
Accuracy of indicator 3000~15000
Weighing LED height of word 8
(mm) 36
Weighing LCD height of word 8
(mm) 43
Zero range ±4%
Tare range 100%
Rechargeable battery 5V/4000mAH lithium
battery
6V/4500mAH lead-acid
battery
Transformer 5V/2A electronic
100~240V/50~60Hz
9V/1A electronic
100~240V/50~60Hz
T type frame assembly
Optional assembly: 38mm pole height, stainless steel T
type frame 1pc; stainless steel tube support 1pc; M6×8
jackscrew 2pcs; L type small wrench 1pc; M4×8
stainless steel screw 4pcs
RS232 interface Optional
RS485 interface Optional

2
2-1-2 Basic data of full Stainless Steel Platform:
Plate
size(cm) 2828 3040 4050 5060 6080
Waterproof
and dustproof
grade
IP68
Capacity(kg) 15/30/60 30/60/150 60/150/300 60/150/300 150/300/600
Load cell
size(mm) 150×35×40 150×44×40 150×60×62 150×60×62 150×90×74
side hole
2-1-3 Working temperature: -5~+35℃
2-1-4 Storage temperature: -25~50℃
3. Keyboard and indication meaning
3-1 keyboard
Turn off key
Turn on / do ZERO key
Setting parameter and inputting numbers
Tare key
3-2 Indication meaning
Indication Meaning
3101.x Version number of software
dc x.xx The voltage of battery is x.xxV
Err-00 Load cell wiring error or AD error
Err-01 Calibration switch is not short while calibrating
Err-02 Counting mode, under sampling

3
Err-03 When calibration, the placed weight is too small and it refuses to calibrate.
(Weight should more than 10% max. capacity)
- - - -
Overload, show this as the weight over 100%FS+9e, with the DING sound.
Then you should reduce the weight.
4. Operations
4-1 Power on and Power off:
①Power on:
Press <ON/ZERO> key, It displays software version after “DING” sound, and then dc-x.xx (voltage of battery
is 3~4.2V), self-inspection, 9,8,7···1,0, and the “zero” lamp lighting. Now it’s in working state.
②Power off:
Press <OFF> key to power off.
③Auto power off:
It will be auto power off after 10 minutes when scale is in at ZERO and with no operation.
④Low voltage off:
It will be auto power off when the voltage is too low.
4-2 Calibration
1. Switch on the adjust key(the adjust key is in the indicator).
Press <ON/ZERO> to power on .
2. Press <SET/0~9> and <ON/ZERO> 3 seconds at the same time.
It shows the last capacity. For example: c-60 means 60kg.
Press <SET/0~9> to choose c-30, c-60, c-100, c-150,c-200, c-300,c-600,
c-1500, c-3000, c-6000 (c is capacity and unit is kg)
3. Press <TARE> to do tare action.
4. Now it displays internal number 0. If it is not 0, press <ON/ZERO> to zero.
5. Place more than 10% max. capacity standard weights on plate.
Press <TARE> to input the value of weights after internal number is stable.
Press <SET/0~9> to add 1. Press <TARE> to input next value till to finish.
And then it shows CAEnd for 1 second and return to weighing.
(Please attention to the place of decimal point when inputting values)
6. If display Err03, it means calibration fault.

4
The reason is: weights are too small or input wrong value.
4-3 Zero
When without tare, the weight display is ≤4% Max. capacity. Press <ON/ZERO> and the display
shows “ 0 ”, ”ZERO” Lamp lighting.
4-4 Weighing
Put weight to pan, and it shows the weight, lamp lighting.
4-5 Tare
Put a container on plate and press <TARE >, it shows 0 and ”ZERO” lamp off. Then ”TARE” lamp
lighting. Put the weight on container and it shows net weight. Remove the weight and container
together, it displays negative tare and “ZERO” lamp lighting. Now press <TARE > and it returns to
normal weighing.
4-6 Power saving
Show “0” with auto power saving after 40 seconds. Put a weight to start weighing again.
4-7 Battery
Battery Lamp
Battery
voltage
Full capacity
Half capacity
Low battery
flashing
Will auto turn
off
4-8 Charging

5
Put the plug in the socket, is charging lamp. is lighting when charging.
Show voltage:after power on and on“0”, at the same time press <ON /ZERO> and <TARE > three seconds,
now show the battery voltage, press <SET/0~9> to exit.
4-9 Parameter setting
Press <SET/0~9> for 3 seconds to enter setting and show main menu. Press <SET/0~9> to choose
continuously. It displays as bellow:
rAngE (set limit)
UnItS (choose unit)
A-OFF (choose auto power off)
FILt (set display mode)
Zero (set auto zero)
bUZZE (set buzzle)
d (choose division)
LU- (brightness adjusting)
4-9-1 rAngE (set upper and low limit)
4-9-1-1 When it shows rAngE, press <TARE> to set limit values. Press <SET/0~9> to choose ON or OFF.
“ON” is start limit function. “OFF” is Exit limit function. Press <TARE> to confirm.
4-9-1-2 When choose “on” , Press <tare> to enter to set limit value. “under” lamp is lighting and max figure is
blinking. Press <set/0~9> once to add numbers. Press <tare> to confirm. When finishing setting under
values it will auto exit and then set “over”(same as set under limit).After finish setting, it will back into
weighing.
4-9-1-3 When low limit > high limit, it displays off, and then exit.
4-9-1-4 Alarming indicate: m is the weight.
When m≥high limit, “over” lamp is lighting and flickering.
When low limit <m<high limit, “accept” lamp is lighting (not flickering).
When m≤low limit, “under” lamp is lighting.
Caution: when the display is not stabilization, no lamp lights.
4-9-2 Units
4-9-2-1 when it displays units, press <tare> to enter and press <set/0~9> to change units. Then press <tare>
to confirm. Units: h9(kg), pcs(counting), lb.lb (decimal pounds)

6
4-9-2-2 Counting: when it displays “pcs”, press<tare>. Now “pcs” lamp lighting.
Longtime press <on/zero>, it displays count and return to 0. Then put the sample (as much as possible, but
don’t more than max.capacity). After stable, press <tare>. Press <set/0~9> to add values and press<tare>to
choose. After finishing, it display pcs and pcs lamp lighting.
Caution: pick quantities of max. less than 30000.
4-9-3 A-off
When it displays A-off, press <tare> to enter and press <set/0~9> to choose n or y. n is not in auto power off
situation. y is after 10 minutes in zero, it will be auto-off.
4-9-4 Filt (set display mode)
When it displays filt, press <tare>to enter and press <set/0~9> to choose filt-1 or filt-2 or filt-3 or filt-4. Press
<tare>to confirm.
Filt-1: Single animal scale function. Weighing in 3 seconds after place weight. is lighting.
Filt-2: Many animal scale function. It shows very slowly after place weight., then lighting.
Filt-3: It will show fast when add weight to scale. (suggestion)
Filt-4: It will show more faster when add weight to scale.
4-9-5 Zero
When it displays zero, press <tare>to enter and it displays zero range x.x. (x.x is auto zero range: 0.5d, 1d,
1.5d, 2d, 2.5d, 3d, 3.5d, 4d, 4.5d and 5d. d is division value. Press <set/0~9> to choose and press <tare> to
confirm and return weighing.
4-9-6 Buzzer
When it displays buzzer, press <tare> to enter and press <set/0~9> to choose on or off, “on” is using
“ding…” Sound in upper and lower limit situation. “off” is without “ding…” Sound.
4-9-7 d
When it displays d, press <tare> to enter and press <set/0~9> to choose division. Press <tare> to confirm.
There are three divisions of each capacity. When you choose the smaller one, the speed of display will be
slower.
4-9-8 Lu-
When it displays lu-, press <tare> to enter and press <set/0~9> to choose. lu-1 is lower brightness. lu-2 is
higher brightness. Press <tare> to confirm.
4-9-9 Install and Adjust

7
4-9-9-1 Stainless steel indicator
Opening the back over of indicator , welding the leads of load cell by color , ring the welding point
with heat shrinkable tube , contraction after heating , then place all the lines into sealing bowl , fix
the lines and sealing by 704 glue , air dry after 1 hour . Meaning : Red(power+) ,
Black(power-),Green (signal+) , White(signal-)
4-9-9-2 Stainless steel platform scale
Inserting the pole into platform base and fix it by L type small wrench , then install indicator on T
type frame.
5. Notes
5-1 Normal notes
5-1-1 Please read the instruction manual before usage.
5-1-2 Please calibrate scale regularly.
5-1-3 Do not overloading. Not throw heavy things on the scale violently. The damage for overloading is not
within the range of guaranteed maintenance.
5-1-4 Don’t touch chemicals such like solvent, etc.
5-1-5 Keep the scale clean in order to weighing well.
5-1-6 There is a lead seal on the bottom of the scale. Users are not allowed to remove the seal. If the seal is
damaged the scale is not guaranteed for maintenance.
5-2 For sealed lithium battery
5-2-1 The working temperature of battery is -10℃~+50℃. It can be circle charged about 500 times at 20℃.
5-2-2 Please don’t change battery by yourself.
5-2-3 Please charge in time. Please full charge if you don’t use the scale for a long time. Please charge at
least 3 months.
5-2-4 The capacity of battery will be reduced after charge/discharge many times.
Table of contents
Other Jadever Measuring Instrument manuals