Jamboree 1995 Rallye User manual

;.f/
·1
1995
owner's
manual

This page intentionally blank.

This page intentionally left blank.
, .'

This page intentionally lefl blank.
;.
..

FULL ONE-YEAR 115,000 MILE
WARRANTY
FOR
MOTOR
HOMES
MANUFACTURED
BY
SUBSIDIARIES
OF
FLEETWOOD
ENTERPRISES,
INC.
SOLD
IN
THE
UNITED
STATES
AND
CANADA
COVERAGE PROVIDED
Your
new
motor
home,
induding
the structure, pfumbing, heating
and
electrical systems,
and
aU
appliances
and
equipment ins!aUed
by
the manufacturer,
is warranted under normal use to be free from manufacturing defects in material
or
workmanship_
The warranty extends to the first retail purchaser and his transferee(s)
and
begins on the date of original retail delivery or the date the motor home
is
first placed into service as a rental, commercial
or
demonstrator unit (whichever occurs first). The warranty extends for a period of
one
year from such
date
or
until the unithas received 15,000 lotal miles of use as determined
by
the mileage shown on the odometer(whichever occurs first). Written notice
of
defects
must
be
given to the selling dealer
or
the manufacturer
not
later than ten (10)
days
after the expiration
of
the warranty period.
OWNER'S
OBLIGATIONS
The owner is responsible for norma! maintenance
as
described in the
o,'mer's
Manual; however, minor adjustments (such
as
adjustments to the interior
or
exterior doors,
LP
regulator pressure, cabinet latches,
1V
antenna control, etc.)
Will
be
performed by the dealer during the first
90
days
of
warranty
coverage. Thereafter, such adjustments are the responsibility
of
the owner as normal maintenance unless required
as
a direct result
of
repair
or
replace-
ment of a defective part
under
this warranty. .
Ifa problem occurs which the
owner
believes is covered
by
this warranty, the
owner
shall contact the selling dealer,
or
otherauthorized dealer, giving that
dealersufficient informationtoresolve the matter. The
owner
shaH
detiverthe
molorhome
to thedealer
or
manufacturingplantlocation
for
warrantyservice.
DEALER'S
OBLIGATIONS
By agreement with Ihe manufacturer, the dealer
is
obligated to maintain the
motor
home prior to retail sale, to perform a detailed predeliveryinspection
and to repair
or
replace
any
parts necessary tocorrecl defects
in
material
or
workmanship.
WHEN
THE
DEALER
DOES NOT RESOLVE
THE
PROBLEM
lithe
dealer
is
unable
or
unwilling to resolve a problem which the
owner
is convinced is covered
by
the warranty, he should contact the manufacturing
plant
at
the address listed below and provide the manufacturer with a description in writing of the problem and attempts made to resolve it.
MANUFACTURING
PLANT
OBLIGATIONS
Upon receipt of notice
of
a claim, where the
dealer
was unable
or
unwilling to resolve the problem. the manufacturing plant will repair or replace
any
parts necessary to correct defects in material
or
workmanship,
or
will take other appropriate action as
may
be
required.
WHEN THE MANUFACTURING
PLANT
DOES
NOT
RESOLVE
THE
PROBLEM
If the representatives
of
the manufacturing plant are unable to resolve
the
problem
and
the owner is convinced that
it
is covered
by
this warranty, the
owner
should call the toll-free
number
listed belowto describe the problem
and
the
attempts made to resolve it.
WHAT
IS
NOT
COVERED
BY
THE
EXPRESS
WARRANTY
THIS WARRANTY DOES
NOT
COVER:
1.
THE
AUTOMOTIVE SYSTEM (INCLUDING
THE
CHASSIS AND DRIVETRAIN), TIRES AND
BATIERIES,
WHICH ARE COVERED BY
THE
SEPARATE
WARRANTIES
OF
THE RESPECTIVE
MANUFACTURERS
OF
THESE
COMPONENTS.
2.
DEFECTS
CAUSED
BY
OR
RELATED
TO:
A. ABUSE, MISUSE, NEGLIGENCE,
OR
ACCIDENT;
B. FAILURE
TO
COMPLY WITH INSTRUCTIONS CONTAINED IN
THE
OWNER'S MANUAL;
C. ALTERATION
OR
MODIFICATION
OF
THE
MOTOR HOME;
D. ENVIRONMENTAL CONDITIONS (SALT. HAIL,
CHEMICALS
IN
THE
ATMOSPHERE, ETC.)
3.
NORMAL
DETERIORATION
DUE
TO
WEAR
OR
EXPOSURE, SUCH
AS
FADING
OF
FABRICS
OR
DRAPES, CARPET WEAR, ETC.
4.
NORMAL
MAINTENANCE
AND
SERVICE ITEMS,
SUCH
AS
LIGHT
BULBS, FUSES, WIPER BLADES, LUBRICANTS,
ETC.
5.
MOTOR
HOMES
ON
WHICH
THE
ODOMETER
READING
HAS
BEEN
ALTERED.
6.
TRANSPORTATION TO AND FROM DEALER
OR
MANUFACTURING PLANTLOCATION, LOSS OFTIME, INCONVENIENCE, COMMERCIAL
LOSS~'
LOSS
OF
USE, TOWING CHARGES, BUS FARES, VEHICLE
RENTAl,
INCIDENTALCHARGES SUCH AS TELEPHONE CALLS
OR
HOTEL BILLS. OROTHER INCIDENTAl
OR
CONSEQUENTIAL DAMAGES.
SOME STATES DO
NOT
ALLOW
THE
EXCLUSION
OR
LIMITATION
OF
INCIDENTALOR CONSEOUENTIALDAMAGES, SO
THE
ABOVE
LIMITATION
OR
EXCLUSION MAY NOT
APPLY
TO
YOU.
THIS WARRANTY GIVES YOU
SPECiRe
LEGAL
RIGHTS,
AND
YOU MAY
ALSO
HAVE
OTHER RIGHTS WHICH VARY FROM STATE TO STATE.
THEMANUFACTURERISNOTRESPONstBLE
FORANYUNDERTAKtNG.REPRESENTAnoNORWARRANTYMADEBY
ANYDEALEAOROTHERPERSONBEYONDTliOSE
EXPRESSLY SET
FORrn
IN
TliIS
WARRANTY.
Brand Name:
_______________
_ Model:
__________
_ Serial No.
_____
_
FOR
SERVICE
ASSISTANCE:
Fleetwood Parts & Service
P.O.
Box
5700
Riverside, CA 92507
(800)
322·8216
Fleetwood Parts & Service
P.O.
Box
1007
Decatur,
IN
46733
(800)
322·8216
Fleetwood Parts & Service
P.O.
Box
106
Paxinos, PA 17860
(800)
322-8216
CORPORATE
HEADQUARTERS:
MotorHome Division
Fleetwood Enterprises, Inc.
P.O.
Box
7638
Riverside,
CA
92513-7638
(800)
322·8216
prifltedir

SAFETY REGULATIONS REGARDING LP GAS
SYSTEMS AND LP GAS APPLIANCES
The
manufacturer
of
this recreationat vehicle is required to
furnish
the following consumer information
as
provided by
the National Fire Protection Association
and
the American National Standards Institute.
The
information
and
warnings
found here
may
also
be
found in otherchapters
of
thisOwner's Manual. Please
see
chapterstitled
"LP
GAS
SYSTEM"
and
"APPLIANCES"
for other safety
and
operating information.
WARNING
LP
GAS
CONTAINERS
SHALL
NOT
BE
PLACED
OR
STORED
INSIDE
THE
VEHICLE.
LP
GAS
CONTAINERS
ARE
EQUIPPED WITH
SAFETY
DEVICES WHICH RELIEVE
EXCESSIVE
PRESSURE
BY
DISCHARGING
GAS TO
THE
ATMOSPHERE.
WARNING
IT
IS
NOT
SAFE
TO
USE COOKING APPLIANCES
FOR
COMFORT
HEATING.
COOKING
APPLIANCES NEED
FRESH
AIR
FOR
SAFE
OPERATION.
BEFORE
OPERATION:
1.
OPEN
OVERHEAD
VENT
OR
TURN
ON
EXHAUST
FAN,
AND
2.
OPEN
WINDOW.
THIS
WARNING LABEL
HAS
BEEN LOCATED IN
THE
COOKING
AREA
TO
REMIND
YOU
TO
PROVIDE
AN
ADEQUATE
SUPPLY
OF
FRESH AIR
FOR
COMBUSTION.
UNLIKE
HOMES,
THE
AMOUNT
OF
OXYGEN
SUPPLY
IS LIMITED DUE
TO
THE
SIZE
OF
THE
RECREATIONAL VEHICLE, AND
PROPER
VENTILATION
WHEN
USING
THE
COOKING APPLIANCE{S)
WILL
AVOID
DANGERS
OF
ASPHYXIATION.
IT IS
ESPECIALLY
IMPORTANT
THAT
COOKING APPLIANCES
NOT
BE
USED
FOR
COMFORT
HEATING
AS
THE
DANGER
OF
ASPHYXIATION
IS
GREATER
WHEN
THE
APPLIANCE IS USED
FOR
LONG
PERIODS
OF
TIME.
WARNING
PORTABLE
FUEL-BURNINGEQUIPMENT, INCLUDING
WOOD
AND
CHARCOAL
GRillS
AND
STOVES,
SHALL
NOT
BE
USED
INSIDETHIS
RECREATIONAL
VEHICLE.
THE
USE
OF
THIS
EQUIPMENT
INSIDE
THE
RECREA-
TIONAL
VEHICLE
MAY
CAUSE
FIRES
OR
ASPHYXIATION.
WARNING
DO
NOT
BRING
OR
STORE
LP
GAS
CONTAINERS,
GASOLINE,
OR
OTHER
FLAMMABLE
LIQUIDS
INSIDE
THE
VEHICLE
BECAUSE
A FIRE
OR
EXPLOSION
MAY
RESULT.
Awarninglabel
has
beenlocated
near
the
LP
gas
container.
This
labelreads: DO
NOT
FILL
CONTAINER(S)TO
MORE
THAN
80
PERCENT
OF
CAPACITY.
Overfilling the
lP
gas containercan result in uncontrolled
gas
flow which can cause fire
or
explosion. A properly filled
containerwill contain approximately 80 percent
of
its volume as liquid LP gas.
The
following label has been placed
in
the vehicle nearthe range:
IF
YOU
SMELL
GAS:
1. Extinguish any open flames, pilot lights and all smoking materials.
2. Do not touch electrical switches.
3.
Shut
off
the
gas
supply
at
the
tank
valve(s)
or
gas
supply
connection.
4. Open doors and other ventilating openings.
5. Leave the area untll odorclears.
6. Have the gas system checked and leakage source corrected before using again.
LP gas regulators must always
be
installed with the diaphragm vent facing downward. Regulators that are not in
compartmentshavebeen equippedwitha protectivecover. Makesurethatregulatorventfacesdownwardandthecover
is kept in place to minimize vent blockage which could result in excessive
gas
pressure causing fire
or
explosion.

IMPORTANT NOTICE
Ourforestproductsuppliers have advisedthat urea-formaldehyde is used in
the production
of
particle board, hardwood plywood orpaneling which they
supply usandwhich we utilize in ourfinished product.Thesesuppliers have
requested that we communicate this to
our
customers.
Foryourinformation, weare reproducing samplesof statementswhich have
been provided to us
by
our suppliers.
WARNING: THIS PRODUCT IS MANUFACTURED WITH UREA-FORM-
ALDEHYDE RESIN. FORMALDEHYDE VAPOR
MAY
IN
SOME PEOPLE
CAUSE HEADACHES, EYE, NOSE AND THROAT IRRITATION, AND
AGGRAVATION
OF
ALLERGIESANDRESPIRATORYPROBLEMS,SUCH
AS ASTHMA. PROPERVENTILATION SHOULD REDUCE THE RISK OF
SUCH PROBLEMS.
Champion
International
Corporation
--
WARNING: IRRITANT: THIS PRODUCT CONTAINS A UREA-FORMAL-
DEHYDE RESIN
AND
MAY RELEASE FORMALDEHYDE VAPORS
IN
LOW CONCENTRATIONS. FORMALDEHYDE CAN BE IRRITATING TO
THE EYES AND UPPER RESPIRATORY SYSTEM
OF
ESPECIALLY
SUSCEPTIBLE PERSONS SUCH AS THOSE WITH ALLERGIES OR
RESPIRATORY AILMENTS. USE WITH ADEQUATE VENTILATION. IF
SYMPTOMS DEVELOp, CONSULTYOUR PHYSICIAN.
Georgia~Pacific
Corporation
WARNING: THIS PRODUCT IS MANUFACTURED WITH A UREA-
FORMALDEHYDE RESIN ANDWILL RELEASE SMALLQUANTITIES OF
FORMALDEHYDE.FORMALDEHYDELEVELS INTHEINDOORAIR CAN
CAUSE TEMPORARY EYE AND RESPIRATORY IRRITATION, AND MAY
AGGRAVATE RESPIRATORY CONDITIONS OR ALLERGIES. VENTILA-
TION WILL REDUCE INDOOR FORMALDEHYDE LEVELS.
Weyerhaeuser
Company
Ventilation is important in maintaining a comfortable environment and we
direct your attention to the discussion of ventilation contained in your
Owner's Manual.

TABLE
OF CONTENTS
WARRANTY
Entry Doors and Screens ....................................13
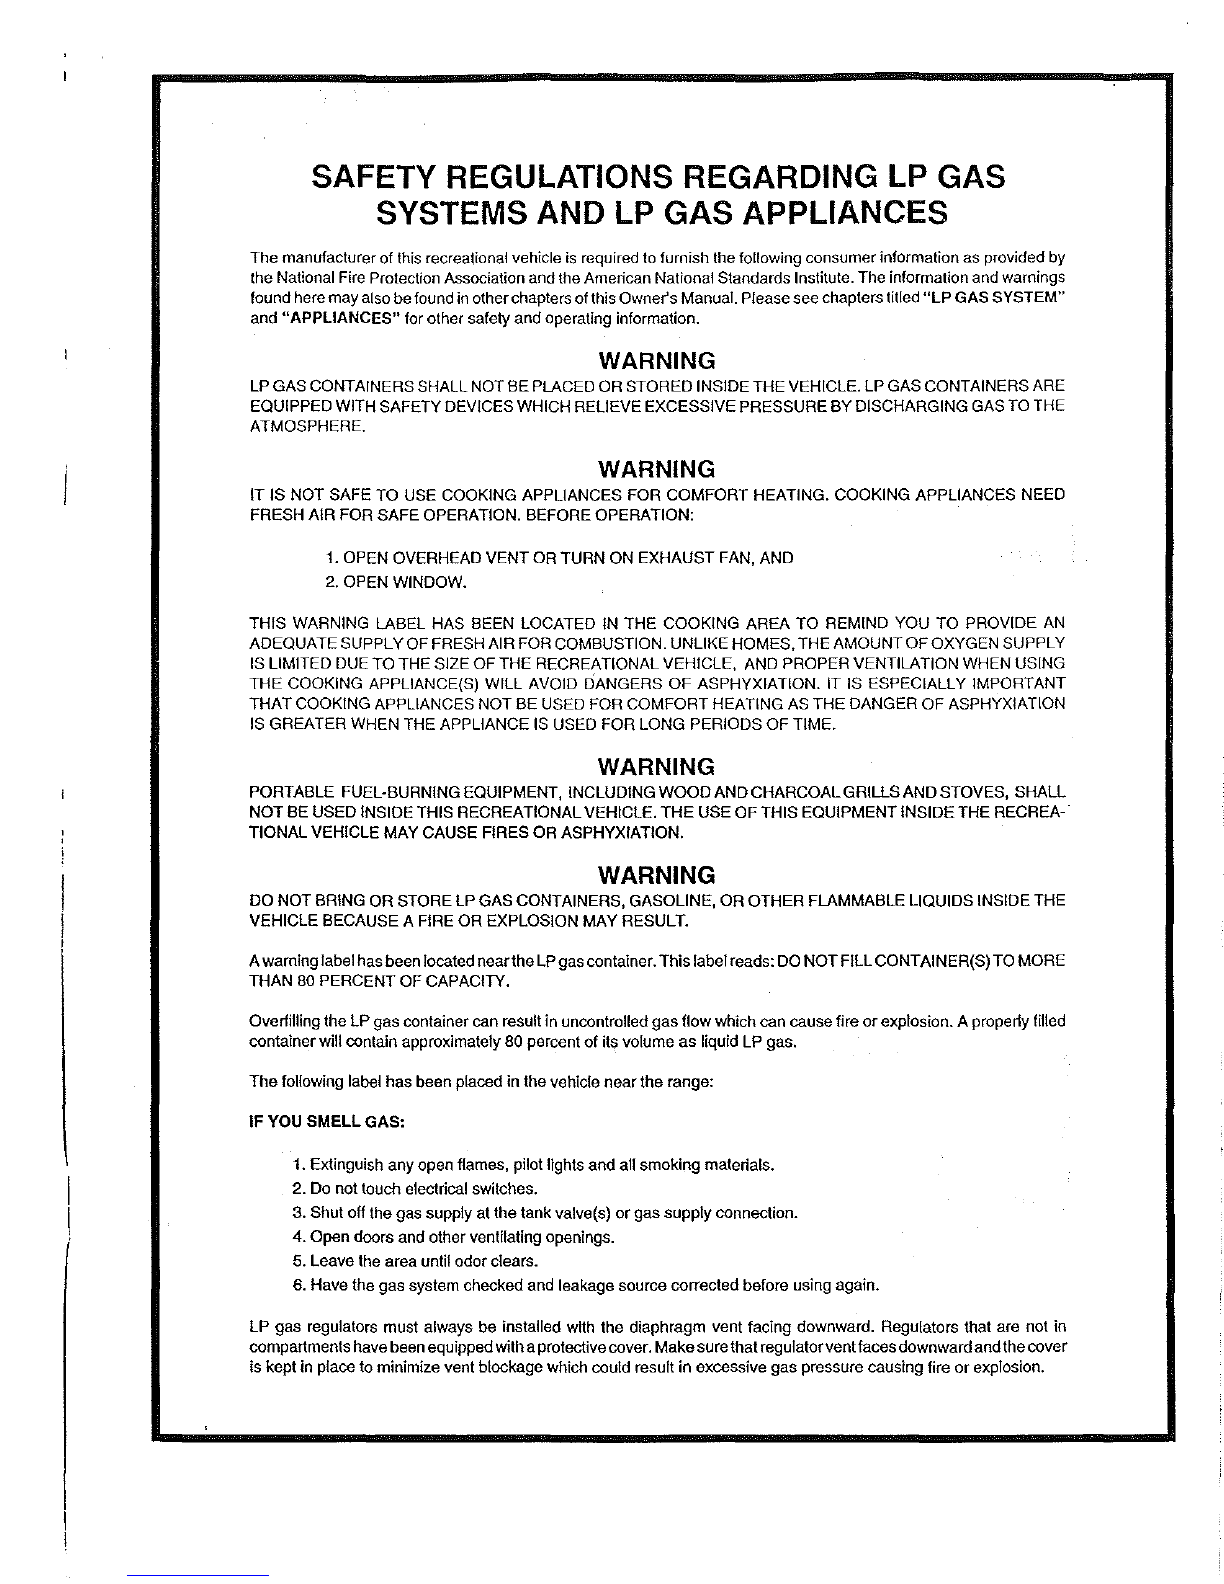
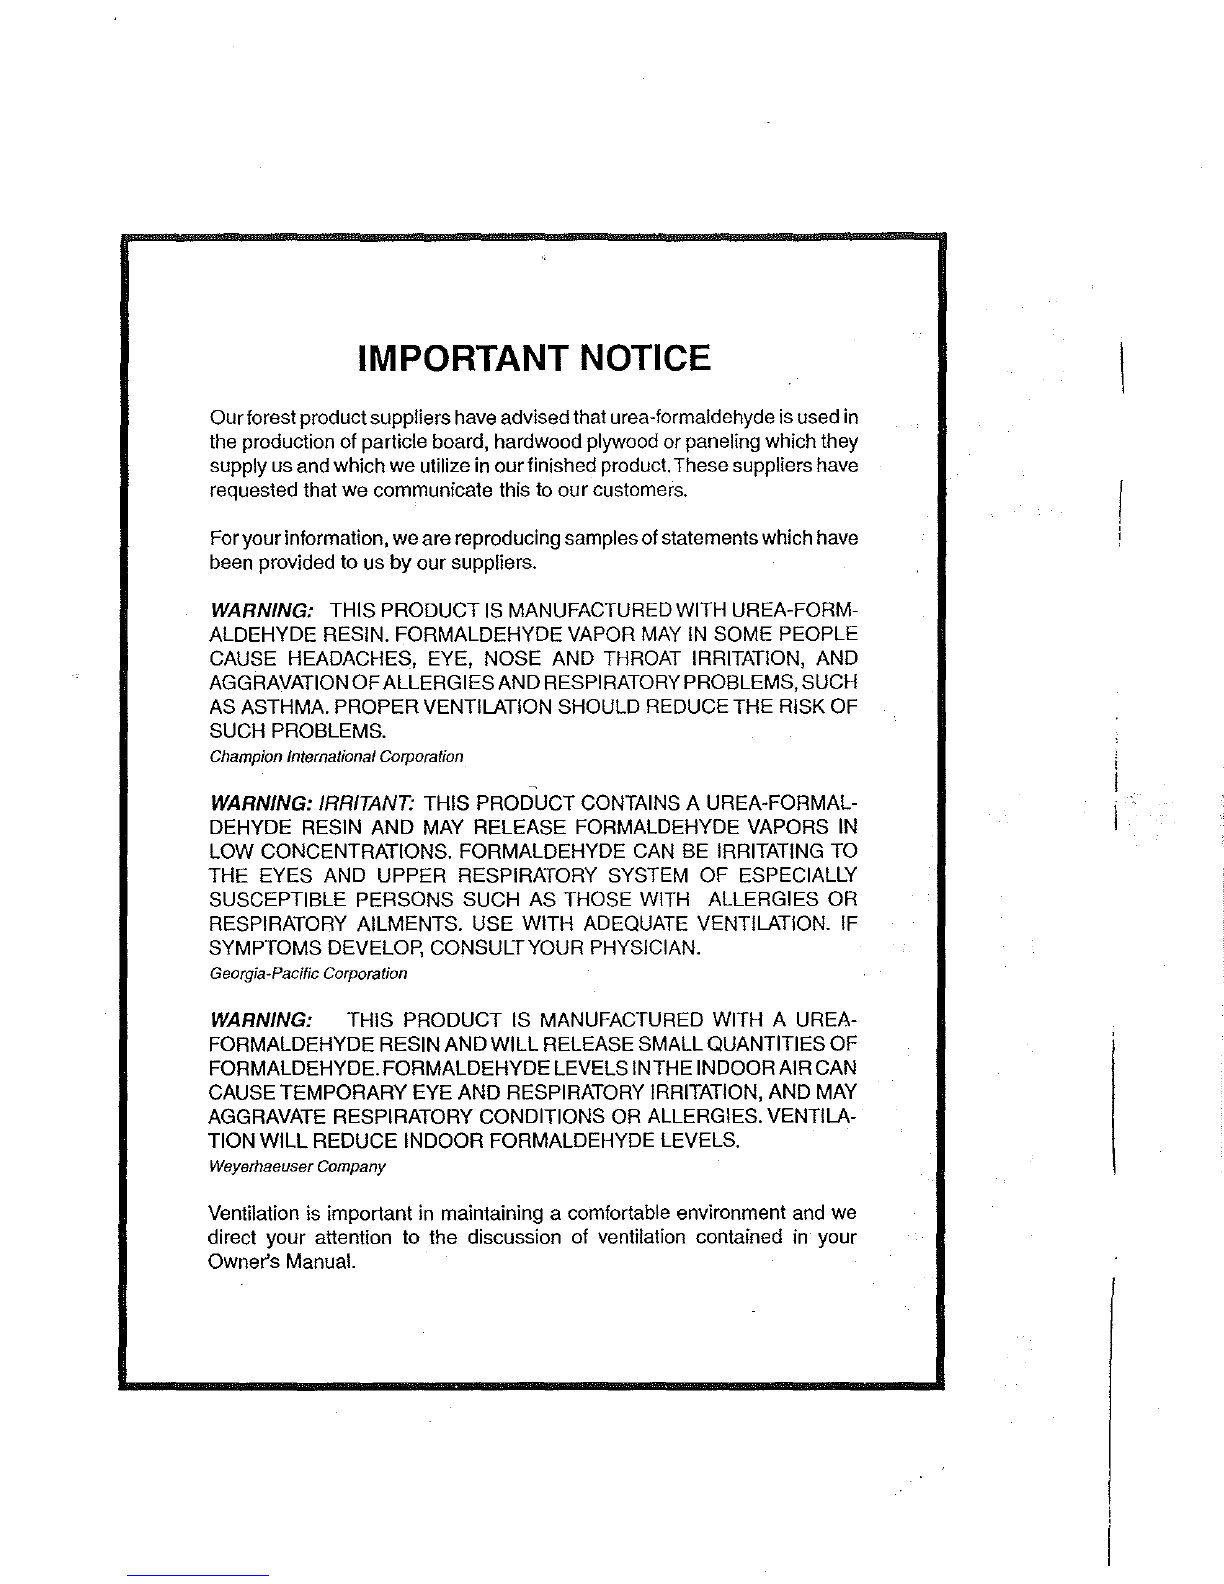
NOTICES
AND
WARNINGS Windows ............................................................. 13
Introduction
.............................................................1 EmergencyExit Window ................................. 13
Side Slider Windows .......................................13
Warranties............................................................. 1 Sun Visors ...........................................................
13
Reporting Safety Defects ......................................2 Mini-Blinds ..........................................................
13
Owner's Information Package ...............................2
Chassis
and
Vehicle Identification.........................3 Storage ............................................................... 13
Exterior Compartments...................................13
On
the
Road
.............................................................5 InteriorStorage ...............................................
14
Motor
Home
Loading ............................................5 Interior and Furnishings ......................................
14
Responsibility for ProperLoading.....................5 Dinette Conversion .........................................
14
A Few Definitions First ...................:......:...........5 Sofa/Lounge Conversion.................................14
Towing a Vehicle
or
Trailer ....................................5 Folding Doors/Privacy Curtain Dividers .........
14
Carrying Capacity
and
Load
Distribution ......... 6 InteriorLighting ...............................................15
How to Weigh Your Loaded
Motor
Home Overhead Vents .............................................. 15
Without a Trailer
or
OtherTowed
Load
............. 6 Bunk LadderInstallation .................................15
How
to Weigh
Your
Loaded
Motor
Home Monitor Panel ...................................................... 15
With a Trailer
or
OtherTowed
Load
.................. 7
Loading Tips .....................................................7
Tires ......................................................................8
Tire Inflation ......................................................8
Tire Replacement .............................................8
Effects
of
Long Term Occupancy ........................16
Ventilation
and
Controlling Condensation ...... 16
Fire Safety........................................................... 16
Fire SafetyPrecautions...................................
17
Smoke Detector..............................................
17
If
You
Geta Flat Tire .........................................8
Spare Tire Carrier.............................................8
Changing a Flat Tire .........................................9
Seats
and
Seat Belts ............................................9
Plumbing
Systems
................................................
19
Fresh Water System ...........................................
19
City
Water Connection ....................................
19
Driver/PassengerSeats ....................................9
Seat
Belts .........................................................9
The Water Pump.............................................20
Water Filter .....................................................
20
Child Restraint ..................................................9 Troubleshooting the Fresh Water System ......
20
Driving
and
Parking...............................................9
Fuel and Fuel Systems .......................................
10
FuelFill ........................................................... 10
Leaks ..............................................................20
Sanitizing the Fresh WaterSystem ................
20
ExteriorShower..............................................
21
FuelTypes
and
Vapor Lock.............................10
General Chassis Topics ......................................
11
Variable SpeedEngine Fan ............................
11
Exhaust System Heat.....................................
11
Waste Water System...........................................
21
Toilet ...............................................................
21
Draining the HoldingTanks .............................
21
HoldingTank Care ..........................................
22
Carbon Monoxide
Electrical
Systems
.................................................
23
Safety Precautions ..............................................
11
Chassis Electrical System ...................................
23
Carbon Monoxide Detector.............................
12
Chassis Bulbs
and
Fuses ...............................
23
EmergencyTowing ..............................................
12
12-Volt Coach System.........................................
23
Attaching Accessories
to
Your
Motor
Home ................................................
12
Engine Temperature
Gauges
..............................
12
BatteryDisconnect..........................................23
AuxiliaryStartSystem.....................................
23
BatteryInspection
and
Care ...........................23
Living
with
Your
Motor
Home
..............................
13
BatteryCharging.............................................
24
Manual Entry Steps.............................................
13
Selecting a Replacement Battery ...................
24
EntryAssist Handle .............................................
13
120-Volt System ..................................................
24

TABLE OF CONTENTS
PowerConverter.............................................25
TV
Antenna.....................................................34
PowerInverter.................................................25 TV and Radio Interference ..................................34
GroundFault Interrupter .................................25 Miscellaneous Appliances ...................................35
Coach Fuses and Circuit Breakers .....................25 Mal
ntenance
...........................................................37
Generator............................................................25 Exterior................................................................37
GeneratorFuelSupply....................................25 Stains..............................................................37
GeneratorOperation .......................................26
GeneratorOperating Safety Precautions ....... 26
Electrical System Wiring .....................................27
Windows, Doors, Vents
and
Locks ................. 37
Rubber Roof System ...........................................37
Cleaning
""""'"''''''''''''''''''''''''''''
..................37
LP
Gas
System
......................................................29 Care................................................................ 38
LP Gas Safety Precautions .................................29 Sealant Renewal.............................................38
System Components...........................................30 Door, Window,
Roof
Component
Hoses .........................................
,................... 30
and
Molding Resealing ...................................38
LP
Gas
Regulator...........................................30 Interior.................................................................38
Using LP Gas System at Fabrics ............................................................38
LowTemperatures...............................................30 Laminate
Top
Care..........................................39
Filling LP GasTanks ...........................................
31
Walls
and
Ceiling Panels ................................39
LP Gas System Leak Checks .............................
31·
Bathtub
and
Plastic
Shower
Stall....................39
LP
Leak Detector ................................................32 Floors
and
Carpeting ......................................
39
Lighting LP GasAppliances ................................32 Engine Access................................................39
Appliances
.........................................c
...................
33 Maintenance Checklist ........................................39
Water Heater.......................................................33
Motor
Home
Storage
.............................................
41
Refrigerator .........................................................33 Storage Checklists ..............................................
41
Acrylic Refrigerator
Door
Panels.....................33 Short-Term Storage ........................................
41
Furnace ...............................................................33 Long-Term Storage .........................................
41
Range .................................................................33 Winterization .......................................................42
Range Exhaust Hood ......................" .................. 34 Water System Winterizing...............................
42
Air
Conditioner ....................................................34 Reactivating the Motor Home
Entertainment Equipment....................................34 After Storage .......................................................43
120-Volt
TV
and
VCR ......................................34 Maintenance
Chart
................................................45
120/12-Volt Television .....................................34

..
-~
CHASSIS AND VEHICLE IDENTIFICATION
Two
numbers are used to identify the vehicle and
components used on the vehicle. The
V.1.
N.
or
Vehicle
Identification Number is the legal identification
of
the
completed vehicle and is the number of the vehicle
registration.The V.I.N. is found on the Federal Certifica-
tionTag located on the leftinteriorsidewall ofthe motor
home driver compartment. Refer to this number when
ordering parts or service from the chassis dealer ser-
vice center.
FEDERAL CERTIFICATION TAG
MANUFACTURED
BY:
DATE
OF
MFR:
INCOMPLETE
VEHICLE
MFD.
BY:
DATE
OF
INC.
VEH.
MFR:
GROSS
VEHICLE
WEIGHT
RATE:
GAWRFRONT
WITH:
RIMS
TIRES
AT:
PSI
COLD
SINGLE
GAWR
INTERMEDIATE
WITH:
RIMS
TIRES
AT:
PSI
COLD
SINGLE
GAWRFRONT
WITli:
RIMS
TIRES
AT:
PSI
COLD
SINGLE
This
vehicle
confonns
to
all
applicable
Federal
Motor
Vehicle
Safety
Standards
in
effecl
in:
VEH.
IDENT.
NO.:
1YPE
VEHICLE:
MULTI·PURPOSE
PASSENGER
VEHICLE
The
tires
on
this
unit
may
be
different
from
those
shown
above.
Check
tire
sidewalls
for
maximum
inflation
pressures.
Replacement
tires
must
be
raled
nOlless
than
lhe
axle
capacity
(GAWR).
Locatedto the left interiorsidewall
of
the
motor
home drivercompartment.
3
The Fleetwood Identification Number (F.I.N.) is found
on
the
Fleetwood Motor Homes tag to the left
of
the
main entry door
or
on the exterior left front side
of
the
motor home. Use this number when ordering parts
through your Fleetwood dealer
or
Service Center.
FLEETWOOD.
MOTOR
HOMES
OF
INC.
PLAN APPROVAL NO.
"'F.I.N.
MFD.
10.
NO.
MODEL
DATE OF MFA.
MO:
YR:
Located
to
the left
of
the main entry
door
or
on exteriorleft front side
of
the
motor home.
F.I.N.
V.I.N.

MOTOR HOME LOADING
Responsibility
for
Proper
Loading
As the operator of this motor home, you bear the sale
responsibility for proper, safe loading.This section will
guide you through the steps necessary to properly and
safely load your vehicle.
Your
motor home chassis is designed to carry a specific
maximum weight. This weight includes everything: the
weightofthe empty motorhome itself, all occupants and
their belongings, fuel, fresh
water,
waste water and any-
thing else that may be
in
or
attached to the motor home.
A Few
Definitions
First
Before discussing loading and weighing, we need to
explain some common weight terms. We'll use abbre-
viations
in
our discussion. These terms are:
GVWR
(Gross
Vehicle Weight Rating): This is
the maximum allowable load that this motor
homewas designed to carry. Modifications to
your motor home, such as installing bigger
tires
or
changing spring load capacities, will
notin anyway increasethisweightrating.The
GVWR is shown on the Federal certification
tag posted on the left interior sidewall of the
driver's compartment.
GAWR
(Gross
Axle
Weight
Rating): This is the
maximum allowable weight a specific axle is
designed to carry. Each axle has its own
GAWR. When you add the GAWRs, they will
not necessarily add
up
to the GVWR. The
GAWR
is
also shown on the Federal certifica-
tion tag posted on the left interiorsidewall of
the driver's compartment.
GCWR
(Gross
Combined
Weight Rating):This
isthe maximumallowablecombined weightof
the fully equipped and loaded motor home
(including passengers, all cargo, fluids, etc.)
plusthe weight of
any
fully loadedtowed load
(such as a trailer, boat,
or
automobile). The
Gross Combined Weight Rating (GCWR) is
listed on the wardrobe door tag. Exceeding
the GCWR will cause damage to your motor
home drivetrain
or
chassis, unstable driving
and handling characteristics, and will reduce
your warranty protection.
ONTHE
ROAD
GTW
(Gross
Towed Weight): This
is
the maxi-
mum allowable loaded weight that this motor
home has been designed to tow. This cannot
beincreased by changingthe trailerhitch.The
GTW is listed on the wardrobe door tag.
MTW
(Maximum
Tongue
Weight): means the
maximum vertical load that the towed load
applies to the hitch of the motor home. The
MTW is listed on the wardrobe door tag.
UVW
(Unloaded
Vehicle Weight): This is the
calculated weight of the motor home, as built
at the factory with full fuel, engine oil (and
other engine/drivetrain fluids) and
LP
gas.
The UVWdoesnot include cargo, fresh water,
passengers,
or
accessories installed by the
dealer. The UVW is listed on the wardrobe
door tag.
TOWING A VEHICLE OR TRAILER
("TOWED
LOAD")
Note:Somestates
and
provincesrequirebrakes
and
safety chains
on
towed vehicles. Consult
the
proper
authoritiesin thestates
or
provinces
through which you will
be
traveling.
You
mustconsiderotherimportantweightfactors ifyou
expect to pull a trailer, tow dolly,
or
another vehicle
behindyourmotorhome.Thesefactorshavelimitations
just like the weight factors above. These factors are:
GCWR-Gross
Combined Weight Rating
GTW-Gross
Towed Weight
MTW-Maximum
Tongue Weight
GAWR-Rear-Gross
AxieWeightRating-Rear
axles
or
axles (if equipped with tag axles)
The ratings forthese factors are all listed on the ward·
robe doortag.
If you expect to pull a vehicle with your motor home,
there are additional guidelines that you must follow:
•
Do
not
use a
load
equalizing hitch. It could
cause structural damage
to
the motorhome
frame components.

6
•
•
Limitthe tongue weight
of
the trailer
or
towing
deviceto the
MTW
aslistedon the ratings tag.
Heavier tongue weights can damage
your
motorhome frame
and
body, cause unstable
driving
and
handling characteristics,
and
will
restrict
your
coverage under the Ownercare
warranty.
Do
not
towa vehicle weighing more than the
GTW
listedon the wardrobe doortag. Heavier
towed loads can cause braking problems,
damage the motor home structure
or
drive
train, causeunstable driving
or
handlingchar-
acteristics, and restrict
your
coverage under
the Ownercare warranty. Changing the trailer
hitch willnot increase the towcapacity
of
the
motorhome.
The way your motor home handles will be affected by
the way the towed unit is loaded. Ifthe tongue weight is
too lightin relation
to
the GTW, handling problems can
result. Careful load planning and safe experimentation
with different loading patterns can help improve motor
home handling stability and make your driving and
towing experience more enjoyable.
WARNING
DO NOTEXCEEDTHE RATED LOAD OFTHE
MOTOR HOME, OR THE RATED LOAD OF
ANYAXLE.EXCEEDINGTHE GVWR, GAWR
OR GCWR OF YOUR MOTOR HOME
WILL
REDUCEYOUR WARRANTY PROTECTION,
CAN CAUSE UNDESIRABLE HANDLING
CHARACTERISTICS AND
MAY
CREATE A
SAFETY HAZARD.
Carrying
Capacity
and Load
Distribution
The
allowable carrying capacity of the motor home is
thedifferencebetweenthe GVWRandthe weightofthe
empty motor home. When the motor home is being
designed, the number and size of storage compart-
ments, the liquid tank capacities and number of beited
seating positions.,are maximized for value and conve-
nience.lfyoufill all liquidtankstocapacity, fill all storage
compartmentsand cupboardsto maximumvolumeand
fill all available seating positions with passengers, the
motorhome will
be
overloaded.The numberof passen-
gers and placement of cargo will affect the amount of
water and cargo that you can carry (See
"Loading
Tips").
In
addition to knowing the overall weight that can be
safely loaded in or attached to the motor home, you
must know how
to
distribute the w'eight so that correct
amounts of weight are placed on the axles. When the
load isproperlydistributed,yourmotorhomewill handle
better, and you as the driverwill be more confident and
comfortable.
Ifyour motorhome is improperly loaded, drivingwill be
more uncomfortableand much of yourdriving attention
will be given to correcting vehicle wandering, drift, pull
and sudden directionalchangescaused bywind blasts.
If the front axle load is below 80-85% of the front axle
capacity, these handling discomforts will
be
more no-
ticeable. Always aim to load your motor home so that
the front axle is loaded to at least 80-85% of the front
GAWR.
Note: Carrying capacities
of
your
motorhome
are specifiedon a label affixed
to
the inside
of
a wardrobe door.
The
label includes allfactory
installed options.
If
other equipment such
as
leveling jacks, awnings, roof pods, etc., are
installed
after
the motorhome leaves the fac-
tory,
the weight
of
these items must be sub-
tracted from the total
of
the passenger and
cargo carrying capacities.
How
to
WeighYour Loaded
Motor
Home
Without
aTrailer
or
Other
Towed Load
Refer to your local telephone directory to find a public
weigh station. The following procedures'will help you
determine whetheryour loaded motor home (complete
with cargo, fluids, passengers, and driver) is within
GAWR, GVWR, and GCWR limits. When you arrive at
aweighstation,theattendantwill guideyou through the
correct positioning of the motor home on the scales.
1.
Center the front wheels on the scale platform
andtakea reading.ThisisthefrontGrossAxle
Weight (Reading 1).
2. Centertheentire motorhome(all axles) onthe
scale and take a reading. This is the Gross
Vehicle Weight (Reading 2).
3. Centerthe rear axle (orboth rear axles ifyour
motorhomeis equippedwith tagaxles) on the
platform and take a reading. This reading is
the rear Gross Axle Weight (Reading 3).
Comparethe readings taken on the scalestotheweight
ratings on the Federal certification tag and wardrobe
doortag. Fill in the chart
althe
backofthis manual to aid
in comparing weights.
If any readings are higherthan the rating, you will have
to adjust or remove the load.

s.a:
..
-
Xfflam:-
:
How
to
Weigh Your Loaded
Motor
Home
With aTrailer
or
OtherTowed Load
1.
Center the front wheels
on
the scale platform
andtake a reading.Thisisthe frontGrossAxle
Weight (Reading 1).
o
2.
Centerthe entire motorhome so that only the
motor home is being weighed. Leave the
trailer hitched to the motor home, but resting
off of the scale (Reading 2):
c::J
3.
Center both
the
motor home
and
the
trailer
combination
on
the scale
and
take a reading.
Thisis
the
GrossCombinedWeight(Reading
3).
c::J
MOTOR
HOME READINGS
(from
tags)
4. Subtract Reading 1 from Reading
2.
This is
the rear Gross Axle Weight.
o
7
Comparethe readingstaken
on
thescalesto
the
weight
ratings
on
the Federal certification tag and wardrobe
doortag. Fill in thechartatthe back
of
this manualtoaid
in
comparing weights.
If any readings are higherthan the rating,
you
will have
to adjust
or
remove the load.
If you
exceed
weight
ratings,
you
will:
•
•
•
•
Causedamagetothe motorhome, drivetrain,
or
chassis
Cause unstable driving and handling charac-
teristics
Cause unsafe braking
Reduce your warranty protection.
Since you may load your motor home differently for
different trips, loading and weight patterns will change.
Periodically reweigh your motor home
and
log the
weights in the backof this manual. Refer to your log as
you prepare to load for future trips.
Loading
Tips
•
•
•
Do not load heavy items
in
upper cabinets.
Secure and brace items so they wont move
during travel, thereby shifting the load.
Do notload heavyitems neareither
end
ofthe
motor home
or
on the bumpers.
GVWR MOTOR HOME SCALE READINGS
Reading 2
__
~
__
Front GAWR FRONT AXLE Reading 1
____
_
Rear GAWR REAR AXLE Reading 3
____
_
Hitch Rating TOWED VEHICLE Reading 4
____
_
GCWR COMBINED VEHICLES Add 2 and 4
___
_

!
•
•
•
•
Adjust cargo storage to keep the side to side
wheel loads as equal as possible.
Fresh water and waste water weigh over
pounds per gallon. Carry only as much water
asneededfortravel useortobalancetheload,
and whenever possible, empty the holding
tanks before traveling.
WARNING
MODIFICATION
OF YOUR
VEHICLE
BY
ADDITION
OF
RACKS
NOT
ORIGINALLY
EQUIPPED
BY
THE
MANUFACTURER
TO
CARRY
ADDITIONAL
EQUIPMENT,
VEHICLES
OR
CARGO
WILL
REDUCE
YOUR
WARRANTY
COVERAGE
AND
MAY
CAUSE
PERSONAL
INJURY
OR
PROPERTY
DAMAGE.
Makealoadingdiagramofyourproperlyloaded
motor home. This diagram and your loading
log will help you locate where specific items
are stored, and will help speed the loading
process.
Storeemergencyitems
in
areadilyaccessible
location.Includeafire extinguisher, tools, first
aid kit, rain gear, flashlight, highway warning
devices, and
an
electric cord with light.
WARNING
DO NOT STORE
OR
CARRY LP GAS CON-
TAINERS, GASOLINE,
OR
OTHER FLAM-
MABLE
LIQUIDS INSIDE YOUR MOTOR
HOME.THE CONTAINERS
MAY
LEAK.
TIRES
Your motor home is equipped with truck tires. Under
normal circumstances and with proper maintenance,
you
should receive thousands of miles of trouble-free
service.
Tire
Inflation
For safety and maximum tire life, proper inflation pres-
sure must be maintained. Properly inflated tires also
contribute to overall motor home stability and safety.
Refer to the tire section
in
your Chassis
Operator's
Manual for information on maintenance and tire care.
Theproperinflationpressuresare stated onthe Federal
Certification
Tag
locatedonthesidewall nearthe driver's
seat
WARNING
FOR SAFETY AND MAXIMUM TIRE LIFE,
CHECKTIREPRESSURESOFTEN (lNCLUD-
INGTHESPARE).
PAY
SPECIALATTENTION
TO INSIDE REAR DUALS. ALWAYS CHECK
PRESSURE WHEN TIRES ARE COLD, AND
DO NOT BLEED AIR OUT
OF
WARM TIRES.
FOLLOW THE TIRE PRESSURE INSTRUC-
TIONS
IN THE CHASSIS OPERATOR'S
MANUAL.
Note:Checkthe wheellugnuttightnessperiodi-
cally. They could work loose during driving.
Check the Chassis Operator's Manual for cor-
rect lug
nut
torque andtorquing procedure.
Tire
Replacement
Replacementtires must
be
the same size, and have at
leastthe same weight carrying capacity as the original
equipment.All tires ofthe same size and rating maynot
have the same weight carrying capacity. Consult your
tire dealer. The original equipment tires supplied on
your motor home have weight carrying capacities to
supportGross Axle Weight Ratings (GAWR) asstated
on the Federal Certification
Tag
located on thesidewall
nearthe driver's seat.
If
You Get a
FlatTire
In case of sudden tire failure:
•
•
•
•
•
•
Avoid heavy brake application
Gradually decrease speed
Holdthesteeringwheelfirmlyand moveslowly
to a safe, off-road place
Park on a firm level spot
Turn off the ignition
Turn on the hazard flasher system
Spare
Tire
Carrier
On somemodels, the spare tire carrieris located under
the rear of the motor home between the frame rails.
WARNING
TRUCK
TIRES AND WHEELS
ARE
EX-
TREMELY HEAVY AND
MAY
WEIGHT
100
POUNDS
OR
MORE.
DO
NOT ATTEMPT
TO
REMOVE THE SPARE TIRE UNLESS
YOU
ARECAPABLEOFHANDLINGTHEWEIGHT.

Changing
a
FlatTire
Even with good tire maintenance and normal driving,
you may experience a flat tire. Summon professional
help through your auto club, travel service,
or
a local
truck service facility.
Your
motor home is not equipped
with a jack
or
other lifting device. Do not attempt to lift
the motor home with a jack. Consult the
Chassis
Operator's
Manual for additional information on tire
inflation and proper torque.
WARNING
TO AVOID PERSONAL INJURY AND/OR
PROPERTY DAMAGE IF A BLOWOUT OR
OTHER TIRE DAMAGE OCCURS, OBTAIN
EXPERTTIRE SERVICE HELP.
DO
NOT
AT-
TEMPTTO CHANGETHETIRE YOURSELF.
WARNING
TRUCK
WHEELS AND TIRES
ARE
EX-
TREMELY HEAVY AND MAY WEIGH 100
POUNDS
OR
MORE.
DO
NOT ATTEMPT
TO
REMOVE THE SPARE TIRE UNLESS
YOU
ARECAPABLE
OF
HANDLINGTHEWEIGHT.
SEATS AND SEAT BELTS
Driver/Passenger Seats
The
driver'sand passenger's seats offerdifferent posi-
tion/comfort adjustments:
WARNING
DO NOT ADJUST THE SEAT POSITION
WHILE THE VEHICLE
IS
IN MOTION. YOU
MAY LOSE CONTROL
OFTHE
VEHICLE.
Forward/Back
-Theforward/backleverIs located
underthe front left of the seat. Pull the lever
toward the left outside of the seat to unlock.
Release the lock lever to secure the seat
position.
Swivel
-The swivel lockleveris located underthe
frontrightoftheseal. Lifttheleverforward and
up to swivel. The seat locks in the center,
forward position.When unlocked, theseatwill
SWivel
freely around to the center position.
Recline-The recliner leveris located on the right
arm rest.
Seat
Belts
Seat belts are an important safety feature of your
vehicle. Foryourprotection, always useyourseatbelts.
9
The driver's seat and other seats designed to carry
passengers while moving have been equipped with
seat belts.
WARNING
ALL
RIDERS SHOULD
USE
SEAT BELTS
WHILE THE VEHICLE
IS
IN
MOTION. NEI-
THERSEATSWITHOUTSAFETYBELTS NOR
BEDS SHOULD BE OCCUPIED WHILETHE
VEHICLE IS IN MOTION.
Adjust seat belts as follows:
To
fasten
belt, be sure itis noltwisted,then push
the tongue end of one belt into the buckle of
the mating belt. Be sure it latches. For great-
estsafety, adjustthe beltsnugly asIowanthe
abdomen as comfort will allow.
To release
the
belt, depress the button
in
the
center of the buckle and slide the tongue out
of the buckle. Never use a belt for more than
one person at a time.
Child
Restraint
All vehicle occupants, and especially children, should
be restrained whenever riding
in
vehicles. Holding a
child in your arms is not a substitute for seat belts
or
a
child restraint system. Child restraint systems are de-
signed to
be
secured in the vehicle seats by lap belts.
Children could be endangered
in
a crash if their child
restraints are not properly secured
in
the vehicle.
When using anychild restraintsystem,
be
sure to read
and follow all instructions on installation and use that
come with the system.
When securing a child restraint with a lap belt that has
no retractor, pull the excess webbing through the ad-
justment mechanism.
If the child restraint is still not secure, use a different
seating pOSition in the vehicle and/or contact your
dealer and the child restraint manufacturer for help.
DRIVING AND PARKING
Once you become accustomed to the feel of the con-
trolsandthe referencepointsfrom the driver'sseat,you
will find driving a motor home comparable to driving
yourfamily car. Become familiarwith the position ofthe
motorhome in traffic, and becautious when maneuver-
ing to allow for the length and width of the vehicle.
Always allow room to corner and to change lanes.
Learn to usethe side and rearview mirrors to viewthe
road behind.

10
Rememberthat your motor home is heavierthan a
car,
making it less maneuverable and harder to stop. Also,
because of it's greater side surface area, it is more
easilyaffected bycross winds. Allow extradistancesfor
passing and stopping, and drive at a moderate speed,
particularly
in
traffic and
in
gusty wind conditions.
Driving on winding or mountain roads is not difficult if
done with reasonable care. Observe proper vehicle
speedswhen ascending
or
descendinghillsandalways
operate
in
the propertransmission range. Downshifton
hillsto avoid overheating
or
undueengineloads.Down-
shift when descending grades. Engine braking power
will help control vehicle speed, and relieve some ofthe
strain on the brakes.
Mountain driving or desert temperatures can put ex-
treme demands on chassis components. Under ex-
treme use conditions you may need to turn off the
vehicle airconditionerto improve engine and transmis-
sion cooling.
Be
aware ofthe extraheightofyourmotorhome.Check
for low hanging tree branches
or
other obstructions
whenever you drive
or
park.Avoid lowoverhangs when
pulling in for service. Always check overhead clear-
ances of overpasses and bridges.This may be particu-
larlyimportantifyou drivewiththeoverheadvents open
or
if the motor home is equipped with a roof air condi-
tioner, roof rack, CB
or
TV/radio antenna. Before leav-
ing
on
a trip, check your route. Some tunnels prohibit
motor homes with
LP
gas systems.
When parking parallel to a curb, be sure to allow for
poles or obstructions as the front and rear portions of
the motorhome swing widerthan an automobile.When
parking on an incline, turn thefrontwheel into the curb
in
the direction ofthe roll toaidthe parking brake.When
parking, always shift the transmission to PARK ("P")
and set the parking brake, if applicable.
WARNING
DO
NOT PARK OR IDLETHE MOTOR HOME
OVER COMBUSTIBLE MATERIALS SUCH
ASTALLGRASS
OR
DRIED LEAVES.THIS
IS
PARTICULARLY IMPORTANT IF THE EX-
HAUST SYSTEM HAS NOT BEEN PROP-
ERLY
MAINTAINED. COMBUSTIBLE MATE-
RIALS
MAY
CATCH FIRE FROM HOT EX-
HAUST GASES, SOOT OR SPARKS THAT
COULD ESCAPE THROUGH CORROSION
HOLES
OR
CRACKS.
If operating, parking
or
idling your vehicle off-road is
unavoidable:
Be
aware that combustible materials could catch
fire from the vehicle's hot exhaust system.
Keep a fire extinguisher handy.
Avoid driving your vehicle through
or
over com-
bustiblematerialssuchas leaves, grass, vege-
tation
or
stubble high enough to touch, catch
or collect on its hot exhaust system.
Parking or idling should be done only in an area
where there are no combustible materials
under tl\e vehicle.
FUEL AND FUEL SYSTEMS
See the Chassis Operator's Manual
in
the
Owner's
Information
Package for chassis fuel recommenda-
tions.lfyour motorhome is equipped with a generator,
seethe generatoroperatinginstructionsinthe
Owner's
Information
Packageforfuel and maintenancerecom-
mendations.
Fuel Fill
The fuel filler cap is located toward the rear of the
coach. Modern fuel systems may build up vapor pres-
sure within the tankas the gasoline warms during use
or
hot weather. Under certain conditions, sudden re-
lease ofthis pressure when removing the gasoline cap
can cause gasoline to spray from the fill opening,
creating a fire hazard.
WARNING
WHEN REMOVING THE GASOLINE CAP,
ROTATE
SLOWLY ONLY FAR ENOUGH
TO
ALLOW PRESSURE
TO
RELEASE. AFTER
"HISSING"SOUNDSTOPS,COMPLETETHE
REMOVAL OFTHE CAP.
To
protectthegasolinesystemfrom excessivepressure
orvacuum,
or
from suddenrelease ofpressure, replace
lost or damaged caps with caps of the same design
which are available from your Fleetwood motor home
dealer.
Clean upfuel spills immediately. Rawfuel spilled on the
motor home could damage the exterior finish, and
is
a
serious fire hazard.
FuelTypes
and
Vapor
Lock
Your motor home's automotive fuel and emissions
systems are sophisticated and highly engineered to
meet Federal and State emissions standards.They are
sometimes sensitive to fuel types and blends, particu-
larly fuels blended for certain altitudes and climates.
Fuel suppliers provide customers with the correct fuel
for their location and seasonal conditions. Sometimes,

12
Carbon
Monoxide
Detector
Your motor home is equipped with a carbon monoxide
(CO) detector. It is Usuallylocated in the main sleeping
area.
If the indicator sounds, it
is
an
indication that carbon
monoxide gas is present.This mayoccurwhileidling in
hightrafficconcentrations where othervehicles as well
as
your motor home are contributing to the carbon
monoxide level in the surrounding air. Sounding
of
the
alarm does not indicate a faulty alarm.The detector is
doing its job of warning you
of
potentially high concen-
trations
of
carbon monoxide. See the section on Car-
bon
Monoxide
in this manual.
Test the CO detectorafterthe motorhome has been in
storage, before each trip, and
at
least once a week
during use. Replace the sensor and battery when
necessary.Do not replace the batterywithoutreplacing
the
sensor. Sensors
are
available
through
your
Fleetwood dealer.Please referto the operating instruc-
tions included in your Owner's
Information
Package.
EMERGENCYTOWING
Consultyourchassis operator's manual forinformation
on safe and approved towing procedures. Most tow
truckoperatorswilling and able totow motorhomeswill
be familiar with these procedures. Be prepared to give
thetow truckoperatorat leastthefollowing information
when you call:
Length and height
of
motor home
Chassis manufacturer
Gross vehicle weight rating
CAUTION
Do
not
tow
the
motor
home
from
the
rear.
Towing
from
the
rear
will
cause
serious
overloading
of
the
front
tires
and
suspen-
sion,
possibly
resulting
In
tire
or
front
sus-
pension
failure.
The
rear
frame
extensions
are
not
designed
to
withstand
the
loads
imposed
by
lifting
from
the
rear.
Thevehicle must be towed from the front, eitheron the
rearwheels (if operational)
or
on a heavyduty dolly,
or
transported on a flat bed trailer. Consult your
Chassis
Owner's
Manual.
To
prepare your motor home for towing:
1. Secure any loose or protruding parts
of
the
disabled vehicle.
2. Secure any heavy, loose items in the interior.
3. Turn off LP gas appliances and the LP gas
tank valve.
4. Do not allow any person to ride in the towed
vehicle.
ATTACHING ACCESSORIESTO
YOUR MOTOR HOME
The walls in your motor home are constructed with
Vacu-bond® lamination technology. Structural mem-
bersarelocatedspecificallytomountandattach factory
installed components and accessories, andmay
not
be
locatedto supportafter-marketaccessoriesnotspecifi-
cally designed for use
on
or in
your
motor home.
Please consult with your dealer before attempting to
install
or
mount accessories on the sidewalls
of
your
motor home. Holes drilled in the sidewall may cause
damage, and may affect portions
of
your warranty
coverage.
ENGINETEMPERATURE GAUGES
Engine temperature gauges have been calibrated
to
indicate a midrange reading as the "normal" operating
temperature. The reason for this is that many owners
perceive 212°Fasthe boiling point.However, this isnot
thecasein an enginewithapressurizedcoolingsystem
and a coolant mixture of glycol and water. As a motor
home owner, be aware that the gauge is intended to
providea warning
of
anyrapid changeinenginecoolant
temperature from the "normal" reading
of
the gauge
rather than an absolute temperature reading.

though, fuel blended for winter is supplied during sum-
mer months.
'Vapor
lock" occurs when gasoline vaporizes, and va-
por
pockets block the flow of liquid fuel
to
the engine. If
you experience engine stall or stutter, you may be
experiencing vapor lock. Ifyourengine and fuel system
are properly tuned and maintained, you should not
experience this problem. If vapor lock occurs, the fuel
itselfcould bethe cause. Ifatall possible,checkwith the
service stationoperatorasto the fuel blend before filling
yourfuel tank. Ifyou purchase yourfuel from nationally
recognizedfuel dealers, yourchances ofvaporlockcan
be reduced. If you store your motor home during the
wintermonths, be awarethatwhenyou take the vehicle
out ofstorage in the spring or summer, winterfuel may
cause vapor lock until it is consumed.
GENERAL
CHASSISTOPICS
Variable Speed Engine Fan
When the engine is under load or requires maximum
cooling, the enginefan adjusts and turns faster.The fan
may become verynoisy athigh speed and when maxi-
mum cooling is required. High speed fan noise can
sometimesbemisinterpretedastransmission slippage.
This is not the case. High engine speed and tempera-
ture conditions, such as pulling away from a stop after
long freeway driving, can cause loud fan noise until the
engine cools down.This fan noise indicatesthat the fan
is doing what it is supposed
to
do. This noise is not a
defect in the fan
or
the transmission.
Exhaust
System
Heat
Yourmotorhome engine has been designedtoconform
to Federal and State emission requirements.
To
meet
these requirements, engine operating temperatures
are high. As a result, the engine and exhaust system
radiate a great deal of heat
Special heat shields are built into your motor home to
protectwiring and othercomponentsfrom possible heat
damagecaused
by
the exhaust system. Do notremove
these shields, modify the exhaust system, or add addi-
tional equipment, such as wiring, plumbing, or other
components, which will
be
affected by exhaust system
heat.
CARBON
MONOXIDE
SAFETY PRECAUTIONS
Carbon monoxide is a colorless, tasteless, odorless
gas. It is a by-product of combustion
in
engines. The
engines in your motor home and generator system
11
produce itconstanlly while they are running. CARBON
MONOXIDE IS
DEADLY.
Please read and understand
the following precautionsto protect yourselfand others
from the effects of carbon monoxide poisoning.
WARNING
EXHAUST GASES ARE DEADLY. DO NOT
BLOCK
THE TAILPIPES OR SITUATE THE
VEHICLEINA PLACEWHERETHEEXHAUST
GASES HAVE ANY POSSIBILITY.OF ACCU-
MULATING
EITHER OUTSIDE,
UNDER-
NEATH,OR INSIDEYOUR VEHICLE OR ANY
NEARBY
VEHICLES. OUTSIDE AIR MOVE-
MENTS CAN CARRY EXHAUST GASES IN-
SIDE THE VEHICLE THROUGH WINDOWS
OR OTHER OPENINGS REMOTE FROMTHE
EXHAUST
OUTLET.
OPERATE
THE
ENGINE(S)ONLYWHEN SAFE DISPERSION
OF
EXHAUST GASES CAN BE ASSURED,
AND
MONITOR OUTSIDE CONDITIONS
TO
BE
SURE THAT EXHAUST CONTINUES
TO
BE DISPERSED SAFELY.
Beware of exhaust gas (carbon monoxide) poisoning
symptoms:
Dizziness
Vomiting
Nausea
MuscularTwitching
Intense Headache
Throbbing in Temples
Weakness and Sleepiness
Inabilityto Think Coherently
Ifyou
or
othersexperience any ofthese symptoms, get
out into the fresh air immediately. Ifsymptoms persist,
seek medical attention. Shut down the unit and do not
operate until it has been inspected and repaired.
WARNING
DO NOT UNDER ANY CIRCUMSTANCES
OPERATE ANY ENGINE WHILE SLEEPING.
You
would not be able to monitor outside conditions to
assure thatengine exhaust does not enterthe interior,
and you would not be alert to exhaust odors or symp-
toms of carbon monoxide pOisoning.
Do not operate an engine with a damaged exhaust
system. Check the system frequently for damage. Do
not under any Circumstances modify the exhaust
systems(s) in any
way.

,
,
!
13
LIVING WITH YOUR
MOTOR HOME
MANUAL
ENTRY STEPS
Entry steps are located under each entry door.
To
extend the manual step pull step assembly out; let it
down completely. Push step all the way in to store.
WARNING
THE DISTANCE BETWEEN THE MOTOR
HOME AND THE GROUND IS TOO FAR TO
EASILY MANAGE. BE SURE THE STEP IS
OUT
BEFORE EXITINGTHE MOTOR HOME.
ENTRY ASSIST HANDLE
An entry assist handle is located outside each entry
door.
ENTRY DOORS AND SCREENS
Thescreendoormay
be
separatedfromthe main entry
door
by
depressing the catch
or
releasing the magnet.
Aholdbackmechanism can be used
to
securethe main
door against the side ofthe motor home.
WINDOWS
Windowsin your motorhome are eitherslider
or
torque
panetype. Sliderwindows maybelocked
by
turningthe
lock knob. Torque windows may be opened and ad-
justedbytumingthe knob
or
cranklocated
althe
bottom
of the window.
Emergency
Exit
Window
READ AND UNDERSTAND THESE INSTRUCTIONS
BEFOREYOU NEED TO USE THEM.
The
emergency
exit window provides an emergency means
of
escape
if
the motorhomedoorsare blocked
or
disabledforany
reason
or
in case the motor home must be evacuated
under emergency conditions.
To
release the window,
follow the instructions attached to the window frame.
Side
SliderWindows
Turn lock, slide window and/or screen to open and
close.
NOTE:Screensare
not
removable forcleaning.
They maybe pushed out
of
their frames
if
the
windowmustbeusedforemergencyexit. In this
case, the screens will be destroyed
and
will
probably have
to
be replaced.
SUN
VISORS
The
sunvisorsatthedriver'sand passenger'spositions
swing down and adjust to provide relief from glare and
bright skies.
Swivel tension may
be
adjusted with a screwdriver at
the tension adjusting screw.
MINI-BLINDS
To
raise
mini-blinds:
Release bottom
of
blind from
retainer. Pull straight down on cord and release at
desiredheight. Itisnotnecessaryto pullthecord
to
one
side
or
the other to secure blind.
To
lower
mini-blind:
Pull straight down on the cord
slightly, and move itabout 45 degrees to either
the
left
or
right and lowerthe blind. Stop the blind in mid-travel
by
moving it back to the straight down position. Reat-
tach the retainers when traveling.
To
adjust
the
angle: Turn the adjusting rod either
direction.
STORAGE
Exterior
Compartments
Exterior storage compartments maximize available
space and should accommodate mostofyour storage
needs.All ofthe storage compartments, exceptthe
LP
gas
and generatorcompartments, can be locked. Fire-
prevention regulations require that the LP gas and
generatorcompartments be unlocked at all times.

14
Note:Your motorhomecouldbe overloaded
or
out
of
balance
if
notproperly loaded. Refer to
the "MotorHome Loading"section
in
this man-
ual,
and
follow the loading
and
weighing in-
structions in that section. When storing equip-
ment
and
supplies:
Always keep tools and equipment stored
in
areas
where they will not shift while traveling.
Whenever possible, place heavy articles
in
stor-
age compartments which are low and
in
the
best location for better weight distribution.
Pack articles carefully in the storage compart-
ments to minimize shifting. If necessary, use
straps to prevent movement.
Be sure liquid containers are capped and cannot
tip
or
spill. Secure all glass containers and
dishes before traveling.
Exteriorstorage compartments may not
be
water-
tight in all climate conditions. Carry any ar-
ticles which could be damaged by water in-
side the motor home.
WARNING
DO NOT STORE FLAMMABLE, VOLATILE
LIQUIDS OR HAZARDOUS CHEMICALS IN-
SIDE THE MOTOR HOME OR
IN
OUTSIDE
STORAGECOMPARTMENTS.TOXICFUMES
FROMTHESELIQUIDSORCHEMICALS
MAY
ENTER
THE INTERIOR OF THE MOTOR
HOME.
Interior
Storage
The closets and cabinets have friction catches
or
hid-
denlatches along one edge ofthe door. Pressthe latch
to
open the door. Overhead doors may have supports
to
hold them open.
Drawers restin notches when they are closed.
To
open
drawers, lift up slightly, then pull open.
Closetsmaybeequippedwith 12-voltlightsthatmaybe
switchedtoturn ONwhentheclosetdooris opened. Be
surethe light goes
OFF
when the closet dooris closed
-yourbatterywillbedischargedifitstaysON. Ifthe light
stays
on
when the door is closed, the door switch
requires adjustment. The same loading considerations
apply to interior storage areas as to exterior. Consult
the
"Motor
Home
Loading"
section
in
the
"ON
THE
ROAD"
chapter.
INTERIOR AND FURNISHINGS
The materials used insideyourmotor home have been
selected for durability and comfort. With reasonable
care, these materials will stand up under years of
recreational living. The "MAINTENANCE" chapter in
this manual outlines care requirements for the various
upholstery fabrics, floor, cabinet, and wall finishes.
Dinette
Conversion
To
convert the dinette into a bed:
Unfasten
and remove cushions.
Reach
under
the table, either remove leg or fold
up under
the
table top.
Raise front portion
of
table several inches to
disengage inserts from the wall supports.
Lower
table top to the dinette frame to complete
bed base.
Slide
seat and back cushion into place over bed
base.
Sofa/Lounge
Conversion
To
convert a sofa/lounge into a bed:
Remove
sofa bolsters.
lift
front
of
sofa frame up and out.
Push
the back
of
the lounge back and down.
Push
the
seat belts through the space between
the lounge back and seat.
To
restore the sofa/lounge:
Pull
the
seat belts back up through the space.
lift
the front edge
of
the sofaframe up, and push
it back.
The
sofa backwill come up.
Push
the sofa into position.
Folding
Doors/Privacy
Curtain
Dividers
The dividers allow you to separate areas in the motor
home.
They
glide
on
nylon rollers and
do
not require
lubrication.
They
are held closed by a catch. When the
dividers are open
for
traveling, be sure to attach the
hold back straps to keep them from sliding back and
forth.
- -
.~~-~-~-~.
--,
.'
Table of contents
Other Jamboree Motorhome manuals