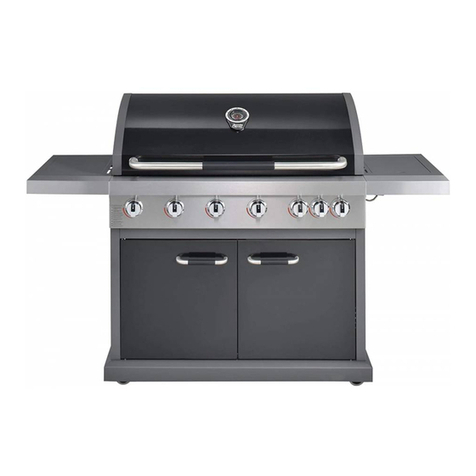
Jamie Oliver Classic 3S User manual

G2140D3 | G2140D5 | G2140XX
EN | FR | DE | IT | NL | SE | DK | FI | NO
01809
4S
CLASSIC

2
1
2

2
3
3
4
4 x B

4
5
4 x A
6

4
5
7
4 x B
8
4 x B 2 x D

6
9
10
4 x B 2 x D
4xB
1xA

6
7
11
1 x A
12
2 x C

8
13
14

8
9
15
2 x A
16

10
17
18
✔

10
11
ExplodedView |Vue éclatée | Explosionsansicht | Vista esplosa | Opengewerkt beeld | Sprängskiss | Eksploderet visning | Räjäytyskuva | Perspektivsnitt
1
2
3
4
5
6
7
8
9
10
11
12
14
16
17
18
19
20
21
22
23
24
25
26
27 2830
29
31
33
34
35
36
38
39
37
40
41
42
43
44
45
46
49
50
51
52
47
48
53
54
55
56
57
15
26
6
58
4
32
13

12
UK
Single part list
No. Description Qty
1 Thermometer 1
2 Thermometer holder 1
3 Lid 1
4 Lid screw 2
5 Lid handle 1
6 Lid rubber stopper 4
7 Warming rack 1
8 Cast iron grid 240x450mm 3
9 Flame tamer 4
10 Burner xation 4
11 Main burner 4
12 Grease collector 1
13 Grease collector holder 1
14 Grease Tray 1
15 Firebox back panel 1
16 side burner cover axle 1
17 side burner cover 1
18 side burner grid 1
19 side burner 1
20 side burner insert 1
21 Side burner injector holder 1
22 Side burner injector base 1
23 Side burner ignition needle 1
24 Side burner gas tube 1
25 Right side table 1
26 Side table front 2
27 Cabinet left side panel 1
28 Cabinet front beam 1
29 Door magnet 2
No. Description Qty
30 Upper door hinge 2
31 Cabinet back panel 1
32 Cabinet bottom panel 1
33 Cabinet right side panel 1
34 Battery box 1
35 Lower door hinge 2
36 Door stopper 2
37 Gas bottle holder 2
38 Swivel caster holder 4
39 Swivel caster 4
40 Door handle 2
41 Door 2
42 LED lamp switch 1
43 LED panel connecting wire 1
44 LED panel 5
45 Knob base 5
46 Control knob 5
47 Control panel 1
48 Control panel front 1
49 Gas connector 1
50 Gas connector holder 1
51 Main burner pipe 1
52 Gas tube 1
53 Main burner valve 4
54 Side burner valve 1
55 Heat shield 1
56 Control panel holder left 1
57 Control panel holder right 1
58 Left side table 1

12
13
UK
Instruction for use
Read these instructions very carefully and ensure that your barbecue is properly installed, assembled, maintained and serviced according to
these instructions. Failure to follow these instructions may result in serious bodily injury and/or property damage. If you have any questions
concerning the assembly, operation or maintaining this barbecue, please consult your dealer, gas supplier, the manufacturer, agent or check
www.jamieoliverbbq.com for support.
Very important safety instructions
- Keep this manual in a save place for future reference.
- Use outdoors only.
- Read the instructions before using the appliance.
- WARNING: accessible parts may be very hot. Keep young children away.
- Do not move the appliance during use.
- Do not modify the appliance.
- Turn o the gas supply at the gas cylinder after use.
- Parts of the item may get very hot, always use protection gloves (heat protection class II, DIN-EN 407) to prevent injury.
- Domestic use only.
- Never light the barbecue with the lid closed.
- This appliance must be kept away from ammable materials during use.
- Any modication of the appliance may be dangerous.
- Parts sealed by the manufacturer or his agent must not be altered by the user.
Warnings:
- Do not store or use gasoline or mentholated fuels or any other ammable vapors and liquids in the vicinity of this or any
other appliance.
- Never light a gas grill with gasoline or comparable uids!
- Never change the assembly that the manufacturer packaged.
Mounting steps
Make sure your grill is assembled properly. Detailed assembly instructions are packed with each grill giving specic assembly procedures for
each model. Follow these instructions carefully to ensure the correct and safe assembly of the grill. Assembly your grill on a at, leveled even
surface to ensure an easy, smooth assembly.
Caution: Although we take every eort to ensure that the assembly process is as easy as possible, it is inherent with fabricated steel parts that
corners and edged can cause cuts if improperly handled during assembly procedures. Be careful while handling any parts during assembly. It
is strongly recommended to protect your hands with a pair of work gloves.

14
UK
Preparation
Hose and Regulator
This barbecue is only suitable for use with low-pressure butane or propane gas, tted with the appropriate pressure regulator and exible
hose. The pressure regulator must comply with EN 16129 in the current version and the national regulations. The correct operation pressure
of your barbecue can be found at the technical data overview at the end of this manual. The hose must be secured to the regulator and the
barbecue by using suitable hose clips, crimps or nuts. Please consult your local LPG dealer for information regarding a suitable regulator and
gas cylinder.
The use of the wrong regulator or hose is unsafe; always check that you have the correct items before operating the appliance. The length of
the hose must not exceed a maximum length of 1.5 meters. A worn or damaged hose must be replaced immediately. Ensure that the hose is
not twisted, obstructed, kinked or in contact with any part of the appliance other than its connections. The life time of the exible hose and
regulator is limited. Check the validity of the hose and regulator before every use, the validity is printed on the parts. National regulations
apply to validity of hose and regulator, please contact your local gas dealer for further information. We recommend to change the gas hose
latest after 2 years of use or if there is any sign of worn or damage.
Gas leakage test
Before rst use of your barbecue a gas leakage test must be performed. Always perform a gas leakage test when exchanging the gas bottle,
regulator or exible hose.
IMPORTANT: never use naked ame to check for gas leaks at the gas connections. If you smell gas, turn of the gas cylinder immediately.
Always check for leaks before using the appliance. DO NOT SMOKE!
Procedure:
- Prepare approx. 100ml of leak detection solution by mixing one part washing up liquid with 3 parts water.
- Ensure all control valves are in OFF position.
- Ensure the exible hose is connected securely to the gas cylinder.
- Connect the regulator to the gas cylinder.
- Ensure the regulator is connected securely to the gas cylinder.
- Apply the soapy leak detection solution to the exible hose and all joints.
- Turn on the gas cylinder
- If bubbles appear on the exible hose or joints you have leak witch much be xed before using the barbecue.
o Turn o the gas cylinder and x the leaks.
o Reaped the procedure.
o If the leak cannot be xed, do not attempt to x the leak but contact your local gas dealer.
Warning: Shut of the gas cylinder if you smell gas!
Gas Cylinder
The maximum diameter and the maximum height of the cylinder is Ø245 mm and 500 mm as shown in Figure 1. Use the gas cylinder in
upright position only! Connect the hose and regulator to the gas container at the right side of the gas grill.
Fig.1
1: maximum Diameter
2: maximum height

14
15
UK
The cylinder should not be dropped or handled roughly! If the barbecue is not in use, the cylinder must always be disconnected. Replace the
protective cap on the cylinder after disconnection the cylinder from the barbecue.
Cylinders must be stored outdoors in an upright position and out of the reach of children. The cylinder must never be stored where
temperatures can reach over 50°C. Do not store the cylinder near ames, direct exposure to sunlight, pilot lights or other sources of ignition.
DO NOT SMOKE!
Never t the cylinder right next to the barbecue. Always place the cylinder at the right hand side of the barbecue.The cylinder should be sited
as far away from the barbecue as possible, without straining the hose. The barbecue and the cylinder must be placed on a level surface and
must not be carried/transferred whilst alight. There is an increased risk of re when barbecuing. Always have a re extinguisher ready in case
of an accident or mishap. Turn o the gas supply at the cylinder after use.
Energy saving tips:
- Reduce the opening time of the lid.
- Turn the grill o as soon as the grilling is completed.
- Preheat the gas grill for 10 to 15 minutes only.
- Do not preheat longer then recommended.
- Do not use a higher setting than required.
Use and characteristics
This barbecue is safe and easy to use. The specied gases to use are butane, propane and its mixtures. Ensure you only use your barbecue at
the correct pressure the barbecue is designed for. Details for the operating pressure can be found at the rating label on the barbecue, or at the
technical details at the end of this manual. Please contact your local gas dealer or appliance shop for further information.
Food can be barbecued on the cooking grid either with or without the lid being closed. This barbecue may be used to cook food that is
suitable for barbecuing. Any other use is prohibited and may be very dangerous. Use of the appliance as a re place is also prohibited.
Wheels has been tted to this barbecue for easy maneuverability.
This barbecue is tted with a grease tray. Make sure to clean the grease tray before every use of the barbecue.
Adequate ventilation is vital for combustion and eciency performance of the barbecue. This will ensure the safety of the user and other
people in the direct area where the barbecue is being used. Never use the barbecue in any enclosed covered area.
The barbecue must not have any overhead obstruction. E.g. trees, shrubs, lean to roof. The barbecue must be installed with a clearance of
minimum 1.0m all around.
This barbecue must be kept away from ammable materials during use. (Petroleum based products, thinners or any other solid object that
carries a ammable warning label.)
Strongly recommends minimum clearances from combustible materials must be:
- Rear - 600mm
- Sides - 500mm
- Top - 1000 mm
600mm
500mm
500mm
1000mm
500mm

16
UK
Strong wind is not allowed to blow through the back of the gas grill.
Important:
When the wind speed is above 2m/s, don’t use the barbecue facing into the wind. The barbecue is designed for use outdoors only.
Turn o the barbecue at the cylinder valve or regulator after use.
Any modication to the barbecue may be dangerous and may cause injury or property damage.
Any unauthorized modication of the barbecue will invalidate the guarantee on this barbecue.
When the barbecue is turned on, never mount the cylinder under the barbecue on the base shelf as this could result in serious injury
to the user, other people and/or property.
Lighting your Barbecue
Lighting instructions main burner
1. Open the lid before lighting.
2. Connect the gas cylinder to the barbecue following the instructions supplied with the regulator.
3. Turn all the control knops to ‘O’position.
4. Turn ON the gas supply at the cylinder or regulator switch, following the regulator and operating instructions.
5. Perform gas leakage test, as stated on Page 14 . If there is a gas leak do not use the barbecue, consult your local gas dealer or
appliance supplier for advice.
6. To light the left hand burner, push the control knop, hold for 3-5 seconds and turn the left burner control knob anti-clockwise to
the 90° position (full rate position). An audible click will be heard, an orange ame of approx. 10cm length will appear, this should
light the burner. Check that the burner is alight. If the burner has not lit, repeat this process.
7. If the burner has not lit after two attempts, turn OFF the gas tap and wait 5 minutes before retrying the ignition sequence.
8. When the burner has lit, the burner rate can be adjusted by turning the knob anti-clockwise to any position between the full and
low rate position.
9. Light the remaining burners from left to right in sequence.
10. To turn OFF the barbecue, turn the cylinder valve handle or regulator switch to the ‘O’ position by following the regulator
instructions. Once the burners have extinguished turn all the control knobs to the‘O’position.
11. Turn OFF the gas supply at the cylinder or regulator switch.
Warning: If any burner fails to ignite, turn the control knop to the‘O’position (clockwise) and also turn the cylinder valve o.Wait ve minutes
before attempting to relight. Never bend over the grill when lighting it.
Warning : If the burner still does not light ,turn the burner control knob to” OFF” and wait 5 minutes to let the gas clear before lighting again.

16
17
UK
PUSH TO TURN
MAIN BURNER
Lighting instruction side burner (if applicable)
1.
Once the grill burner has been lit, the side burner can be lit by following the instructions below.
2.
Open the side burner lid before lighting the side burner and turn the side burner control knob to the ‘O’position.
3.
Push down the side burner control knob and keep pressing whilst turning anti-clockwise to the full rate position, an audible
click will be heard, this will light the burner. If the burner does not light, repeat this process.
4.
If the burner has not lit after two attempts, turn OFF the gas tap, wait 5 minutes and then repeat step 3 in main burner lighting
instructions.
5.
When the burner has lit, the burner rate can be adjusted by turning the knob anti-clockwise to any position between the full
and low rate position.
6.
To turn the barbecue side burner o, turn the cylinder valve or regulator switch to the‘O’position and then turn all of the control
knobs on the barbecue clockwise to the‘O’ position until the ames have been extinguished
Warning: If the burner fails to ignite, turn the control knob to the‘O’position (clockwise) and also turn the cylinder valve o. Wait ve minutes
before attempting to relight with ignition sequence. Never bend over the grill when lighting it.
Lighting instruction infrared burner (if applicable)
1.
Once the grill burner has been lit, the infrared burner can be lit by following the instructions below.
2.
Open the infrared burner lid before lighting the infrared burner and turn the infrared burner control knob to the‘O’ position.
3.
Push down the infrared burner control knob and keep pressing whilst turning anti-clockwise to the full rate position, push the
infrared burner ignitor to light the burner. If the burner does not light, repeat this process.
4.
If the burner has not lit after two attempts, turn OFF the gas tap, wait 5 minutes and then repeat step 3 in main burner lighting
instructions.
5.
When the burner has lit, the burner rate can be adjusted by turning the knob anti-clockwise to any position between the full
and low rate position.
6.
To turn the barbecue infrared burner o, turn the cylinder valve or regulator switch to the ‘O’ position and then turn all of the
control knobs on the barbecue clockwise to the‘O’position until the ames have been extinguished
Warning: If the burner fails to ignite, turn the control knob to the‘O’position (clockwise) and also turn the cylinder valve o. Wait ve minutes
before attempting to relight with ignition sequence. Never bend over the grill when lighting it.
Cleaning and care
ATTENTION: All cleaning and maintenance should be carried out only when the barbecue is cool and not connected to the gas cylinder.
Cooking grid
“Burning o” the barbecue grill bars after every use (for approx. 15min) will keep excessive food residues to a minimum. A barbecue cleaning
brush to removes food residues from the cooking grid. Use mild soapy water and a soft sponge to remove stains and other particles, rinse with
water. After cleaning apply a little plant oil to the cooking grid, using a paper towel, this will prevent corrosion on the cooking grid.

18
UK
Outside surface
Use mild detergent or baking soda and hot water solution. Non-abrasive scouring powder can be used on stubborn stains, then rinse with
water.
If the inside surface of the barbecue lid has the appearance of peeling paint, baked on grease build up has turned to carbon and is aking o.
Clean thoroughly a strong hot soapy water. Rinse with water and allow to completely dry. NEVER USE OVEN CLEANER.
Interior of barbecue bottom
Remove residue using brush, scraper and/or cleaning pad then wash with a soapy water solution. Rinse with water and allow to dry.
Plastic surfaces
Wash with a soft cloth and hot soapy water. Rinse with water. Do not use abrasive cleaners, degreasers or a concentrated barbecue cleaner on
plastic parts.
Grease tray
Do not open the grease tray during use.
When cleaning the grease tray, pull out the grease tray rst.
We strongly recommend to use tin foil on the grease tray before each use. The tin foil must be removed and the fat tray must be cleaned after
every grill session. Do not use your grill if the grease tray is lled over 1/3. Make sure your grill is cooled down before you clean the grease tray.
CLEANING THE BURNER ASSEMBLY
Turn the gas OFF at the control knob and disconnect the cylinder.
Remove cooking grid and ame tamers when cold.
Clean the burner with a soft brush or blow clean with compressed air and wipe with a cloth.
Clean any clogged ports with a pipe cleaner or sti wire (such as an opened paper clip).
Inspect burner for any damage (cracks or holes). If damage is found, replace with a new burner. Reinstall the burner, check to ensure that the
gas valve orices are correctly positioned and secured inside the burner inlet (venturi).
In some cases your barbecue will light back because of an insect crawling inside the burner venturi or a spider spinning its web inside the
burner. This can be xed by using a bottle brush inserted through the burner venturi and pushing through over the burner length. If condition
persists consult your gas dealer.
STORAGE OF THE BARBECUE
Storage of a barbecue indoors is only permissible if the cylinder is disconnected and removed from the barbecue. The barbecue should always
be stored in a dry, dust free environment. Use a Jamie Oliver barbecue cover to protect your barbecue, by using the cover you can ensure the
maximum life time of the barbecue.

18
19
UK
Servicing
Your gas barbecue should be serviced annually by a competent registered person.
Troubleshooting
Problem Solution
Appliance does not light, no ame,
burner fault
- Check whether the gas supply is turned on at the gas cylinder
- Make sure that there is enough gas in the cylinder
- Is there a kink in the exible hose? Straighten out the exible hose.
- Check if the spark of the ignitor hits the burner.
- Is it possible to light the burner with a long match? Check the ignition
system.
No spark at the ignitor - The distance between the burner and the electrode needs to be 5 – 8
mm. The tip of the electrode should be pointing to the center of a gas
exit hole of the burner.
- Clean and readjust the electrode to its correct position.
Uneven burner ame pattern - Clean the burners. Remove all residues of the burner.
- Check if the burners are dry at the inside and outside. Dry the burners
in case of water residues.
- Make sure there is enough gas in the cylinder.
Grill does not function properly - STOP! Turn OFF the gas cylinder and all control valves of the barbecue.
DO NOT SMOKE!
- Check all gas joints. Perform gas leakage test.
- Wait 5 minutes to allow accumulated gas to disperse, then restart the
lighting procedure.
- Burners are not t properly over the outlets. Fit burner exactly in center
of the outlets.
- Gas pipe is blocked. Remove the exible hose from the appliance. Turn
on the gas cylinder just for a second to remove blockage from the
hose. Turn o the gas cylinder and reconnect the hose to the appli-
ance. Perform gas leakage test before using the appliance again.
- Outlets blocked. Remove the burners. Check the gas outlets and use a
thin metal wire to remove any residues that might cause a blockage.
Install the burners again and try to relight the appliance. Follow the
lighting instruction.
- In case the appliance is still not working properly as your local appli-
ance dealer or an competent, registered person for further informa-
tion/help.

20
UK
Service and Contact:
In case you have any question, suggestions or complaints, please contact our customer service team. They are more than happy to help you
from Monday to Friday, between 8:00 am to 18:00pm.
To le a claim, please refer to the contact form at www.jamieoliverbbq.com or write to below mentioned address, attn. customer service. To
le a claim will require:
- Legible copy of purchase/sales recieped
- Barbecue model name and number (you can nd that information on the rating label at the appliance)
- Purchase date, store name/location
- Proper photographs of all the damaged parts listed in your claim. The photograph needs to be at least A5 size.
Email: [email protected]
Phone: 0031-85-0466269
Web: www.jamieoliverbbq.com, www.merison.com
Address: Merison Retail B.V.
Joop Geesinkweg 224
1114AB Amsterdam-Duivendrecht
The Netherlands
Electric power
The product uses 4 x 1.5V batteries to power the LED lights.
Battery type: AA 1.5V
Replacing the Battery
If the LED light is not working the batteries might be empty and need to be replaced.
- Open the lid of the battery box. The battery box is located at the right inner side of the cabinet.
- Remove the old batteries and replace them with new batteries, follow the battery direction (+/- orientation) as indicated
in the battery box.
- Close the lid of the battery box.
- The battery box can also be operated with rechargeable batteries
This manual suits for next models
2
Table of contents
Languages:
Other Jamie Oliver Grill manuals

Jamie Oliver
Jamie Oliver HOME SUPER User manual

Jamie Oliver
Jamie Oliver Pro 4s Deluxe User manual

Jamie Oliver
Jamie Oliver Home 2 User manual

Jamie Oliver
Jamie Oliver Pro 6 User manual

Jamie Oliver
Jamie Oliver Home 2 User manual

Jamie Oliver
Jamie Oliver Pro 4s Deluxe User manual

Jamie Oliver
Jamie Oliver C2240V User manual

Jamie Oliver
Jamie Oliver C2040V User manual

Jamie Oliver
Jamie Oliver Explorer 5500 User manual

Jamie Oliver
Jamie Oliver 550885 User manual