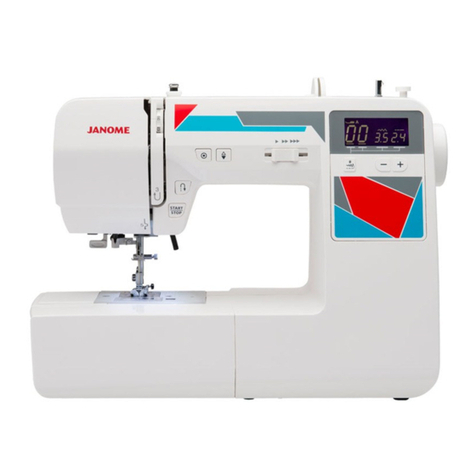
Janome J30 Troubleshooting guide

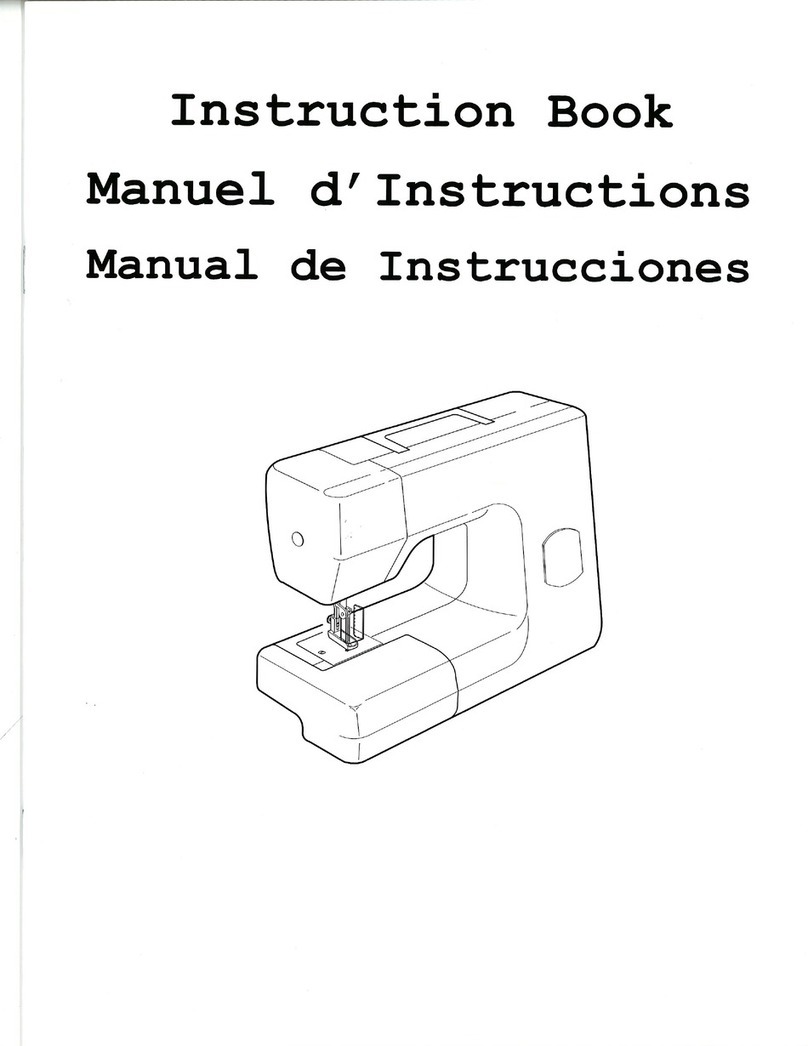
SERVICE MANUAL
&
PARTS LIST
MODEL: J30
First Edition: 12 February 2019

INDEX
WHAT TO DO WHEN.......................................................................................................................... 1-3
CHANGING EXTERNAL PARTS
FACE COVER .........................................................................................................................................4
FREE-ARM COVER ...............................................................................................................................5
FRONT COVER ......................................................................................................................................6
REAR COVER.........................................................................................................................................7
MECHANICAL ADJUSTMENT
PRESSER BAR HEIGHT ........................................................................................................................8
NEEDLE DROP POSITION.....................................................................................................................9
ADJUSTMENT OF HOOK TIMING .......................................................................................................10
ADJUSTMENT OF NEEDLE BAR HEIGHT..........................................................................................11
CLEARANCE BETWEEN NEEDLE AND TIP OF ROTARY HOOK ......................................................12
FEED DOG HEIGHT .............................................................................................................................13
TOP TENSION ......................................................................................................................................14
STRETCH STITCH FEED BALANCE ...................................................................................................15
REPLACEMENT AND ADJUSTMENT OF THE NEEDLE THREADER PLATE....................................16
ADJUSTING BUTTONHOLE LEVER POSITION..................................................................................17
SELF-DIAGNOSTIC TEST
SELF-DIAGNOSTIC TEST.............................................................................................................. 18-23
TO DISPLAY THE VERSION OF THE PROGRAM...............................................................................23
REPLACING THE ELECTRONIC COMPONENTS
PRINTED CIRCUIT BOARD A CONNECTION .....................................................................................24
PRINTED CIRCUIT BOARD A ..............................................................................................................25
PRINTED CIRCUIT BOARD F2 ............................................................................................................26
PRINTED CIRCUIT BOARD F1 ............................................................................................................27
PRINTED CIRCUIT BOARD L...............................................................................................................28
DRIVING MOTOR (DC MOTOR) ..........................................................................................................29
SWITCHING REGULATOR UNIT..........................................................................................................30
PARTS LIST .................................................................................................................................... 31-45
1
Condition Cause Howtox Reference
1. Skipping
Stitches
1. Needleisnotinsertedproperly.
2. Needleisbentorworn.
3. Incorrectlythreaded.
4. Needleorthreadare
inappropriateforthefabric
being sewn.
5. Sewingonstretchfabric.
6. Inappropriateneedlebar
height.
7. Inappropriateneedletohook
timing.
8. Inappropriateneedletohook
clearance.
Inserttheneedleproperly.
Changetheneedle.
Rethread.
Usetherecommendedsewingneedle
andthread.
UseaHAx#11bluetipneedle.
Seemechanicaladjustment“Adjustment
ofneedlebarheight”.
Seemechanicaladjustment“Adjustment
ofhooktiming”.
Seemechanicaladjustment“Clearance
betweenneedleandtipoftherotary
hook”.
P. 11
P. 10
P. 12
2. Fabricnot
moving
1. Incorrectfeeddogheight.
2. Feed dog is in down position.
3. Threadonbottomsideof
fabricisjammedup.
4.Feeddogteethareworn.
Adjustthepresserbarleveltomake
thepressurestronger.Seemechanical
adjustment“Feeddogheight”.
Raisethefeeddog.
Makesuretobringbothneedleand
bobbinthreadsunderthefootwhenstart
sewing.
Changethefeeddog.
P. 13
WHAT TO DO WHEN

2
Condition Cause How to Fix Reference
3. Breaking
upper
thread.
1. Initial sewing speed is
toofast.
2. Threadpathisincorrect.
3. Needleisbentordull.
4. Toptensionistoostrong.
5. Needlesizeisinappropriatefor
fabric.
6. Needleeyeisworn.
7. Needleholeinneedle plate is
wornorburred.
Startwithmediumspeed.
Usetheproperthreadpath.
Replacewithanewneedle.
Adjusttoptensioncorrectly.
Useappropriateneedleforfabricand
threadinuse.
Changetheneedle.
Repairtheholeorreplacetheneedle
plate.
4. Breaking
bobbin
thread.
1.Bobbinholderisincorrectly
threaded.
2.Toomuchthreadiswound
onthebobbin.
3.Lintisstuckinsidethebobbin
holder.
4.Threadqualityistoolow.
5.Threadisjammingaroundthe
bobbinholder.
Setthebobbinthreadcorrectly.
Adjustthepositionofbobbinwinder
stopper.
Cleanthebobbinholder.
Changetoahighqualitysewingthread.
Clearoutthejammingthread.
5. Needle
breaks
1.Needleishittingtheneedleplate.
2.Needleisbentorworn.
3.Needleishittingthehook.
4.Fabricisbeingpulledtoostrongly
whilesewing.
Seemechanicaladjustment“Needledrop
position”.
Changetheneedle.
Seemechanicaladjustment“Clearance
betweenneedleandtipoftherotary
hook”.
Guidethefabricgentlywhilesewing.
P. 9
P. 12

3
Condition Cause Howtox Reference
6.Noisy
operation
1. Backlashbetweenhookgear
andlowershaftgearistoo
great.
2. Lowershaftgearisloose.
3.Inappropriatebelttension.
4. Notenoughoil.
5.Uppershaftgearisloose.
Eliminatethebacklash.
Eliminatethelooseness.
Seepartremovalandreplacement
“drivingmotor(DCmotor)”.
Oilallmovingparts.
Eliminatethelooseness.
P. 29
7.Deformation
pattern
1.Inappropriatefeedbalance.
2. Toptensionistoostrong.
Adjustthefeedbalancingscrew.
Seemechanicaladjustment
“Toptension”.
P. 15
P. 14

4
CHANGING EXTERNAL PARTS
FACE COVER
To remove:
1.Removethecapandsetscrewqandliftthefacecovertodisengagetheribontheinside.
Removethefacecoverw.
To attach:
2.Followtheaboveproceduresinreverse.
q
w

5
FREE-ARM COVER
To remove:
1.Removethesetscrewqand w.
Movethefree-armcoveretotheleft.
Removethefree-armcover.
To attach:
Followtheaboveproceduresinreverse.
CHANGING EXTERNAL PARTS
q
w
e

6
CHANGING EXTERNAL PARTS
FRONT COVER
To remove:
1.Removethefacecoverandfree-armcover(Seepage4and5).
2.Removethesetscrewsq(2pcs.).
3.Removethesetscrewsw(4pcs.),backcovere.
4.Removethesetscrewsr(2pcs.).
5.Loosenthesetscrewt.
6.Disengagethefrontcoverandrearcoverhooks.
7.Removethefrontcover.
8.DisconnectalltheconnectorsfromthecircuitboardA.
NOTE:
Donotdisconnecttheconnectorsbypullingoncord.Todisconnect,grasptheconnector,notthecord.
To attach:
7.Followtheaboveproceduresinreverse.See"PRINTEDCIRCUITBOARDACONNECTION".(Page24)
q
ww
e
w
rr
t

7
CHANGING EXTERNAL PARTS
REAR COVER
To remove:
1.Removethefacecoverandfree-armcover(Seepage4and5).
2.Removethesetscrewsq(2pcs.)andthesetscrewsw(3pcs.).
3.Removethesetscrewse(4pcs.)andbackcoverr.
4.Removethesetscrewst(2pcs.).
6.Disengagethefrontcoverandrearcoverhooks.
7.Removethefrontcover.
To attach:
5.Followtheaboveproceduresinreverse.
q
ee
r
e
tt
w

8
6.0 mm
MECHANICAL ADJUSTMENT
PRESSER BAR HEIGHT
Thedistancebetweenthebottomofthepresserfootinuppositionandtheneedleplateshouldbe6.0mm.
1. Removethefaceplateandneedle.
2. Lowerthefeeddogbelowtheneedleplate.
Placeablock6mmthickunderthe presserfootandlowerthepresserfootlifterw.
3. Loosenthesetscrewq.Raisethepresserfootlifterandtightenthesetscrewqrmly.
Attachtheneedleandfaceplate.
NOTE:
Makesurethatthepresserfootshouldbeparalleltothefeeddogslotsintheneedleplate.
q
Feed dog slots
Presserfootshouldbeparallel
tothefeeddogslots.
w

9
0.2 mm
ormore
0.2 mm
ormore
A = B
MECHANICAL ADJUSTMENT
NEEDLE DROP POSITION
Setthestitchpatternto“”.Thestandardneedledroppositionshouldbeatcenteroftheneedleplatehole.
Selectzigzagstitch“”,andsetthestitchwidthat“7.0”.Theclearancebetweentheneedleandtheedgeof
theneedleholeshouldbeatleast0.2mmoneitherside.Ifnot,adjustasfollows:
1. Turnthepowerswitchoff.Removethefacecover.(Seepage4.)
2. Loosenthehexagonalsocketscrew3x4q.Adjusttheneedledroppositionbyturningtheeccentricpin.
ThedirectionofeccentricpinshouldbeasshowninFig.1.
3. Attachthefacecover.
NOTE:
Checkthehooktimingafterthisadjustment.
needleplatehole
w
Fig. 1

10
Theamountofascendingtraveloftheneedlebarfromitslowestpositiontotheposition()wherethetipof
therotaryhookexactlymeetstherightsideoftheneedleshouldbe3.25to3.55mm.
1.Removetheneedleplateandbobbinholder.
2.Turnthepowerswitchon.
3.Selectthepattern(leftposition).Setthezigzagwidthat0.
4.Removethefree-armcover.(Seepage5.)
Turnthehandwheeltowardyoutolowertheneedleatitslowestposition.
5.Loosenthehexagonalsocketscreww(2pcs.).
6.Movetheneedlebar3.4mmfromthelowestposition.
7. Turnthelowershaftgearuntilthetipofhookmeetstherightsideoftheneedlewhileholdingthehandwheel.
8.Tightenthehexagonalsocketscreww(2pcs.).
9.Attachthefree-armcover,bobbinholderandneedleplate.
MECHANICAL ADJUSTMENT
ADJUSTMENT OF HOOK TIMING
w
Needle plate
Bobbinholder
w
Lowershaftgear
Leftposition()
(#14)
Tipofhookmeetsthe
rightsideoftheneedle
Lowest needle position
3.25 – 3.55 mm

11
Beforeproceedingwiththisadjustment,checkthehooktiming(refertopage10).Thedistancebetweenthe
upperedgeoftheneedleeyeandthetipofthehookshouldbeintherangeof1.6to2.0mmwhenthetipofthe
hooktimingmeetsrightsideoftheneedleintheleftneedleposition()astheneedleascendsfromitslowest
position.
1.Removetheneedleplate,bobbinholderandfaceplate.
2.Turnthepowerswitchon.
3.Selectthepattern(leftposition).Setthezigzagwidthat0.
4.Turnthehandwheeltowardyouuntilthetipofhookmeetstherightsideofthe needle.
5.Loosenthehexagonalsocketscrewq.
6.Movetheneedlebartoadjusttheneedlebarheight,andtightenthehexagonalsocketscrewq.
Becarefulnottoturntheneedlebar.
7. Attachthebobbinholder,needleplateandfacecover.
MECHANICAL ADJUSTMENT
ADJUSTMENT OF NEEDLE BAR HEIGHT
1.6 – 2.0 mm
q
Needle setting
groove
Upperedgeofneedlehole
Hookrace(unit)
Hookrace
Tipofhookmeetstherightsideoftheneedle
Leftposition()
(#14)
Needle plate
Bobbinholder

12
Adjustment procedure:
1.Removetheneedleplateandbobbinholder.Attachthemasterneedle.Turnthepowerswitchonandsetthe
zigzagwidthatmaximum.
2.Removethefacecover.(Seepage4.)
3.Loosenthesetscrewsq(2pcs.).
4.Turnthehandwheeltowardyou.Adjusttheclearancebetweentheneedleandthetipoftherotaryhook,by
movingthehookbaseplateupordown,towithin–0.1to+0.05mmattheleftandrightneedleposition.
5.Tightenthesetscrewsq(2pcs.).
6.Attachthefacecover.Removethemasterneedle.Attachthebobbinholderandneedlepate.
7. Checktheclearancebetweentheneedleandtheedgeoftheneedleholeintheneedleplate(seepage9).
*Theclearancebetweentheneedleandthepointofhookshouldbe–0.1to+0.05mm.
CLEARANCE BETWEEN NEEDLE AND TIP OF THE ROTARY HOOK
MECHANICAL ADJUSTMENT
–0.1to+0.05mm
Needlebarsupporter
adjustingplate q
Needle plate
Bobbinholder
Tipofhook

13
Thehighestpositionofthefeeddogshouldbebetween0.80and0.90mmfromthesurfaceoftheneedle
plate.
1.Lowerthepresserfootandturnthepowerswitchon.
2.Turnthehandwheeltowardyoutosetthefeeddogatthehighestposition.
3.Removethefree-armcover.(Seepage5.)
4.Loosenthesetscrewqand nut w.
5.Adjustthefeeddogheightbyturningtheadjustingscrewe.
Thehighestpositionofthefeeddogshouldbebetween0.80and0.90fromthesurfaceoftheneedleplate.
6.Tightenthenutwandsetscrewq.
7. Attachthefree-armcover.
FEED DOG HEIGHT
MECHANICAL ADJUSTMENT
A B
e
w
Presserfoot
Feed dog
0.80 – 0.90 mm
Surfaceoftheneedleplate
q

14
MECHANICAL ADJUSTMENT
TOP TENSION
Thetoptensionshouldbebetween65and80gwhenpullingthethreadupinthedirectionofarrow.
*Usepolyestersewingthread#50(White).
*Ifitisnotwithintheabovelimit,adjustasfollows.
1.Setthetensiondial“4”.
2.Removethefacecoverandfrontcover.(Seepage4and6.)
3.Lowerthepresserfoot.
•Ifthetoptensionistooloose,turntheleadscrewinthedirection(A).
•Ifthetoptensionistootight,turntheleadscrewinthedirection(B).
4.Checkthetoptensionandattachthecover.
Whitepolyesterthreadsize50
Pullthethreadatthespeedof110mm/secinthedirectionofarrow
Cover

15
MECHANICAL ADJUSTMENT
STRETCH STITCH FEED BALANCE
To check:
1. Entertheself-diagnosticmode(seebelow).
AttachtheSatinstitchfootF.Placeafabricunderthepresserfoot.Lowerthepresserfoot.
2. Pressthelockingstitchbuttontostarttestsew,andchecktheresults(thestandardgurelengthof5
piecesofgure8is33-39mm).
3. Ifstretchpatternsaredistorted,correctthemwiththefeedbalancingdial.
Ifstretchpatternsaretoodeformedandcannotbecorrectedwiththefeedbalancingdial,adjustasfollows.
To adjust:
1. Removethefeedbalancingdialcover.Turnthedialatstandardpositionasillustrated.
TurnthepowerswitchON.
Selectthestraightstitchandsetthestitchlengthat“0”.Placeafabricunderthepresserfoot.
Lowerthepresserfoot.(Donotsetbobbinandneedlethreads)
2. Turnthehexagonalsocketscrewtothelefttoloosenit.
Movethegearup(A)ordown(B)toadjustthefeed.
*Donotmovethegearrightorleftwhenadjusting.
Startthemachineandcheckthemovementofthefabric.
Adjustthehexagonalsocketscrewposition(gearposition)untilthefabricwillnotbefedwiththestitch
lengthsettingat“0”.
3. Tightenthesocketscrewandattachthefeedbalancingdialcover.
Entertheself-diagnosticmodeandtestsewagain.Checkthatthestandardlengthof5piecesofgure8is
33-39mm.Ifnot,turnthefeedbalancingdialtocorrectit.
36–39mm
Correct IncorrectIncorrect
Feedbalancingdial
(Standardposition)
Hexagonalsocketscrew
Feedbalancingdialcover
(A)
(B)
TO ENTER SELF-DIAGNOSTIC MODE:
Turnthepowerswitchonwhile
simultaneouslypressingauto-
lockbuttonandneedleup/down
button.
TheLCDdisplaywill
indicate“01”.
Pressthevaluesetkey
7timestodisplaythe“08”.
Pressthe
start/stop
buttontodisplaythe
“88”and
toenter
thestretchstitchtest
mode.
Gear
Thestandardgurelengthof5piecesofgure
8is33-39mm

16
X
Threaderplate
supporter
Threader
positioning
plate
FIG. 3
Pin
Adjustmentofleftorrightdirection
Threaderplate
Nut w
Viewfrom"X"
q
Verticaladjustment FIG. 2
REPLACEMENT AND ADJUSTMENT OF THE NEEDLE THREADER PLATE
Ifthehookofthethreaderplateisdamaged,changeandadjustthepartasfollows:
TO CHANGE THE THREADER PLATE:
1. Pushdowntheneedlethreaderknobandpullthethreaderplatesupporterdowntoremoveit(seeFIG1).
2. Toinstalltheneedlethreaderplate,linethegrooveupwiththepinandpushituptosnapt.
TO ADJUST THE THREADER PLATE POSITION:
1. If the hook on the threader positioning plate touches the top or bottom side of the needle hole, loosen
setscrewqandadjustthehookposition(FIG.2).
2. Ifthehookonthethreaderplatetouchestheleftorright side of the needle hole, loosen setscrew wand
adjustthehookposition(FIG3).
Replacingthethreaderplatesupporter
(withthethreaderplateattached) FIG. 1
MECHANICAL ADJUSTMENT

17
BHsensor
1.6 mm gap
TO ENTER ADJUSTING MODE
MECHANICAL ADJUSTMENT
ADJUSTING BUTTONHOLE LEVER POSITION
TO ADJUST THE BUTTONHOLE LEVER GUIDE:
1. Enterthediagnostictestofbuttonholesensormode.(Seepages18and19.TheLCDshoulddisplay03and
BHsymbol.)
2. Removethefacecover(seepage4)andloosenthesetscrewq.
3. MovethebuttonholeleverguidesotheBHsymboldisappearwhenthebuttonholeleverislowered.
Tightenthesetscrew.
TO ADJUST THE BUTTONHOLE SENSOR POSITION:
4.Attachthebuttonholefoot(R).
5.Lowerthebuttonholelevertoitslowestpositionandopena1.6mmgapbetweenthesliderandthe
buttonholefoot.
6. TurntheadjustingscrewwtotheleftuntiltheLCDdisplayBHsymbol.
7. Next,turntheadjustingscrewtotherightuntiltheBHsymboldisappears.
8. Turnoffthepowerswitch.
9. Attachthefacecover.
q
Buttonholeleverguide
Buttonholefoot(R)
Buttonholelever
w
NOTE:
Ifthereisanylintordustinthebuttonholesensorslit,loosenthescreweandcleanitoutwithaswab.
e

18
TO ENTER SELF-DIAGNOSTIC MODE:
Preparation:
1.Turnthepowerswitchoff.
2.Movethebobbinwinderspindletotheleft.
3.Raisethefeeddog.
4.Setthespeedcontrollevertotheleft.
5.Removethepresserfootandraisethepresserfootlifter.
6.Turnthehandwheeltowardyoutoraisetheneedletoitshighestposition.
NOTE:
•Becareful:thesewingmachinemaystartrunninginitsownwhileintestmode.
•Turnoffthepowerswitchbeforereplacinganyparts.
•Repeatthediagnostictestuntiltheproblemhasbeenresolved.
•Youcanskipstepsinthediagnosticprocedureandgodirectlytothetestyouwanttoperform.
(Enterself-diagnosticmode,thenselectthestepnumberofthediagnostictestyourequirebypressing
the
start/stopbutton
.)
To begin:
Turnontheswitch.Ifanyofthefollowingproblemsoccur,taketherecommendedactionsintheorderthey
areshown.
1.Themachinedoesnotrespondwhenthepowerswitchisturnedon:
•Checkeachconnectorconnection
•Replacethemachinesocket
•Replacetheswitchingregulator
•ReplacetheprintedcircuitboardA
2.Thesewingmachinelampdoesnotlightup:
•Replacethelightbulb
•ReplacetheprintedcircuitboardA
SELF-DIAGNOSTIC TEST
1. Turnthepowerswitchonwhile
simultaneouslypressingauto-lock
buttonandneedleup/downbutton.
2. TheLCDdisplay
willindicate“01”.
3. Pressthe
start/stop
button to
enterthe
self-diagnosticmode.
Table of contents
Other Janome Sewing Machine manuals

Janome
Janome Memory Craft 6500 User manual

Janome
Janome 3128 User manual

Janome
Janome ML 744D User manual

Janome
Janome MC15000 User manual

Janome
Janome marie osmondqc User manual

Janome
Janome MC 300E - User manual

Janome
Janome 625E User manual

Janome
Janome 712T User manual

Janome
Janome JP720 User manual

Janome
Janome Sew Precise User manual

Janome
Janome 5812 User manual

Janome
Janome Quilt Maker Pro 18 VERSA User manual

Janome
Janome HD9 User manual

Janome
Janome 1600P PROFESSIONAL - User manual

Janome
Janome Horizon User manual

Janome
Janome Jem Platinum 720 User manual

Janome
Janome 8050 User manual

Janome
Janome Horizon Memory Craft 15000 User manual

Janome
Janome 502X User manual

Janome
Janome 2212 User manual