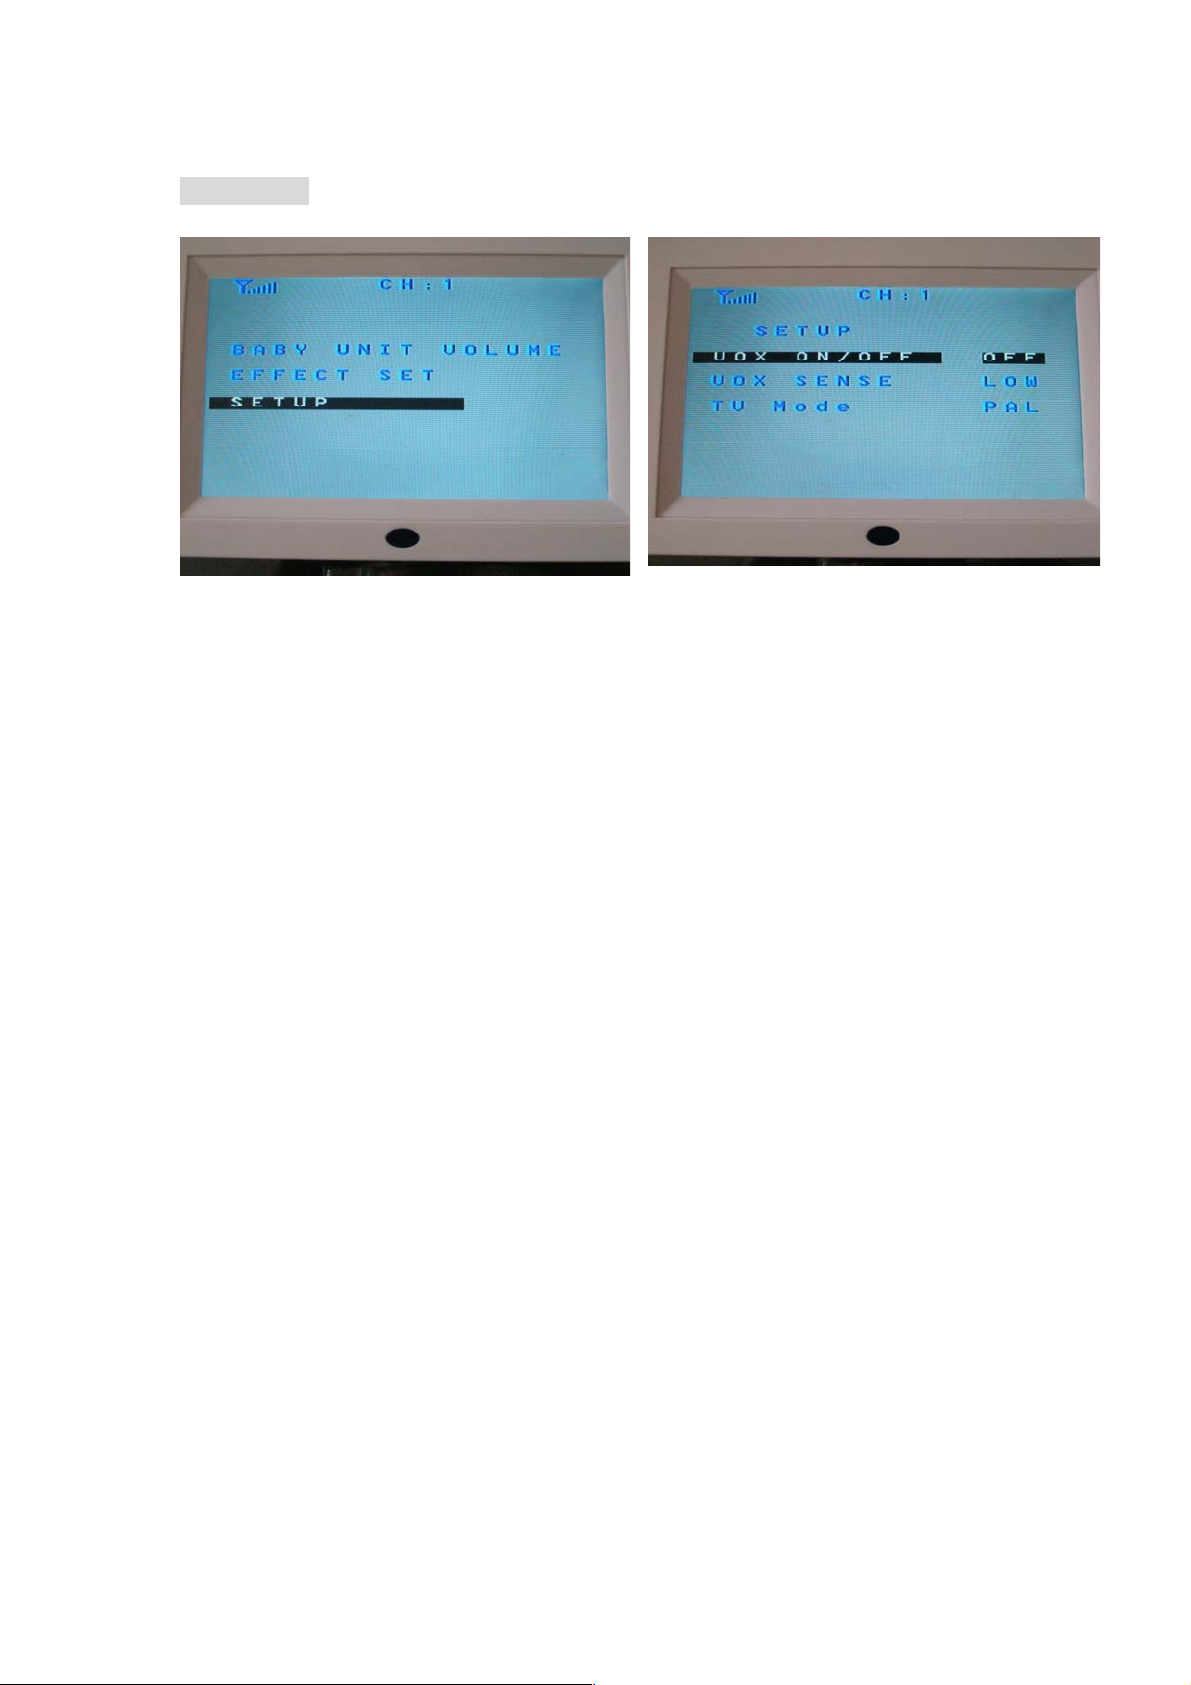
Jaycar QC3649 User manual


Contents
Caution.........................................................................................................................3
Safety Notice................................................................................................................3
Main Features..............................................................................................................3
Digital Baby monitor kit components............................................................................4
Package Contents........................................................................................................4
Main Parts....................................................................................................................5
User Manual.................................................................................................................6
Main Menu....................................................................................................................6
Mode selection..............................................................................................................7
-Baby unit volume mode...............................................................................................7
-Effect set mode............................................................................................................7
-Set up mode.................................................................................................................9
-TV Out function...........................................................................................................10
Pair process.................................................................................................................10
Signal indicators...........................................................................................................11
Trouble shooting...........................................................................................................11
Product specification....................................................................................................12

Caution
For your safety, please use only the DC converter provided. (The manufacturer will not be
responsible for any loss caused by a DC converter not supplied by the manufacturer)Please only
use the socket supplied with the DC converter. Use of improper socket may cause electrical and
fire damage.
Safety Notice
Do not use if charger is damaged.
Do not use battery over the specified time period
Please charge battery before first use.
In order to protect your battery, please fully charge your battery before use. The battery must
be fully discharged before your next charge.
Over charge and over discharge will shorten the life of battery. If the usage period of fully
charged battery is shorter than a new battery, you need to change your battery
Do not touch the DC converters conductors e.g. with rings etc
Main Features:
4 Channel, supports 4 cameras for one monitor
7" LCD color screen
Infrared night vision
High sensitivity microphone
2-way communication
VOX function
NOTE: Additional cameras available (QC-3648)

Digital Baby monitor kit components:
1x Monitor
1x Camera
Package Contents:
6VDCAdaptor
12VDCAdaptor
7" Wireless LCD baby monitor
2.4GHzwirelesscamera
InstructionManual
AVCable
NOTE: Additional cameras available (QC-3648)
2 x power adaptor
1 x AV Cable
1 x Instruction Manual
Check the package to confirm that you have received all
components show above.

Main Parts
2.4G wireless digital camera
7” LCD digital baby monitor receiver
Camera power On/OFF
6V DC PORT
Night light
Pair key
Power Key
Press Mkey to show main
menu, this also acts as
confirm button.
Power light
Up/down Navigation key
can M
Left
can se
nav
aut
and right navigation key
lect Channels, hold right
igation key for 3 seconds to
o scan channels
adjust onitors volume

12V DC Port
AV Cable port
User Manual
To connect camera and monitor,
Press “POWER” button on the
wireless camera and the LCD
monitor, this will pair the camera
and monitor.
Signal strength/Channels Status will show on the top left of the LCD monitor.
Main Menu
Press Mbutton to display the main menu
Baby Unit Volume mode
Effect SET mode
Setup mode

Mode Selection
Baby Unit Volume Mode
Press M button to display the main menu, and then select the "baby unit volume" mode by
UP/Down navigation key.
Press Mbutton to select, press UP/Down navigation key to adjust the voice level (0-9,
volume level)
Press Mbutton to confirm volume level
Press left navigation key to Exit and return to monitor screen
Effect SET Mode
1. Vertical mode
Press Mbutton to display the main menu, and then select the "EFFECT SET" mode by
pressing down navigation key,
Press Mbutton to enter. Press right navigation key to convert Vertical on/off.
Press Mbutton to confirm.
Press left navigation key to Exit.

1. Horizontal mode
Press Mbutton to display the main menu and then select the "EFFECT SET" mode by
selecting down navigation key.
Press Mbutton to enter, press Down Navigation key to select Horizontal mode, press
right navigation key to convert Horizontal on/off.
Press Mbutton to confirm.
Press left navigation key to Exit.
2. Contrast mode
Press Mbutton to display the main menu and then select the "EFFECT SET" mode by
pressing down navigation key.
Press Mbutton to enter, press Down Navigation key to select Contrast mode, press
left navigation key to decrease the image contrast, press right navigation
key to increase the image contrast (0-8, contrast level).
Press Mbutton to confirm.
Press left navigation key to Exit.
3. Saturation mode
Press Mbutton to display the main menu, and then select the "EFFECT SET" mode by
pressing down navigation key,
Press Mbutton to enter, press Down Navigation key to select Saturation mode. press
left navigation key to decrease the image Saturation, press right navigation
key to increase the image Saturation (0-6, saturation level).
Press Mbutton to confirm.
Press left navigation key to Exit.

Set up Mode
automatically turn on.
2. VOX SENSE mode
Press Mbutton to display the main menu and then select the "SETUP" mode by
pressing Down navigation key, Press Mbutton to enter, press Down
Navigation key to select VOX SENSE mode;
Press right Navigation key to convert VOX SENSE low/high
Press Mbutton to confirm
Press left Navigation key to exit.
3. TV mode
Press Mbutton to display the main menu and then select the "SETUP" mode by Down
navigation key, Press Mbutton to enter, press Down Navigation key to
select TV MODE;
Press right Navigation key to convert TV mode PAL/NTSC
Press Mbutton to confirm
Press left Navigation key to exit
d then select the "SETUP" mode by
nction turned ON). The baby monitors LCD screen will
tected. Once a voice is detected it will
1. VOX ON/OFF mode
Press Mbutton to display the main menu an
pressing down navigation
Key, Press Mbutton to enter.
Press right Navigation key to turn VOX on/off.
Press Mbutton to confirm
Press left Navigation key to exit;
NOTE: (When VOX fu
enter sleep mode when no voice is de

TV OUT Function
To connect in this function, connect the AVcable supplied to the baby monitors AV out
port, this is then connected to a RCA capable device e.g. TV or monitor. In this
function the Monitor and camera will function as normal
Pair Process:
Method one:
y on the Monitor (located on rear of LCD)
ck of the camera
flashing and then stop when pairing has been successful.
Method two:
Press the power button on the back of the camera, the led on the camera will start to
flash, this means you can now pair up with the monitor.
Press Pair key on the Monitor (located on rear of LCD), the pairing is successful when
the power led of camera stops to flash.
NOTE: You can pair up to 4 cameras with this monitor. To pair another camera,
select next channel by selecting right navigation button on the monitor and
selecting CH2, CH3, and CH4. Pairing will be same as above procedure.
, when the led flashes, your
, the led on the camera will start
Pair key
Press Pair ke
camera is now ready to be paired.
Press the power button on the ba

Signal Indicators:
Signal Strength Description
Indicators
Perfect signal
Low signal
No signal
Note: Please ensure you have adequate signal strength when positioning the baby
monitor (see above table for reference)
Trouble Shooting
Problem Solution
No video
Make sure the camera and monitor are in a
effective working range.
Check the DC power of camera
Camera is running on batteries but when I
connect DC power, camera will not turn on
Press power button on the camera
Remove
Two way talk --- low volume
Adjust the volume by UP/DOWN key on monitor
or enter the main menu, then select baby unit
volume mode, adjust the volume by UP/DOWN
Navigation key.
When camera is working, IR lights will not light
up.
IR lights work in low light, the IR lights will not
physically light up.
There are ripples on the monitor and I am using
batteries in the camera
Make sure there is sufficient charge in your
batteries
I can not pair up with extra cameras when I am
using batteries in the camera.
Make sure there is sufficient charge in your
batteries or switch to DC power.

Product Specification
Item Value
Transmission Frequency 2400MHz-2480MHz
Transmission Power 17dBm
Operating Frequency 2450 MHz
Unobstructed Effective Range 250m
Modulation Mode FHSS
Operating Temperature 0°-60°
Storage Temperature 25°
GENERAL
Operating Humidity 20%-80%RH
Imaging Sensor Type 1/4CMOS
Picture Total Pixels 628x582(PAL) 510X492(NTSC)
Horizontal Resolution 360Line
View Angle 60°
Minimum Illumination 1.5Lux
Band Width 4MHz
Night Vision Range 3-5m
Battery Working Time 8 hours
Motion Detection Distance >5m
Sound Control Sensitivity >60dBA
Consumption Current 150mA +15mA
Power Supply DC 6V
Dimensions(W×D×H) 100(W)86(D)86(H)
Frame 22
CAMERA
Weight 141g
LCD Screen Type 7” TFT-LCD
Effective Pixels 480x234
Receiving Sensitivity -85dBm
Video System NTSC/PAL
Color Configuration R.G.B.
Consumption Current 350mA+15mA
RECEIVER
Power Supply DC 12V
Distributed by: Ph: 1300 738 555
Tech Brands by Int’l: +61 2 8832 3200
Electus Distribution Pty Ltd Fax: 1300 738 500
320 Victoria Rd www.techbrands.com.au
Rydalmere NSW 2116 Australia Made in China
Table of contents