JayKay E-FIN User manual

E-FIN
USER MANUAL

2 3
CONTENT
Safety information
Warnings
1. Included in delivery & technical data
2. E-Fin Glossary
3. Remote Glossary
4. Assembly
5. Installation
6. Instruction
7. Maintenance, reparation, disassembly & storage
8. Environmental aspect & disposal
9. Warranty
10. Downloads
11. Disclaimer
4
5
6
7
8
9
10
12
15
16
16
17
18

4 5
WARNINGS
Warning: Never drive through sea grass, mud or silt. This can
block the propeller. If something gets into the propeller, remove
the fin from the water, dry it completely and then remove the
foreign object with a tool. Never put your fingers into the pro-
peller.
Warning: Always make sure there is enough draft (> 0.5 m)
before you lower the board with the E-Fin into the water. In the
water, you should always keep an eye on shallows and keep the
minimum distance between the E-Fin and the bottom.
Warning: Do not open or tamper with the electronics housing.
You could get an electric shock. In addition, the warranty would
no longer be valid.
Warning: Always make sure that the screws of the adapter are
tight. Also make sure that the fin is properly stowed in the box
and that the box fixes the fin.
Warning: Be careful not to get your fingers, hair or clothing into
the propeller or other moving parts.
Warning: Always keep the E-Fin out of reach of infants and
small children.
Drive responsibly and respect those around you. How you drive
affects how this new mode of transport is seen by others.
SAFETY INFORMATION
The E-Fin is operated by a propeller.
To use it safely, you have to read all warnings and instructions in this
manual.
The E-Fin may lose drive at any time.
This can be caused by radio interference, an empty remote control
battery, accidental adjustment of the power regulator or other
factors. Use the power of the E-Fin on your SUP or kayak only as you
would trust yourself to do without a drive.
Take care of your environment.
Avoid driving near breeding birds, seal banks or similar
animal-inhabited areas.
Riding on water recklessly can lead to death.
Always be careful when you are out on the water. Always drive
defensively and assume that others don‘t see you. Don‘t ride in strong
waves (waves > 0.5 m) or storms. Do not drive in shipping lanes or
cross the course of larger ships. lf possible, avoid paddling through
fog at night or when visibility is poor.
Comply with the local laws.
There are rules and bans on different waters. Familiarise yourself
with the local laws, pay attention to bathing areas and other areas
that are closed to water sports.

6 7
Propeller
Charging port
Propeller protection cover
2. E-FIN GLOSSARY
1 x Electric Fin (battery: 21.6 V DC; 10 Ah; 216 Wh)
1 x Remote (battery: 3.6 V DC; 300 mAh; 1 Wh)
1 x Adapter
1 x Power supply
1 x Charger
1 x User manual
Optimal operating temperature
5 °C - 40 °C
Min. & max. operating temperature
0 °C - 60 °C
Humidity
0 % - 100 %
1. INCLUDED IN DELIVERY & TECHNICAL DATA

8 9
4. 1 REMOTE
The control is simply clipped onto the handle of the paddle at selected
height. lt must be mounted parallel to the paddle and point towards
the driver.
4. 2 E-FIN
To mount the E-Fin, turn the SUP/board on its back so that the fin
mount is facing up. Depending on the fin mount on your board, choose
the right system and screw the adapter onto the E-Fin with the three
screws and allen key provided. Make sure to tighten the screws only
lightly and without great force so as not to damage the adapter. The
E-Fin then can be attached to your board.
4. 3 US-FINBOX SYSTEM
The US finbox system has a standardized fin box. Here the fin is fixed
in the box with a small washer and a screw. The whole thing works
without tools, as the screw can be screwed in by hand. This system
requires some dexterity to get the plate through the fin. The more often
the fin is installed, the easier it will become.
4. 4 SLIDE-IN SYSTEM
This system is very easy to assemble. The fin is simply pushed into the
box and then secured with the small pin (on the strap).
4. ASSEMBLY3. REMOTE GLOSSARY
Power controller
Charging port
Battery level E-Fin
Batter level remote
Rotary knob with OFF /
AUTO / MANUAL function
Note: The E-Fin is not compatible with carbon reinforced
boards and sinkers, as both can cause radio interruptions
between the E-Fin and remote.

10 11
a. The supplied charger should be checked regularly for damage to the cable, plug,
housing and other parts. If there is any damage, do not charge the E-Fin until the
charger has been repaired or replaced.
b. Do not expose the charger to moisture or extreme humidity. Do not charge the
JayKay E-Fin and the JayKay controller outdoors or in the rain. Dry the charging
ports before charging.
c. Stop charging if charging of the E-Fin and/or remote is not completed in the
specified time. Stop charging if the batteries become unusually hot, begin to smell,
become discolored, become deformed or if you or if you notice anything unusual
during use, charging or storage.
d. Do not charge the E-Fin if the battery case is cracked, swollen, or shows other signs
of damage. Discontinue use immediately and dispose of the the battery immediately.
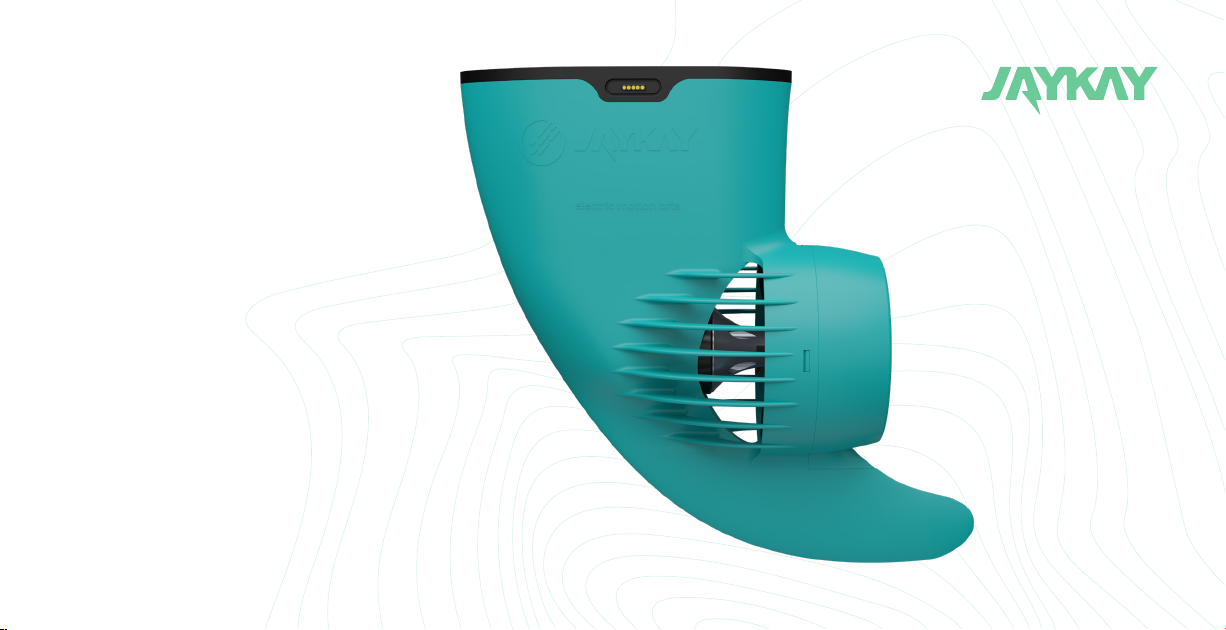
5. 4 E-FIN CHARGING AND CONTROL
Both devices have a battery-saving charging time of 3 hours. The
charging time of the E-Fin and the controller can also vary here. Char-
ging is done via the included charging cables with the corresponding
power supply unit.
5. 1 TURN ON AND OFF
The fin turns on when it is immersed in water with the charging port.
The fin switches off when it is removed from the water. The control is on
in the rotary wheel position „AUTO“ or „MAN“ and off in the rotary wheel
position „OFF“.
5. 2 CONNECTION BETWEEN REMOTE AND E-FIN
The E-Fin is delivered already coupled. However, if the E-Fin needs to
be coupled again for any reason, please refer to chapter „6. 6. Menu
item 2: Pair E-Fin(s)“ on page 13.
5. 3 BATTERY LEVEL INDICATOR
The battery runtime can be checked via the remote. The upper row of
LEDs shows the battery level of the E-Fin, the lower row of LEDs shows
the battery level of the remote.
a. The remote is on, but the E-Fin is off:
white LEDs flash (according to the last battery level).
white LEDs light up.
The battery level is shown by the number of LEDs lit up.
b. The remote and E-Fin are on:
white LEDs light up.
The battery level is shown by the number of LEDs lit up.
c. The 6 battery states:
lf the devices are full, all 5 LEDs light up white. lf the battery level is reduced, the
LEDs also go down. lf the battery level is very low and the devices should be charged,
only one red LED will light up in the display.
5. INSTALLATION
Note: In order to switch on the E-Fin
it must be completely in the water.
Warning: Never leave the E-Fin/remote
unattended when charging.
Note: If the temperature of the E-Fin is above 45 °C,
charging is inhibited until the temperature is below
the limit of 45 °C. If the charging time is over
3 hours, this case has occurred.

12 13
6. 3 OPEN MENU
To enter the menu, there is a „secret“ position on
the rotary knob, exactly between the the „AUTO“
and „MAN“ modes (see figure).
lf you want to get into the menu, the rotary knob must be set to the
position shown between „AUTO“ and „MAN“.
a. 1 LED in the lower row lights up blue
when the position has been found.
b. Hold position for 5 seconds until all 5 LEDs light up blue.
c. Turn the rotary knob back to „MAN“.
6. 1 SELECT DRIVING MODE
Before switching the mode, the power regulator has to be at the very
bottom on the lowest level. lf the power regulator is NOT at the lowest
level, the LEDs indicate with left running red LEDs that the regulator
should be pushed down to activate the new driving mode.
„AUTO“ In the automatic function, the E-Fin supports the paddle stroke. Through the
power regulator, the assisting force can be set strong (slider up) or weak
(slider down).
„MAN“ When driving manually, the E-Fin responds permanently to the power control.
„OFF“ The control is switched off.
6. 2 ADJUST POWER
By moving the power control you change the power.
6. INSTRUCTION
lowest power.
medium power.
highest power.
To confirm the selection, the rotary knob must be turned to the
„secret“ position and back to „MAN“.
6. 6 MENU ITEM 2: PAIR E-FIN(S)
Up to 5 fins can be connected to one remote.
a. the E-Fin can be connected with the remote now.
b. Now the charging cable MUST be removed in order to connect the fin
to the remote. After approx. 2 seconds:
c. The E-Fin is connected with the remote now.
6. 4 NAVIGATE MENU
To navigate through the menu, the power controller must always be
pushed up and back again. As a result, the red LED moves one field
each time.
shows what menu you are in.
indicates that you are in the main menu.
To get into the submenu, the rotary knob must be turned to the
„secret“ position and back to „MAN“.
6. 5 MENU ITEM 1: SELECT POWER LEVEL
In this submenu you can choose between three
power levels by sliding the power controller up and
down again. The upper row of LEDs then shows:
Note: Parental control
This position is not marked and
is only found by active search.
Important: The E-Fin(s) must ALWAYS be plugged
into the charger before connecting.

14 15
7. MAINTENANCE, REPARATION, DISASSEMBLY & STORAGE
6. 7 MENU ITEM 3: CALIBRATE POWER CONTROLLER
Note the top row of LEDs:
a) The red LEDs run to the right:
The power regulator must be pushed all the way up.
b) The red LEDs run to the left:
The power regulator must be pushed all the way down.
6. 8 MENU ITEM 4: SOFTWARE UPDATE
Only relevant after consulting JayKay Service at
service@jaykay-sport.de.
6. 9 EXIT MENU
To exit the menu, turn the mode dial to the „secret“ position and
back to „MAN“.
The menu will then close automatically.
lf further E-Fins are to be connected to the same remote, proceed as
follows:
a. Stay in the same submenu. Attach the fin to the net.
b. Move the power controller up and down, then you can activate another fin.
Another LED lights up yellow.
The second E-Fin can be connected to the remote control now.
c. Remove the cable again and connect the fin and remote control to each other.
Proceed in the same way with all other fins.
To exit the menu, turn the rotary knob to the „secret“ position and
back to „MAN“.
a. Do not attempt to disassemble the product without consulting JayKay‘s service
department. If your device requires service, contact JayKay support at
service@jaykay-sport.de.
b. Modifications to the product that have not been expressly approved by JayKay
may void the warranty.
c. Do not subject the batteries to impact by dropping or throwing the product.
d. Do not throw the product or battery into a fire, as this could cause an explosion
e. Do not short-circuit the battery by bringing the connector terminals into contact
with other metal objects. This could cause injury or fire and could also damage
the battery.
f. Your device contains an internal rechargeable lithium-ion battery that poses a fire
or chemical burn hazard if mishandled.
g. Do not charge or use the device in a location where the temperature may exceed
45 °C (113 °F).
h. Do not expose the fin to direct sunlight.
i. Rinse the fin with fresh water after EACH use and rub the loading ports dry.
j. Make sure that the battery level is about 50 % before storing it for a long time.
k. Store the product in a cool and dry place.
Warning: If you do not follow the safety instructions, there is
a risk of fire, electric shock and other injury, or damage to the
JayKay E-Fin, the JayKay remote and other objects may be
damaged.

16 17
10. DOWNLOADS
On our website under „Downloads“ we have summarized
the most important documents for downloading:
10. 1 ENGLISH
8. ENVIRONMENTAL
ASPECT & DISPOSAL
9. WARRANTY
Your device must not be disposed of with household waste. Please
follow local regulations for the disposal of electronic devices. If this de-
vice shows signs of damage, such as bulging, swelling, or deformation,
discontinue use and contact customer support immediately.
a. Dispose of used batteries according to the applicable local disposal regulations
for batteries and rechargeable batteries.
b. Never dispose of used batteries together with
conventional conventional waste.
c. Batteries contain toxic substances.
9. 1 WARRANTY ON THE E-FIN
This E-Fin is covered by a 24-month manufacturer‘s warranty that co-
vers defects in workmanship and materials. It does not cover damage
due to improper use, carelessness or accidents.
If the E-Fin has a manufacturing defect within 24 months of shipment,
contact service@jaykay-sport.de before returning the product for
return authorization.
9. 2 WARRANTY ON BATTERIES
Our warranty period on the battery is 12 months.
9. 3 RETURNING THE PRODUCT UNDER WARRANTY
Please keep your shipping box. The warranty does not cover damage
caused by returning the product in inadequate packaging.
Notes on the disposal of the product and the rechargeable
batteries: We are registered as a manufacturer of electrical
and/or electronic equipment under registration number DE
98465168 and as a manufacturer of batteries/accumulators
under registration number 78713801 at Stiftung Elektro-Altge-
räte Register, Nordostpark 72, 90411 Nürnberg, Germany.

18
11. DISCLAIMER
Before using any JayKay product, we strongly recommend that you
familiarize yourself with local regulations and country-specific laws.
Ultimately, you are responsible for compliance with all applicable laws
and regulations, and JayKay assumes no liability with respect to your
use of JayKay products.
JayKay GmbH
Heidachstr. 70/2 | 88079 Kressbronn, Germany
service@jaykay-sport.de | www.jaykay-sport.de
Table of contents
Popular Engine manuals by other brands

Mercury
Mercury MerCruiser Axius 350 MAG user manual

Fiamma
Fiamma COMPACT F45s RHD Installation and usage instructions

Lombardini
Lombardini 832 Use & maintenance

SAER Elettropompe
SAER Elettropompe CL95 Use and maintenance manual

Scania
Scania DI13 series installation manual

TJERNLUND
TJERNLUND AUTO-DRAFT D-3 manual

Volvo Penta
Volvo Penta AQ205 Operator's manual

WEICHAI
WEICHAI Baudouin M33 PowerKit Operation and maintenance manual

Lister Petter
Lister Petter L Series Operator's handbook

Predator Engines
Predator Engines 69731 quick start guide

Jabiru
Jabiru 3300 installation manual

Briggs & Stratton
Briggs & Stratton 84100 Operating & maintenance instructions