manuals.online logo
Brands
  1. Home
  2. •
  3. Brands
  4. •
  5. Jenn-Air
  6. •
  7. Dishwasher
  8. •
  9. Jenn-Air DW1000B User manual

Jenn-Air DW1000B User manual

Page
For Future Reference ................................................................................................................... 2
Important Information ................................................................................................................... 2
Safety Instructions ....................................................................................................................... 3
Using Your Dishwasher ............................................................................................................ 4-6
Hot Water is Essential .............................................................................................................. 4
Preparing Dishes ...................................................................................................................... 4
Loading Your Dishwasher..................................................................................................... 4-5
Using Detergent and Rinse Aid ................................................................................................ 6
Selecting Cycles and Options/Starting the Dishwasher ..................................................... 8-10
What Can and Cannot Be Washed .............................................................................................. 7
Special Tips ........................................................................................................................... 11-13
For Best Results ..................................................................................................................... 11
Water Conditions .............................................................................................................. 11-12
Energy Saving Tips ................................................................................................................ 12
Caring for the Dishwasher ...................................................................................................... 12
Winter Storage ........................................................................................................................ 13
Changing Panels .................................................................................................................... 13
Before You Call For Service ................................................................................................ 14-15
Warranty .................................................................................................................................... :. 16
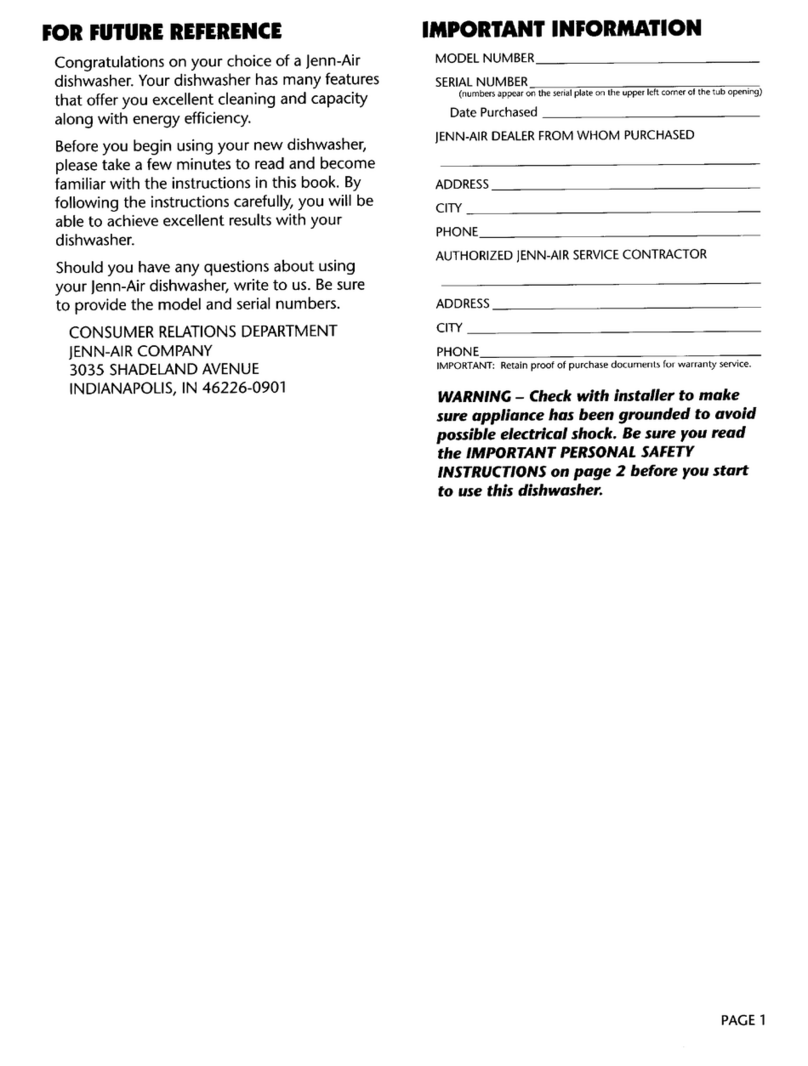
Congratulationson your choice of a Jenn-Air MODELNUMBER
Expressions dishwasher.Your new state-of- SERIALNUMBER
the-artdishwashermakeswashing thedishes (nurnbersappearontheseriarpfateontheupperleftcornerofthetubopening)
easierthanever before. SimplyselectSensor DatePurchased
Start and letthedishwasher dotherest. Your
dishwasher has many features that offer you JENN-AIRDEALERFROMWHOMPURCHASED
excellent cleaning and capacity along with
energy efficiency.ADDRESS
Beforeyou begin usingyour newdishwasher, CITY
pleasetakeafewminutesto readandbecome PHONE
familiar with the instructions in this book. By
following the instructionscarefully,you will be AUTHORIZEDJENN-AIRSERVICECONTRACTOR
able to achieve excellent results with your
dishwasher. ADDRESS
CITY
Should you have any questions about using
your Jenn-Airdishwasher,writeto us. Besure PHONE
to provide themodel and serial numbers. IMPORTANT:Retainproofofpurchasedocumentsforwarrantyservice.
Jenn-Air Customer Assistance WARNING-Checkwith installer to makesureappliance
c/o Maytag Customer Service has beengrounded to avoid possible electrical shock.
Besure you readtheIMPORTANTPERSONALSAFETY
P.O. Box 2370INSTRUCTIONSon page 3 before you start to use this
Cleveland,TN 37320-2370 dishwasher.
2
Productswith a UL label have been listedwith 8. Becarefulnottotouch the heatingelement
the Underwriters' Laboratories, Inc. - those on the bottom of the tub during or at the
with aCSAtag havebeen listedwith Canadian completion of a cycle.It may be hot.
StandardsAssociation.Nevertheless, aswith
any other equipment using electricity and 9. Use only detergents and rinse additives
moving parts, there is a potential hazard, designed for an automatic dishwasher.
When using your dishwasher,follow basic Never use soap, laundry detergent, or
precautions, including the following: hand washing detergent in your dish-
washer.Keep these products out of the
1. Readallinstructionsbeforeusingthedish- reach of children.
washer. 10. Do not sit, stand on or abuse the door or
2. Use the dishwasher only for its intended dish racks of the dishwasher.
function. 11.WARNING: Under certain conditions, hy-
3. Disconnectelectrical power todishwasher drogengas maybeproducedinahotwater
before attempting to service, system that has not been used for two
weeks or more.Hydrogen gas is explo-
4. Toavoidelectricalshockhazard,thesidessive. Ifthehotwatersystem hasnotbeen
andbackmustbeenclosed,andthefront usedforsucha period,turnonallhotwater
panelsmustbeattachedbeforeelectrical faucetsandletthewaterflowfromeachfor
poweris appliedto the dishwasher. Refer several minutes. This will release any ac-
to the installation instructions for proper cumulated hydrogen gas. As the gas is
grounding procedures,flammable, do not smoke or use an open
flame during this process.
5. Connecttoa properlyrated, protectedand
sized power supplycircuit to avoidelectri- 12.Do not wash plastic items unless marked
cal overload. "dishwasher safe" or the equivalent. For
plastic items not so marked, check the
6.Children should neverbe permitted to op- manufacturer's recommendations.
erate, or play in,with, or aroundthis dish-
washer. 13.Do not tamper with controls.
7.To reduce the risk of injury when loading 14.Always remove the door to the washing
itemstobewashed, sharporpointeditems compartment when removingan old dish-
should be located with the handles up. washer from service or discarding it.
Also,loadsharpitemssothey are notlikely
to damage thedoor seal.
-SAVE THESEINSTRUCTIONS-
3
• If your dishwasher drains into a food waste
For proper performance of yourdishwasher, hot disposer, make certain the disposer is
water is necessary to activatethe dishwasher completely empty beforestarting the
detergent and melt fatty food soils, dishwasher toprovide for proper draining, if
thereisablockageinthedisposer,"BLOCKED
Thewater should be 120°F - 140°F.If, for any DRAIN" may appear in theDisplay.
reason,the temperature of thewater beingdeliv-
ered by thewater heater is significantly below
120°F, the dishwasherwill operate longer.The
dishwasher will automatically heat the water as Seldom will households have identical dishes.
needed. The word "HEATING" willappear in the The number and type of articles used will vary
Display. daily. Your dishwasher isdesigned to beflexible
and accommodate a wide variety of dishes and
Tocheckwatertemperature, turn onthehotwater utensils.Thefollowing instructions and drawings
faucet nearestthedishwasher.Letwater run into will help you becomefamiliar with your dishwash-
aglassuntilit isashotas possible,thencheckwith er. With experience, you will learn the best ar-
a candy or meat thermometer. Ifthetemperature rangement for your particular needs.
at the faucet isbelow 120°F have aqualified
person raisethe water heater thermostat setting. General Recommendations
•Place allitems on the racks so they are
For moreinformation,see page 11. separated and face the center to insure the
water spray willreach the soiled surfaces. Do
not allow items to extend out of the racks.
• Make sure themovement of the upper and
• It is notnecessary to rinsedishes beforelower spray arms is not blocked by items
placing them in your Jenn-Air dishwasher, hanging below the lower rackor tall articles in
Simply scrape off bonesand large piecesof the upper rack.
food. The food disposer in your dishwasher • Insurethe free flow of water to the detergent
can handleavarietyof itemssuch as pits,fruit cup by not blockingit with large items.
seeds, popcorn andtoothpicks. These items
will be choppedintosmall piecesduringdrain • Larger,flat, lightweight items (such as plastic
covers) maybewedged next tothe silverware
and removed with the drain water, if hard basket or along the sidesand back of the
itemsget into the dishwasher module, you racks.
may hear chopping noises during the drain. •Thewash tower fisesthroughthecenterofthe
These soundsarenormal. lower rack during the cycle. For thebest
cleaning results, avoid blocking it or loading
• Foods that have been burned onto cooking tail articles next to it.
utensilswill need to be scrapedor soaked.
•Certainfoods, such as mustard,mayonnaise, Adding a Forgotten Item
lemon juice, vinegar,salt or dressings may For best cleaning, the forgotten item should be
causestainlesssteel flatware to rust and pitif added earlyin thecycle,whilethe"WASH"symbol
allowed to remain in contact with the surface is lit.
foraperiodoftime.Therefore,itisbesttorinse 1. Unlatch the door and wait until the sound of
these food soils off stainlesssteel flatware circulating water stops.
unlessthedishwasher isto beoperated soon 2. Open thedoor and add the item.
after loading. 3. Latchthe door.Thecycle will continueat the
point it was interrupted.
4
Upper Rack Lower Rack
Theupper rack isdesigned to holdglasses, cups, Largedinnerplatesand other dishesmay beplaced
saucers,small plates, bowls,etc. Bowlsfit securely in any convenient location in the lower rack with
in theback righthalfofthe top rack. Small plates, soiledsurfacesfacingthecenter.Tall itemssuchas
such assalad plates or saucers,can be loaded in bakeware and largeplattersshould beloaded onthe
front of the bowls, facing the center. Glasses and left side of this rack. Small plates, saucers or shallow
cups of varying sizes can be loaded with flexibility in bowls may be loaded inthe elevated areabehind the
the center and left side. Ifadditional space isneeded wash tower.
for loading small plates, the left set of rack tines can
also be used.
When loading glassware, leavea small space be-
tween each piece so they do not touch each other
during the wash cycle. Do not place glasses over
the tines. Instead, rest them against the side of the
rack or tines.
I
Flatware
Put flatwarein theremovablesilverwarebasket,
mixingknives, forks and spoons. To prevent them
from nesting together, placesome handles up and
somedown. However, sharp orpointed items should
A fold-down shelf can befound on the left side of the always be loaded with the handles up.
upper rack. Itwillholdtall,difficult-to-load items such
as long-handled spoons, wire whisks, spatulas and The silverware basket may be removed for ease of
knives. When the shelf is down small glasses and loading or unloading.
cups can be loaded underneath it. The shelf can be
raised to load taller glasses and mugs.Usethe covered section for small, lightweight articles
such as measuring cups and spoons,smallplastic
A removable utensil tray sits on topofthe upper rack items, baby spoons, etc. Lower the cover to keep
and holds long,awkward items such as spatulas,these items in place.
serving spoons, knives, etc.When usingthe tray, be
sure items do not block the upper wash arm.
5
Adding Detergent
Add Detergent to Dispenser Cup Just Before You
Detergent Select the Cycle and Options.*
Useonly a powderor liquid detergent designed for an
automaticdishwasher. Never use soap, laundry de-SensorStart
If d(shes are not pre-dnsed, place proper amount of
tergent or hand dishwashing detergent in your
dishwasher as it will cause severe oversudsing, detergentin both Prewashand Main Wash cups.if
Usefreshdetergentandstoreitinacool,dryplace(not dishesare pre-rinsed,adddetergentonlyto the Main
under thekitchen sink),Wash cup. Closethe lid.
Recommended Amount to Use Sani Scrub
Theamountofdetergenttousedependsonthewater PlaceproperamountofdetergentinboththePrewash
hardness(measuredingrainspergallon--gpg)andtheand MainWashcups. Closethelid.
amount ofsoilon thedishes.Generally detergent
amountsshouldbeincreasedfor harder water and Quick Wash
heaviersoil. PlacetheproperamountofdetergentintheMainWash
cup only. Closethe lid.
Too little detergent canresult in poor cleaning, hard
waterfilming andspotting, andpoordrying.Overuse of Rinse & Hold
detergent (especiallyinchemically softenedwater)can DoNOT usedetergent in thiscycle.
cause permanent etching (cloudiness) of glassware.
For detergents with low phosphatecontent(8.7% or *NOTE: If theDelicateWash option is selected, use
less) the usage level may have to be increased,The half of the normal amount of detergent.
phosphate content is shown on theside of thebox.RinseAid
A basicguidelineisoneteaspoonofdetergentforeach YourJenn-Air dishwasherfeatures an automaticrinse
grainof water hardness(gpg).Use a minimumof threeaid dispenser,located nearthedetergent dispenseron
teaspoons (one tablespoon) in soft water.Refer tothethe door interior.Rinseaidimprovesdryingresultsand
chart below, reducesspottingandfilming.
Note: When using Ultraor concentrated dishwasher To fill,turn dispenser cap counterclockwise to open.
detergents, follow the packagerecommendations on Removecap and pour liquid rinseaid intotheopening.
theamount to use. Replace cap and turn clockwise,
Water Whenitis timeto refillthe dispenser,the words"LOW
Hardness*Detergent Use RINSEAID"willappearintheDisplay.
Soft 3 teaspoons
(0-3grains) (fill cuptofirst line)
Medium 4-9 teaspoons
(4-9 grains) (fillcup tosecond line)
Hard10-12 teaspoons_,_
(10-12grains) (fill cup to thirdline)
• Your localwaterutility cantell youthe exact degreeof
hardness of your water supply. In rural areas, your
state university extensionservice cantell you howto
test your water hardness,
For water hardness of 13-14 grains, add additional
detergent (1 teaspoon for eachgrain over 12) at the
beginningofthe main wash portionofthecycle. (Open
door, add detergent to bottom of tub, closedoor and
dishwasherwill continuethrough cycle.)
If water is 15 grains or harder,it will bevirtually
impossible to get good results with any dishwasher.
The only solution isa mechanical water softener to
improvewater quality.6
Most tableware, cookware and silverware can be facturer, simply test-wash a small item for several
safely washed in your Jenn-Airdishwasher. If you weeks before attempting to wash an entire set.
have any doubts about a particular piece of Remember:ltistheuser'sresponsibilitytodeter-
dishware,check with the manufacturer to see if it mine if dishware should be washed in a dish-
is dishwasher safe.If you cannot reach the manu- washer.
Yes, except High water temperature No Cannot withstand high
anodized alu- and detergents may af- water temperatures and
minum and fect finish. Check clean- detergents.
some cook- ing instructions.
ware.
........... Yes(Iflabeled Always check manu-
No,exceptfor Seasoning will be re- "dishwasher facturer's recommenda-
Jenn-Air grill- moved,andironmayrust. safe") tionbeforewashing.Plas-
rocks tics vary in their capacity
to withstand high water
Yes, except Always check manu- temperatures and deter-
antique or facturer's recommenda- gents.
handpainted tion before washing. An-
china,tiquehandpaintedorover- Yes RunaRinse&HoldCycle
the-glaze patterns may if not washing immedi-
fade. Gold leaf may dis- ately. Prolonged contact
color. If in doubt, test- withfoodscontainingsalt,
washasmallitemfor sev- vinegar, milk products or
eral weeks before wash- fruit juice could damage
ing an entire set. finish.
Yes, except Always check manuf-
antique or acturer's recommenda- Yes, except RunaRinse&HoldCycle
lightweight tion before washing, those with if not washing immedi-
delicate crys- Sometypes of leaded commercial ately. Prolonged contact
tal. crystal may etchwith re- "darkening". with food containingsalt,
peated washings. If in Note: Do not acid or sulfide (eggs,
doubt, test-wash a small wash with mayonnaise and sea-
itemforseveralweeksbe- stainlesssteel food) could damage fin-
forewashinganentireset. or copper, ish.Commercial"darken-
ing" may be removed by
Yes,except Milk glasswill yellow with detergent.
milk glass, repeated dishwasher _ _ : _
washing. _ _!_ No May rust.
No Will discolor. °_......
No Always check manu-
°o0_o facturer's recommenda-
_{_ _ No High water temperatures ........ tion before washing.
and detergent may dis Wood may warp,crack
color or pit finish, or discolor.
7
Simply touch the Sensor Start Pad and let the Touching the Delay Padcan postponeorinterrupt
dishwasher select the cycle neededto clean the any cycle from 10 minutes to 12 hours.
dJshload.Theindicator onthe SensorStart Pad
will light and a tone will sound when theSensor To set a delay, first touch SensorStart Pador
Start Pad istouched. WASH, wash droplets, an select anyof the optionpads. Then, quickly touch
estimated cycletime and MIN (minutes) will and hold theDelayPaduntilthe desired amount
appear in the Display. of delay time appearsin the Display. When
touched, the indicator on the Pad will light and a
By using avariety of sensors the dishwasherwilltonewill sound.DELAY and 10MINwill appearin
judge the water temperature, soil level and the Display.
detergent, as well as the wash arm speed and
rotation. It then develops an optimum cycle Asyou hold the Delay Pad, the timewill increase
basedon the information gathered, by 10 minute increments until 30 minutes is
reached. It will then increaseto 60minutes and
Continuouslythroughoutthecyclethedishwasher continue to increasein one hour increments until
will check the conditions. You may nQticethe 12 hours is reached. The dishwasher will
time in the Display change (either upor down) automaticallystartas soon asthedelay time ends.
as the dishwasher ad!usts to the conditions. DELAYwillremain intheDisplayuntilthe timehas
This is normal, counted down.
The cycle selected may range from 52 minutes To cancel the delay time, touch the Delay Pad
using 5 gallons of water for prerinsed or lightly again.The indicator lightwillgo out andthe cycle
soiled loadsto 110 minutes using 11 gallons of will start immediately.
water for loads with heavy or dried soils.Note: If delay is chosen without first selecting a
The Display will also show the drying option last cycle and options, the dishwasher will select the
selected. It is not necessary to reselect it each last wash cycle used in the delay mode.
time. However, you may choose a different
option. See page 9 for drying options. This featurecan also beused to temporarily
interrupt a cycle. The cycle will resume from the
pointof interruptionwhen the delay time runs out
or when the DelayPad is touched again.
8
IfyouprefertouseacycleotherthanSensorStart, estimated cycle time and MIN will appear in the
you can choose Sani Scrub, Quick Wash or Rinse Display.
& Hold. Refer to the chart below for more
information. When Rinse & Hold is selected, the indicator on
the pad will light and a tone will sound. RINSE,
When either Sani Scrub or Quick Wash are rinse droplets, estimated cycle time and MIN will
selected, the indicator on the pad touched will light appear in the Display.
and a tone will sound.WASH, wash droplets,
Rinse& Hold Rinse6 Min,2 Gal.
Useto rinsearelativelyfewsoiled
disheswhicharetobehelduntilthe
dishwasherisfull.TouchtheRinse
&HoldPad.
Quick Wash
Useto quicklywashdustyor very MainWash 17Min. 5 Gal.
lightlysoileddishesyouwishtostore 2 Rinses
or reuse immediately. Touch the Dry
QuickWashPad.35 Min.(optional) 11Gal.
SaniScrub
Usefor loadswithheavyor dried PreWash
soils.TouchtheSaniScrubPad,2 Rinses
MainWash. . 75 Min.
2 Rinses
Dry 35 Min.
110Min.+ HeatingDelay*
* TheFinalRinseisheatedtoapproximately150°F.Thetimerequiredwillvarydependingonthewatertemperatureatthe
beginningoftherinse.
To select HeatDry, touch the Heat Dry Pad.The For bestdrying results, use Rinse Aid and Heat
indicator on the pad will light and HEATED DRY Dry. Make sure the water temperature is 120°Fto
will appear in the Display. The dishes are dried 140oF. Some items like plastics, Teflon-coated
using a fan to circulate heat from the heating pans and cups and glasses with concave bottoms
element located in the bottom of the dishwasher, are difficult to dry and may need towel drying
before putting them away.
If you are not in a hurry to put the dishes away,
cancel Heat Dry by touching the pad again. The
indicator light on the pad will shut off and only the
fan will operate. Any cycle, including Sensor Start, can become a
gentle wash and dry cycle for china and crystal.
With either option you may notice moist air being Touch the Delicate WashPad after selecting a
released from the dishwasher through the vent cycle. Theindicatoronthepadwiillightandatone
under the control panel. After the dishwasher will sound. DELICATE WASH will light in the
shuts off, the dishes will be slightly warm to the Display. Use half as much detergent as normally
touch and ready to put away. required.
9
RINSE_-This symbol flashes to indicate the rinse
,,,,,, circulation has started.
44_,k_b
To cancel any cycle before it's finished, touch the """
Cancel Pad. The indicator on the Cancel Pad will
light and a tone will sound. The dishwasher will DRY- The fan symbol will light during the dry
drain and shut off.I1_:_111 period and the fan blades will flash only
when the fan is on. The heat symbols
will also light when Heat Dry isselected.
To prevent children from accidentally starting the Special Indicator Words
dishwasher or changing the cycle and options, CLEAN - appears at the end of a complete wash
touch the Lock Pad3 times within 3 seconds,cycle. It will remain lit until the door has been
LOCKED will appear in the Display.To cancel, opened for 60 seconds.
again touch theLock Pad3times within 3 seconds. DELAY - appears when the Delay Pad is touched.
LNOTE: This does not lock the door. I The time (in hours or minutes) is also displayed.
DELICATE WASH - appears when this option has
been chosen with any wash cycle.
After loading,close the door,press the door until
the latch clicks. HEATED DRY - appears if Heat Dry is selected.
Note: If your water heater is located a long HEATING- appears when the water temperature
distance from the kitchen, run the water from the islowandtheheatingelementisonduringwashing
hot water tap to clear the line of cold water before or rinsing portions of the cycle.It is NOT lit during
starting, the drying portion of the cycle.
Turn the dishwasher on by firmly touching the pad LOCKED - appears when the Child Lock has been
corresponding with the chosen cycle (Sensor activated.
Start Pad, Sani Scrub Pad,Quick Wash Pad or
Rinse& Hold Pad). Theindicator light for the LOWRINSEAID-appearsattheendofthecycle
selected cyclewill glow.asaremindertoadd morerinseaidtothedispenser
in the door. Itshuts off after the doorisopened.
PF -appears when there has been a power failure.
Through words, symbols and numbersthe Display Any option selected before the power failure will
window indicates what is happening in the need to be reselected.
dishwasher.RINSED - appears after a Rinse & Hold cycle.
Cycle Progression
Thedishwasherwill indicatetheportionoftheService Indicator Words
cycleitis currently in. Estimated timeremaining IfBLOCKED DRAIN, BLOCKED WASH ARM or
in thecycle(in minutes) also appears in theWASH ARM appears intheDisplay, see pages
Display. 14-15. If any other code appears, contact your
servicer or Jenn-Air Customer Assistance, c/o
WASH " This symbol flashes to indicate the Maytag Customer Service (1-800-688-1100).
i_nlll_T wash circulation has started. Soiled
IIII II|t itemscan beadded while inthis portion
ofthecycle.
lO
To determine ifthe film on theglasses is due to
hard water, soak a glass approximately 5 minutes
Select Sensor Startin undilutedwhite vinegar. Rinse anddry. If film is
This selection monitors the items which affect removed, it is due to hard water (if not removed,
results and developsa cycle for best results, see Soft Water Etching).
Load theDishwasher Properly To correct:
To insure that all soiled surfaces get adequate
wash action, carefully follow the instructions for 1. Increase theamount of detergent used ac-
loading the dishwasher. (See pp. 4-5.) Make sure cording to the degree of water hardness. (See
nothing extends above or below the racks to p. 6.)
interfere with the movement of the upper or lower 2. Check the water temperature. (See p. 4.)
spray arms. 3. Usea rinse aid to improve the sheeting action
of the water.(See p. 6.)
Use Enough Detergent
For proper soil removal, good drying results, and To remove filmfrom dishwasher interior, try
to prevent filming, etching and spotting, an ad- one of thefollowing:
equate amount of detergent must be used. We
recommend 1 teaspoon of detergent per grain of 1. Removewith a damp cloth and a mild scouring
water hardness with a minimum of 3 teaspoons, powder.
See page 6 on adding detergent. 2. Startemptydishwasheron Rinse &Hold cycle.
During fill, open door and add 1/2cup white
Use a Rinse Aid vinegar to water. Allow dishwasher to com-
Using a rinse aid improves drying results and plete cycle. Do not use detergent. Follow with
reduces spotting and filming. See page 6 for Quick Wash (add detergent).
instructions on using a rinseaid.
Use Hot Water Soft Water Etching
Hot waterdissolvesandactivatesthedishwashing If the cloudy film is not removed after soaking in
detergent, dissolves grease on dishes and helps vinegar (previous procedure), then the condition
dry glasses spot-free. Low incoming water tem- is etching. This permanent film occurs in unusual
perature lengthens the cycle time to heat to the conditions under which the surface of the glass is
proper temperature. (See p. 4.) pitted or eroded. It is permanent.
Select HeatDry In the beginning stages, etching may be identified
For faster drying select Heat Dry. This option bya"rainbow"look--shadesof blue, purple, brown
provides fast, efficient drying at less than a penny or pink may be seen when theglassis held at an
per load. The dishes are dried using a fan to angle to the light. In advanced stages the surface
circulate heat from the heating element located in of the glassware appears frosted, spotted or
the bottom of the dishwasher,cloudy.
Certain types of glassware will etch in any dish-
washer with the combination of soft water (espe-
Hard Water Deposit ciaUymechanically softened), an excessive amount
If an unusual amount of calcium is in the water, a of detergent, heat and prednsing. There is no
lime film or deposit may eventually build up on the relationship to the cost or quality of the glass.
dishes and interior surface of the dishwasher. You
may first notice this as "cloudy" glasses.
11
To prevent:
1. Adjust the amountof detergent to the degree The interior is normally self-cleaning. Occasion-
of water hardness. (See p. 6.) ally check the bottom of the dishwasher tub and
2. Lower the incoming water temperature to clean out pieces of food which may collect there.
120°F. (See p. 4.)
3. Do not manually pre-rinse dishes beforeload- Periodically cleanthe bottom edge of the dish-
ing in dishwasher.Prerinsing prior to loading washer door liner.Food and liquids drip onto this
to remove all food soil aggravates etching, area when the dishwasher is loaded.
Rust If you notice an odor in your dishwasher,itmay be
Sometimes the dishes or the interior of the dish- due to a strong "chemical" or chlorine odor from
washer may turn a brown, red or black color ifiron the dishwasher detergent. Using a different deter-
or manganese is in thewater. To remove discol- gent, especially a lemon scented one, will prob-
oration from the dishwasher interior, dishes and ably eliminate the odor. In some instances the
glassware (no metal items): smell of the rinse aid may be strong. Purchase a
freshpackage of rinse aid and see if it is better.
1. Select a rust removing compound, such as Lastly, if the dishwasher is run only every couple
RoVer Rust Remover. It is available from of days,an odor may develop.Use the Rinse &
dealers by using Part No. 057961. Hold feature daily to remove any food soil that may
2. Start empty dishwasher on Rinse& Hold. cause an odor.
During fill, open the door and add 1/4 cup
RoVer Rust Remover to the water. Allow the To remove an odor,try one of the following:
dishwasher to complete the cycle.
3. Follow with Quick Wash (add detergent). 1. Place baking soda in both sides of thedeter-
gent dispenser. Select the Quick Wash and let
The only permanent solutionis to install special the dishwasher run for about 2 minutes. Stop
filters which can remove iron and manganese the dishwasher by unlatching the door and let
from the water,stand overnight. Then, restart the dishwasher
by latching the door and let it complete the
cycle.
2. Select the Quick Wash cycle and let the dish-
You can help save energy if you: washer fill with water (main wash). Then open
the door and pour 1/4 cup of chlorine bleach
1. Wash full loads, into the bottom of the dishwasher. Latch the
2. Do not pre-rinse normally soiled dishes. Use door and let thedishwasher complete the
the recommended amount of detergent for cycle.Do not use detergent.
good washing results without hand rinsing.
3. Load correctly for best washing results. Incor- Clean the control panel and front panel with a soft
rect loading may cause poor washing and damp cloth and liquid spray cleaner. Do not use
lengthen the cycle, any abrasive powders or abrasive cleaning pads.
4. Use your dishwasher during off-peak hours.
Local utilities recommend this to avoid heavy
usage of energy at certain times of the day.
Check with your utility company to see if off-
peak rates exist.
5. Select the Sensor Start cycle.
12
4.Place door panel(s) (notched side up)behind
the metaltrim at the bottom of the door. Bow
CAUTION:To protect against rupture offill valve, the panels so they fit behindthe control panel
BE SUREthe water lines leading to the dish- at the top.
washer, are well protected against freezing. 5. Slide the panel(s) under the side metal trim
which was not removed. To do this, it will be
1.Run dishwasher through acycleusing deter- necessary to compress thebacking behind
gent. if an odor remains, repeat using baking the colored panel(s).
sodainthe dispensercuporadding 1/4cupof 6. Reinstall theside trim which was removed
chlorine bleachin the bottom ofthe tub.Clean earlier. Align the holesand replace thethree
the bottomedge ofthe doorand front lipofthe screws.
tub with a baking soda and water solution.
2. Turnthe watersupply off and set thedish- Lower Panel-Most Models
washerto drain(selectRinse & Hold cycle).1. The loweraccesspanelisheldbyfourscrews
Once Rinse& Hold is completed,open the (two above the panelandtwo below). With
doorandreturnTimertoOff. these removed,the panel maybe removedto
3. Disconnectthe electrical supply, make it easyto changepanel colors.
4. Placeapan underthe drain outlet.Disconnect 2. Withthe loweraccess panel removed,remove
the flexibletubingfromthe pump anddrain the the four screwsalong the bottom of panel and
water into pan by pushing down on drain arm removethe trim which holdsthe panels.Once
lever. Reconnect hose andsecure clamp, thedesired panel isfacing out, replace the
5. Prop thedooropen. trim,and reinstallthe paneltothedishwasher.
To restore service, turn on the electricity and Use carewhen changing panelstobecertain you
water supply. Select a washcycle and let the arenotinjuredonsharpedgesandthatthepanels
dishwasher complete the cycle. Check connec-
tions to make sure they are water tight, are not damaged.If you have any questions
concerning changing panels or wish to purchase
a different color panel,contact your local Jenn-Air
dealer.
Your Jenn-Air dishwashercomeswith reversible
panel inserts which arepre-assembled at the
factory.This enablesyou to select the color you
want beforeyourdishwasher is installedorchoose
another color at a later date.
To Change Panels
Door Panel
1. Remove three screws holdingthe side trim
stripononesideofthedoor.Takenoteofhow
thetrimcomesoff.
2. Graspingthelowerpartof the door panel(s),
bowpanel(s) outcarefully atthebottomwhile
sliding panel(s)far enough to clear theflange
on thetrim strip whichwasnot removed and
remove panel(s).
3. Arrange panel so the desired color is facing
out.
13
Check these points if your dishwasher... Stains or discolors dishes
• Aluminumutensilscanleavemarkswhenthey
Leaves food soil on dishes rub againstotherthings.Loadproperly,
•Check the watertemperature. (Seep. 4.) • Irondepositsinthewater can leaveayellow or
•Checkwater hardness.Forextreme hardwater brownfilm on dishes. You maydesireto have
conditions it may be necessary to install a aspecialfilter installedinthewater supply line,
mechanical water softener, or periodicallyuseRoVerRust Remover.(See
•Usefresh highphosphatedetergentthat isnot Water Conditions, pp.11-12.)
caked. Store detergent in cool, dry place. • Certain high-acid foods cause stainless steel
• Be sure dishes are loaded properly with noth- flatware to rust and pitwith prolongedcontact.
ingblockingthepathof the wash arms, center (See p. 4.)
spray nozzle or detergent dispenser.
•Check for nesting of dishes that prevents Cycle takes too long
water from reaching all surfaces. • Check to see that the incoming water tern-
•Check to makesure glasses are not loaded perature is at least 120°F. (See p. 4.)
over prongs.
• Heavilysoileddishes may requiremore deter- Seems noisy
gent. Be sureit is put in the dispenser as • Water circulation noise is normal.
directed. (See p. 6.) • Humming during drain is normal.
• Burned-on food may need soaking. • Dishes may not beloaded properly. Dishes
should not be touching one another.
Leaves glassware cloudy or spotted • Wash arm may be hittingan item when rotat-
•Checkthewatertemperature.Avoidextremely ing.Load itemsso nothingblocksthewash
high or low temperatures. (See p. 3.) arm.
• Use a rinseaid such as Jet-Dry. • Chopping or grinding noise may be heard
• Do not pre-rinse dishes before loading them during the cyclewhen the internal food dis-
into the dishwasher.
• Refer to Water Conditions for moreinforma- poser is chopping food.
tion. (See pp. 11-12.) • Detergent cup lid hits door liner when dish-
washer door isopened at end of cycle and is
Does not dry properly normal.
• Be sure the Heat Dry option is selected. • Installation (location, flooring, cabinetry, etc.)
• Use a rinse aid. can affect noise level.
•Check the water temperature. (Seep. 4.) • Water valve hiss during fill is normal.
• Increasedetergent use according to water
hardness. (See p. 6.) Does not runproperly/Won't fill
•Check for improper loading and do not over- • Be sure door is tightly closed and latched.
load. Dishes should not nest together.• Check to seethat water is turned on.
• Plastic items have a porous surface and tend • The cycleisnot properlyselected. Besurethe
to hold water. Towel drying may be required, cycle pad has beentouched and Displayis lit.
• Glasses, cups, etc., with concave bottomswill • Motor runs 1-2 minutes before fill begins.
hold water. • Checkyour home'scircuitbreaker orfuse box.
• Inlet hose may be kinked.
• Water inlet valve may be clogged with sedi-
ment and in need of cleaning.
• If LOCKEDappears in theDisplay,touch the
Lock Pad 3times within 3 seconds to unlock.
14
Does not drain properly Chips dishware
•Check tosee that the cycle has been com-• Be sure dishes are loaded according to the
pleted. The dishwashermay beat a normal instructionsso they donot striketogetherfrom
pause between cycles which is normal,thewashaction.
•Drain hosemay bekinked. •Wedo not recommend washing fineantique
•Check your home's circuitbreaker or fusebox. chinaandcrystal in thedishwasher.
Reset ifnecessary.•Do not loadglasses over rack tines, or allow to
•Food is backing up in thepipes at thesink. Iftouch eachother.
hooked up to a food wastedisposer, besure• Do not overload.
, the knock out is removed from the disposer
and it is run regularly. Display window is warm to the touch
• Some water is normal and keeps seals from • Normal operation.
drying.
• Elevate the drain hose 32"when installing. Displays WASH ARM
• The lower wash arm is turning too slow due to
Detergent cup did not empty completely excessive sudsing. Try another brand of de-
e Check to see that the cycle has been com-
pleted, tergent and use recommended amounts.
• Be sure dispenser is not blocked from wash
action. Displays BLOCKED DRAIN and beeps
• Be sure dispenser is not wet when detergent• Make sure the food waste disposer isempty to
is added, allow proper draining.
• Make sure large items placed in the front right • If the disposer is empty, the drain hose may be
corner of upper rack are not blocking the blocked and service is needed.
detergent cup.
• Use fresh detergent. Store in dry, cool place. Displays BLOCKED WASH ARM and beeps
• Check lower dish rack for items extending
Leaks below the rack (such as flatware, small lids,
• Check to see that the dishwasher is level as etc.) which would prevent the lower wash arm
described in the Installation Instructions. from turning properly.
• Suds can cause the unit to overflow so mea- • Check for items placed over the center jump-
sure detergent carefully. Try another brand of up wash tower. See page 5 for lower rack
detergent. Use only detergents designed for loading instructions.
automatic dishwashers. • Check that drain hose loop is 32" high.See
• Make sure you follow directions on how to add installation instructions.
a forgotten item.(See p. 4.) Symbol of Dry (Dry Fan) turns on after cycle is
Has on odor complete
•Soiled dishes held too long in thedishwasher • Drying timewill beadded ifthe watertempera-
can createan odor.UsetheRinse& Hold tureis low. (See p.4.) This is normal,
cycle.
•Dishwashers willhave a "new"smell when first
installed,
•Dishwasher notdraining properly. (See "Does
not drain properly".)
15

Other Jenn-Air Dishwasher manuals

Jenn-Air JDB1105AWB0 User manual

Jenn-Air

Jenn-Air JDB1105AWB0 User manual

Jenn-Air JDB3600AWX0 User manual

Jenn-Air

Jenn-Air JDB3600AWX0 User manual

Jenn-Air TriFecta JDB3200AW User manual

Jenn-Air

Jenn-Air TriFecta JDB3200AW User manual

Jenn-Air JDB1095AWB1 User manual

Jenn-Air

Jenn-Air JDB1095AWB1 User manual

Jenn-Air JDB4950 User manual

Jenn-Air

Jenn-Air JDB4950 User manual

Jenn-Air JDB1080AW User manual

Jenn-Air

Jenn-Air JDB1080AW User manual

Jenn-Air JDB1105AWB1 User manual

Jenn-Air

Jenn-Air JDB1105AWB1 User manual

Jenn-Air DW731 User manual

Jenn-Air

Jenn-Air DW731 User manual

Jenn-Air JDB1095AWB0 User manual

Jenn-Air

Jenn-Air JDB1095AWB0 User manual

Jenn-Air DW961 User manual

Jenn-Air

Jenn-Air DW961 User manual

Jenn-Air JDB1255AWB1 User manual

Jenn-Air

Jenn-Air JDB1255AWB1 User manual

Jenn-Air JDD4000AWX User manual

Jenn-Air

Jenn-Air JDD4000AWX User manual

Jenn-Air JDB8000AWB1 User manual

Jenn-Air

Jenn-Air JDB8000AWB1 User manual

Jenn-Air JDB7910AWB User manual

Jenn-Air

Jenn-Air JDB7910AWB User manual

Jenn-Air JDB9600CWS User manual

Jenn-Air

Jenn-Air JDB9600CWS User manual

Jenn-Air JDB3000AWB0 User manual

Jenn-Air

Jenn-Air JDB3000AWB0 User manual

Jenn-Air JDB1105AWB41 User manual

Jenn-Air

Jenn-Air JDB1105AWB41 User manual

Jenn-Air DW700 User manual

Jenn-Air

Jenn-Air DW700 User manual

Jenn-Air DU460 User manual

Jenn-Air

Jenn-Air DU460 User manual

Jenn-Air JDB3650AWF4 User manual

Jenn-Air

Jenn-Air JDB3650AWF4 User manual

Jenn-Air JDB3910 User manual

Jenn-Air

Jenn-Air JDB3910 User manual

Jenn-Air DU430 User manual

Jenn-Air

Jenn-Air DU430 User manual

Jenn-Air JDB1250AWW User manual

Jenn-Air

Jenn-Air JDB1250AWW User manual

Jenn-Air JDB9800CWS User manual

Jenn-Air

Jenn-Air JDB9800CWS User manual

Popular Dishwasher manuals by other brands

LG DB365 Series owner's manual

LG

LG DB365 Series owner's manual

Frigidaire FDB421RF Factory parts catalog

Frigidaire

Frigidaire FDB421RF Factory parts catalog

Frigidaire FDB632RB operating instructions

Frigidaire

Frigidaire FDB632RB operating instructions

Ariston LFF 8H54 operating instructions

Ariston

Ariston LFF 8H54 operating instructions

Bosch SPV68U53UC operating instructions

Bosch

Bosch SPV68U53UC operating instructions

Atag VA 6511QT/A01 Instructions for use

Atag

Atag VA 6511QT/A01 Instructions for use

Midea DW143W instruction manual

Midea

Midea DW143W instruction manual

AEG Favorit 667 operating instructions

AEG

AEG Favorit 667 operating instructions

Russell Hobbs RHTTDW6 instruction manual

Russell Hobbs

Russell Hobbs RHTTDW6 instruction manual

KAPASS H50U Installation and operation manual

KAPASS

KAPASS H50U Installation and operation manual

Bosch SMI8ZCS07E user manual

Bosch

Bosch SMI8ZCS07E user manual

Zanussi ZDTS401 user manual

Zanussi

Zanussi ZDTS401 user manual

AEG FAVORIT 54730 operating instructions

AEG

AEG FAVORIT 54730 operating instructions

Baumatic BFD65W instruction manual

Baumatic

Baumatic BFD65W instruction manual

Asko DFI643AU operating instructions

Asko

Asko DFI643AU operating instructions

Hisense HSGP15FB user manual

Hisense

Hisense HSGP15FB user manual

AEG FD770VP user manual

AEG

AEG FD770VP user manual

Asko DFI5448DXXL user manual

Asko

Asko DFI5448DXXL user manual

manuals.online logo
manuals.online logoBrands
  • About & Mission
  • Contact us
  • Privacy Policy
  • Terms and Conditions

Copyright 2025 Manuals.Online. All Rights Reserved.