manuals.online logo
Brands
  1. Home
  2. •
  3. Brands
  4. •
  5. Jenn-Air
  6. •
  7. Oven
  8. •
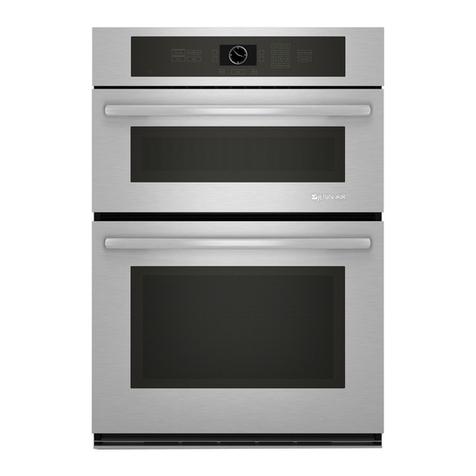
  9. Jenn-Air WM27160 User manual

Jenn-Air WM27160 User manual

T
Built-In 27"& 30" t
Electric Combination Wall Ovens 303.6..oE omiJENN'AIR,.o,...L,s,.4. 50.01
INSTALLATION
INSTRUCTIONS
PART NO. 210410
Model numbers covered by these instructions: WM27160, WM27260, WM27460,WM30460
COMBINATIONWALLOVEN CUTOUT
1-1/4" Dia Conduit Access Hole* 1-1/4" Dia Conduit Access Hole*_--B-_---- A----_I
5/5"Plywood Floor (Must Support 250 Ibs.) 5/8" Plywood Floor (Must Support 250 Ibs.)
- -
A 27 MIN 68.58 MIN A 30 MIN 76.20 MIN ..-------------I
B24 MIN 60.96 MIN B 24 MIN 60.96 MIN
C 44-1/2±1/16 113.03±.16 C 44-1/2±1/16 113.03 ±.16
D 23-1/2 MIN 59.69 MIN D 23-1/2 MIN 59,69 MIN C 1
E 25-1/2±1/16 64.77:L.16 E 28-3/16±1116 71.60±.16
F44-15116 114.14F 44-15116114.141 r
G26-3/4 67.95 G 29-5/4 75.57 •
H 24-7/16 62.07 H24-7/16 62.07
I 4 to 20 t0.2to 50.8 I 4to20 10.2 to 50.8__
•Hole must be cut as close to comer of cabinet as possible. _'_E
I Do not block air intake slots along bottom of oven
INSTALLATION
• Cut hole in cabinet to mount oven. Cutout in cabinetshouldbe levelandstraight.Note:Thereare noprovisionsto levelthe uni
afteritisinstalled.Anoventhatisnotlevelcouldcause poorbakingresults,
2.Installplywoodfloorasshownabove.
3. Attachunittothe cabinetwith6 No. 8"flat headscrewssuppliedinsideofenvelopecontainingthese instructions.Pre-ddllhole.=
incabinetforattachmentscrewsusing1/8"drill.Oven mountingholesare providedinsidetrim.
4.See instructions"ElectricalConnections"forelectricalhook-up.
5. See Fig. 1 forlowertriminstallation.
6.See User'sManualforoperatinginstructions.
Fig.1_
Removelowerscrewsfromhingereceptacle
plates. Alignlowertrimandreinstallscrews iv
Microwave Oven_JENN-AIR |
3035 SHADELAND INDIANAPOUS. IN 46226-0g01J
INSTALLATION
INSTRUCTIONS
PART NO. 210649 Built-In Kit
With useof Model M168 Microwaveoven.
___ Step 2. Bottom Rail
A. Removetop bracketsand d_scard
(retain screws - seeFig. 2).
Note: A 27" minimumwide
cadinetmusthe providedB. Replace largebracket withbracket included in trim kit,
toinstallTrimKit MK27. att,9.chingwith screw removed from original (seeFig. 3).
Note: A 30"minimum wide C.Setmicrowave onits backso bottom is accessible.Remove
Cabinetmustbeprovidedleftoutboard screw and corresponding right hand screwfrom
toinstallTrim KitMK30. bottom front and attach bottom railas shown in Figure 4 with
ssme screws.
Step 1. Electrical Requirements _------_'__L=._
OBSERVE ALL GOVERNING CODES ANDORDINANCES, _ Fig. 2
A. A 120-Volt, 60Hz, AC, 15 ampere, fused electrical supply is
required(time-delay fuse orcircuit breaker isrecommended.)
However, if your homehasa circuit wiredand fused for 20
amperes, this is preferred.If youareinstalling s new circuit,
_ne wired and fusedfor20 amperesisrecommended.It is
also recommended that s separate circuit servingonly this ap-
pliancebe provided. Do not use an extension cord.
B. Electrical Connection
ELECTRICAL GROUND IS REQUIREDON THISAPPLIANCE.
DO NOT,UNDERANY CIRCUMSTANCES, REMOVE THE
POWERSUPPLY CORD GROUND PRONG.4p
For your personal safety,thisapptisnce must beproperly
groundedandpolarized.This applianceis equipped witha _ _f
powersupply cordhaving • 3-prong grounding plug.Tomini- C'-""-'J !._!/Fig. 3
mJzepossible shockhazard, the cord must bepluggedintos I _..J }_!1
mating 3-hole greunding type wall receptacle, grounded in ac-
cordance with the National E!ecthcal Code, local codesand
ordinances.If a mating wallreceptscJeis not svsiisbie,it is _-_
the personalresponsibility and obligation of the customer to
have a properly groundedand poJsrized3-hoJewaIJreceptscie
installed by a qualified electrician, (SeeFigure1.)
3-Prong
Grounding Plug
•
(_ - " ;RAIL
PowerSuppty
Cora_ ,
ProPerty Potarized .;;_,;:_.
3-Ha_eGrounding .:::_
Fig. 1 "ry_eWaJlReceotade Fig. 4
RequiredGroundingMethod
Step 3. Cabinet or Wall Opening
Theopeningshould be per dimensionsdescribed below.All comers should
_esquare. Thefloorofthe opening must beplywood and must belevel
andcapableof supporting 80 Ibs.
_I" "A" "1 I
LI_'rE RECEFrAC_ _ Model fDim "A"
16V_ MK27251/2"
iMK3O 2B_h" i_
-_ _%____,_, Fig.7
_JInstallation Above Lower Oven
Note 1: When instaging this Kitaboveabuilt-in oven, check built-in
The weight of the Microwave:rnay e_xceed oven installation instructions to determinecutout dimensions
for the(lower) wail oven.
Step 4. Assembly of Trim Note 2: For a newinstaflafion, the 48"heightdimensionto the bot-
tom of the cutout forthemicrowave oven is recommended.
t_. Locate pieces of assembly as indicated inFig.5.These include a top,Thisplacesthe microwave oven bottom atapproximately 50"
bottom, right, ]eft, (2) glassassemblies, 6 screws (4 fiat head and 2 from the floor. See figure 8.
truss head), and 4 end caps.
3. Insert end capsinto the end of the top(see Fig.5). ]
3,Assemble outer frameby attaching top, sides, and bottom with 4 flat CAUTION /
head screws as c_epictedinFig.5. When the microwaveoven is installed above a Jenn-Air walloven, /
3. Attach gtassassem_liasenleftand rightsides by inserting flangeinto theminimum heightdtmensi°nfromtheb°tC°m°fthewal!°ven /
top and attaching with truss head screwin thebottom (see Fig. 5). cutout to the bottom of the microwave cutout must be main- t
Outside ofglass to beflushwithoutside trim. tained.....
_-EndCaps __._
Notc_/I--Top
attop _ _ _"
I
+,oo_JII litv rl 1
/L_)_ III tl!l TrimI I Jl
III II_G_ass I
Fig. 5 "_ Bottom i)
;tep 5. Installation of Microwave Oven , _Fig.s
_,.Plug powercord of oven into receptacle. MK27 Kits may beused with microwavemodel M168, installed above
=L Slidetheoven intothe opening, Be sure thelip ofthebottom rail is Jenn-Air 27"wall oven modelsbeadng manufac_rer No. E33658, when
flushwithfront of cabinet. Centermicrowave in opening, installed in accordance with Manufacturer's Installation
3. Attach railto cabinetwith 2 fiathead screws (see Fig, 6), Instructions,These includemodels W27100, W27200, W27400.
3. Attach trim assembly as shown inFig.7. Insert bottomoftnm as-
sembly intorail and rotate upward. Attach top oftrim to cabinetwith 2 MK30 Kits may beusedwith microwave model M168, installedabove
flat head screws. Jenn-Air 30" wall oven models bearing manufacturerNo. E33658, when
__ installed inaccordancewith Manufacturers Installation Instructions.
These inciude models W30100, W30400.
Manufacturer's No.can be obtained from the serial plate on the
Fig.6 oven.
-IMPORTANT -
-._ SAVE FOR LOCAL ELECTRICAL INSPECTOR'S USE
•-...... Part # 210649A

This manual suits for next models

5

Other Jenn-Air Oven manuals

Jenn-Air W10419852A User manual

Jenn-Air

Jenn-Air W10419852A User manual

Jenn-Air JJW8.527 User manual

Jenn-Air

Jenn-Air JJW8.527 User manual

Jenn-Air JMW8530DA Series User manual

Jenn-Air

Jenn-Air JMW8530DA Series User manual

Jenn-Air JGW8130DDB - 30" Single Gas Wall Oven7 User manual

Jenn-Air

Jenn-Air JGW8130DDB - 30" Single Gas Wall Oven7 User manual

Jenn-Air JJW8127 User manual

Jenn-Air

Jenn-Air JJW8127 User manual

Jenn-Air PROSTYLE JJW9827DDP User manual

Jenn-Air

Jenn-Air PROSTYLE JJW9827DDP User manual

Jenn-Air JJW3430 User manual

Jenn-Air

Jenn-Air JJW3430 User manual

Jenn-Air PRO-STYLE JJW9530DDP29 User manual

Jenn-Air

Jenn-Air PRO-STYLE JJW9530DDP29 User manual

Jenn-Air JJW3830 User manual

Jenn-Air

Jenn-Air JJW3830 User manual

Jenn-Air 209630 User manual

Jenn-Air

Jenn-Air 209630 User manual

Jenn-Air JJW3830DP User manual

Jenn-Air

Jenn-Air JJW3830DP User manual

Jenn-Air ELECTRIC WALL OVEN User manual

Jenn-Air

Jenn-Air ELECTRIC WALL OVEN User manual

Jenn-Air ProStyle JJW9830DDP User manual

Jenn-Air

Jenn-Air ProStyle JJW9830DDP User manual

Jenn-Air Electric Wall-Oven User manual

Jenn-Air

Jenn-Air Electric Wall-Oven User manual

Jenn-Air JJW8330DDB Instructions for use

Jenn-Air

Jenn-Air JJW8330DDB Instructions for use

Jenn-Air 2240 User manual

Jenn-Air

Jenn-Air 2240 User manual

Jenn-Air WG30100 User manual

Jenn-Air

Jenn-Air WG30100 User manual

Jenn-Air JJW2327 User manual

Jenn-Air

Jenn-Air JJW2327 User manual

Jenn-Air JJW8.527 User manual

Jenn-Air

Jenn-Air JJW8.527 User manual

Jenn-Air JMW8527DA Series User manual

Jenn-Air

Jenn-Air JMW8527DA Series User manual

Jenn-Air GAS WALL OVEN User manual

Jenn-Air

Jenn-Air GAS WALL OVEN User manual

Jenn-Air JJW8630 User manual

Jenn-Air

Jenn-Air JJW8630 User manual

Jenn-Air JJW2427WS User manual

Jenn-Air

Jenn-Air JJW2427WS User manual

Jenn-Air JJW7530DDS User manual

Jenn-Air

Jenn-Air JJW7530DDS User manual

Popular Oven manuals by other brands

Bosch OVEN instruction manual

Bosch

Bosch OVEN instruction manual

Miele H6780BP2 Operating and installation instructions

Miele

Miele H6780BP2 Operating and installation instructions

SEVERIN TO 2054 Instructions for use

SEVERIN

SEVERIN TO 2054 Instructions for use

Meireles MF-7600-X instruction manual

Meireles

Meireles MF-7600-X instruction manual

Bauknecht BAK5S KP8V2 BLG installation instructions

Bauknecht

Bauknecht BAK5S KP8V2 BLG installation instructions

Robam ZQB235-SA01 Operation manual

Robam

Robam ZQB235-SA01 Operation manual

Inoxtrend XBP Series Operating and maintenance instructions

Inoxtrend

Inoxtrend XBP Series Operating and maintenance instructions

Bosch HBC84K5.0A instruction manual

Bosch

Bosch HBC84K5.0A instruction manual

Vigan Mammoth T45L2P user manual

Vigan Mammoth

Vigan Mammoth T45L2P user manual

Henny Penny GCC-220 Specification sheet

Henny Penny

Henny Penny GCC-220 Specification sheet

AEG BP500302WM user manual

AEG

AEG BP500302WM user manual

Bosch HBL33B5 0 Series instruction manual

Bosch

Bosch HBL33B5 0 Series instruction manual

Siemens CB734G1.2 User manual and installation instructions

Siemens

Siemens CB734G1.2 User manual and installation instructions

EVE OWL instruction manual

EVE

EVE OWL instruction manual

Zanussi ZOU 333 user manual

Zanussi

Zanussi ZOU 333 user manual

Cylinda IBU3112RF user manual

Cylinda

Cylinda IBU3112RF user manual

Monsher MOER 6091 user manual

Monsher

Monsher MOER 6091 user manual

Whirlpool 1319999/868842 installation instructions

Whirlpool

Whirlpool 1319999/868842 installation instructions

manuals.online logo
manuals.online logoBrands
  • About & Mission
  • Contact us
  • Privacy Policy
  • Terms and Conditions

Copyright 2025 Manuals.Online. All Rights Reserved.