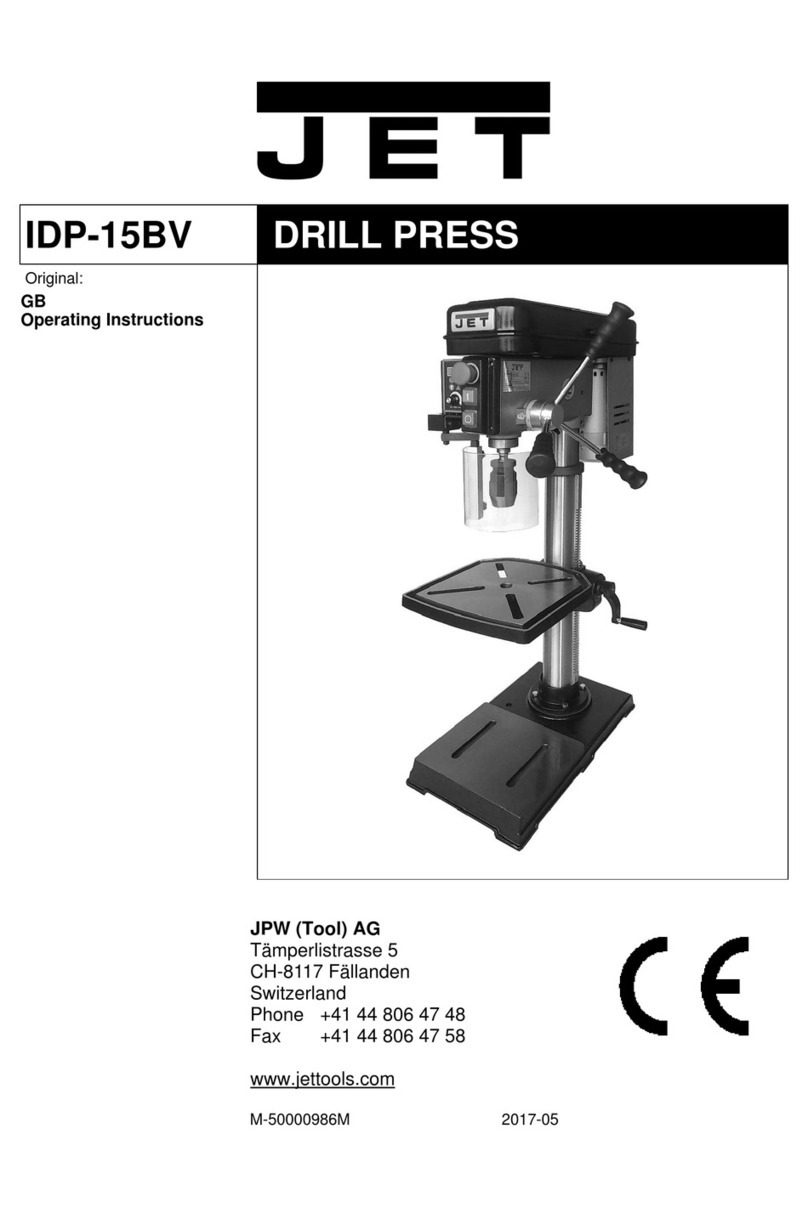
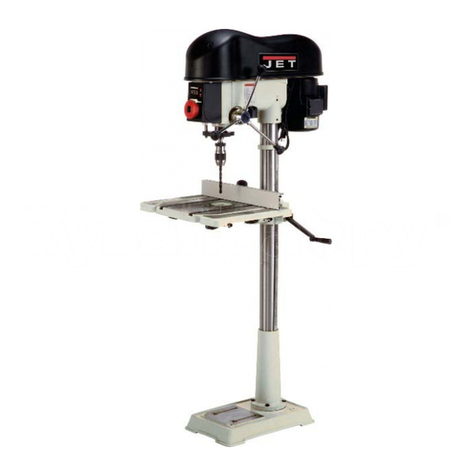
Jet JDP-15B-M User manual

JDP-15B-M/T
JDP-17-M/T
DRILL PRESS
Original:
GB
Operating Instructions
Translations:
D
Gebrauchsanleitung
F
Mode d´emploi
JPW (Tool) AG
Tämperlistrasse 5
CH-8117 Fällanden
Switzerland
Phone +41 44 806 47 48
Fax +41 44 806 47 58
www.jettools.com
M- 716100M/T, 716200M/T, 716300M/T 2016-09

CE-Conform
i
ty Dec
l
arat
i
on
CE-Konform
i
tätserk
l
ärung
Déc
l
arat
i
on de Conform
i
té CE
Product / Produkt / Produit:
Drill Press
Säulenbohrmaschine
Perceuse à colonne
JDP-15B / JDP-15F / JDP-17
Brand / Marke / Marque:
JET
Manufacturer / Hersteller / Fabricant:
JPW (Tool) AG, Tämperlistrasse 5, CH-8117 Fällanden
Schweiz / Suisse / Switzerland
We hereby declare that this product complies with the regulations
Wir erklären hiermit, dass dieses Produkt der folgenden Richtlinie entspricht
Par la présente, nous déclarons que ce produit correspond aux directives suivantes
2006/42/EC
Machinery Directive
Maschinenrichtlinie
Directive Machines
2014/30/EU
electromagnetic compatibility
elektromagnetische Verträglichkeit
compatibilité électromagnétique
designed in consideration of the standards
und entspechend folgender zusätzlicher Normen entwickelt wurde
et été développé dans le respect des normes complémentaires suivantes
EN ISO 12100:2010
EN 12717:2001+A1:2009
EN 60204-1:2006+A1:2009
EN 61000-6-2:2005
EN 61000-6-4:2007+A1:2011
Responsible for the Documentation / Dokumentations-Verantwortung / Résponsabilité de Documentation:
Hansjörg Meier
Head Product-Mgmt. / Leiter Produkt-Mgmt. / Resp. Gestion des Produits
JPW (Tool) AG
2016-09-26 Alain Schmid, General Manager
JPW (Tool) AG, Tämperlistrasse 5, CH-8117 Fällanden
Schweiz / Suisse / Switzerland

GB - ENGLISH
Operating Instructions
Dear Customer,
Many thanks for the confidence you have shown in us with the purchase of your new JET-machine. This manual has been
prepared for the owner and operators of a JET JDP-15B, JDP-15F, JDP-17 drill press to promote safety during installation,
operation and maintenance procedures. Please read and understand the information contained in these operating instructions
and the accompanying documents. To obtain maximum life and efficiency from your machine, and to use the machine safely, read
this manual thoroughly and follow instructions carefully.
…Table of Contents
1. Declaration of conformity
2. Warranty
3. Safety
Authorized use
General safety notes
Remaining hazards
4. Machine specifications
Technical data
Noise emission
Contents of delivery
Features
Description of machine
5. Transport and start up
Transport and installation
Assembly
Mains connection
Dust collection
Starting operation
6. Machine operation
7. Setup and adjustments
Removing the chuck and arbor
Adjusting the depth stop
Adjusting quill retraction lock
Changing spindle speeds
Table movements
Table tilt adjustment
Table insert levelling
Cross laser adjustment
LED work light adjustment
Return spring adjustment
8. Maintenance and inspection
9. Trouble shooting
10. Environmental protection
11. Available accessories
1. Declaration of conformity
On our own responsibility we hereby declare that this product
complies with the regulations* listed on page 2. Designed in
consideration with the standards**.
2. Warranty
The Seller guarantees that the supplied product is free from
material defects and manufacturing faults. This warranty does
not cover any defects which are caused, either directly or
indirectly, by incorrect use, carelessness, accidental damage,
repair, inadequate maintenance or cleaning and normal wear
and tear.
Guarantee and/or warranty claims must be made within
twelve months from the date of purchase (date of invoice).
Any further claims shall be excluded.
This warranty includes all guarantee obligations of the Seller
and replaces all previous declarations and agreements
concerning warranties.
The warranty period is valid for eight hours of daily use. If this
is exceeded, the warranty period shall be reduced in
proportion to the excess use, but to no less than three months.
Returning rejected goods requires the prior express consent
of the Seller and is at the Buyer’s risk and expense.
Further warranty details can be found in the General Terms
and Conditions (GTC). The GTC can be viewed at
www.jettools.com or can be sent by post upon request.
The Seller reserves the right to make changes to the product
and accessories at any time.
3. Safety
3.1 Authorized use
This drill press is designed for drilling wood and machinable
metal and plastic materials only. Machining of other materials
is not permitted and may be carried out in specific cases only
after consulting with the manufacturer.
Never cut magnesium-
high danger of fire!
The workpiece must allow to safely be loaded and clamped
for machining.
The proper use also includes compliance with the operating
and maintenance instructions given in this manual.
The machine must be operated only by persons familiar with
its operation and maintenance and who are familiar with its
hazards.
The required minimum age must be observed.

The machine must only be used in a technically perfect
condition.
When working on the machine, all safety mechanisms and
covers must be mounted.
In addition to the safety requirements contained in these
operating instructions and your country’s applicable
regulations, you should observe the generally recognized
technical rules concerning the operation of wood- and metal-
working machines.
Any other use exceeds authorization.
In the event of unauthorized use of the machine, the
manufacturer renounces all liability and the responsibility is
transferred exclusively to the operator.
3.2 General safety notes
Wood and metalworking machines can be dangerous if not
used properly. Therefore the appropriate general technical
rules as well as the following notes must be observed.
Read and understand the entire instruction manual before
attempting assembly or operation.
Keep this operating instruction close by the machine,
protected from dirt and humidity, and pass it over to the new
owner if you part with the tool.
No changes to the machine may be made.
Daily inspect the function and existence of the safety
appliances before you start the machine.
Do not attempt operation in this case, protect the machine by
unplugging the power cord.
Do not wear gloves while operating this machine.
Remove all loose clothing and confine long hair.
Before operating the machine, remove tie, rings, watches,
other jewellery, and roll up sleeves above the elbows.
Wear safety shoes; never wear leisure shoes or sandals.
Always wear the approved working outfit:
- safety goggles
- ear protection
- dust protection
Install the machine so that there is sufficient space for safe
operation and workpiece handling.
Keep work area well lighted.
The machine is designed to operate in closed rooms and
must be placed stable on a firm and levelled surface.
The machine must be bolted down to avoid tipping!
Make sure that the power cord does not impede work and
cause people to trip.
Never use the power cord to carry the tool.
Do not expose the power cord to heat, oil or any sharp
corners. Do not pull the cord to unplug.
Keep the floor around the machine clean and free of scrap
material, oil and grease.
Make sure the motor fan and fan cover are kept clear of
sawdust.
Stay alert!
Give your work undivided attention. Use common sense.
Keep an ergonomic body position.
Maintain a balanced stance at all times.
Do not operate the machine when you are tired.
Do not operate the machine under the influence of drugs,
alcohol or any medication. Be aware that medication can
change your behaviour.
Keep children and visitors a safe distance from the work area.
Never reach into the machine while it is operating or running
down.
Never leave a running machine unattended.
Before you leave the workplace switch off the machine.
Pull the mains plug if the tool is not in use.
Make all machine adjustments, cleaning or maintenance with
the machine unplugged from the power source.
Before starting the machine, clear all items, such as tools and
rags, away from machine.
Do not operate the electric tool near inflammable liquids or
gases.
Observe the firefighting and fire alert options, for example the
fire extinguisher operation and place.
Do not use the machine in a dump environment and do not
expose it to rain.
Wood dust is explosive and can also represent a risk to health.
Dust form some tropical woods in particular, and from
hardwoods like beach and oak, is classified as a carcinogenic
substance.
Always use a suitable dust extraction device
Before machining, remove any nails and other foreign bodies
from the workpiece.
Never operate without the chuck guard in place.
Remove the chuck key and wrenches before machine
operation.

Do not remove chips and work piece parts until the machine is
at a complete standstill.
Do not remove chips or debris with your hands - use a brush
or chip hook.
Be careful when changing drill bits. Drill bits are sharp edged
and can get very hot during machining.
Work only with well sharpened tools.
Do not start the drill press while the cutting tool is in contact
with the workpiece.
Do not force the power tool. It will do a better and safer job
and give you much better service if it is used at the rate for
which it was designed.
Specifications regarding the maximum or minimum size of the
workpiece must be observed.
Never place your fingers in a position where they could
contact the drill or other cutting tool if the work piece should
unexpectedly shift or your hand should slip.
Machine only stock which is securely supported.
Secure workpiece against rotation. Use fixtures, clamps or a
vice to hold the workpiece.
Never hold the workpiece with your hands alone.
To clamp workpiece to the table, use the table slots or
clamping ledge around the outside of the table.
When using a drill press vice, always fasten it to the table.
If a work piece overhangs the table such that it will fall or tip if
not held, clamp it to the table or provide auxiliary support.
Do not use wire wheels, router bits, shaper cutters, circle
cutters and grinding discs on this drill press.
Make sure, drill bit and table are securely locked before
operating the drill press.
Never move the table while the machine is running.
Do not stand on the machine.
Do not operate the machine with the safety equipment not in
place –high safety risk!
Connection and repair work on the electrical installation may
be carried out by a qualified electrician only.
Always unwind any extension cords fully.
Have a damaged or worn power cord replaced immediately.
Do not use the machine when the ON-OFF switch does not
operate correctly.
The use of accessories other than those recommended in this
manual can create a safety hazard.
To avoid injury from parts thrown by the clock spring, follow
instructions exactly as given when adjusting the return spring
tension of the quill.
Do not stare into beam of cross laser
Do not view directly with optical instruments
Do not point the laser beam at people or animals.
Do not use the laser beam on highly reflective materials.
Reflected light is dangerous.
A defective laser beamer may be replaced only, not repaired.
3.3 Remaining hazards
When using the machine according to regulations some
remaining hazards may still exist.
The rotating drill bit can cause injury.
Thrown workpieces and workpiece parts can lead to injury.
Tipping of the workpiece due to insufficient support can lead
to injury.
Dust, chips and noise can be health hazards. Be sure to wear
personal protection gear such as safety goggles, ear
protection and dust mask.
Assure good ventilation.
Use a suitable dust collection or air filtration system.
The use of incorrect mains supply or a damaged power cord
can lead to injuries caused by electricity.
4. Machine specifications
4.1 Technical data
Mains 230V ~1L/N/PE 50Hz
Motor Output Power 0.55kW (0,75 HP) S1
Reference current 3.7 A
Laser class 2 <1mW, 650nm
Work light LED
Extension cord (H07RN-F): 3x1,5²mm
Installation fuse protection 10A
Insulation class I
Mains 400V ~3L/N/PE 50Hz
Motor Output Power 0.55kW (0,75 HP) S1
Reference current 1,6 A
Laser class 2 <1mW, 650nm
Work light LED
Extension cord (H07-F): 5x1,5²mm
Installation fuse protection 10A
Insulation class I
JDP-15B:
Number of spindle speeds 16
Range of speeds 180 - 2900 rpm
Spindle taper MT2
Keyless chuck (arbor MT2/B16) 1-16mm
Spindle travel 80mm
Quill diameter 47mm
Distance spindle to column 190mm
Distance spindle to table max 471mm
Distance spindle to base 683mm
Table size Depth x Width 320 x 454mm
Table slots (4x) 15 x 70mm
Table T-slots (2x) 13mm
Table T-slots distance 270mm
Table insert (MDF) 95 x 95 x 16-19mm
Table tilt +/- 90°
Workpiece weight on the table max 30kg
Column diameter 73mm
Base size D x W 460 x 288mm
Base working surface D x W 200 x 240mm
Base slot (2x) 15 x 160mm
Base slot distance 126mm
Base mounting hole distance (2x Ø 11) 200mm
Overall D x W x H 677 x 434 x 1115mm
Net weight 71 kg
JDP-15F:
Number of spindle speeds 16
Range of speeds 180 - 2900 rpm
Spindle taper MT2
Keyless chuck (arbor MT2/B16) 1-16mm
Spindle travel 80mm
Quill diameter 47mm
Distance spindle to column 190mm
Distance spindle to table max 778mm
Distance spindle to base 1182mm
Table size Depth x Width 320 x 454mm
Table slots (4x) 15 x 70mm
Table T-slots (2x) 13mm
Table T-slots distance 270mm
Table insert (MDF) 95 x 95 x 16-19mm
Table tilt +/- 90°
Workpiece weight on the table max 30kg
Column diameter 73mm
Base size D x W 480 x 288mm
Base working surface D x W 200 x 240mm
Base slot (2x) 15 x 160mm
Base slot distance 126mm
Base mounting hole distance (2x Ø 11) 200mm
Overall D x W x H 677 x 434 x 1623mm
Net weight 79 kg
JDP-17:
Number of spindle speeds 16
Range of speeds 180 - 2900 rpm
Spindle taper MT2
Keyless chuck (arbor MT2/B16) 1-16mm
Spindle travel 127mm
Quill diameter 52mm
Distance spindle to column 215mm
Distance spindle to table max 763mm
Distance spindle to base 1194mm
Table size Depth x Width 356 x 483mm
Table slots (4x) 15 x 79mm
Table T-slots (2x) 13mm
Table T-slots distance 270mm
Table insert (MDF) 95 x 95 x 16-19mm
Table tilt +/- 90°
Workpiece weight on the table max 30kg
Column diameter 80mm
Base size D x W 507 x 328mm
Base working surface D x W 217 x 271mm
Base slot (2x) 15 x 178mm
Base slot distance 130mm
Base mounting hole distance (2x Ø 11) 200mm
Overall D x W x H 723 x 483 x 1679mm
Net weight 86 kg
4.2 Noise emission
Acoustic pressure level
(according to EN ISO 11202, inspection tolerance 4 dB):
Idling at 2300rpm LpA 70 dB(A)
The specified values are emission levels and are not
necessarily to be seen as safe operating levels.
As workplace conditions vary, this information is intended to
allow the user to make a better estimation of the hazards and
risks involved only.
4.3 Content of delivery
Fig 1
Head assembly
Table assembly with MDF-table insert
Machine base
Column and bracket assembly
Rack

Fig 2
Drift key
Ring spanner
Column locking handle
Table elevating crank
3 down feed handles
Worm shaft
Allen keys
Bolts and washers for base mount
16mm keyless chuck
MT2/ B16 arbor
Chuck guard
Operating manual
Spare parts list.
4.4 Features
Rapid spindle travel with one revolution of the handle
One-handed belt tensioning allows for rapid speed changes
Integrated depth stop makes repetitive drilling quick and easy
Cross Laser easily identifies the drill centre
Long-lasting, built-in LED work light reduces shadows
Precisely ground cast iron work table
Large table surface features twin T-slot grooves and 4 table
slots to accommodate any project
Table edge designed to make clamping easy
MDF table insert, 95x95mm, height adjustable, easily
replaced
Large cast iron base provides stability
Powered by an efficient high torque induction motor and poly-
V belt drive system
16mm keyless chuck with MT2/B16 arbor supplied
Transparent chuck guard with limit switch, for safe operation
Pulley cover with limit switch, for safe operation
E-stop button, for safe operation
4.5 Description of machine
Fig 3
A…Pulley cover
B…Downfeed handle
C…Downfeed lock
D…LED work light and cross laser
E…Column locking handle
F…Table elevating crank
G…Rack
H…Column
I…..Base
J….Table
K….Table insert (MDF)
L….Chuck guard
M…Spindle quill
N….Switches for work light and cross laser
P….Motor ON/OFF switch
Q….E-stop button
5. Transport and start up
5.1 Transport and installation
The machine is designed to operate in closed rooms and
must be placed stable on firm and levelled surface.
Warning:
To avoid tipping, the machine must be bolted down with
two lag screws (not provided). Fig 4

Fig 4
For packing reasons the machine is not completely
assembled.
5.2 Assembly
Do not connect the drill press to power source until machine
has been fully assembled.
If you notice transport damage while unpacking, notify your
supplier immediately. Do not operate the machine!
Dispose of the packing in an environmentally friendly manner.
Clean all rust protected surfaces with a mild solvent.
Make sure the set screw (Fig 5) is tight against the column.
Fig 5
Attach base to column foot with four M8 screws and flat
washers. Fig 6.
Fig 6
Tighten screws firmly.
Set the column assembly upright.
Insert the worm shaft (HP6, Fig 7).
Fig 7
Position the rack (F, Fig 8) into the table bracket slot.
The longer flat portion of the rack should be at the top.
With the aid of a second person, slide the table bracket and
rack together down the column.
Fig 8
Place the stop collar (G, Fig 9) onto the column and slide it
down. Tighten set screw (J).
ATTENTION: the rack must be free for side movement.
Fig 9
Mount the table elevating crank (HP4, Fig 10).
Make sure the set screw (K) aligns with the flat on the worm
shaft.

Mount column locking handle (HP3).
The locking handle is adjustable, pull to rotate.
Fig 10
With the aid of a second person, carefully lift the head onto
the column top.
Warning:
The head assembly is heavy! Use care when lifting onto
the column!
Rotate the head assembly until the sides of the belt cover are
parallel with the sides of the base.
Tighten the 2 grub screws (O, Fig 11) firmly.
Fig 11
Install 3 downfeed handles (HP5, Fig 12).
Fig 12
Thoroughly clean spindle, arbor and chuck with a soft rag and
solvent, such as mineral spirits.
Important: the three pieces must be free from any lubricant.
Any grease, oil or residue in these areas can cause the
pieces to separate, creating a safety hazard and potential
damage to the tool.
Slide the arbor (HP11, Fig 13) into the spindle. Turn the arbor
as you push it, until the tang engages the slot in the spindle.
Fig 13
Push chuck (HP 10) onto arbor.
Open the chuck to completely retract the chuck jaws.
Use a rubber mallet or a hammer against a block of wood and
tap the bottom of the chuck two or three times.
Chuck guard Assembly:
Loosen the hex socket screw (S, Fig 14) and install the chuck
guard assembly (G).
Tighten screw (S) again.
Fig 14
The chuck guard can be adjusted up/down for best user
protection. Loosen the locking knob (L, Fig 15) to adjust.
The chuck guard can be opened (rotated) for setup access.

Fig 15
ATTENTION:
The chuck guard is electrically interlocked. For machine
operation, the chuck guard must be closed.
5.3 Mains connection
Mains connection and any extension cords and plugs used
must comply with the information on the machine licence plate.
The mains connection must have a 10A surge-proof fuse.
Only use connection cables marked H07RN-F, with wires
1,5mm2 or more.
Power cords and plugs must be free from defects.
Connections and repairs to the electrical equipment may only
be carried out by qualified electricians.
The machine is equipped with 1.8m power cord and plug.
ATTENTION:
-Check at first if the machine spindle rotates freely and if all
safety devices are fitted before starting the machine.
- If the direction of rotation is not correct, the phase converter
inside the CCE Euro plug must be pushed in and turned 180°
(400V version only).
Clockwise direction of the spindle is correct.
5.4 Dust collection
Wood dust is explosive and can represent a risk to health.
Assure good work area ventilation.
Use a suitable dust collection and air filtration system to avoid
a high dust concentration in the air.
Dust the machine down after each use and as necessary.
5.5 Starting operation
Start the machine with the green ON-button (C, Fig 16).
The red OFF-button (B) stops the machine.
Fig 16
The E-stop button (A) stops all machine functions.
The machine lamp can be turned ON/OFF independently (D).
The cross laser can be turned ON/OFF independently (E).
ATTENTION:
In case of machine overload the motor overload cut-off will
react. After appr.10 min of cooling the machine can be
started again.
Cuck guard and pulley cover are electrically interlocked. For
machine operation, both must be closed.
The LED indicator (F) will display a ”white”light in the ready
state; whenever there is power connected to the drill press.
The LED indicator (D) will display a “green”light when the
start button has been pressed and the drill press is operating.
6. Machine operation
Before each operation of your drill press, check that all locking
handles, set screws, bolts, etc., are tight on the table and
head. Confirm that the drill bit is securely inserted inside the
chuck jaws.
Clear all items, such as tools and rags, away from machine.
Before attempting regular work, get the feel of the drill press
by practicing on scrap material. For best results, always use
sharp bits, and proper spindle speeds and feed rates.
For through-boring, remove the table insert.
To minimize tear-out, place a piece of scrap wood on the
table below the work piece.
Always adjust the table and the depth stop to prevent drilling
into the table. Use a back-up piece of scrap wood to cover the
table. This protects both the table and the drill bit.
Secure work piece to the table with clamps or a vice to
prevent rotating with the drill bit.
Feed the bit into the material with only enough force to allow
the drill bit to work. Feeding too slowly may cause burning of
the work piece. Feeding too quickly may cause the motor to
stop and/or the drill bit to break.

Recommended speeds for a 10mm HSS drill bit:
Soft Wood: 3000 RPM
Hard Wood: 1500 RPM
Plastic: 3000 RPM
Aluminium: 3000 RPM
Brass: 1000 RPM
Cast iron: 1000 RPM
Mild steel: 800 RPM
High carbon steel: 600 RPM
Stainless steel: 300 RPM
Generally speaking, the smaller in relation the drill bit, the
greater the RPM required.
Wood requires higher speeds than metal.
Metal is usually drilled at slower speeds; cutting oil is applied
if necessary.
Use the speed chart (Fig 17) provided inside the pulley cover
as a general guideline.
Fig 17
ATTENTION:
Always keep your hands well clear of the rotating bit.
Do not remove chips and workpiece parts until the machine is
at a standstill.
Do not remove chips or debris with your hands-use a brush or
chip hook.
Close the chuck guard and pulley cover before you start the
machine.
When using a drill press vice, always fasten it to the table.
Never do any works “freehand” (hand-holding the work piece
rather than supporting it on the table).
Support long workpieces with helping roller stands.
Do not use wire wheels, router bits, shaper cutters, circle
cutters, or rotary planers on this drill press.
Never cut magnesium-
high danger of fire!
Do not stare into beam of cross laser.
Do not view directly with optical instruments
Do not point the laser beam at people or animals.
Do not use the laser beam on highly reflective materials.
Reflected laser light is dangerous.
7. Setup and adjustments
General note:
Setup and adjustment work may only be carried out after
the machine is protected against accidental starting by
pulling the mains plug, push the E-stop button.
7.1 Removing the Chuck and Arbor
Push the E-stop button.
Lower the quill using the down feed handle.
Lock it in the lowered position (see chapter 7.3)
Rotate the spindle to align the key in the spindle with the key
hole in the quill.
Protect the table surface.
Insert the drift key (HP1, Fig 18) into the aligned slots and tap
lightly. Catch the chuck and arbor assembly as it falls away
from the spindle.
Fig 18
7.2 Adjusting the Depth Stop
To drill multiple holes at the same pre-set depth, use the
depth stop:
Method 1:
Loosen the lock handle (G, Fig 20).
With the drill bit in the chuck, rotate the down feed handle (D)
to advance the drill bit until it just contacts the top surface of
workpiece. Fig 19

Fig 19
Rotate the scale ring (E, Fig 20) to zero. This sets the
workpiece surface as your zero reference point.
Fig 20
Move workpiece out from under bit.
Rotate the down feed handle until the scale ring reads your
desired depth.
Turn the stop ring (F) counter-clockwise until it stops moving.
Tighten the lock handle (G).
The drill bit will now advance only to this point.
Method 2:
Mark the desired depth of cut on the side of the workpiece.
Loosen the lock handle (G, )
Lower the drill bit to the marked position (Fig 21).
Fig 21
Loosen the lock handle (G).
Turn the stop ring (F, Fig 20) counter-clockwise until it stops
moving.
Tighten the lock handle (G).
The drill bit will now advance only to this point.
Note:
For fine adjustment, slightly loosen lock handle (G) and
delicately further advance downfeed handle (D).
Retighten lock handle (G).
7.3 Adjusting quill retraction lock:
The quill can be held in the down position and prevented from
retracting, such as to facilitate removal of chuck and arbor.
Loosen the lock handle (G).
Rotate the down feed handle (D) to the desired depth.
Rotate lock ring (F, Fig 22) clockwise all the way until it stops.
Fig 22
Tighten lock handle (G)
The quill will stays in this position.
7.4 Changing Spindle Speeds
Open the pulley cover.
A spindle speed and belt arrangement chart (C, Fig 23) is
found on the inside of the pulley cover. Refer to this chart
whenever changing speeds.
Fig 23
Loosen knob (A) and move pull tensioner (B) away from belt
to release tension.
Change the belts location according the speed chart.
Make sure the belts are properly seated in the groves of each
pulley.

Tension the belt.
Close the pulley cover.
Note:
The pulley cover is electrically interlocked (LS).
For machine operation the pulley cover must be closed.
7.5 Table Movements
Push the E-stop button.
Loosen column locking handle (A, Fig 24).
Turn table elevating crank (B) to raise or lower table.
Re-tighten locking handle (A) before attempting to drill.
Fig 24
Note:
When drilling a large workpiece, swing table out of the way
and use base as your table.
Slots in base and table can be used to mount workpiece or
work- holding devices.
7.6 Table Tilt Adjustment
Push the E-stop button.
Remove the alignment pin (E, Fig 25) first, by turning the nut
(D) clockwise.
Fig 25
Loosen the hex cap bolt (C) to tilt the table.
Tighten the hex cap bolt.
ATTENTION:
Only loosen the hex cap bolt slightly, otherwise the table
assembly will separate from the column and fall.
The alignment pin only works at 0and must be reinserted
when the table is returned to 0.
7.7 Table Insert Levelling
The insert should be flush with the table surface:
Loosen the two screws beneath table insert (G, Fig 26).
Fig 26
Loosen wing nuts (H) and rotate the bolts (J) as needed.
MDF-table insert:
95x95mm, 16-19mm thick (JET Article no.: JDP17-130)
7.8 Cross Laser Adjustment
The lasers are designed for use with twist drill bits.
There will be shadowing with wider tools, such as Forstner
bits, therefore use will be limited.
The two laser beams need to meet at the drill centre (Fig 27).
Fig 27
The Laser Assembly has been installed and pre-set at the
factory.
To adjust, install a small drill bit and rotate lasers (L, Fig 28)
gently with a set of pliers.

Fig 28
ATTENTION:
Class 2 Laser
Do not stare into beam of laser
Do not view directly with optical instruments
Do not point the laser beam at people or animals.
Do not use the laser beam on highly reflective materials.
Reflected laser light is dangerous.
A defective laser beamer may be replaced only, not repaired.
7.9 LED Work Light Adjustment
The integrated LED work light is adjustable.
Push on the rim of the light to adjust (Fig 29).
Figure 29
7.10 Return Spring Adjustment
Disconnect the machine from the power source (unplug).
The return spring is adjusted at the factory and should not
need further adjustment. If adjustment is necessary:
Unplug the machine from the power source.
Pull off cap (A, Fig 30)
Fig 30
Loosen two jam nuts (B, C) approximately 3mm.
Firmly hold the coil spring cover (D).
Pull out the cover and rotate until the pin (E) on the return
spring plate engages the next notch in the coil spring cover.
Turn the cover clockwise to decrease tension and counter-
clockwise to increase tension.
Tighten two jam nuts (B, C). Do not over-tighten.
Nuts should not contact the housing when tight.
Install cap (A).
8. Maintenance and inspection
General notes:
Maintenance, cleaning and repair work may only be
carried out after the machine is protected against
accidental starting by pulling the mains plug.
After each use, remove chips and sawdust.
Clean the machine regularly.
Periodically lubricate gently with grease:
-the drive splines (grooves) in the spindle
-the teeth of the quill
-the rack
Periodically apply a light film of oil to quill and column.
This will reduce wear, prevent rust and assure ease of
operation.
Exposed metal surfaces of table and base should be kept
clean and free of rust. Apply protective spray or paste wax.
Check that bolts all are tight
Check that electrical cords are in good condition.
Make sure the motor fan and fan cover are kept clear of
sawdust. Periodically blow out any dust.
Periodically check the proper function of the safety devices.
-Chuck guard limit switch
-Pulley cover limit switch
-E-stop button
Defective safety devices must be replaced immediately.

Repair and maintenance work on the electrical system may
only be carried out by a qualified electrician.
If the drill press is not to be used for an extended period,
reduce the belt tension.
9. Trouble shooting
Motor doesn’t start
*No electricity-
check mains and fuse.
*Defective switch, motor or cord-
consult an electrician.
*Overload has reacted-
Wait and restart.
*Chuck guard or pulley cover open-
Close chuck guard.
Close pulley cover
Chuck will not stay on spindle
*Oil or grease on contact surfaces-
clean the tapered surfaces of chuck and spindle.
Machine vibration
*Incorrect belt tension-
Adjust belt tension.
*Dry spindle quill-
lubricate spindle quill.
*Spindle pulley loose-
tighten retaining nut.
*Motor pulley loose-
Tighten set screw.
*dull drill bit-
re-sharpen drill bit.
Drill bit burns
*incorrect speed-
reduce speed.
*Chips clogged-
retract drill bit frequently
*dull drill bit-
re-sharpen drill bit.
*feeding too slow-
feed faster.
Drill leads off
*cutting lips or angle not equal-
re-sharpen drill bit correctly.
*drilled hole off centre-
drill a pilot hole first.
*bent drill bit-
use a proper drill bit.
*drill bit not properly installed-
install drill bit correctly.
Laser cross not on drill centre
*laser cross not adjusted correct-
adjust lasers (see chapter 7.8)
Laser doesn’t work
*Defective line laser or power supply-
consult an electrician
A defective laser beamer may be replaced only, not repaired.
10. Environmental protection
Protect the environment.
Your appliance contains valuable materials which can be
recovered or recycled. Please leave it at a specialized
institution.
11. Available accessories
Refer to the JET price-list

DE - DEUTSCH
Gebrauchsanleitung
Sehr geehrter Kunde,
vielen Dank für das Vertrauen, welches Sie uns beim Kauf Ihrer neuen JET-Maschine entgegengebracht haben. Diese Anleitung
ist für den Inhaber und die Bediener zum Zweck einer sicheren Inbetriebnahme, Bedienung und Wartung der Bohrmaschinen
JDP-15B, JDP-15F, JDP-17 erstellt worden. Beachten Sie bitte die Informationen dieser Gebrauchsanleitung und der
beiliegenden Dokumente. Lesen Sie diese Anleitung vollständig, insbesondere die Sicherheitshinweise, bevor Sie die Maschine
zusammenbauen, in Betrieb nehmen oder warten. Um eine maximale Lebensdauer und Leistungsfähigkeit Ihrer Maschine zu
erreichen befolgen Sie bitte sorgfältig die Anweisungen.
Inhaltsverzeichnis
1. Konformitätserklärung
2. Garantieleistungen
3. Sicherheit
Bestimmungsgemäße Verwendung
Allgemeine Sicherheitshinweise
Restrisiken
4. Maschinenspezifikation
Technische Daten
Schallemission
Lieferumfang
Produkteigenschaften
Ü berblick
5. Transport und Inbetriebnahme
Transport und Aufstellung
Montage
Elektrischer Anschluss
Absaug-Anschluss
Inbetriebnahme
6. Betrieb der Maschine
7. Rüst- und Einstellarbeiten
Bohrfutterwechsel
Bohrtiefenanschlag Einstellung
Pinolen-Rückzugsbegrenzung
Drehzahlwechsel
Tischverstellung
Tischschwenkung
Tischeinlage
Kreuzlaser Einstellung
LED Maschinenleuchte
Pinolen Rückzugsfeder Einstellung
8. Wartung und Inspektion
9. Störungsabhilfe
10. Umweltschutz
11. Lieferbares Zubehör
1. Konformitätserklärung
Wir erklären in alleiniger Verantwortlichkeit, dass dieses
Produkt mit den auf Seite 2 angegebenen Richtlinien*
übereinstimmt.
Bei der Konstruktion wurden folgende Normen**
berücksichtigt.
2. Garantieleistungen
Der Verkäufer garantiert, dass das gelieferte Produkt frei von
Material- und Fertigungsfehlern ist. Diese Garantie trifft nicht
auf jene Defekte zu, welche auf direkten oder indirekten, nicht
fachgerechten Gebrauch, Unachtsamkeit, Unfallschaden,
Reparatur, mangelhafte Wartung bzw. Reinigung sowie
normalen Verschleiß zurückzuführen sind.
Garantie- bzw. Gewährleistungs-ansprüche müssen innerhalb
von 12 Monaten ab dem Verkaufsdatum (Rechnungsdatum)
geltend gemacht werden. Weitergehende Ansprüche sind
ausgeschlossen.
Die vorliegende Garantie umfasst sämtliche
Garantieverpflichtungen seitens des Verkäufers und ersetzt
alle früheren Erklärungen und Vereinbarungen betreffend
Garantien.
Die Garantiefrist gilt für eine tägliche Betriebszeit von 8
Stunden. Wird diese überschritten, so verkürzt sich die
Garantiefrist proportional zur Ü berschreitung, jedoch
höchstens auf 3 Monate.
Die Rücksendung beanstandeter Ware bedarf der
ausdrücklichen vorherigen Zustimmung vom Verkäufer und
geht auf Kosten und Gefahr des Käufers.
Die ausführlichen Garantieleistungen sind den Allgemeinen
Geschäftsbedingungen (AGB) zu entnehmen. Die AGB sind
unter www.jettools.com einzusehen oder werden auf Anfrage
per Post zugestellt.
Der Verkäufer behält sich das Recht vor, jederzeit
Änderungen am Produkt und Zubehör vorzunehmen.
3. Sicherheit
3.1 Bestimmungsgemäße Verwendung
Diese Bohrmaschine ist ausschließlich zum Bohren von Holz
und von zerspanbaren Kunststoffen und Metallen geeignet.
Die Bearbeitung anderer Werkstoffe ist nicht zulässig bzw.
darf in Sonderfällen nur nach Rücksprache mit dem
Maschinenhersteller erfolgen.
Niemals Magnesium zerspanen-
Hohe Feuergefahr!
Es dürfen nur Werkstücke bearbeitet werden welche sicher
zugeführt und gespannt werden können.
Die bestimmungsgemäße Verwendung beinhaltet auch die
Einhaltung der vom Hersteller angegebenen Betriebs- und
Wartungsanweisungen.

Die Maschine darf ausschließlich von Personen bedient
werden, die mit Betrieb und Wartung vertraut und über die
Gefahren unterrichtet sind.
Das gesetzliche Mindestalter ist einzuhalten.
Die Maschine nur in technisch einwandfreiem Zustand mit
montierten Schutzeinrichtungen betreiben.
Neben den in der Gebrauchsanleitung enthaltenen
Sicherheitshinweisen und den besonderen Vorschriften Ihres
Landes sind die für den Betrieb von Holz- und
Metallbearbeitungsmaschinen allgemein anerkannten
fachtechnischen Regeln zu beachten.
Jeder darüber hinaus gehende Gebrauch gilt als nicht
bestimmungsgemäß und für daraus resultierende Schäden
haftet der Hersteller nicht. Das Risiko trägt allein der Benutzer.
3.2 Allgemeine Sicherheitshinweise
Holz- und Metallbearbeitungs-maschinen können bei
unsachgemäßem Gebrauch gefährlich sein. Deshalb ist zum
sicheren Betreiben die Beachtung der zutreffenden
Unfallverhütungs-Vorschriften und der nachfolgenden
Hinweise erforderlich.
Lesen und verstehen Sie die komplette Gebrauchsanleitung
bevor Sie mit Montage oder Betrieb der Maschine beginnen.
Bewahren Sie die Bedienungsanleitung, geschützt vor
Schmutz und Feuchtigkeit, bei der Maschine auf, und geben
Sie sie an einen neuen Eigentümer weiter.
An der Maschine dürfen keine Veränderungen, An- und
Umbauten vorgenommen werden.
Ü berprüfen Sie täglich vor dem Einschalten der Maschine die
einwandfreie Funktion und das Vorhandensein der
erforderlichen Schutzeinrichtungen.
Festgestellte Mängel an der Maschine oder den
Sicherheitseinrichtungen sind zu melden und von den
beauftragten Personen zu beheben.
Nehmen Sie die Maschine in solchen Fällen nicht in Betrieb,
sichern Sie die Maschine gegen Einschalten durch Ziehen
des Netzsteckers.
Zum Schutz von langem Kopfhaar Mütze oder Haarnetz
aufsetzen.
Beim Arbeiten an der Maschine keine Handschuhe tragen.
Enganliegende Kleidung tragen, Schmuck, Ringe und
Armbanduhren ablegen.
Tragen Sie Schutzschuhe, keinesfalls Freizeitschuhe oder
Sandalen.
Verwenden Sie die durch Vorschriften geforderte persönliche
Schutzausrüstung.
-Augenschutz
-Gehörschutz
-Staubschutz
Die Maschine so aufstellen, dass genügend Platz zum
Bedienen und zum Führen der Werkstücke gegeben ist.
Sorgen Sie für gute Beleuchtung.
Die Maschine ist für den Betrieb in geschlossenen Räumen.
Achten Sie darauf, dass sie standsicher auf festem und
ebenem Grund steht.
Um Kippen zu vermeiden, muss die Maschine am Boden
festgeschraubt werden !
Beachten Sie dass die elektrische Zuleitung nicht den
Arbeitsablauf behindert und nicht zur Stolperstelle wird.
Bewegen Sie das Werkzeug niemals am Netzkabel, ziehen
Sie nicht am Kabel um den Stecker aus der Steckdose zu
ziehen.
Halten Sie Kabel fern von Hitze, Ö l und scharfen Kanten.
Den Arbeitsplatz frei von Abfällen, Ö len, Staub, behindernden
Werkstücken, etc. halten.
Achten Sie darauf, dass die Motor-Lüftungsschlitze immer frei
und sauber sind.
Seien Sie aufmerksam und konzentriert. Gehen Sie mit
Vernunft an die Arbeit.
Achten Sie auf eine ergonomische Körperhaltung.
Sorgen Sie für sicheren Stand und halten Sie jederzeit das
Gleichgewicht.
Bedienen Sie die Maschine nicht, wenn Sie müde sind.
Arbeiten Sie niemals unter dem Einfluss von Rauschmitteln
wie Alkohol und Drogen an der Maschine. Beachten Sie, dass
auch Medikamente Einfluss auf Ihr Verhalten nehmen können.
Halten Sie Unbeteiligte, insbesondere Kinder vom
Gefahrenbereich fern.
Niemals in die laufende Maschine greifen.
Die laufende Maschine nie unbeaufsichtigt lassen.
Vor dem Verlassen des Arbeitsplatzes die Maschine
ausschalten.
Bei Nichtgebrauch der Maschine diese ausstecken.
Umrüst-, Einstell- und Reinigungsarbeiten nur im
Maschinenstillstand und bei gezogenem Netzstecker
vornehmen.

Vor dem Maschinenstart, entfernen Sie alle losen Teile wie
Werkzeug, Putztücher, etc.
Benützen Sie die Maschine nicht in der Nähe von brennbaren
Flüssigkeiten oder Gasen.
Beachten Sie die Brandmelde- und
Brandbekämpfungsmöglichkeiten z.B. Standort und
Bedienung von Feuerlöschern.
Benützen Sie die Maschine nicht in feuchter Umgebung und
setzen Sie sie nicht dem Regen aus.
Achten Sie stets darauf, dass keine zu große
Staubkonzentration entsteht –verwenden Sie stets eine
geeignete Absauganlage.
Holzstaub ist explosiv und kann gesundheitsschädigend sein.
Insbesondere tropische Hölzer und harte Hölzer wie Buche
und Eiche sind als krebserregend eingestuft.
Vor der Bearbeitung Nägel und andere Fremdkörper aus dem
Werkstück entfernen.
Arbeiten Sie nie ohne Bohrfutterschutz.
Entfernen Sie vor dem Start den Bohrfutterschlüssel und
andere Werkzeuge.
Späne und Werkstückteile nur bei stehender Maschine
entfernen.
Späne nicht mit der Hand entfernen, Handbesen oder
Spänehaken verwenden.
Vorsicht beim Werkzeugwechsel. Bohrer sind scharfkantig
und können bei der Zerspanung sehr heiß werden.
Nur mit gut geschärften Werkzeugen arbeiten.
Die Maschine nur starten, wenn Bohrer und Werkstück sich
nicht berühren.
Die Maschine nicht überfordern.
Sie arbeitet viel besser und hält länger, wenn sie der Leistung
entsprechend eingesetzt wird.
Angaben über die min. und max. Werkstückabmessungen
müssen eingehalten werden.
Halten Sie mit ihren Fingern ausreichend Abstand zum
rotierenden Bohrwerkzeug, beachten Sei dass das Werkstück
oder Ihre Hände verrutschen können.
Bearbeiten Sie nur ein Werkstück, welches sicher aufliegt.
Sichern Sie das Werkstück gegen Mitdrehen.
Verwenden Sie Zwingen, einen Schraubstock oder eine
Hilfsvorrichtung um das Werkstück zu fixieren.
Halten Sie das Werkstück niemals mit den Händen allein.
Zum Festklemmen des Werkstücks am Tisch, verwenden Sie
die Tischnuten oder am Tischrand angesetzte
Schraubzwingen.
Einen Schraubstock immer am Tisch festschrauben.
Falls die Schwerpunktlage des Werkstückes außerhalb des
Tisches liegt, klemmen Sie es am Tisch fest oder stützen Sie
es mit einem Rollenbock ab.
Verwenden Sie keine Bürstwerkzeuge, Fräswerkzeuge,
Kreisschneider und Schleifscheiben auf dieser Maschine.
Ü berprüfen Sie die korrekte Befestigung des Bohrers und des
Bohrtisches bevor Sie mit der Maschine arbeiten.
Führen Sie bei laufender Maschine keine Verstellung am
Bohrtisch durch.
Nicht auf der Maschine stehen.
Die Maschine nie bei entfernten Schutzeinrichtungen in
Betrieb nehmen –große Verletzungsgefahr!
Arbeiten an der elektrischen Ausrüstung der Maschine dürfen
nur durch eine Elektrofachkraft vorgenommen werden.
Verlängerungskabel immer ganz von der Trommel abwickeln.
Tauschen Sie ein beschädigtes Netzkabel sofort aus.
Niemals die Maschine benutzen, wenn der Ein-Ausschalter
nicht ordnungsgemäß funktioniert.
Der Gebrauch von anderen als in dieser
Gebrauchsanweisung empfohlenen Zubehörteilen oder
Zusatzgeräten kann eine Verletzungsgefahr darstellen.
Achtung vor wegfliegenden Teilen bei der Rückholfeder
Einstellung.
Niemals in den Laserstrahl schauen.
Richten Sie den Laserstrahl nicht auf Personen oder Tiere.
Verwenden Sie den Linienlaser nicht bei stark reflektierendem
Material. Reflektiertes Laser-Licht ist gefährlich.
Ein defekter Laser darf nicht repariert werden, nur getauscht.
3.3 Restrisiken
Auch bei vorschriftsmäßiger Benutzung der Maschine
bestehen die nachfolgend aufgeführten Restrisiken.
Verletzungsgefahr durch den rotierenden Bohrer.
Gefährdung durch wegfliegende Werkstücke und
Werkstückteile.
Gefährdung durch Kippen des Werkstücks bei
unzureichender Abstützung.
Gefährdung durch Lärm und Staub.
Unbedingt persönliche Schutzausrüstungen wie Augen-,
Gehör- und Staubschutz tragen.
Für gute Belüftung sorgen!
Eine geeignete Absauganlage einsetzen!
Gefährdung durch Strom, bei nicht ordnungsgemäßer
Verkabelung.
4. Maschinenspezifikation
4.1 Technische Daten

Netzanschluss 230V ~1L/N/PE 50Hz
Motor-Abgabeleistung 0.55kW (0,75 PS) S1
Betriebsstrom 3.7 A
Klasse 2 Laser <1mW, 650nm
Maschinenleuchte LED
Anschlussleitung (H07RN-F): 3x1,5²mm
Bauseitige Absicherung 10A
Isolationsklasse I
Netzanschluss 400V ~3L/N/PE 50Hz
Motor-Abgabeleistung 0.55kW (0,75 PS) S1
Betriebsstrom 1.6 A
Klasse 2 Laser <1mW, 650nm
Maschinenleuchte LED
Anschlussleitung (H07RN-F): 5x1,5²mm
Bauseitige Absicherung 10A
Isolationsklasse I
JDP-15B:
Drehzahlen 16
Drehzahlbereich 180 - 2900 U/min
Spindelaufnahme MK2
Schnellspannbohrfutter (Dorn MK2/B16) 1-16mm
Bohrhub 80mm
Pinolendurchmesser 47mm
Abstand Spindel zur Säule 190mm
Abstand Spindel zum Tisch max. 471mm
Abstand Spindel zum Sockel 683mm
Tischgröße Tiefe x Breite 320 x 454mm
Tischnuten (4x) 15 x 70mm
Tisch T-Nuten (2x) 13mm
Tisch T-Nut Abstand 270mm
Tischeinlage (MDF) 95 x 95 x 16-19mm
Tischschwenkung +/- 90°
Tischbelastung (Werkstückgewicht) max. 30kg
Säulendurchmesser 73mm
Sockelgröße T x B 460 x 288mm
Sockel Aufspannfläche T x B 200 x 240mm
Sockel-Nuten (2x) 15 x 160mm
Nutabstand 126mm
Abstand der Ankerbohrungen (2x Ø 11) 200mm
Gesamt Abmessung T x B x H 677 x 434 x 1115mm
Maschinen Nettogewicht 71 kg
JDP-15F:
Drehzahlen 16
Drehzahlbereich 180 - 2900 U/min
Spindelaufnahme MK2
Schnellspannbohrfutter (Dorn MK2/B16) 1-16mm
Bohrhub 80mm
Pinolendurchmesser 47mm
Abstand Spindel zur Säule 190mm
Abstand Spindel zum Tisch max. 778mm
Abstand Spindel zum Sockel 1182mm
Tischgröße Tiefe x Breite 320 x 454mm
Tischnuten (4x) 15 x 70mm
Tisch T-Nuten (2x) 13mm
Tisch T-Nut Abstand 270mm
Tischeinlage (MDF) 95 x 95 x 16-19mm
Tischschwenkung +/- 90°
Tischbelastung (Werkstückgewicht) max. 30kg
Säulendurchmesser 73mm
Sockelgröße T x B 480 x 288mm
Sockel Aufspannfläche T x B 200 x 240mm
Sockel-Nuten (2x) 15 x 160mm
Nutabstand 126mm
Abstand der Ankerbohrungen (2x Ø 11) 200mm
Gesamt Abmessung T x B x H 677 x 434 x 1623mm
Maschinen Nettogewicht 79 kg
JDP-17:
Drehzahlen 16
Drehzahlbereich 180 - 2900 U/min
Spindelaufnahme MK2
Schnellspannbohrfutter (Dorn MK2/B16) 1-16mm
Bohrhub 127mm
Pinolendurchmesser 52mm
Abstand Spindel zur Säule 215mm
Abstand Spindel zum Tisch max. 763mm
Abstand Spindel zum Sockel 1194mm
Tischgröße Tiefe x Breite 356 x 483mm
Tischnuten (4x) 15 x 79mm
Tisch T-Nuten (2x) 13mm
Tisch T-Nut Abstand 270mm
Tischeinlage (MDF) 95 x 95 x 16-19mm
Tischschwenkung +/- 90°
Tischbelastung (Werkstückgewicht) max. 30kg
Säulendurchmesser 80mm
Sockelgröße T x B 507 x 328mm
Sockel Aufspannfläche T x B 217 x 271mm
Sockel-Nuten (2x) 15 x 178mm
Nutabstand 130mm
Abstand der Ankerbohrungen (2x Ø 11) 200mm
Gesamt Abmessung T x B x H 723 x 483 x 1679mm
Maschinen Nettogewicht 86 kg
4.2 Schallemission
Schalldruckpegel
(nach EN ISO 11202, Messunsicherheit 4dB):
Leerlauf, 2300 U/min LpA 70 dB(A)
Die angegebenen Werte sind Emissionspegel und sind nicht
notwendigerweise Pegel für sicheres Arbeiten.
Sie sollen dem Anwender eine Abschätzung der Gefährdung
und des Risikos ermöglichen.
4.3 Lieferumfang

Fig 1
Bohrkopf komplett
Tisch komplett mit MDF-Tischeinlage
Sockel
Säule mit Flansch
Zahnstange
Fig 2
Auswurfkeil
Ringschlüssel
Griffschraube für Tisch-Säulenklemmung
Kurbel für Tisch Höhenverstellung
3 Stück Bohrvorschubhebel
Schneckenwelle für Tisch Höhenverstellung
Inbusschlüssel
Schrauben und Scheiben für Sockelmontage
16mm Schnellspannbohrfutter
Aufnahmedorn MK2/ B16
Bohrfutterschutz
Gebrauchsanleitung
Ersatzteilliste.
4.4 Produkteigenschaften
Schneller Pinolen-Vorschub, mit nur einer Hebel-Umdrehung
Spannrolle mit Einhand-Bedienung für einfachen
Drehzahlwechsel.
Integrierter Bohrtiefenanschlag für Serienarbeiten, mit
Skalenring genau einstellbar.
Ein Kreuzlaser zeigt am Werkstück die Bohrmitte an.
Langlebige LED Maschinenleuchte zur Ausleuchtung.
Präzise geschliffener Grauguss Maschinentisch
Große Tischfläche, zwei parallele T-Nuten und 4 offenen
Nuten zur flexiblen Aufspannung.
Umlaufend flacher Tischrand, erlaubt das Setzen von
Schraubzwingen.
95x95mm Tischeinlage aus MDF, in der Höhe einstellbar,
leicht zu ersetzen.
Schwerer Maschinensockel aus Grauguss für Stabilität.
Effizienter Antrieb mit 2 Poly-V-Riemen und
durchzugsstarkem Induktionsmotor.
16mm Schnellspann-Bohrfutter mit Dorn MK2/B16.
Durchsichtiger, höhenverstellbarer Bohrfutterschutz mit
Endschalter für sicheres Arbeiten.
Riemendeckel mit Endschalter für sicheres Arbeiten.
Separater Not-Halt Taster für sicheres Arbeiten.
This manual suits for next models
8
Table of contents
Other Jet Power Tools manuals