Interfaces
RS232C / USB / Ethernet / Power Input
• RS232C Com-port with 12V/ 500mA output (optional 5V)
• USB 2.0 ports x4
• Ethernet 10/100/1000, RJ45
• Power input 3-pin connector. 9-36V or 18-72V model depending.
• Not mounted custom option: SMA-connectors for WLAN antenna, single
or diversity.
VERSO 12 (med tangentlinjer & med Sierra GPS)) VERSO 12 (utan tangentlinjer & med Sierra GPS)
Display brightness
control
Power button Speaker
VERSO 12 (med tangentlinjer & med Sierra GPS)) VERSO 12 (utan tangentlinjer & med Sierra GPS)
RS232C (+12V Pin 9)
(Optional 5V)
Optional
WLAN
SMA
PowerUSB 2.0
RJ-45 10/100/1000
VERSO 12 (med tangentlinjer & med Sierra GPS)) VERSO 12 (utan tangentlinjer & med Sierra GPS)
WLAN 802.11 a/b/g/n, 2.4/5Ghz, Integrated Antenna Dome
Bluetooth 2.0+ EDR Class 1
User Replaceable items
Before removal of any lid, shut down computer and disconnect power cord.
Battery: UPS function, use Torx T10 screwdriver to remove antenna dome.
Dimming screen after 10 seconds
Sleep signal after 1 minute, soft power down after 10 minutes. (Default OS settings).
Boot Media: CFast, use Torx T10 screwdriverto remove antenna dome.
Boot Media Battery
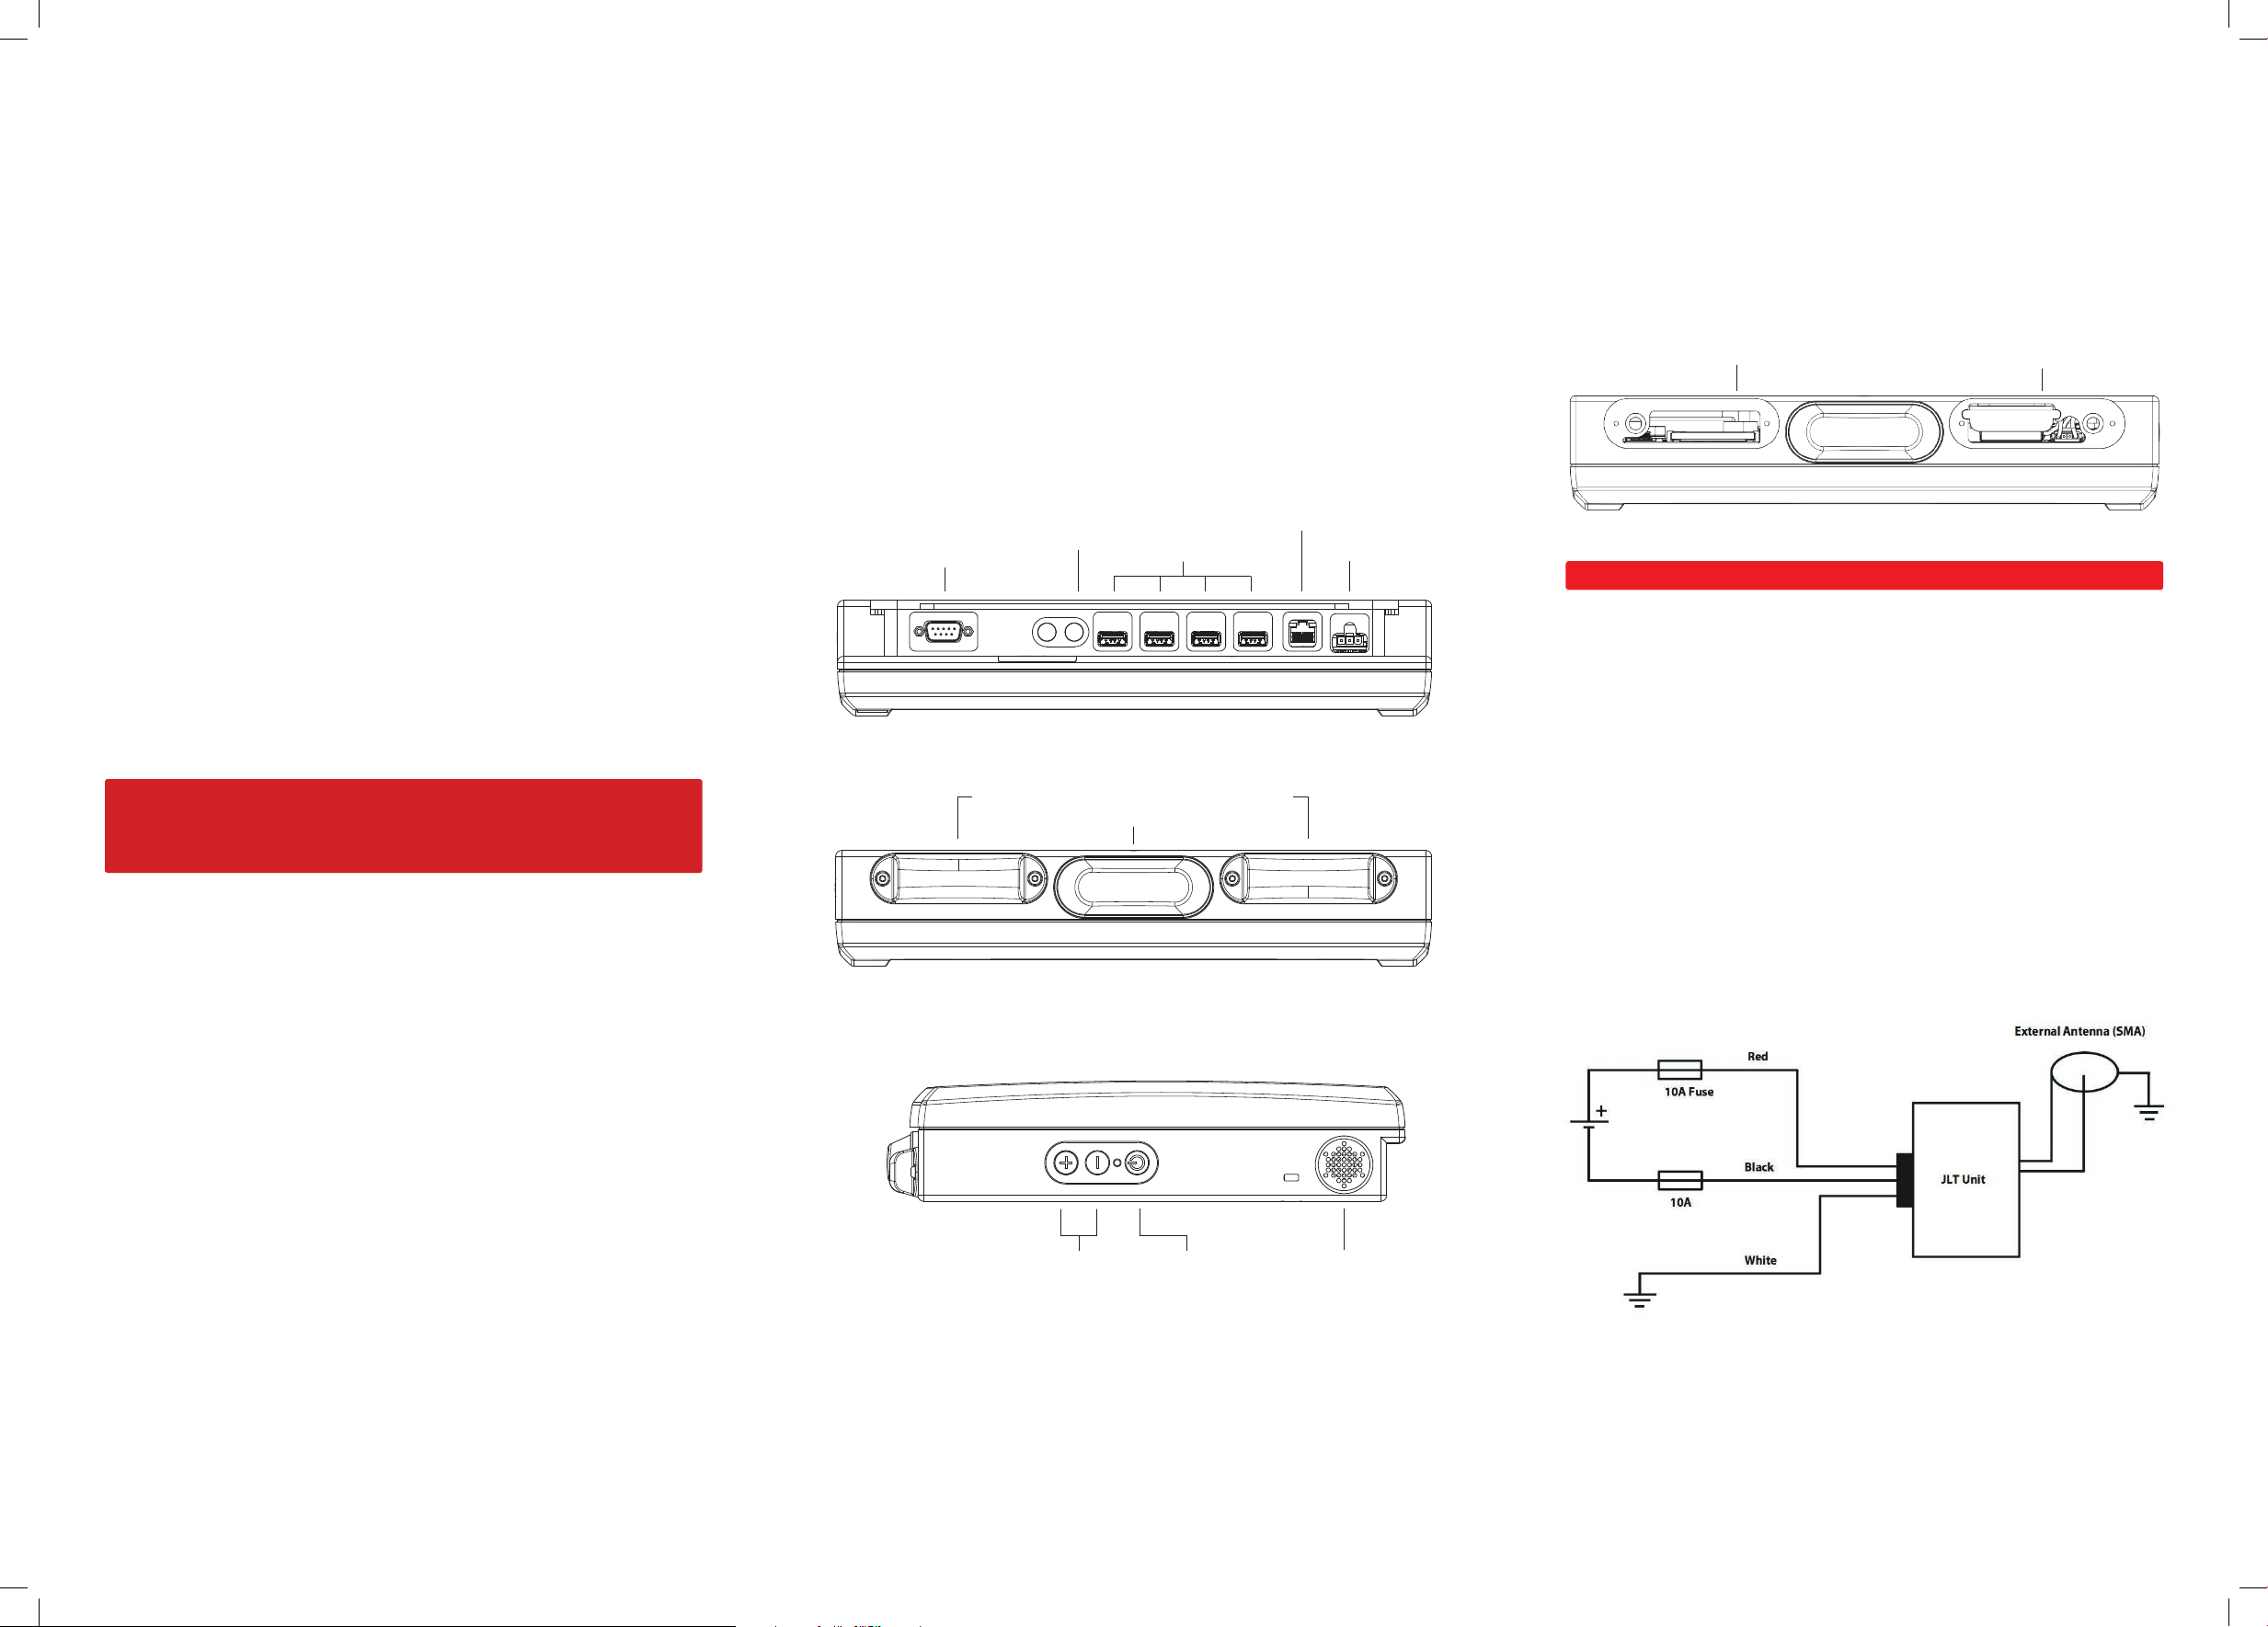
Power Input
Model dependent: See back label for input voltage range.
2x 10A Fuse for 9-36 VDC, unisolated
2x 5A Fuse for 18-38 VDC, isolated
Touch Screen
First Startup
On rst startup of a JLT Unit with a JLT OS image preloaded, Windows Setup starts.
During the initial Windows setup the picture will disappear for shorter periods or up
to a few minutes. Do not turn o or restart the unit, wait for the picture to reappear
and the setup completes.
Do not shut down the unit until the setup is fully completed, otherwise the
Operating System may be corrupt or damaged beyond recovery.
If the system already has been damaged or corrupted, a disk restore can be made
from a JLT OS image, contact your supplier for information and guidance.
Note
If your supplier is providing a specic customer image, this step may be skipped.
After windows setup is done, please calibrate the touchscreen when the OS is
launched. Start menu – Program – UPDD – Calibrate
Press all calibration points.
Do not use any other objects than ngers or stylus pointers intended for touch
screens. regular pens, screwdrivers or any other not intended objects may
permanently damage the touch screen surface.
Touch screen can be cleaned with a damp cloth, ordinary hand dishwashing uids
may also be used.
Optional


