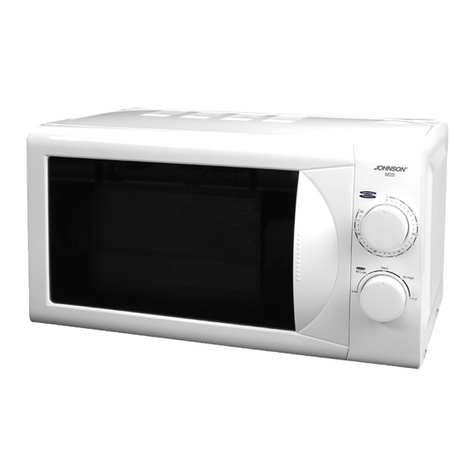
Johnson Onda 32 User manual

Forno a microonde combinato con grill
ISTRUZIONID’USO
Combined electric oven microwave & grill
INSTRUCTIONS FOR USE
Four électrique combiné micro-ondes & grill
INSTRUCTIONS POUR L’UTILISATION
Kombinierter elektrischer Backofen Mikrowelle & Grill
BETRIEBSANLEITUNG
Horno eléctrico combinado microondas y asador
INSTRUCCIONES DEFUNCIONAMIENTO
Forno elétrico combinado microondas & grill
INSTRUÇÕES DEUTILIZAÇAÕ
Onda 32
I
GB
F
D
E
P

2
230 V˜50/60 Hz
1400 W p. max 32 lt
B
C
A G
H L E
F D
D3
D
D1
D5
D9
D6
D7
D2
E
D4
D8

AVVE TENZE GENE ALI
Conservate con cura il presente
manuale e leggetene attenta-
mente le avvertenze; esse forni-
scono importanti indicazioni riguardanti la
sicurezza, l’uso immediato e futuro del-
l’apparecchio.
Questo apparecchio, adatto per il solo uso
domestico, dovrà essere destinato solo
alla funzione per il quale è stato espres-
samente concepito.
Ogni altro uso è da considerarsi improprio
e pericoloso.
Il costruttore non può essere considerato
responsabile per eventuali danni derivanti
da usi impropri, errati ed irragionevoli.
L’installazione dovrà essere effettuata se-
condo le prescrizioni del costruttore. Una
errata installazione può causare danni a
persone, animali, cose, il costruttore non
può esserne ritenuto responsabile. La si-
curezza delle apparecchiature elettriche è
garantita solo se queste sono collegate ad
un impianto elettrico provvisto di idonea
messa a terra secondo quanto stabilito
dagli attuali standard vigenti in materia di
sicurezza elettrica.
Gli elementi dell’imballaggio (sacchetti in
plastica, chiodi, polistirolo espanso, ecc.)
non devono essere lasciati alla portata di
bambini o incapaci in quanto rappresen-
tano potenziali fonti di pericolo.
Prima di collegare l’apparecchio accertarsi
che i dati di targa siano rispondenti a
quelli della rete di distribuzione elettrica.
In caso di incompatibilità tra la presa e la
spina rivolgersi a personale qualificato per
le necessarie operazioni di adeguamento.
Non utilizzare adattatori, prese multiple
e/o prolunghe.
Qualora il loro uso si rendesse indispen-
sabile utilizzare esclusivamente materiale
conforme alle vigenti norme di sicurezza
ed aventi requisiti di compatibilità con ap-
parecchio e rete di distribuzione elettrica.
Utilizzando l’apparecchio per la prima
volta, assicurarsi di aver tolto ogni eti-
chetta o foglio di protezione.
Se l’apparecchio è dotato di prese d’aria,
assicurarsi che non vengano mai occluse
nemmeno parzialmente.
L’uso di qualsiasi apparecchio elettrico
comporta l’osservanza di alcune regole
fondamentali ed in particolare:
Non immergere o bagnare l’apparecchio;
non usarlo vicino ad acqua, in vasca, nel
lavello o in prossimità di altro recipiente
con liquidi. Nel caso l’apparecchio dovesse
cadere accidentalmente in acqua NON cer-
care di recuperarlo ma innanzitutto to-
gliere immediatamente la spina dalla presa
di corrente.
Successivamente portarlo in un centro as-
sistenza qualificato per i necessari con-
trolli.
Durante l’uso, l’apparecchio deve essere
lontano da qualsiasi oggetto o sostanza
infiammabile od esplosiva.
Non toccare l’apparecchio con mani ba-
gnate o umide.
Non usare l’apparecchio a piedi nudi.
Non tirare l’apparecchio o il cavo per stac-
care la spina dalla presa.
Non lasciare l’apparecchio esposto ad
agenti atmosferici (pioggia, sole).
Si raccomanda di tenere l’apparecchio
fuori dalla portata di bambini od incapaci
e di non permetterne loro l’utilizzo.
Scollegare la spina dalla presa di corrente
quando l’apparecchio non viene utilizzato
e prima di effettuare qualsiasi operazione
di pulizia o manutenzione.
Il cavo di alimentazione deve essere sro-
tolato per tutta la sua lunghezza al fine di
evitarne il surriscaldamento.
Il cavo di alimentazione non deve essere
avvicinato a fonti di calore e/o superfici
taglienti.
In caso di cavo di alimentazione danneg-
giato, provvedere alla sostituzione che
deve essere effettuata da personale quali-
ficato.
In caso di guasto e/o cattivo funziona-
mento spegnere l’apparecchio e rivolgersi
a personale qualificato.
I
3

4
Eventuali manomissioni o interventi effet-
tuati da personale non qualificato fanno
decadere i diritti di garanzia.
Per pulire l’apparecchio usare solo un
panno morbido e non abrasivo.
Quando l’apparecchio, risulta inutilizza-
bile e si desidera eliminarlo, asportarne i
cavi e smaltirlo presso un ente qualificato
al fine di non contaminare l’ambiente.
• Se nel prodotto vi sono parti in vetro,
queste non sono coperte da garanzia.
ATTENZIONE:
Le parti in plastica del prodotto non sono
coperte da garanzia.
ATTENZIONE:
I danni del cavo di alimentazione, deri-
vanti dall’usura non sono coperti da ga-
ranzia; l’eventuale riparazione sarà
pertanto a carico del proprietario
ATTENZIONE:
Se si rendesse necessario portare o spe-
dire l’apparecchio al centro assistenza
autorizzato, si raccomanda di pulirlo ac-
curatamente in tutte le sue parti.
Se l’apparecchio risultasse anche mini-
mamente sporco o incrostato o presen-
tasse depositi di cibo, depositi calcarei,
depositi di polvere o altro; esternamente
o internamente: per motivi igenico-sani-
tari, il centro assistenza respingerà l’ap-
parecchio stesso senza visionarlo.
Il simbolo sul prodotto o sulla con-
fezione indica che il prodotto non deve
essere considerato come un normale ri-
fiuto domestico, ma deve essere portato
nel punto di raccolta appropriato per il
riciclaggio di apparecchiature elettriche
ed elettroniche.
Provvedendo a smaltire questo prodotto
in modo appropriato, si contribuisce a
evitare potenziali conseguenze negative
per l’ambiente e per la salute, che po-
trebbero derivare da uno smaltimento
inadeguato del prodotto. Per informa-
zioni più dettagliate sul riciclaggio di
questo prodotto, contattare l’ufficio co-
munale, il servizio locale di smaltimento
rifiuti o il negozio in cui è stato acqui-
stato il prodotto.

5
COMPONENTI
A Sportello
B Leve apertura sportello
C Pannello comandi
D Selettore potenze
E Selettore tempi
F Anello di rotazione
G Piatto girevole
H Griglia rotonda
L Base del forno
IST UZIONI D’USO INSTALLAZIONE
1) Collegamento
Prima di collegare l’apparecchio accertarsi
che i dati di targa siano rispondenti a quelli
della rete di distribuzione elettrica. Colle-
gare l’apparecchio ad una presa di corrente
con scarico a terra conforme alle norme di
sicurezza. Evitare installazioni elettriche
non conformi. Qualunque errore di colle-
gamento annulla la garanzia.
2) Installazione
- Appoggiate l’apparecchio su un piano
orizzontale e stabile, ben aerato, lontano
da lavandini e acqua in genere. - Assicura-
tevi che intorno abbia uno spazio almeno
di 7,5 cm. e sopra di 30 cm, in modo da
permettere la corretta fuoriuscita di calore
e vapore durante il funzionamento.-
Non ostruire le griglie di areazione dell’ap-
parecchio e non fate penetrare alcun tipo
di liquido. - Non rimuovete i piedini dalla
parte inferiore della carcassa.- Installate
l’apparecchio lontano da fonti di calore.
CONSIGLI DI SICU EZZA
1) L’apparecchio é stato concepito esclusi-
vamente per un uso domestico; per cuo-
cere, riscaldare o scongelare alimenti e
bevande.
2) Non toccare le parti calde dell’apparec-
chio quando é in funzione e utilizzare
guanti isolanti per ritirare i recipienti dal-
l’interno dell’apparecchio.
3) Non fate funzionare il microonde a vuoto
deve contenere sempre degli alimenti altri-
menti potrebbe deteriorarsi
4) Il vostro apparecchio ha una potenza
delle microonde elevata e regolabile. Po-
trete scongelare, riscaldare o cuocere
molto più rapidamente che con i sistemi di
cottura tradizionali. I tempi da impostare
sono indicati sulle confezioni degli ali-
menti, se questi non dovessero esserci, im-
postare un tempo pari a un terzo del tempo
di cottura tradizionale.
5) Assicuratevi che lo sportello (A) sia cor-
rettamente chiuso, in caso contrario il
forno non funzionerà e comunque non ten-
tate di farlo funzionare con lo sportello
aperto
6) Non utilizzare le microonde per:
- Friggere, poiché non é possibile control-
lare la temperatura dell’olio che potrebbe
bruciarsi
- Cuocere o riscaldare uova nel loro guscio,
uova sode con o senza guscio.
- Riscaldare contenitori ermeticamente
chiusi, ma inserirli aperti.
- Cuocere alimenti in genere con il guscio.
- Asciugare la biancheria.
7) Temperature degli alimenti: biberons,
vasetti...
- Prima di riscaldare, togliere le tettarelle
dai biberons ed i coperchi dai vasetti.
- La cottura a microonde scalda solo gli ali-
menti. I contenitori potrebbero essere freddi
o tiepidi mentre gli alimenti al loro interno
potrebbero essere bollenti.
- Per evitare rischi di scottature, mescolare
gli alimenti e controllatene la temperatura
(sopratutto per gli alimenti destinati ai
bambini) prima di servirli.
8) iscaldamento dei liquidi.
Durante il riscaldamento dei liquidi può ve-
rificarsi un ritardo dell’ebollizione, che
causa un improvviso innalzamento del li-
quido quando il contenitore viene tolto
dall’apparecchio. Di fatto il grado di ebolli-
zione è stato raggiunto, ma le bolle restano
imprigionate sul fondo del contenitore, per
cui vi possono essere dei rischi di scotta-
tura. Per evitare questo problema, mettere
un cucchiaio in plastica nel liquido da ri-
scaldare.
9) Contenitori usa e getta.
Controllare attentamente l’apparecchio in
funzione, quando state utilizzando conte-

6
nitori usa e getta in plastica, carta o altro
materiale combustibile. Se notate presenza
di fumo, lasciate lo sportello (A) chiuso, in-
terrompete la cottura e disinserite l’alimen-
tazione.
10) Con il grill non utilizzate stoviglie in
plastica: fondono.
Posizionate gli alimenti ad almeno 5 cm di
distanza dalle resistenze del grill. Durante
la cottura di carni grasse possono generare
degli schizzi che se finiscono sulle resi-
stenze si incendiano.
Questi però si spengono da soli se il forno
è stato regolarmente pulito.
AL P IMO UTILIZZO
Togliere gli accessori dall’imballo, lavateli
e asciugateli.
1/ MONTAGGIO DEGLI ACCESSO I
Posizionate l’anello di scorrimento Fsulla
base L del forno, assicurandovi che le tre
rotelline si posizionino nella scanalatura
della base del forno.
Appoggiate il piatto girevole Gsull’anello
di scorrimento F.
All’avvio dell’apparecchio il piatto girerà
indifferentemente verso sinistra o destra.
Per l’utilizzo della griglia rotonda Hè suf-
ficiente appoggiarla sul piatto girevole. Non
deve comunque essere mai appoggiata di-
rettamente sulla base del forno L.
2/ ELIMINAZIONE DELL’ODO E
DI NUOVO DEL G ILL
Le resistenze del grill sono coperte da un
grasso protettivo. Prima di utilizzare questa
funzione bisogna quindi pulirle. Per fare
ciò, selezionate la funzione grill D9, impo-
stare il timer Esu 15 minti. L’apparecchio
entrerà in funzione ripulendo le
resistenze. Questa operazione provocherà
odore e fumo, da ritenere normali.
FUNZIONAMENTO
Il forno a microonde non deve funzionare
vuoto, per imparare ad usarlo facendo
delle prove, mettere un bicchiere pieno
d’acqua sul piatto girevole G.
Cottura a microonde
Mettete il prodotto all’interno del micro-
onde, sul piatto girevole G.
Scegliete la potenza più adatta all’alimento
da trattare selezionandola con la manopola
Dsulle prime 5 posizioni
D1. mantenimento al caldo (potenza mi-
nima)
D2.scongelamento e cottura di piatti deli-
cati
D3.scongelamento rapido di piccole por-
zioni
D4.cottura lenta o riscaldamento di piatti
delicati
D5.cottura e riscaldamento (potenza mas-
sima)
Selezionate il tempo di funzionamento con
la manopola E.
Chiudete lo sportello A. La luce interna si
accenderà e il forno entrerà in funzione.
Passato il tempo impostato, il forno emet-
terà il segnale sonoro spegnendosi. Aprite
lo sportello e togliete il prodotto dall’in-
terno facendo attenzione alla temperatura
del contenitore.
Cottura combinata grill-microonde
Mettete il prodotto all’interno del micro-
onde, sul piatto girevole G.
Scegliete la potenza più adatta all’alimento
da trattare selezionandola con la manopola
Dsulle posizioni D6 o D7 o D8.
D6. potenza minima
D7. potenza media
D8. potenza massima
Selezionate il tempo di funzionamento con
la manopola E.
Chiudete lo sportello. La luce interna si ac-
cenderà e il forno entrerà in funzione. Pas-
sato il tempo impostato, il forno emetterà
il segnale sonoro spegnendosi. Aprite lo
sportello e togliete il prodotto dall’interno
facendo attenzione alla temperatura del
contenitore.
Cottura con solo grill
Mettete il prodotto all’interno del micro-
onde, sul piatto girevole Go sulla griglia H
(ATTENZIONE, mantenere una distanza ali-
mento-resistenze di almeno 5 cm).

7
Posizionate la manopola D sulla posizione
D9. Selezionate il tempo di funzionamento
con la manopola E.
Chiudete lo sportello. La luce interna si ac-
cenderà e il forno entrerà in funzione. Pas-
sato il tempo impostato, il forno emetterà
il segnale sonoro spegnendosi. Aprite lo
sportello e togliete il prodotto dall’interno
facendo attenzione alla temperatura del
contenitore.
NOTE
Per regolare correttamente i tempi di cot-
tura inferiori ai 2 minuti, girate la manopola
timer Eben oltre il riferimento 2 per poi ri-
portarla sul tempo desiderato.
Durante il funzionamento è possibile aprire
lo sportello Aper controllare la cottura. Il
forno si ferma automaticamente per ri-
prendere la cottura se si richiude lo spor-
tello. Dopo l’apertura dello sportello, se si
desidera interrompere anzitempo la cot-
tura, riportare il timer Esulla posizione 0
prima di richiudere lo sportello, per evitare
il funzionamento a vuoto del forno.
CONSIGLI P ATICI
1) Il piatto girevole G deve sempre es-
sere in posizione.
2) Utilizzare contenitori appropriati per
la cottura a microonde. Per verificare la
“trasparenza” alle microonde di un conte-
nitore è possibile fare un semplice test.
Mettere il contenitore vuoto sul piatto gi-
revole Gcon un bicchiere pieno d’acqua.
Selezionate la potenza massima D5 e fate
scaldare per un minuto. Se dopo questa
operazione il contenitore è freddo significa
che è trasparente e può essere usato con le
microonde. Al contrario se è caldo, significa
che è assorbente e non bisogna quindi
usarlo per questo tipo di cottura.
3) Scongelamento
Togliere gli eventuali essudati (acqua o
sangue) che si formano durante lo sconge-
lamento, a metà dell’operazione per evitare
che provochino un riscaldamento intorno
agli alimenti.
4) Vaschette metalliche.
E’ consigliabile evitare l’uso di materiale
metallico all’interno del vostro forno a mi-
croonde (posate, graffette presenti sulle
confezioni, piatti con dorature o piatti in
metallo, vassoi e vaschette in alluminio).
PULIZIA
Il forno a microonde è più efficace quando
è pulito, quindi pulite regolarmente il vo-
stro apparecchio.
- Superfici esterne: NON usare solventi,
candeggina, ammoniaca, prodotti abrasivi,
ecc...
- Sportello e pareti della cavità: usate un
panno o una spugna con detergenti non
abrasivi e poi asciugatelo. NONcercate in
alcun modo di smontare lo sportello. Se la
porta e la sua cornice fossero deteriorate,
non utilizzate il microonde e rivolgetevi ad
un centro assistenza autorizzato.
Se notate macchie di grasso o alimenti es-
siccati, fate bollire per 5 minuti nella cavità,
mezzo litro d’acqua con la funzione micro-
onde. Il vapore ammorbidirà i residui ren-
dendo più facile la pulizia. Se necessario
togliete il piatto girevole Ge l’anello di ro-
tazione Fper pulire anche la base della ca-
vità L. Il piatto girevole Ge la griglia tonda
H, possono essere lavati con prodotti per
stoviglie o in lavastoviglie.
MANUTENZIONE
IMPORTANTE, è estremamente pericoloso
effettuare qualunque tipo di riparazione o
sostituzione, dovete sempre rivolgervi ad
un centro assistenza autorizzato ohnson.
Inserire nell’apparecchio solo gli accessori
in dotazione e stoviglie specificatamente
compatibili con microonde e grill.
EVITARE stoviglie o accessori quali: piatti,
bicchieri e contenitori vari in materiali come
ceramica, terra cotta, plastica ecc...

6
GENE AL SAFETY EQUI EMENTS
Carefully read the requirements
in this manual and keep in a safe
place. It contains important in-
structions on the safety, use and future of
your appliance.
This appliance is only for domestic use
and must only to be used for the purpose
it was specifically designed.
Any other use is considered improper and
dangerous.
The manufacturer cannot be held respon-
sible for any damages caused by impro-
per, incorrect and negligent use. The
installation must be carried out according
to the manufacturer’s instructions. The
manufacturer shall not be held responsible
for any damages to people, animals or ob-
jects caused by incorrect installation. The
safety of the electrical equipment is only
guaranteed if it is connected to an electri-
cal installation equipped with a suitable
earthing system in compliance with the
current standards on electrical safety.
Do not leave parts of packaging (plastic
bags, foam polystyrene, nails, etc) within
reach of children or incapacitated people
since they are potential sources of danger.
Before connecting the appliance, check
that the technical data on the rating label
corresponds to those of the main electri-
city network.
In case of incompatibility between the ou-
tlet and the plug, contact a qualified elec-
trician for the necessary adjustments.
Do not use adaptors, multiple plugs and
extension leads.
However, if absolutely necessary only use
materials that conform to the current sa-
fety standards and that are compatible
with the appliance and the main electricity
network.
On using the appliance for the first time,
remove any labels or protective sheets.
If the appliance is equipped with air inlets,
make sure they are never blocked not even
partially.
The use of any electrical appliance invol-
ves the observance of some fundamental
rules. In particular:
Do not immerge the appliance in water
and do not wet; do not use it near water,
in the tub, washbasin or near other reci-
pients with liquids. If the appliance
should accidentally fall in water, DO NOT
try to touch it but immediately disconnect
the plug from the mains power.
Then bring it to an authorised service
centre for the necessary controls.
During use, the appliance must be kept
away from any inflammable objects or
substances or explosives.
Do not touch the appliance with wet
hands or feet.
Do not use the appliance with bare feet.
Do not pull on the power cord or on the
appliance itself to disconnect the plug
from the power outlet.
Do not leave the appliance exposed to at-
mospheric agents (sun, rain…)
Keep the appliance out of reach of chil-
dren or incapacitated people and do not
let them use it.
Disconnect the plug from the power ou-
tlet when the appliance is not being used
and before carrying out any cleaning or
maintenance.
The power cord must be completely un-
wound to prevent it from overheating.
The power cord must be kept away from
heat sources and/or sharp edges.
If power cord is damaged, have it repla-
ced by qualified personnel.
Switch off and contact a qualified techni-
cian if the appliance should breakdown
and/or not function properly.
Any tampering or interventions executed
by unqualified people will cancel the gua-
rantee.
Use a soft and non-abrasive cloth to
clean the appliance.
When the appliance is unserviceable and
must be eliminated, remove its cords and
dispose of it at an authorised disposal
centre in order to protect the environ-
ment.
• Warranty does not cover any glass parts
of the product.
ATTENTION:
The damages of the power supply cord,
originate by the wear aren’t covered by
guarantee; the repair will be in charge to
the owner. ATTENTION:
Warranty does not cover any plastic parts
of the product.
GB
9
ATTENTION:
If the need should arise to take or send the
appliance to an authorised service centre,
make sure to clean all its parts thoroughly.
For hygienic purposes, the service centre
shall reject appliances that are not perfec-
tly clean on the outside or inside without
making any controls or repairs.
The symbol on the product or on its
packaging indicates that this product may
not be treated as household waste. Instead
it shall be handed over to the applicable
collection point for the recycling of elec-
trical and electronic equipment.
By ensuring this product is disposed of
correctly, you will help prevent potential
negative consequences for the environ-
ment and human health, which could
otherwise be caused by inappropriate
waste handling of this product.
For more detailed information about recy-
cling of this product, please contact your
local city office, your household waste di-
sposal service or the shop where you pur-
chased the product.
COMPONENTS
A Door
B Door opening levers
C Control pannel
D Power selector
E Time selector
F Rotation ring
G Rotating plate
H Round grill
L Oven base
INST UCTIONS FO USE INSTALLATION
1) Connection
Before connecting the appliance make sure
that the data indicated answer the ones of
the electric grid. Connect the appliance to
a socket with grounding in conformity with
the safety rules. Avoid electric installations
that are not in conformity. Any connection
mistake cancels the guarantee.
2) Installation
Place the appliance on a horizontal and
stable surface, well aired, far from wash-
basins and water in general. – Make sure
that around it there is a space of at least
7,5 cm and above of 30 cm, this to allow
the right emission of heat and steam du-
ring functioning. – Do not obstruct the
ventilation grill of the appliance and do not
make any type of liquid to penetrate. – Do
not remove the feet from the bottom part
of the casing. – Install the appliance far
from heat sources.
SAFETY ADVICE
1) The appliance has been studied exclusi-
vely for domestic use; to cook heat or de-
freeze food and beverages.
2) Do not touch the hot parts of the ap-
pliance when in function and use insulating
gloves to remove the containers from in-
side the appliance.
3) Do not make the microwave function
when empty it must always contain food
otherwise it could damage itself.
4) Your appliance has a high and adjustable
microwave power. You can defreeze heat
or cook much faster than with the traditio-
nal cooking systems. The time to set is in-
dicated on the packaging of the food, if it
is not indicated, set a time equal to a third
of the traditional cooking time.
5) Make sure that the door (A) is closed; if
not the oven will not function and however
do not try to make it work with the door
opened.
6) Do not use the microwave to:
- Fry, as it is not possible to control the
temperature of the oil that could burn
- Cook or heat eggs in their shell, hard-
boiled eggs with or without shell.
- Heat hermetically closed containers, in-
sert them open.
- Dry laundry.
7) Food temperature: feeding bottles,
jars…
- Before heating, remove the teat from the
feeding bottles and the lid of the jars.

10
- The microwave cooking heats only the
food. The containers could be cold or tepid
while the food inside could be boiling.
- To avoid risks of burns, mix the goods
and control the temperature (above all for
food designated to children) before serving
them.
8) Heating of liquids
During heating of liquids a delay in boiling
could occur, which causes a sudden rise of
the liquid when the container is removed
from the appliance. In fact the boiling de-
gree has been reached, but the bubbles re-
main entrapped on the bottom of the
container, therefore there could be risks of
burns. To avoid this problem, put a plastic
spoon in the liquid to heat.
9) Disposable containers
Carefully control the appliance during ope-
ration, when you are using disposable con-
tainers in plastic, paper or other
combustible material. If you notice smoke,
leave the door (A) closed, stop the cooking
and disconnect the feeding.
10) With the grill do not use plastic di-
shes and cutlery as they melt
Place the food at least 5 cm from the resi-
stances of the grill, during cooking of fat
meats as squirts can occur and finish on
the resistances and take fire. These howe-
ver extinguish by themselves if the oven
has been regularly cleaned.
FI ST TIME YOU USE THE OVEN
Remove the accessories from the packing,
wash and dry them.
1/ASSEMBLY OF THE ACCESSO IES
Place the sliding ring F on the base L of the
oven; make sure that the three wheels po-
sition themselves in the slots of the base of
the oven. Lean the rotating plate G on the
sliding ring F.
When the appliance will be switched on the
plate will turn indifferently towards the left
or the right.
For the use of the round grill H you just
have to lean it on the rotating plate.
It must never however be leaned directly on
the base of the oven L.
2/ELIMINATION OF THE SMELL
OF THE NEW G ILL
The resistances of the grill are covered with
protective grease. Before using this fun-
ction you therefore have to clean it. To do
so, select the function grill D9, set the timer
E on 15 minutes. The appliance will start
and clean the resistance. This operation
will provoque smell and smoke which is
normal.
FUNCTIONING
The microwave oven must never be in
function empty, to learn how to use it by
making tests, put a glass full of water on
the rotating plate G.
Microwave cooking
Put the product inside the microwave, on
the rotating plate G.
Choose the power most suitable for the
food to be treated setting it with the button
D on the first 5 positions.
D1. To keep warm (minimum power)
D2. Defrosting and cooking of delicate di-
shes
D3. Fast defreezing of small portions
D4. Slow cooking or warming up of delicate
dishes
D5. Cooking and warming up (maximum
power). Set the time of operation with the
button E.
Close the door A. The inside light will turn
on and the oven will start. Once the time
you have set will be passed, the oven will
give out a sound and will turn off. Open the
door and remove the product being careful
of the temperature of the container.
Combined cooking grill-microwave
Put the product inside the microwave, on
the rotating plate G.
Choose the power most suitable to the
food to be treated set it with the button D
on the positions D6 or D7 or D8.
D6. minimum power
D7. medium power
D8. maximum power
Set the time of operation with the button E.
Close the door. The internal light will turn
on and the oven will start. After the time

11
you have set will have passed, the oven will
give out a sound and turn off. Open the
door and remove the product from inside
being careful to the temperature of the
container.
Cooking only with the grill
Put the product inside the microwave, on
the rotating plate G or on the grill H
(WARNING keep a distance food-resistance
of at least 5 cm)
Place the button D on position D9
Select the operation time with the button E.
Close the door. The inside light will turn
on and the oven will start. Once the selec-
ted time will have passed, the oven will give
out a sound and turn off. Open the door
and remove the product from inside being
careful to the temperature of the container.
NOTE
To regulate in the right way the cooking
time less than 2 minutes, turn the timer
button E well beyond the reference 2 and
them bring it back on the wanted time.
During functioning it is possible to open
the door A to check the cooking. The oven
will stop automatically to restart the coo-
king if you recluse the door. After the ope-
ning of the door, if you want to stop ahead
of time the cooking, re-put the timer E on
position 0 before reclosing the door, to
avoid functioning of the oven when empty.
P ACTICAL ADVICE
1) The rotating plate G must always be
in position
2) Use containers suitable for microwave
cooking. To check the “transparency” to
the microwaves of a container it is possible
to do a simple test, put the container empty
on the rotating plate G with a glass full of
water. Select the maximum power D5 and
make it heat for one minute. If after this
operation the container is cold this means
that it is transparent and can be used with
the microwave. On the contrary if it is hot,
this means that it is absorbent and must
not be used for this type of cooking.
3) Defreeze
Remove the eventual exudates (water or
blood) that form themselves during the
defrosting, at half operation to avoid that
they cause a heating around the food.
4) Metallic containers
It is advisable to avoid the use of metallic
material inside your microwave oven (cu-
tlery, staples that are on the packaging,
plates with gold-plating or metallic plates,
trays and aluminium containers).
CLEANING
The microwave oven is more efficient
when clean; therefore clean your appliance
regularly.
- External surfaces: DO NOT use solvents,
bleach, ammonia, abrasive products etc…
- Door and cavity walls: use a cloth or
sponge with non abrasive detergents and
then dry it. DO NOT try in any way to di-
sassemble the door. If the door and its
frame should be damaged, do not use the
microwave and contact an authorized as-
sistance centre.
- If you see stains of grease or dry food,
boil for 5 minutes in the cavity a half litre
of water with the microwave function. The
steam will soften the residuals rendering
easier the cleaning. If necessary remove
the rotating plate G and the rotating ring
F to clean also the base of the cavity L.
The rotating plate G and the round grill H
can be washed with products for dishes or
in the dishwashers.
MAINTENANCE
IMPORTANT, it is extremely dangerous to
effect any type of repair or replacement,
you must always contact an authorized
ohnson assistance centre.
Insert only the supplied accessories and di-
shes that are specifically compatible with
microwave and grill.
AVOID dishes or accessories such as: di-
shes, glasses and containers in different
materials such as ceramic, terra cotta, pla-
stic, aluminium, etc...

12
AVE TISSEMENTS GÉNÉ AUX
Conservez avec soin cette notice
et lisez en attentivement les
avertissements: ils fournissent
d’importantes indications au sujet de la
sécurité et de l’utilisation immédiate et fu-
ture de l’appareil.
Cet appareil, adapté à l’usage domestique,
ne devra être destiné qu’à la fonction pour
laquelle il a été expressément créé.
Toute autre utilisation doit être considérée
impropre et dangereuse.
Le constructeur ne peut être considéré re-
sponsable pour les éventuels dommages
dérivant d’utilisations impropres, incor-
rectes et déraisonnables.
L’installation devra être effectuée selon les
prescriptions du constructeur. Une instal-
lation incorrecte peut causer des domma-
ges aux personnes, aux animaux et aux
choses ; le constructeur ne peut pas en
être considéré responsable. La sécurité
des appareillages électriques n’est garan-
tie que s’ils sont branchés à une installa-
tion électrique munie de mise à la terre
conformément aux standards en vigueur
en matière de sécurité électrique.
Les éléments d’emballage (sachets en pla-
stique, clous, polystyrol expansé, etc.) ne
doivent pas être laissés à la portée des en-
fants ou des handicapés mentaux étant
donné qu’ils s’agit de sources potentielle
de danger.
Avant de brancher l’appareil, s’assurer que
les données de la plaquette correspondent
à celle du réseau de distribution électri-
que.
En cas d’incompatibilité entre la prise et la
fiche, s’adresser à du personnel qualifié
pour les opérations d’adaptations appro-
priées.
Ne pas utiliser d’adaptateurs, de prises
multiples et/ou de rallonges.
Si leur emploi devait être indispensable,
n’utiliser que du matériel conforme aux
normes de sécurité en vigueur et ayant des
caractéristiques compatibles avec l’appa-
reil et le réseau de distribution électrique.
Lors de la première utilisation de l’appa-
reil, s’assurer d’avoir enlevé toute éti-
quette ou feuille de protection.
Si l’appareil est muni de prises d’air, s’as-
surer qu’elles ne soient jamais bouchées
même partiellement.
L’utilisation de tout appareil électrique
implique le respect de certaines règles
fondamentales et en particulier :
Ne pas plonger dans l’eau ou mouiller
l’appareil, ne pas l’utiliser près de l’eau,
dans la baignoire, dans le lavabo ou à pro-
ximité d’un autre récipient avec des liqui-
des. Si l’appareil devait tomber dans l’eau
ou même seulement être mouillé, N’essa-
yez PAS de le récupérer mais avant tout
débranchez immédiatement la fiche de la
prise de courant.
Successivement le confier à un service
d’assistance après-vente pour les contrô-
les nécessaires.
Pendant l’utilisation, l’appareil doit rester
loin de tout objet ou substance inflamma-
ble ou explosive.
Ne pas toucher l’appareil avec les mains
mouillées ou humides.
Ne pas utiliser l’appareil pieds nus.
Ne pas tirer l’appareil ou le câble pour dé-
brancher la fiche de la prise.
Ne pas laisser l’appareil exposé aux
agents atmosphériques (pluie, soleil).
On recommande de garder l’appareil hors
de la portée des enfants ou des handica-
pés mentaux et ne pas les autoriser à l’uti-
liser.
Débrancher la fiche de la prise de courant
quand l’appareil n’est pas utilisé et avant
d’effectuer toute opération de nettoyage
ou d’entretien.
Le câble d’alimentation doit être déroulé
sur toute sa longueur afin d’en éviter la
surchauffe.
Le câble d’alimentation ne doit pas être
approché de sources de chaleur et/ou sur-
faces coupantes.
Si le câble d’alimentation est endommagé,
son remplacement doit être fait par du
personnel qualifié.
F

13
En cas de panne et/ou de mauvais fon-
ctionnement, éteindre l’appareil et s’adres-
ser à du personnel qualifié.
Les éventuelles manipulations ou inter-
ventions effectuées par du personnel non
qualifié annulent les droits de garantie.
Pour nettoyer l’appareil n’utiliser qu’un
chiffon humide et non abrasif.
Quand l’appareil est inutilisable et l’on
veut le jeter, enlever les câbles et le re-
mettre à une structure qualifiée à cet effet
afin de ne pas contaminer la nature.
• Les parties en verre éventuellement pré-
sentes dan le produit ne sont pas couver-
tes par la garantie.
ATTENTION:
Les endommagements du câbles d’ali-
mentation dérivant de l’usure ne sont pas
couverts par la garantie; l’éventuelle répa-
ration sera donc à la charge du proprié-
taire.
ATTENTION:
Les parties en plastique du produit ne sont
pas couvertes par la garantie.
ATTENTION:
S’il est nécessaire d’amener ou d’expédier
l’appareil au centre d’assistance agréé,
nous recommandons de nettoyer soigneu-
sement toutes ses parties.
Si l’appareil est sale, même légèrement, ou
si des dépôts d’aliments, calcaires, de
poussière ou autre s’y trouvent, à l’exté-
rieur ou à l’intérieur: pour des raisons
hygiéniques et sanitaires, le centre d’as-
sistance refusera l’appareil sans même
l’examiner.
Le symbole sur le produit ou son em-
ballage indique que ce produit ne peut
être traité comme déchet ménager.
Il doit plutôt être remis au point de ramas-
sage concerné, se chargeant du recyclage
du matériel électrique et électronique.
En vous assurant que ce produit est éli-
miné correctement, vous favorisez la pré-
vention des conséquences négatives pour
l’environnement et la santé humaine qui,
sinon, seraient le résultat d’un traitement
inapproprié des déchets de ce produit.
Pour obtenir plus de détails sur le recy-
clage de ce produit, veuillez prendre con-
tact avec le bureau municipal de votre
région, votre service d’élimination des dé-
chets ménagers ou le magasin où vous
avez acheté le produit.

14
COMPOSANTS
A Porte
B Leviers ouverture porte
C Tableau de commande
D Selecteur puissances
E Selecteur temps
F Anneau de rotation
G Plateau tournant
H Grille ronde
L Base du four
INST UCTIONS DE SE VICE
INSTALLATION
1) Connection
Avant de brancher l’appareil assurez-vous
que les données indiquées répondent à cel-
les du réseau de distribution électrique.
Brancher l’appareil à une prise de courant
avec décharge à terre conforme aux normes
de sécurité. Eviter les installations électri-
ques non conformes. N’importe quelle er-
reur de connection annule la garantie.
2) Installation
- Appuyer l’appareil sur une surface hori-
zontale et stable, bien aérée, loin de l’évier
et eau en général. - Assurez-vous que
l’appareil ait autour une espace d’au moins
7,5 cm et au dessus de 30 cm de façon à
permettre une correcte sortie de chaleur et
vapeur durant le fonctionnement. - Ne pas
obstruer les grilles d’aération de l’appareil
et ne pas faire pénétrer aucun type de li-
quide. - Ne pas enlever les pieds de la par-
tie inférieure de la carcasse. - Installer
l’appareil loin des sources de chaleur.
CONSEILS DE SECU ITE
1) L’appareil a été conçu exclusivement
pour utilisation domestique, pour cuire, ré-
chauffer et décongeler aliments et bois-
sons.
2) Ne pas toucher les parties chaudes de
l’appareil quand il est en fonction et utiliser
des gants isolants pour retirer les réci-
pients de l’intérieur de l’appareil.
3) Ne pas faire fonctionner le micro-
ondes à vide il doit toujours contenir des
aliments autrement il pourrait se détériorer.
4) Votre appareil a une puissance des
micro-ondes élevée et réglable. Vous
pourrez décongeler, réchauffer ou cuire
beaucoup plus rapidement qu’avec les sy-
stèmes de cuissons traditionnels. Les
temps pour la cuisson sont indiqués sur les
confections des aliments, si ces temps ne
sont pas indiqués, affichez un temps égal
à un tiers du temps pour la cuisson tradi-
tionnelle.
5) Assurez-vous que la porte (A) soit fer-
mée correctement, dans le cas contraire le
four ne fonctionnera pas, ne pas essayer de
le faire fonctionner avec la porte ouverte.
6) Ne pas utiliser le four à micro-ondes
pour:
- Frire, car il n’est pas possible contrôler la
température de l’huile qui pourrait se brû-
ler.
- Cuire ou réchauffer œufs dans leur co-
quille, œufs durs avec ou sans coquille.
- Réchauffer conténiteurs hermétiquement
fermés, mais introduisez-les ouverts.
- Cuire aliments en général avec coquille.
- Sécher le linge.
7) Températures des aliments, biberons,
petits pots…
- Avant de réchauffer, enlever les tétines
des biberons et les couvercles des petits
pots.
- La cuisson à micro-ondes réchauffe seu-
lement les aliments, les conténiteurs pour-
raient être froids ou tièdes pendant que les
aliments à l’intérieur pourraient être bouil-
lants.
- Pour éviter risques de brûlures, mélanger
les aliments et contrôlé la température
(surtout pour les aliments destinés aux en-
fants) avant de les servir.
8) échauffement des liquides:
- Durant le réchauffement des liquides il
peut se vérifier un retard dans l’ébullition,
qui cause une soudaine élévation du liquide
quand le conténiteur est retiré de l’appareil.
En effet le degré d’ébullition à été rejoint,
mais les bulles restent emprisonnées sur le
fond du conténiteur, donc il peut y avoir
des risques de brûlures. Pour éviter ce
problème, mettre une cuillère en plastique
dans le liquide à réchauffer.
9) Conténiteur jetable

15
- Contrôler attentivement l’appareil en fon-
ction, quand vous utilisez des conténiteurs
jetables en plastique, papier ou autre ma-
tériel combustible. Si vous notez de la
fumée, laissez la porte (A) fermée, inter-
rompez la cuisson et déconnectez l’ali-
mentation.
10) Avec le grill ne pas utilisez vaisselle
en plastique car elles fondent.
- Placez les aliments à au moins 5 cm de
distance des résistances du grill. Durant la
cuisson des viandes grasses celles-ci peu-
vent générer des éclaboussures qui finis-
sent sur les résistances et s’incendient.
Celles-ci s’éteignent toutes seules si le four
a été régulièrement nettoyé.
A LA PREMIERE UTILISATION
Enlever les accessoires de l’emballage,
lavez-les et essuyez-les.
1/MONTAGE DES ACCESSOI ES
Positionnez l’anneau de rotation F sur la
base L du four, en vous assurant que les
trois petites roues se positionnent dans la
rainure de la base du four. Appuyez le pla-
teau tournant G sur la bague F.
Au moment de la mise en fonction de l’ap-
pareil le plateau tournera indifféremment
vers la gauche ou droite.
Pour l’utilisation de la grille ronde H il est
suffisant de l’appuyée sur le plateau tour-
nant. Elle ne doit jamais être appuyée di-
rectement sur la base du four L.
2/ ELIMINATION DE L’ODEU
DU NOUVEAU G ILL
Les résistances du grill sont couvertes d’un
gras de protection. Avant d’utiliser cette
fonction il faut donc les nettoyées. Pour le
faire, sélectionnez la fonction grill D9, af-
ficher le timer E sur 15 minutes. L’appareil
entrera en fonction nettoyant les résistan-
ces. Cette opération provoquera odeur et
fumé ce qui est normal.
FONCTIONNEMENT
Le four à micro-ondes ne doit pas fon-
ctionner vide, pour apprendre à l’utiliser
en faisant des essaies, mettre un verre
plein d’eau sur le plateau tournant G.
Cuisson à micro-ondes
Mettre le produit à l’intérieur du micro-
ondes, sur le plateau tournant G.
Choisir la puissance plus apte à l’aliment à
traiter en la sélectionnant avec le bouton D
sur les premières 5 positions.
D1 maintient au chaud (puissance mini-
mum)
D2 décongélation et cuisson plats délicats
D3 décongélation rapide et petites portions
D4 cuisson lente ou réchauffement de plats
délicats
D5 cuisson et réchauffement (puissance
maximum)
Sélectionnez le temps de fonctionnement
avec le bouton E.
Fermez la porte A. La lumière à l’intérieur
s’allumera et le four entrera en fonction.
Une fois que le temps affiché est passé, le
four fera un signal acoustique et s’étendra.
Ouvrir la porte et enlevez le produit de l’in-
térieur en faisant attention à la température
du conténiteur.
Cuisson combinée grill-micro-ondes
Mettez le produite à l’intérieur du micro-
ondes, sur le plateau tournant G.
Choisissez la puissance plus apte à l’ali-
ment à traiter en la sélectionnant avec le
bouton D sur les positions D6 ou D7 ou D8.
D6 puissance minimum
D7 puissance moyenne
D8 puissance maximum
Sélectionnez le temps de fonctionnement
avec le bouton E.
Fermez la porte. La lumière interne s’allu-
mera et le four entrera en fonction. Quand
le temps sélectionné sera passé le four
émettra un signal acoustique en s’étei-
gnant. Ouvrir la porte et enlever le produit
faisant attention à la température du con-
téniteur.
Cuisson seulement avec grill
Mettez le produit à l’intérieur du micro-
ondes, sur le plateau tournant G ou sur la
grille H (ATTENTION garder une distance
aliment-résistance d’au moins 5 cm).
Positionnez le bouton D sur la position D9
Sélectionnez le temps de fonctionnement
avec le bouton E.

16
Fermez la porte. La lumière interne s’allu-
mera et le four entrera en fonction. Une fois
que le temps sélectionné sera passé, le four
émettra un signal acoustique en s’étei-
gnant. Ouvrir la porte et enlevez le produit
de l’intérieur en faisant attention à la tem-
pérature du conténiteur.
NOTE
Pour régler correctement le temps de cuis-
son inférieur à 2 minutes, tournez le bou-
ton timer E bien outre la référence 2 pour
ensuite le reporté sur le temps désiré.
Durant le fonctionnement il est possible
d’ouvrir la porte A pour contrôler la cuis-
son, le four s’arrête automatiquement pour
reprendre la cuisson si l’on referme la
porte. Après l’ouverture de la porte, si l’on
désire interrompre avant la fin du temps la
cuisson, reportez le timer E sur la position
0 avant de refermer la porte, pour éviter le
fonctionnement à vide du four.
CONSEILS P ATIQUES
1) Le plateau tournant G doit être en po-
sition
2) Utilisez conténiteur appropriés pour
la cuisson aux micro-ondes. Pour vérifier
la “transparence” aux micro-ondes d’un
conténiteur il est possible faire un simple
test, mettez le conténiteur vide sur le pla-
teau tournant G avec un verre plein d’eau.
Sélectionnez la puissance maximum D5 et
faire chauffer pour une minute. Si après
cette opération le conténiteur est froid ceci
veut dire qu’il est transparent et peut être
utilisé avec les micro-ondes. Au contraire
s’il est chaud, ceci veux dire qu’il est ab-
sorbant et donc il ne faut pas l’utiliser pour
ce type de cuisson.
3) Décongélation
Enlevez les exsudats éventuels (eau ou
sang) qui se forment durant la décongéla-
tion, a moitié de l’opération pour éviter
qu’ils provoquent un réchauffement autour
des aliments.
4) Augets métalliques
Il est conseillé d’éviter l’utilisation de ma-
tériel métallique à l’intérieur de votre four
à micro-ondes (couverts, agrafes qui sont
sur les confections, plats avec dorage ou
plat en métal, plateau et augets en alumi-
nium).
NETTOYAGE
Le four à micro-ondes est plus efficace
quand il est propre, donc nettoyé réguliè-
rement votre appareil.
- Surfaces externes : NE PAS utiliser sol-
vants, eau de avel, ammoniaque, produits
abrasifs, etc…
- Porte et parois de la cavité : utilisez un
chiffon ou une éponge avec du détergent
non abrasif et ensuite essuyer. NE PAS es-
sayer de démonter la porte. Si la porte et
son cadre sont détériorés, ne pas utiliser le
micro-ondes et adressez-vous à un centre
d’assistance autorisé.
Si vous notez des taches de gras ou ali-
ments desséchés, faire bouillir pour 5 mi-
nutes dans la cavité, un demi litre d’eau
avec la fonction micro-ondes. La vapeur
assouplira les résidus rendant plus facile le
nettoyage. Si nécessaire enlever le plateau
tournant G et l’anneau de rotation F pour
nettoyer aussi la base de la cavité L. Le
plateau tournant G et la grille ronde H,
peuvent être lavés avec des produits pour
vaisselle ou dans le lave vaisselle.
ENT ETIENT
IMPORTANT: il est extrêmement dangereux
d’effectuer n’importe quel type de répara-
tion ou remplacement, vous devez toujours
vous adressez à un centre d’assistance au-
torisé ohnson.
- N'introduire dans l'appareil que les ac-
cessoires fournis et la vaisselle spécifique
pour microonde et grill.
ÉVITER la vaisselle et les accessoires tels
que: plats, verres et récipients divers en
matériaux tels que la céramique, la terre
cuite, le plastique, l'aluminium, etc...

17
ALLGEMEINE HINWEISE
Das vorliegende Handbuch sor-
gfältig aufbewahren und alle
Hinweise aufmerksam lesen; sie
liefern wichtige Angaben betreffend die
Sicherheit, die sofortige und zukünftige
Benutzung des Gerätes.
Dieses Gerät, das nur für den Hausgebrauch
gedacht ist, darf nur zu den Zwecken be-
nutzt werden, für die es ausdrücklich vor-
gesehen ist.
ede andere Benutzung ist als ungeeignet
und gefährlich zu betrachten.
Der Hersteller kann nicht verantwortlich
gemacht werden für eventuelle Schäden,
die durch ungeeignete, falsche oder unver-
nünftige Benutzung entstehen. Die Instal-
lierung muss nach den Vorschriften des
Herstellers erfolgen. Eine falsche Installie-
rung kann Schäden an Personen, Tieren
und Sachen verursachen, für die der Her-
steller nicht verantwortlich gemacht wer-
den kann. Die Sicherheit der Elektrogeräte
ist nur gewährleistet, wenn diese an ein en-
tsprechend geerdetes Netz angeschlossen
sind, wie durch die heute gültigen Sicher-
heitsvorschriften für Elektrogeräte festge-
legt ist.
Das Verpackungsmaterial (Plastikbeutel,
Nägel, Schaumpolystyrol usw.) dürfen nicht
Kindern oder Behinderten zugänglich auf-
bewahrt werden, da sie potentielle Gefa-
hrenquellen darstellen.
Vor dem Anschliessen des Gerätes sollte
sich vergewissert werden, dass die auf dem
Schild angegebenen Daten denen des
Stromnetzes entsprechen.
Sollten Steckdose und Stecker nicht zu-
sammenpassen, muss für die notwendigen
Anpassungsarbeiten Fachpersonal hinzu-
gezogen werden.
Keine Adapter, Mehrfachsteckdosen
und/oder Verlängerungen benutzen.
Sollte es für die Benutzung unvermeidbar
sein, nur Material verwenden, das den gül-
tigen Sicherheitsvorschriften entspricht
und die Voraussetzung der Übereinstim-
mung zwischen Gerät und Stromnetz hat.
Bei der erstmaligen Benutzung des Gerä-
tes sich vergewissern, dass alle Aufkleber
und Schutzfolien entfernt worden sind.
Wenn das Gerät mit Luftansaugöffnungen
versehen ist, dafür sorgen, dass diese
auch nicht teilweise abgedichtet werden.
Die Benutzung jedes Elektrogerätes erfor-
dert die Beachtung einiger Grundregeln,
und insbesondere:
Das Gerät nicht in Wasser tauchen oder
nass werden lassen; nicht benutzen in der
Nähe der Badewanne, des Waschbeckens
oder eines anderen mit Flüssigkeit gefül-
lten Behälters. Sollte das Gerät ungewollt
ins Wasser fallren, NICHT versuchen, es
herauszunehmen, sondern unverzüglich
den Stecker aus der Steckdose ziehen.
Anschliessend in eine Kundendienstwerkstatt
bringen, um die notwendigen Kontrollen au-
sführen zu lassen.
Während der Benutzung muss das Gerät
von jedem entflammbaren oder explosi-
ven Gegenstand oder Substanz entfernt
gehalten werden.
Das Gerät nicht mit nassen oder feuchten
Händen berühren.
Das Gerät nicht barfuss benutzen.
Zum Herausziehen des Steckers nicht an
dem Gerät oder dem Kabel ziehen.
Das Gerät keinen Witterungseinflüssen
(Regen, Sonne) ausgesetzt lassen.
Es wird empfohlen, das Gerät für Kinder
oder Behinderte unzugänglich aufzubewa-
hren nd diesen nicht die Benutzung zu er-
lauben.
Bei Nichtbenutzung des Gerätes und vor
dem Ausführen irgendwelcher Reinigun-
gsarbeiten den Stecker aus der Steckdose
ziehen.
Das Speisungskabel muss über die ge-
samte Länge abgewickelt sein, m dessen
Überhitzung zu vermeiden.
Das Speisungskabel darf nicht in der Nähe
von Hitzquellen und/oder scharfenkanti-
gen Oberflächen verlaufen.
Im Falle eines beschädigten Kabels soll der
Austausch durch qualifiziertes Personal
erfolgen.
D

18
Im Falle eines Schadens und/oder eines
gestörten Betriebes das Gerät abschalten
und sich an Fachpersonal wenden.
Eventuelle Handhabungen oder Eingriffe,
die von nicht qulifiziertem Personal au-
sgeführt wurden, führen zum Verfall des
Garantierechts.
Zum Reinigen des Gerätes nur ein weiches
Tuch und keine reibende Substanz ver-
wenden.
Wenn sich das Gerät als nicht mehr be-
nutzbar erweist und man es entsorgen
möchte, die Kabel abnehmen und es durch
ein qualifiziertes Unternehmen entsorgen
lassen, um nicht die Umwelt zu belasten.
• Wenn in dem Produkt Teile aus Glas vor-
handen sind, fallen diese nicht unter die
Garantie.
ACHTUNG:
Die aus Kunststoff hergestellten Teile des
Produktes fallen nicht unter die Garantie.
ACHTUNG:
Die durch Verschleiss verursachten Be-
schädigungen des Speisungskabels sind
nicht in der Garantie enthalten; die even-
tuelle Reparatur geht daher zu Lasten des
Eigentümers.
ACHTUNG:
Sollte es notwendig sein, das Gerät zu
einer Kundendienstwerkstatt bringen oder
senden zu müssen, wird eine sorgfältige
Reinigung aller Teile empfohlen.
Sollte das Gerät auch nur minimal ver-
schmutzt oder verkrustet sein oder Abla-
gerungen von Speiseresten, Kalk, Staub
oder anderes aufweisen; ob aussen oder
innen, wird das Gerät vom Kundendienst
ohne es zu prüfen aus hygienischen Grün-
den zurückgewiesen.
Das Symbol auf dem Produkt oder
seiner Verpackung weist darauf hin, dass
dieses Produkt nicht als normaler Hau-
shaltsabfall zu behandeln ist, sondern an
einem Sammelpunkt für das Recycling von
elektrischen und elektronischen Geräten
abgegeben werden muss. Durch Ihren Bei-
trag zum korrekten Entsorgen dieses Pro-
dukts schützen Sie die Umwelt und die
Gesundheit Ihrer Mitmenschen.
Umwelt und Gesundheit werden durch fal-
sches Entsorgen gefährdet.
Weitere Informationen über das Recycling
dieses Produkts erhalten Sie von Ihrem
Rathaus, Ihrer Müllabfuhr oder dem Ge-
schäft, in dem Sie das Produkt gekauft
haben.
BESTANDTEILE
A Tür
B Türöffnungshebel
C Schalttafel
D Wärmewählschalter
E Zeitenwählschalter
F Rotationsring
G Drehteller
H runder Rost
L Boden
GEB AUCHSANWEISUNG INSTALLATION
1) Anschluß
Vor Anschluß des Geräts sollte man sich
überzeugen, daß die auf dem Schild ange-
gebenen Daten mit denen des Stromnetzes
übereinstimmen. Das Gerät an eine den Si-
cherheitsvorschriften entsprechenden ge-
erdeten Steckdose anschließen. Nicht en-
tsprechende Elektroanschlüsse sind zu
vermeiden. eglicher Anschlußfehler annul-
liert die Garantie.
2) Installation
- Das Gerät auf eine gut belüftete, horizon-
tale und stabile, von Waschbecken und
Wasser im allgemeinen entfernte Oberflä-
che stellen. Sich überzeugen, daß um das
Gerät ein Freiraum von mindestens 7,5 cm
und über demselben von 30 cm ist, damit
die Wärme und der Dampf während des Be-
triebes ordnungsgemäß entweichen kön-
nen. – Nicht die Belüftungsgitter des Geräts
verstopfen und keinerlei Flüssigkeit eindrin-
gen lassen. – Nicht die Füsse vom unteren

19
Teil des Gehäuses entfernen. – Das Gerät
von Wärmequellen entfernt installieren.
SICHE HEITSHINWEISE
1) Das Gerät wurde ausschließlich für den
Hausgebrauch, und zwar zum Garen, Erhit-
zen oder Abtauen von Lebensmitteln und
Getränken entwickelt.
2) Die warmen Teile bei Betrieb des Geräts
nicht berühren und zum Entnehmen der
Behälter aus dem Geräteinneren Isolierhan-
dschuhe benutzen.
3) Die Mikrowelle nicht leer einschalten, sie
muß immer Nahrungsmittel enthalten, an-
dernfalls könnte sie beschädigt werden.
4) Das Gerät hat eine hohe und einstellbare
Mikrowellenleistung. Man kann viel schnel-
ler als mit den herkömmlichen Systemen
abtauen, erhitzen oder garen. Die einzu-
stellenden Zeiten sind auf den Packungen
der Nahrungsmittel angegeben; sollte die-
ses nicht der Fall sein, so ist ein Drittel der
herkömmlichen Garzeiten einzustellen.
5) Sich überzeugen, dass die Tür (A) or-
dnungsgemäß geschlossen ist; andernfalls
funktioniert die Mikrowelle nicht. Nicht ver-
suchen, die Mikrowelle mit offener Tür zu
benutzen.
6) Die Mikrowelle nicht benutzen zum:
- Braten, da die Temperatur des eventuelle
verbrennenden Öles nicht kontrolliert
werden kann.
- Kochen oder Erwärmen von Eiern mit
Schale, hartgekochten Eiern mit oder ohne
Schale.
- Erhitzen dicht verschlossener Behälter;
sondern dieselben offen hineinstellen.
- Garen von Lebensmitteln mit Schale im
allgemeinen. - Trocknen von Wäsche.
7) Temperatur der Lebensmittel: Baby-
flaschen, Gläschen ...
- Vor dem Erwärmen die Schnuller der
Babyflaschen und die Deckel der Gläschen
entfernen..
- Beim Garen in der Mikrowelle werden nur
die Nahrungsmittel erwärmt. Die Behält- er
könnten kalt oder lauwarm und die Na-
hrungsmittel im Inneren kochend heiß sein.
- Zur Vermeidung von Verbrennungsgefa-
hren, die Nahrungsmittel mischen und ihre
Temperatur (vor allen Dingen die für Kinder
bestimmten Nahrungsmittel) vor dem Ser-
vieren überprüfen.
8) Erhitzen von Flüssigkeiten
Während des Erhitzens von Flüssigkeiten
kann sich eine Verspätung beim Sieden er-
geben, welche beim Herausnehmen des Be-
hälters aus dem Gerät ein plötzliches
Hochkommen der Flüssigkeit verursacht.
Der Siedegrad ist tatsächlich erreicht, aber
die Blasen bleiben auf dem Boden des Be-
hälters eingefangen, weshalb Verbrennun-
gsgefahr bestehen kann. Um dieses Problem
zu vermeiden, der zu erwärmenden Flüssig-
keit einen Kunststofflöffel beifügen.
9) Einwegbehälter
Bei Gebrauch von Einwegbehältern aus
Kunststoff, Papier oder einem anderen
brennbaren Material, das in Betrieb ste-
hende Gerät aufmerksam überprüfen. Bei
Feststellung von Rauch, die Tür (A) ge-
schlossen lassen, den Garvorgang unter-
brechen und den Strom ausschalten.
10) Kein Kunststoffgeschirr mit dem Grill
benutzen: es schmilzt.
Die Nahrungsmittel mindestens 5 cm von
den Widerständen des Grills positionieren.
.Während des Bratens von fettem Fleisch
können sie Spritzer erzeugen, welche sich
bei Ablagerung auf den Widerständen in
Brand setzen können. Diese erlöschen je-
doch von selbst, wenn der Ofen regelmä-
ßig gereinigt wurde.
BEI DE E STEN BENUTZUNG
Die Zubehörteile auspacken, waschen und
abtrocknen.
1/ MONTAGE DE ZUBEHÖ TEILE
Den Rotationsring F auf dem Boden L der
Mikrowelle legen und sich dabei überzeu-
gen, daß sich die drei Rädchen in der auf
dem Boden befindlichen Rille positionieren.
Den Drehteller G auf dem Rotationsring F
anbringen.
Beim Einschalten des Geräts dreht sich der
Teller sowohl nach rechts als auch nach
links. Zum Gebrauch des runden Grills H,

20
diesen einfach auf den Drehteller stellen.
Er darf in keinem Fall direkt auf den Boden
der Mikrowelle gestellt werden L.
2/ BESEITIGUNG DES NEUGE UCHS
DES G ILLS
Die Widerstände des Grills sind mit einer
Fettschutzschicht bedeckt. Vor dem Be-
nutzen des Grills müssen dieselben gerei-
nigt werden. Hierzu die Funktion Grill D9
wählen und den Timer E auf 15 Minuten
einstellen. Das Gerät beginnt zu funktio-
nieren und reinigt die Widerstände. Bei die-
sem Vorgang entstehen Geruch und Rauch,
welche als vollkommen normal zu betra-
chten sind.
FUNKTIONSWEISE
Die Mikrowelle darf nicht leer benutzt wer-
den; bei Durchführung von Proben zum
Erlernen ihres Gebrauchs, immer ein Glas
mit Wasser auf den Drehteller G stellen.
Garen in der Mikrowelle
Das Produkt im Inneren der Mikrowelle auf
den Drehteller G stellen..
Mit dem Drehknopf unter den ersten 5 Po-
sitionen die für das Nahrungsmittel geei-
gnete Wärmeleistung wählen.
D1. Warmhalten (Mindestwärmeleistung)
D2. Abtauen und Garen von empfindlichen
Speisen
D3. Schnellabtauen von kleinen Portionen
D4. Langsames Garen oder Erwärmen von
empfindlichen Speisen
D5. Garen und Erhitzen (Höchstwärmelei-
stung)
Mit dem Drehknopf E die Zeit wählen.
Die Tür A schließen. Es wird die Innenbe-
leuchtung eingeschaltet und die Mikrowelle
beginnt zu funktionieren. Nach Ablauf der
eingestellten Zeit, gibt die Mikrowelle ein
akustisches Signal ab und schaltet sich aus.
Die Tür öffnen und das Produkt herausneh-
men. Dabei ist die Temperatur des Behäl-
ters zu beachten.
Kombiniertes Garen Grill-Mikrowelle
Das Produkt im Inneren der Mikrowelle auf
den Drehteller D stellen.
Mit dem Drehknopf unter den Positionen
D6, D7 und D8 die für das Nahrungsmittel
geeignete Wärmeleistung wählen.
D6. Mindestwärmeleistung
D7. Mittlere Wärmeleistung
D8. Höchstwärmeleistung
Mit dem Drehknopf E die Zeit wählen.
Die Tür A schließen. Es wird die Innenbe-
leuchtung eingeschaltet und die Mikrowelle
beginnt zu funktionieren. Nach Ablauf der
eingestellten Zeit, gibt die Mikrowelle ein
akustisches Signal ab und schaltet sich aus.
Die Tür öffnen und das Produkt herausneh-
men. Dabei ist die Temperatur des Behäl-
ters zu beachten.
Garen nur mit dem Grill
Das Produkt im Inneren der Mikrowelle auf
den Drehteller G oder den Grill H stellen
(ACHTUNG: zwichen Nahrungsmittel und
Widerständen einen Mindestabstand von 5
cm einhalten).
Den Drehknopf D auf D9 stellen.
Mit dem Drehknopf E die Zeit einstellen.
Die Tür A schließen. Es wird die Innenbe-
leuchtung eingeschaltet und die Mikrowelle
beginnt zu funktionieren. Nach Ablauf der
eingestellten Zeit, gibt die Mikrowelle ein
akustisches Signal ab und schaltet sich aus.
Die Tür öffnen und das Produkt herausneh-
men. Dabei ist die Temperatur des Behäl-
ters zu beachten.
ANME KUNGEN
Zur korrekten Einstellung der Garzeiten von
unter 2 Minuten, den Drehknopf Timer E
bis über den Bezugspunkt 2 hinaus drehen
und anschließend erneut auf die gewün-
schte Zeit stellen. Die Tür A darf zur Kon-
trolle des Garvorgangs geöffnet werden.
Die Mikrowelle hält automatisch an und
fährt bei erneutem Schließen der Tür mit
dem Garen fort. Nach Öffnen der Tür, falls
das Garen vorzeitig unterbrochen werden
soll, vor erneutem Schließen der Tür den
Timer E wieder auf 0 stellen. Dadurch wird
vermieden, daß die Mikrowelle in leerem
Zustand funktioniert.
Other manuals for Onda 32
1
Table of contents
Languages:
Other Johnson Microwave Oven manuals

Johnson
Johnson MICROONDAS JOMI28XINT User manual

Johnson
Johnson JOMI30DGN User manual

Johnson
Johnson MGD20 User manual

Johnson
Johnson JOMI20GB User manual

Johnson
Johnson JOMI25DGN User manual

Johnson
Johnson M20 User manual

Johnson
Johnson MG20 User manual

Johnson
Johnson JOMI20B User manual

Johnson
Johnson Utile User manual

Johnson
Johnson Utile User manual