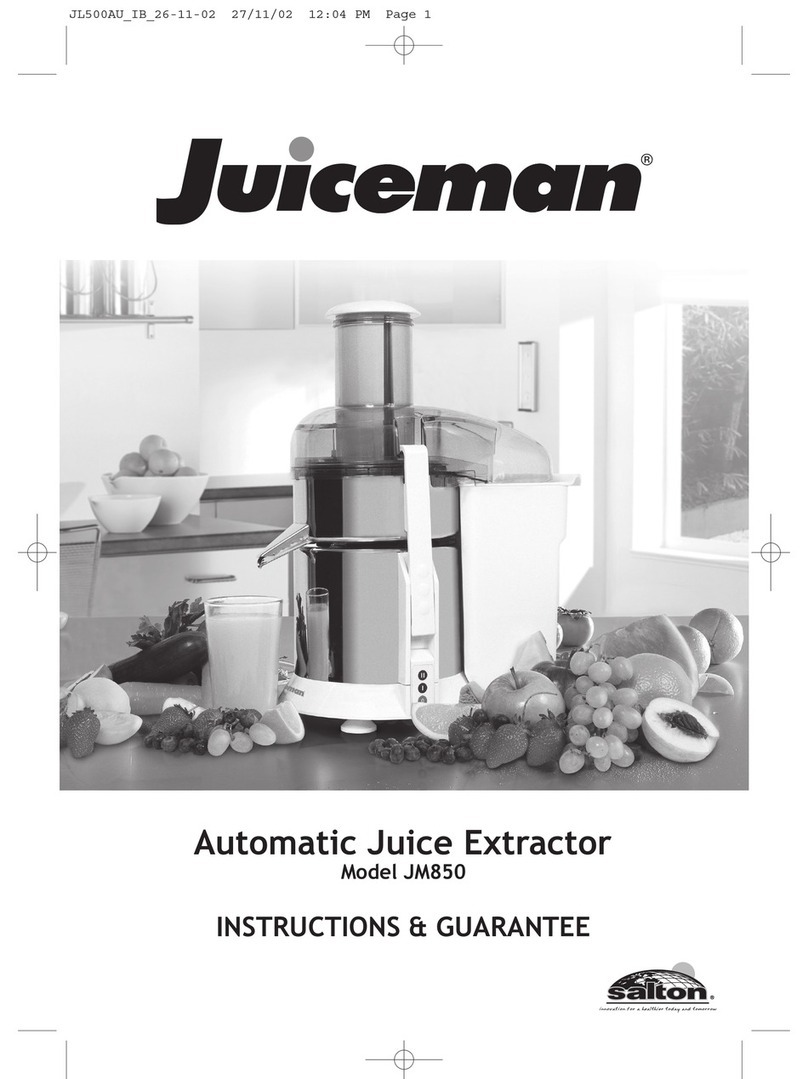
Juiceman JM8000S User manual

1
Model/Modelo/ Modele
❍JM8000S
2-in-1 Juice Extractor
& Citrus Juicer
Extractor de jugo y exprimidor
de cítricos todo en uno
Extracteur à jus et presse-
agrumes 2-en-1
For online customer service
and to register your product, go to:
www.prodprotect.com/applica
Pour obtenir le service à la clientèle en
ligne et pour enregistrer votre produit,
aller à l'adresse:
www.prodprotect.com/applica
Para obtener acceso a servicio para el cliente en
línea y para registrar su producto, por favor vaya a
www.prodprotect.com/applica

2
Please Read and Save this Use and Care Book
IMPORTANT SAFEGUARDS
When using electrical appliances, basic safety precautions should always be
followed including the following:
❍
Read all instructions.
❍
To protect against risk of electrical shock do not put cord, plugs or appliance
in water or other liquid.
❍
Close supervision is necessary when any appliance is used by or near children.
❍
Unplug from outlet when not in use, before putting on or taking off parts,
and before cleaning.
❍
Avoid contacting moving parts.
❍
Do not operate any appliance with a damaged cord or plug or after the
appliance malfunctions, or is dropped or damaged in any manner. Return
appliance to the nearest authorized service facility for examination, repair
or electrical or mechanical adjustment. Or, call the appropriate toll-free
number on the cover of this manual.
❍
The use of attachments not recommended or sold by the manufacturer may
cause fire, electric shock or injury.
❍
Do not use outdoors.
❍
Do not let cord hang over edge of table or counter.
❍
Always make sure juicer cover is clamped securely in place before motor is
turned on. Do not unfasten clamps while juicer is in operation.
❍
Be sure to turn switch to OFF (0) position after each use of your juicer. Make
sure the motor stops completely before disassembling.
❍
Do not put your fingers or other objects into the juicer opening while it is in
operation. If food becomes lodged in opening, use food pusher or another
piece of fruit or vegetable to push it down. When this method is not possible,
turn the motor off and disassemble juicer to remove remaining food.
❍
Do not use the appliance if the rotating sieve is damaged.
SAVE THESE INSTRUCTIONS
This product is for household use only.
POLARIZED PLUG (120V Models Only)
This appliance has a polarized plug (one blade is wider than the other). To reduce
the risk of electric shock, this plug is intended to fit into a polarized outlet only
one way. If the plug does not fit fully into the outlet, reverse the plug. If it still
does not fit, contact a qualified electrician. Do not attempt to modify the plug in
any way.

3
TAMPER-RESISTANT SCREW
Warning: This appliance is equipped with a tamper-resistant screw to prevent
removal of the outer cover. To reduce the risk of fire or electric shock, do not
attempt to remove the outer cover. There are no user-serviceable parts inside.
Repair should be done only by authorized service personnel.
ELECTRICAL CORD
a) A short power-supply cord (or detachable power-supply cord) is to be provided
to reduce the risk resulting from becoming entangled in or tripping over a
longer cord.
b) Longer detachable power-supply cords or extension cords are available and
may be used if care is exercised in their use.
c) If a long detachable power-supply cord or extension cord is used,
1) The marked electrical rating of the detachable power-supply cord or
extension cord should be at least as great as the electrical rating of the
appliance,
2) If the appliance is of the grounded type, the extension cord should be a
grounding-type 3-wire cord, and
3) The longer cord should be arranged so that it will not drape over the
countertop or tabletop where it can be pulled on by children or tripped over.
Note: If the power supply cord is damaged, it should be replaced by qualified
personnel or in Latin America by an authorized service center.
Note: The maximum wattage is obtained with the centrifugal juicer attachment.
Other recommended attachments draw significantly less power.

4
GETTING TO KNOW YOUR JUICE EXTRACTOR & CITRUS JUICER
† 1. Small food pusher
(Part #770106)
† 2. Large food pusher
(Part #770108)
3. Feed chute
† 4. Lid (Part #770109)
† 5. Stainless steel filter
(Part #770102)
† 6. Integrated pulp container
(Part #770104)
† 7. Locking latches (both sides)
(Part #081243EB)
8. Speed control switch
9. Base
10. Cord wrap (under base)
† 11. Anti-drip removable spout
(Part #770105)
† 12. Open/close latch (Part # 770107)
† 13. Juice pitcher (Part # 081244FI-S)
† 14. Citrus juicer drive shaft
(Part #770103)
† 15. Citrus juicer attachment
(Part #081249EB)
† 16. Small juicing cone
(Part #04178EB)
† 17. Large juicing cone
(Part #04177EB)
† 18. Cleaning brush
(Part #04186)
Note: † indicates consumer replaceable/
removable parts
r
l

5
How to Use
This product is for household use only.
GETTING STARTED
• Remove all packing material and, if applicable, any stickers from the product.
Remove and save literature.
• Please go to www.prodprotect.com/applica to register your warranty. For additional
information and recipes for your product go to www.juiceman.com.
• Take the appliance apart following instructions in DISASSEMBLING THE CITRUS
JUICER and wash all removable parts as instructed in CARE AND CLEANING. This
will remove any traces of dust or residue left from manufacturing and shipping.
Important: Do not rinse or immerse base in water or any other liquid.
• Place base on a dry, level counter to prepare and assemble, following instructions in
ASSEMBLING THE JUICE EXTRACTOR.
• Once assembled place the appliance on a level dry space, allowing air space
on all sides to provide proper ventilation for the motor.
PREPARATION
How to prepare fruits and vegetables for juicing.
Purchasing and Storing Ingredients:
• Always use fresh fully ripened fruits and vegetables.
• When purchasing consider selecting fruits and vegetables in season for best
freshness and flavor.
• Choose fruits that are plump, tender and have bright color. Fruits should be heavy
for their size without bruises, cuts or blemishes.
• To ripen fruit, place in a small clean paper bag. Close the bag loosely and let stand
at room temperature. (To speed ripening, add a ripe apple or banana to the bag.)
Once ripened, store in the refrigerator for a day or 2 until ready to use.
• Store perishable vegetables in the refrigerator until ready to use.
Preparing Fruits and Vegetables for the Juice Extractor:
• Wash fruits and vegetables thoroughly just before using in the juice extractor using a
natural bristle brush and a biodegradable cleaner to help remove pesticide residue.
• If desired, remove the skin. The skin may be left on all produce with the exception of
all citrus fruits, including oranges, grapefruit, lemons, limes, tangerines.
Note: The oil in the skin of these fruits tastes bitter and is difficult to digest.
Hint: Although the skin may be left on melons and pineapple, you may choose to
remove them to maximize the fruit flavor in the finished drink.
• All pits and large seeds should be removed from fruits, including apricots, cherries,
nectarines, mangoes, peaches, plums, melons
• Remove and discard outer leaves of non-organic produce. Peel away any wax coatings.
• Trim any bruised or discolored sections of fruits and vegetables.
• The design of the feed chute accommodates larger produce. It will easily
accommodate most whole fruits and vegetables, such as, apples, beets, carrots and
celery. If necessary, cut into large pieces before inserting into feed chute.
• Be sure all parts of the juice extractor and clean and dry. See the CARE AND
CLEANING instructions section of the manual.

6
DISASSEMBLING THE JUICE EXTRACTOR
1. Pull up at the bottom of each locking latch to disengage from the tab on the cover.
The locking latches will raise up, so you can release them from the lid.
2. To remove the lid, take out the food pusher, grasp the feed chute and pull up.
3. To remove the integrated pulp container, grip the side edges with one hand and the
back edge of the pulp container with the other. Pull up with the stainless steel
filter in place.
4. To remove the stainless steel filter, grasp the filter by the rim to pull it out.
Caution: The stainless steel filter cutting teeth are very sharp.
Handle it carefully.
5. Turn the pulp container upside-down.
6. Remove spout by grasping the center of the spout and pulling up
to release from the 4 latches. (see A)
ASSEMBLING THE JUICE EXTRACTOR
1. Turn the pulp container upside-down.
2. Insert removable spout onto pulp container by aligning the 4
latches and pushing down on the center until it
snaps into place (see B.)
3. Place integrated pulp container on the base with the juice
spout facing you.
4. Insert the stainless steel filter in the center of the integrated pulp
container and press down until it snaps into place.
5. Place the lid on top of the integrated pulp container.
6. Lock the locking latches by holding down the cover as you fit the locking mechanism
at the top of each latch over the tab on each side of the lid. Press the bottom of each
latch until you hear it click into place.
7. Insert the desired food pusher into the feed chute (see USING THE SMALL AND
LARGE FOOD PUSHERS). Place the food pusher into the feed chute, matching the
indentations on the food pusher to the projections on the feed chute.
Important: The appliance will not operate until the locking latches are locked.
USING THE ANIT-DRIP SPOUT
The Open/Close latch should be in the Closed ( ) position before and after each juicing
cycle to avoid dripping. The latch should be in the Open ( ) position during juicing.
See CARE AND CLEANING for further instruction.
USING YOUR JUICE EXTRACTOR
Note: To begin, assemble the fruits and or vegetables to be used on the counter or in a
bowl next to the extractor, following the tips in PREPARATION.
Important: The integrated pulp container holds about 3½ cups of pulp. Do not allow
the integrated pulp container to overfill. This may cause the appliance to stall.
1. Plug appliance into a standard electrical outlet. Press the speed control switch to
the low setting (1) and allow it to run 10 seconds before placing any food into the
feed chute.
2. Place food in the feed chute and press lightly with food pusher.
3. Use the food pusher as a guide to gently direct the produce through the feed chute.
A.
B.

7
To get the most juice from the fruits and vegetables, do not force or rush the food
through the appliance.
4. When the pulp container or juice pitcher is almost full (the pulp container holds
about 3½ cups of pulp and the juice pitcher holds about 4 cups of juice) turn off (0).
Allow the motor to come to a complete stop before emptying either part.
5. Follow the instructions in DISASSEMBLING YOUR JUICE EXTRACTOR to remove the
pulp container, then replace following instructions in ASSEMBLING YOUR JUICE
EXTRACTOR. Be sure to replace the containers before resuming extraction.
Caution: The stainless steel filter cutting teeth are very sharp. Handle the filter
carefully.
6. When juicing is complete, open/closed latch should be switched to close ( ).
7. Turn off and unplug from outlet.
Note: Never place fingers or hand into the feed chute.
USING THE SMALL AND LARGE FOOD PUSHERS
Note: The food pusher has 2 parts; the smaller clear inner section locks into
the larger outer section.
1. To remove the small food pusher, hold the large food pusher with one hand and
twist counterclockwise until the lock of the inner section is disengaged;
lift the small food pusher straight up.
2. Place the large food pusher into the feed chute, matching the indentations on the
food pusher to the projections on the feed chute.
Note: Use the smaller opening for small fruits and vegetables. Use the small food pusher
to help guide the fruits and vegetables through the opening in the large food pusher.
3. When using larger pieces of fruits and vegetables, replace the small food pusher
into the large food pusher and use the assembled piece to help guide the larger
fruits and vegetables through the feed chute. Match the notches to the opening. The
clear center will drop into the slot; turn the top clockwise until the small pusher is
locked in place.
JUICE EXTRACTOR TIPS
• Do not put food into the extractor before turning the appliance on.
• Let the appliance run for at least 10 seconds before placing any food into the feed
chute.
• Do not let the juice or pulp container overfill while using the machine. Turn the
appliance off (0), wait for the motor to stop running and any juice to stop flowing.
Empty the juice and/or pulp container. Be sure they are properly replaced before
resuming operation of the extractor.
• Do not process bananas, avocados or coconut. They have no juice and will clog the
appliance.
• Be sure to remove all pits and large seeds from fruits.
• For maximum nutritional benefits, drink your processed juice right a way.
FOR OPTIMUM JUICING
• Avoid excessive build up of pulp on the underside of the lid.
• Remove rind of melons; because they are so thick, they water down drinks.
• Refrigerate washed ripe fruits and vegetables until ready to use.

8
USES FOR THE PULP
The pulp from the fruits and vegetables is high in nutritional value. Use it to add fiber
and flavor to muffins and quick breads. Use it to thicken soups, casseroles and sauces.
Use fruit pulp to add nutrition and flavor to desserts, such as, puddings and cakes. Be
sure to use it the same day you extract the juice.
Pulp is also food for your garden. You can use it as compost.
DISASSEMBLING THE CITRUS JUICER
1. To unlock the locking latches, pull open at the bottom of each latch to disengage
from the tabs on the cover. The latches will raise and be released
from the cover.
2. Lift the juicing cone assembly from the citrus juicer attachment.
3. Lift the citrus juicer attachment from the integrated pulp container.
4. Lift the pulp container and the drive shaft from the base.
5. Turn the pulp container upside-down.
6. Remove spout by grasping the center of the spout and pulling up
to release from the 4 latches. (see C).
ASSEMBLING THE CITRUS JUICER
1. Turn pulp container upside-down.
2. Insert removable spout onto pulp container by aligning the 4 latches
and pushing down on the center until it snaps into place (see D).
3. Place the integrated pulp container on the motor base.
4. Place the citrus juicer drive shaft into the center of the integrated pulp container
and press down to make sure it is seated securely on the base.
5 Place the citrus juicer attachment on top of the integrated pulp container so that the
two small lock tabs are to the right and left.
6. Lock the locking latches by holding down the cover as you as you fit the locking
mechanism at the top of each latch over the tab on each side of the attachment.
Press the bottom of each latch until you hear it click into place.
Important: The appliance will not operate until the locking latches are locked.
7. Place the juice pitcher under the juice spout.
8. Flip the switch to open position ( ).
9. Choose your desired citrus cone and place on the drive shaft (see USING THE
JUICING CONES).
USING THE JUICING CONES
Note: The small cone is recommended for small fruits, such as lemons and limes and
the large cone for larger fruits, such as oranges and grapefruit.
1. Hold the small juicing cone in one hand by the 2 prongs. Place the thumb and
forefinger of the other hand on the large juicing cone directly above the prongs.
Press lightly and lift the conecompletely off. The small juicing cone will be revealed.
2. To replace the large juicing cone, simply place the large juicing cone with the
openings on either side directly above the prongs on the small juicing cone and
press down.
USING THE CITRUS JUICER
1. Assemble the citrus juicer as instructed in the ASSEMBLING THE CITRUS JUICER.
2. Unwrap the cord from the base and plug the cord into a standard electrical outlet.
C.
D.

9
3. Cut citrus fruit in half.
4. Place the cut-side of the fruit on top of the selected cone.
5. Press the speed control switch to low (1).
6. Using firm-to-moderate pressure, press down on the fruit to start the
juicing action
7. When done juicing, press the speed control switch to off (0) to stop rotation of juicer and
remove the fruit from the cone.
8. Flip the latch into the closed position.
9. Unplug the cord from the outlet.
CITRUS JUICER TIPS
• Before juicing a citrus fruit, roll the fruit under your hands on the countertop
exerting slight pressure. This helps to release the juice.
• Drop rind into disposal in your sink to clear out lingering odors from other foods.
• Add the zest of a lemon, lime or orange to simple syrup to add a fresh taste to iced
or hot teas
• Process 1 cup sugar with the zest of 1 lime or lemon and store in closed container in
your refrigerator. Use to decorate cookies, muffins and doughnuts.
Care and Cleaning
This product contains no user serviceable parts. Refer service to qualified service
personnel.
Important: Always unplug your juice extractor from the outlet before cleaning.
CLEANING
1. Disassemble the appliance following the instructions for disassembly.
Tip: Pulp from integrated pulp container can be used in many different ways: making
breads, muffins, cakes, soup stocks, compressed facial packs and garden compost
material. See USES FOR THE PULP.
2. Using a sponge or damp cloth, clean the base, feet and underside of the appliance.
If necessary, you may use a damp toothbrush or cloth to clean juice from the inside
the motor shaft (on top of motor base).
Important: Do not immerse the base in water or spray with water. Clean only by
wiping with a damp sponge, cloth or paper towel.
3. All parts – except the base – are dishwasher-safe (top-rack only) or you may wash
in warm, soapy water, using any mild liquid dishwashing detergent. Do not use any
products containing ammonia or scouring powders, as these can dull, scratch or
mar the surface. Use the cleaning brush provided to remove pulp left on any of the
removable parts. Do not use metal brushes or pads.
NOTE: If needed the Open/Close latch can be removed for cleaning.
Remove the Open/Close latch while in the open ( ) position. Turn
the pulp container upside-down. Locate the back of the latch where
it connects with the pulp container. Then press in the tab at the back
of the latch (see arrow) while pulling up. (see E)
4. To clean the food pusher properly, twist to unlock and remove the
small food pusher from the large food pusher. Clean with other
removable parts; once parts are dry, put back together.
5. To clean the filter, use cleaning brush provided to make sure tiny holes in mesh
E.

10
filter are not clogged. This can be accomplished by holding filter under a running
faucet while brushing the mesh filter screen from both the inside and outside of the
filter mesh with the cleaning brush.
REMOVING TOUGH STAINS
1. Due to powerful staining properties of carotenoids found in many vegetables,
particularly carrots, we suggest soaking any stained parts overnight in one of the
following solutions:
• Biodegradable soap in enough warm water to cover juice extractor parts
• cup bleach added to a sink full of warm water
• 1 part warm water to 1 part cider vinegar
• small box of baking soda in enough warm water to cover juicer parts.
Important: Never use ammonia or abrasive cleansers!
2. After soaking overnight, lightly scrub with soft bristle brush and liquid detergent.
STORAGE
Store your appliance in a clean, dry place. Never wrap cord tightly around the appliance. Do
not put any stress on cord where it enters juicer, as this could cause cord to fray and break.

11
TROUBLESHOOTING
PROBLEM POSSIBLE CAUSE SOLUTION
Appliance will not
start when speed
switch is pressed.
The appliance may not
be assembled correctly. Check the ASSEMBLING
directions found on
page 6 or page 8.
The motor of the
appliance seems to
be struggling.
• Pulp container may be
full.
• Pulp may have
collected under the
cover.
• The speed selected
may not be correct for
the type of produce
you are juicing.
• Turn the appliance off
and empty the pulp
container. Remember,
the pulp container holds
about 3½ cups of pulp;
do not allow to get too
full.
• Turn off and unplug.
Follow the directions
for disassemblY to take
the lid off. Wash lid
thoroughly and return to
appliance following the
assembly directions
• Hard fruits and
vegetables require speed
2; softer fruits and
vegetables use speed 1.
The juice extractor
has stopped
producing juice.
• The juice spout may be
in the closed position.
• The integrated pulp
container or the
stainless steel filter
may be blocked.
• Check to see if the spout
is closed ( ) or open( ).
• Turn appliance off
and unplug. Follow
the directions for
disassembly. Wash all
parts thoroughly and
return to appliance
following the assembly
directions.
The juice extractor
is not producing
as much juice as
expected.
High fiber fruits and
vegetables may be
clogging the stainless
steel filter.
Turn off and unplug the
appliance. Follow the
directions for disassembly.
Wash all parts thoroughly
and return to appliance
following the assembly
directions.
Appliance stops
running Motor may be
overheating Unplug appliance and allow
it to cool approximately 5
minutes before continuing
use.

12
Por favor lea este instructivo antes de usar el producto.
INSTRUCCIONES IMPORTANTES
DE SEGURIDAD
Cuando se usan aparatos eléctricos, siempre se deben respetar las
siguientes medidas básicas de seguridad:
❍
Por favor lea todas las instrucciones.
❍A fin de protegerse contra el riesgo de un choque eléctrico, no sumerja el
cable, los enchufes ni el aparato en agua ni en ningún otro líquido.
❍Todo aparato eléctrico usado en la presencia de los niños o por ellos
mismos requiere la supervisión de un adulto.
❍Desconecte el aparato del tomacorriente cuando no esté en uso, antes de
instalarle o retirarle piezas y antes de limpiarlo.
❍Evite el contacto con las piezas móviles.
❍No use ningún aparato eléctrico que tenga el cable o el enchufe averiado,
que presente un problema de funcionamiento o que esté dañado. Acuda a
un centro de servicio autorizado para que lo examinen, reparen o ajusten o
llame gratis al número correspondiente en la cubierta de este manual.
❍El uso de accesorios no recomendados por el fabricante del aparato puede
ocasionar incendio, choque eléctrico o lesiones.
❍No use este aparato a la intemperie.
❍No permita que el cable cuelgue del borde de la mesa o del mostrador.
❍Asegúrese que la tapa del exprimidor de jugo esté bien asegurada antes de
encender el motor. No desenganche las aldabas mientras el exprimidor está
en funcionamiento.
❍Después de usar el exprimidor, siempre asegúrese de ajustar el interruptor
a la posición de apagado
(0)
. Asegúrese que el motor pare del todo antes de
desmontar el aparato.
❍Mientras el exprimidor está en funcionamiento, no introduzca los dedos
ni otros objetos en las aperturas del aparato. Si un alimento se llegara a
trabar en la apertura, use el empujador o un pedazo de fruta o vegetal para
empujarlo. Si este método no funciona, apague el motor y desmonte el
exprimidor para retirar el alimento trabado.
❍No use el aparato si el tamiz giratorio está dañado.
CONSERVE ESTAS INSTRUCCIONES.
Este aparato eléctrico es para uso doméstico únicamente.

13
ENCHUFE POLARIZADO (Solamente en los modelos de 120V)
Este aparato cuenta con un enchufe polarizado (un contacto es más ancho que
el otro). A fin de reducir el riesgo de un choque eléctrico, este enchufe encaja
en un tomacorriente polarizada en un solo sentido. Si el enchufe no entra en el
tomacorriente, inviértalo y si aun así no encaja, consulte con un electricista. Por
favor no trate de alterar esta medida de seguridad.
TORNILLO DE SEGURIDAD
Advertencia: Este aparato cuenta con un tornillo de seguridad para evitar la
remoción de la cubierta exterior del mismo. A fin de reducir el riesgo de incendio
o de choque eléctrico, por favor no trate de remover la cubierta exterior. Este
producto no contiene piezas reparables por el consumidor. Toda reparación se
debe llevar a cabo únicamente por personal de servicio autorizado.
CABLE ELÉCTRICO
a) El producto se debe de proporcionar con un cable eléctrico corto (o uno
separable), a fin de reducir el riesgo de tropezar o de enredarse en un cable
más largo.
b) Existen cables eléctricos más largos y separables o cables de extensión que
uno puede utilizar si toma el cuidado debido.
c) Si se utiliza un cable separable o de extensión,
1) El régimen nominal del cable separable o del cable de extensión debe
ser, como mínimo, igual al del régimen nominal del aparato.
2) Si el aparato es de conexión a tierra, el cable de extensión debe ser un
cable de tres alambres de conexión a tierra.
3) Uno debe de acomodar el cable más largo de manera que no cuelgue
del mostrador o de la mesa, para evitar que un niño tire del mismo
o que alguien se tropiece.
Nota: Si el cordón de alimentación esta dañado, en América Latina debe
sustituirse por personal calificado o por el centro de servicio autorizado.
Nota: El voltaje máximo se obtiene al usar el accesorio centrífugo del exprimidor
de jugo. Otros accesorios recomendados utilizan considerablemento menos
potencia.

14
CONOZCA SU EXTRACTOR DE JUGO Y EXPRIMIDOR DE CÍTRICOS
† 1. Enpujador de alimentos pequeño
(Pieza No 770106)
† 2. Empujador de alimentos grande
(Pieza No 770108)
3. Tubo de alimentación
† 4. Tapa (Pieza No 770109)
† 5. Filtro de acero inoxidable
(Pieza No 770102)
† 6. Recipiente de pulpa incorporado
(Pieza No 770104)
† 7. Palancas de cierre (ambos lados)
(Pieza No 081243EB)
8. Interruptor de control de velocidad
9. Base
10. Guardacable (debajo de la base)
† 11. Boquilla removible antigoteo
(Pieza No 770105)
† 12. Palanca de abrir / cerrar
(Pieza No 770107)
† 13. Jarra de jugo
(Pieza No 081244FI-S)
† 14. Eje del motor del exprimidor de jugo
(Pieza No 770103)
† 15. Accesorio exprimidor de jugo
(Pieza No 081249EB)
† 16. Cono exprimidor pequeño
(Pieza No 04178EB)
† 17. Cono exprimidor grande
(Pieza No 04177EB)
† 18. Cepillo de limpiar
(Pieza No 04168)
Nota: † indica piezas reemplazables/
removibles por el consumidor
r
l

15
Cómo usar
Este producto es para uso doméstico solamente.
PARA COMENZAR
• Retire todo el material de empaque y cualquier calcomanía del producto.
Retire y guarde el material de lectura.
• Por favor ir a www.prodprotect.com/applica para registrar su garantía. Para
información adicional y recetas adicionales acerca de su nuevo extractor de
jugo, vaya a www.juiceman.com.
• Desarme el aparato según las instrucciones en la sección PARA DESARMAR
EL EXPRIMIDOR DE CÍTRICOS y lave todas las piezas removibles como se
instruye en la sección de CUIDADO Y LIMPIEZA. Esto eliminará cualquier
rasgo de polvo o residuo del proceso de fabricación y envío.
Importante: No enjuague ni sumerja la base en agua o en ningun otro líquido.
• Coloque la base sobre un mostrador seco, nivelado, siguiendo las
instrucciones PARA ARMAR EL EXTRACTOR DE JUGO.
• Una vez que lo arme, coloque el aparato sobre un espacio seco, nivelado,
permitiendo suficiente espacio a todo su alrededor para que el motor se
ventile de forma adecuada.
PREPARACIÓN
Cómo preparar las frutas y vegetales para hacer jugo.
Compra y almacenamiento de los ingredientes:
• Utilice siempre frutas y vegetales frescos que estén completamente maduros.
• Al comprar, considere seleccionar frutas que estén en estación para mayor
frescura y sabor.
• Elija frutas que estén saludables, tiernas y que tengan buen color. Las frutas
deben sentirse pesadas para su tamaño, no deben tener golpes, cortes, ni
manchas.
• Para madurar la fruta, colóquela en una pequeña bolsa de papel limpia. Cierre
la bolsa y déjela reposar a temperatura ambíente. Para agilizar el proceso de
maduración, añada una manzana o banana madura a la bolsa. Una vez que se
madure, guárdela en el refrigerador por uno o 2 días hasta que usted vaya a
usarlos.
• Guarde los vegetales perecederos en el refrigerador hasta que vaya a usarlos.
Cómo preparar las frutas y vegetales para el extractor de jugo:
• Para ayudar a retirar cualquier residuo de pesticida de las frutas y vegetales,
lávelas bien con un cepillo de cerda natural y un limpiador biodegradable justo
antes de utilizar el extractor de jugo.
• Si lo desea, pele las frutas y vegetales. A algunos puede dejarle la cáscara con
excepción de todos los cítricos, incluyendo naranjas, toronjas, limones, limas,
mandarinas
Nota: El aceite de la cáscara de estas frutas sabe amargo y es difícil de digerir.
Sugerencia: Aunque al melón y a la piña se le pueden dejar la cáscara, usted
puede optar por quitársela para maximizar el sabor de la fruta y de el jugoque
prepare.

16
• Le debe quitar todos los huesos y semillas a las siguientes frutas
albaricoques, cerezas, nectarinas, mangos, duraznos, ciruelas, melones
• Retire y deseche las hojas de afuera de los vegetales que no sean orgánicos.
También pele cualquier capa de cera.
• Recorte cualquier sección de las frutas y vegetales que esté golpeada o
decolorada.
• El diseño del conducto de alimentación acomoda frutas y vegetales de
tamaño grande. Puede fácilmente acomodar frutas y vegetales enteros,
cómo manzanas, remolachas, zanahorias y apio. Si es necesario, cortelos en
pedazos grandes antes de colocarlos dentro del conducto de alimentación.
• Asegúrese de que todas las piezas del extractor de jugo estén limpias y secas.
Ver la sección de CUIDADO Y LIMPIEZA de este manual en la página 30.
PARA DESARMAR EL EXTRACTOR DE JUGO
1. Sujete y hale hacia arriba la parte de abajo de cada palanca de cierre para
separarlas de la lengüeta en la tapa. Las palancas de cierre se levantarán para
que usted pueda soltarlas de la tapa.
2. Para retirar la tapa, saque el empujador de alimentos, sostenga bien el tubo
de alimentación y hálelo hacia arriba.
3. Para retirar el recipiente de pulpa incorporado, sujete los bordes del recipiente
por ambos lados y con la otra mano suejete el borde de atrás. Hale el
recipiente hacia arriba manteniendo el filtro de acero inoxidable en su lugar.
4. Para retirar el filtro de acero inoxidable, sujete bien el filtro por el borde y hale
hacia arriba para sacarlo.
Precaución: El filtro de acero inoxidable tiene dientes muy afilados. Manéjelo
cuidadosamente.
5. Coloque el recipiente de pulpa boca abajo.
6. Retire la boquilla, sujetándola bien por el centro y halando
hacia arriba para desengancharla de las 4 palancas de cierre
(ver la ilustración A).
CÓMO ENSAMBLAR SU EXTRACTOR DE JUGO
1. Coloque el recipiente de pulpa boca abajo.
2. Para insertar la boquilla removible sobre el recipiente de
pulpa, alinee las 4 palancas de cierre y presione el centro
de la boquilla hasta que encaje firmemente en su lugar (ver
ilustración B).
3. Coloque el recipiente de pulpa incorporado sobre la base,
con la boquilla hacia usted.
4. Inserte el filtro de acero inoxidable en el centro del recipiente
de pulpa
incorporado y presione hacia abajo hasta que encaje en su lugar.
5. Colóquele la tapa sobre el recipiente de pulpa incorporado.
6. Asegure las palancas de cierre, sosteniendo la tapa mientras encaja el
mecanismo de cierre en la parte de arriba de cada lengüeta, a cada lado de
la tapa . Presione la parte de abajo de cada palanca de cierre hasta que usted
escuche que encaja en su lugar.
7. Inserte el empujador de alimentos que desee utilizar dentro del tubo de
A.
B.

17
alimentación (ver las instrucciones de la sección de USO DE LOS EMPUJADORES
DE ALIMENTOS PEQUEÑO Y GRANDE). Coloque el empujador de alimentos
dentro del tubo de alimentación, de forma que las ranuras en el empujador
correspondan con las partes sobresalientes del tubo de alimentación.
Importante: El aparato no funcionará hasta que as palancas de cierre no estén
bien cerradas.
USO DE LA BOQUILLA ANTIGOTEO
Para evitar goteos, la palanca de abrir / cerrar siempre debe estar en pocición
cerrada ( ) antes y después de la extracción de jugo. La palanca debe estar en
posición abierta ( ) durante la extracción de jugo. Vea las instrucciones en la
sección de CUIDADO Y LIMPIEZA para más detalles.
USO DE SU EXTRACTOR DE JUGO
Nota: Para comenzar, coloque todos los vegetales y frutas que va a utilizar sobre
el mostrador o en un recipiente colocado al lado del extractor.
Importante: El recipiente de pulpa incorporado tiene capacidad para alrededor
de 3 tazas de pulpa. No permita que el recipiente se pulpa se sobrellene. Esto
puede causar que el aparato pare defuncionar.
1. Enchufe el aparato a un tomacorriente estándar. Presione el interruptor
de control de velocidad a la velocidad baja (1) y permita que funcione por
10 segundos antes de colocar cualquier tipo de alimento dentro del tubo
de alimentación.
2. Coloque los alimentos en el tubo de alimentación y presione ligeramente con
el empujador de alimentos.
3. Use el empujador de alimentos para guiar las verduras y frutas a través del
tubo de alimentación. Para obtener la máxima cantidad de jugo de las frutas y
vegetales, no fuerce ni apure los alimentos a través del aparato.
4. Cuando el recipiente de pulpa o la jarra de jugo esté casi lleno (el recipiente
de pulpa tiene capacidad para alrededor de 3 tazas de pulpa y la jarra de jugo
tiene capacidad para 4 tazas de jugo) apague (0) el aparato. Permita que el
motor se pare por completo antes de vaciar alguna de las dos piezas.
5. Siga las instrucciones en la sección de CÓMO DESARMAR SU EXTRACTOR
DE JUGO para retirar el recipiente de pulpa, luego colóquelo de nuevo en su
lugar, siguiendo las instrucciones de CÓMO ENSAMBLAR SU EXTRACTOR DE
JUGO. Asegúrese de colocar ambos recipientes nuevamente en su lugar antes
de continuar la extracción de jugo.
Precaución: El filtro de acero inoxidable tiene dientes muy afilados. Manéjelo
cuidadosamente.
6. Apague el aparato y desenchúfelo del tomacorriente.
Nota: Nunca coloque los dedos, ni la mano dentro del tubo de alimentación.
USO DE LOS EMPUJADORES DE ALIMENTOS PEQUEÑO Y GRANDE
Nota: El empujador de alimentos tiene 2 partes; la sección interior transparente
más pequeña encaja dentro de la sección exterior más grande.
1. Para retirar el tubo de alimentación pequeño, sostenga con una mano el
empujador de alimentos grande y gírelo en dirección contraria a las
manecillas del reloj hasta que el cierre de la sección interior se libere. Levante
el empujador pequeño directamente en dirección vertical.
2. Coloque el tubo de alimentación grande dentro del tubo de alimentación,

18
de forma que las indentaciones en el empujador correspondan con las partes
sobresalientes del tubo de alimentación.
Nota: Use la apertura más pequeña para las frutas y vegetales pequeños. Use
el tubo de alimentación pequeño para guiar las frutas y vegetales a través de la
apertura del empujador de alimentos grande.
3. Cuando utilice pedazos de frutas y vegetales más grandes, coloque el
empujador de alimentos pequeño dentro del empujador de alimentos grande
y use este conjunto de empujadores como una pieza para ayudar a guiar las
frutas y los vegetales más grandes a través del tubo de alimentación. Coloque
las muescas de forma que coincidan con la apertura. El centro transparente
caerá en la ranura. Gire la parte de arriba en la dirección de las manecillas del
reloj hasta que el empujador de alimentos pequeño encaje en su lugar.
SUGERENCIAS Y CONSEJOS PARA EL USO DEL EXTRACTOR DE JUGOS
• No coloque alimentos dentro del extractor antes de encenderlo.
• Deje que el aparato esté encendido por lo menos por 10 segundos antes de
comenzar el proceso de extracción de jugos
• No permita que los recipientes de jugo y de pulpa se sobrellenen mientras
utiliza el aparato. Apague (0) el aparato, espere a que el motor pare de
funcionar por completo y que deje de salir jugo. Vacíe el recipiente de jugo y/o
pulpa. Asegúrese de colocarlos de nuevo en su lugar antes de continuar
usando el aparato.
• No procese bananas, aguacates o coco. No tienen jugo y tupirán el aparato.
• Asegúrese de quitarle todas las semillas grandes a las frutas.
• Para obtener máximos beneficios nutritivos, beba su jugo procesado
acabado de hacer.
PARA OPTIMIZAR EL PROCESO DE EXTRACCIÓN DE JUGO
• Evite la acumulación excesiva de pulpa en la parte de abajo de la tapa.
• Quítele la cáscara a los melones; ya que al ser tan gruesas tienden a aguar
las bebidas.
• Mantenga en el refrigerador las frutas y vegetales maduros y lavados hasta
que estén listos para ser usados.
USOS PARA LA PULPA
La pulpa de las frutas y vegetales tienen un gran valor nutritivo. Puede utilizarla para
añadir fibra y sabor a sus panecillos dulces y panes rápidos. También puede utilizarla
para espesar sopas, cacerolas y salsas. Utilice pulpa de fruta para añadirle nutrición
y sabor a sus postres, cómo el pudín y los pasteles. Asegúrese de usarla el mismo
día que extraiga el jugo para evitar la pérdida del contenido de vitaminas.
COMO DESARMAR EL EXPRIMIDOR DE CÍTRICOS
1. Para abrir las palancas de cierre, sujete y hale la parte de abajo de cada
palanca para soltarlas de las lengüetas en la tapa. Las palancas de cierre se
levantarán y se liberarán.
2. Levante el cono exprimidor y sepárelo del accesorio exprimidor de cítricos.
3. Levante el accesorio exprimidor de cítricos del recipiente de pulpa incorporado.
4. Levante el recipiente de pulpa incorporado y el eje del motor
de la base.
5. Coloque el recipiente de pulpa boca abajo.

19
6. Retire la boquilla sujetándola bien por el centro y halando
hacia arriba para desengancharla de las 4 palancas de cierre
(vea la ilustración C).
COMO ENSAMBLAR EL EXPRIMIDOR DE CÍTRICOS
1. Coloque el recipiente de pulpa incorporado boca abajo.
2. Para insertar la boquilla removible sobre el recipiente de
pulpa, alinee las 4 palancas de cierre y presione el centro
de la boquilla hasta que encaje firmemente en su lugar (ver
ilustración D).
3. Coloque el recipiente de pulpa incorporado sobre la base del motor.
4. Coloque el eje motor del exprimidor de cítricos centrado
dentro del recipiente
de pulpa incorporado y presione hacia abajo para asegurar
que está asentado
de forma segura sobre la base.
5. Coloque el accesorio exprimidor de cítricos encima del recipiente de pulpa
incorporado, de forma que las dos lengüetas pequeñas queden a la derecha
y a la izquierda.
6. Cierre las palancas de cierre, sosteniendo la tapa hacia abajo mientras encaja
el mecanismo de cierre en la parte de arriba de cada palanca sobre la
lengüeta a cada lado del accesorio. Presione la parte de abajo de cada palanca
de cierre hasta que escuche que encaja en su lugar.
Importante: El aparato no funcionará hasta que las palancas de cierre estén
bien cerradas.
7. Coloque la jarra de jugo debajo de la boquilla removible.
8. Mueva el interruptor a la posición abierta ( ).
9. Elija el cono exprimidor de cítricos que desee y colóquelo sobre el eje del
motor (ver las instrucciones de la sección USO DE LOS CONOS EXPRIMIDORES).
USO DE LOS CONOS EXPRIMIDORES
Nota: El cono pequeño se recomienda para las frutas pequeñas, como los limones y las
limas, y el cono grande para las frutas más grandes cómo la naranjas y las toronjas.
1. Sostenga el cono exprimidor pequeño por los dos dientes con una mano.
Coloque el pulgar y el dedo índice de la otra mano sobre el cono exprimidor
grande, directamente arriba de los dientes. Presione ligeramente el cono y
levántelo completamente. Debajo verá el cono exprimidor pequeño.
2. Para situar el cono exprimidor grande nuevamente, simplemente colóquelo
con las aperturas en cada lado directamente arriba los dientes del cono
exprimidor pequeño y presione hacia abajo.
USO DEL EXPRIMIDOR DE CÍTRICOS
1. Ensamble el exprimidor de jugo de acuerdo a las instrucciones de la sección
de COMO ENSAMBLAR EL EXPRIMIDOR DE CÍTRICOS.
2. Desenrolle el cable de la base y enchúfelo a un tomacorriente estándar.
3. Corte la fruta cítrica a la mitad.
4. Coloque el lado cortado sobre el cono seleccionado.
5. Presione el interruptor de control de velocidad a la posición baja (1).
C.
D.

20
6. Usando una presión de firme a moderada, presione sobre la fruta para
comenzar la acción de exprimir.
7. Al terminar de exprimir, apague (0) el interruptor de control de velocidad para
parar la rotación del exprimidor y retirar la fruta del cono.
8. Mueva la palanca de cierre a la posición cerrada.
9. Desenchufe el cable del tomacorriente.
CONSEJOS PARA USO DEL EXPRIMIDOR DE CÍTRICOS
• Antes de exprimir el jugo de una fruta cítrica, ruede la fruta con sus manos
sobre el mostrador ejerciendo presión ligera. Esto ayuda a sacarle el jugo.
• Tire la corteza en su fregadero para eliminar malos olores que queden de
otros alimentos.
• Añada una cascarilla de limón, lima o naranja al sirope para añadirle un gusto
fresco al té frío o caliente
• Procese 1 taza de azúcar con el zumo de una lima o limón y guárdela en
un recipiente cerrado en su refrigerador. Use para decorar galletitas dulces,
panques o roscas dulces.
Cuidado y limpieza
Este producto no contiene piezas reparables por el usuario. Para cualquier
servicio, consulte con personal de servicio calificado.
Importante: Siempre desenchufe su extractor de jugo del tomacorriente antes
de limpiarlo.
LIMPIEZA
1. Desarme su extractor de jugo o exprimidor de cítricos de acuerdo a las
instrucciones.
2. Utilizando una esponja o paño húmedo, limpie la base, los pies de goma y la
parte de abajo del aparto. Si es necesario, puede usar un cepillo de dientes o
un paño húmedo para limpiar el jugo en el interior del árbol motor (encima de
la base del motor).
Importante: No sumerja la base en agua, ni la rocíe con agua. Para limpiarla,
solamente frótela con una esponja, paño o papel toalla húmedo.
3. Todas las piezas – excepto la base – son lavables en la máquina lavaplatos (en
la rejilla de arriba) o tal vez usted prefiera lavarlas en agua caliente y líquido
de fregar, utilizando cualquier detergente líquido de fregar que sea suave. No
use ningún producto que contenga amoníaco ni polvos limpiadores, ya que
estos pueden quitarle el brillo a la superficie, rayarla o estropearla. Use el
cepillo de limpieza proporcionado para sacar la pulpa que queda en las piezas
removibles. No use cepillos ni almohadillas de metal.
Nota: Si es necesario, la palanca de abrir / cerrar se puede
remover para limpiarla. Retire la palanca de abrir / cerrar
cuando este en la posicion de abrir ( ). Coloque el recipiente
de pulpa boca abajo. Localice la parte de atrás de la palanca,
donde ésta se connecta con el recipiente de pulpa. Luego
presione la lengüeta en la parte de atrás de la palanca (ver la
flecha) mientras hala hacia arriba (ver ilustración E). E.
Table of contents
Languages:
Other Juiceman Kitchen Appliance manuals