4
LASER FILM LASER FILM LASER FILM LASER FILM LASER FILM
LASER FILM
LASER FILM LASER FILM LASER FILM LASER FILM LASER FILM
LASER FILM LASER FILM
LASER FILM
INSTALLAZIONE E MONTAGGIO / INSTALLATION AND ASSEMBLY / INSTALACIÓN Y MONTAJE /
INSTALLATION ET MONTAGE / INSTALLATION UND MONTAGE
1 2
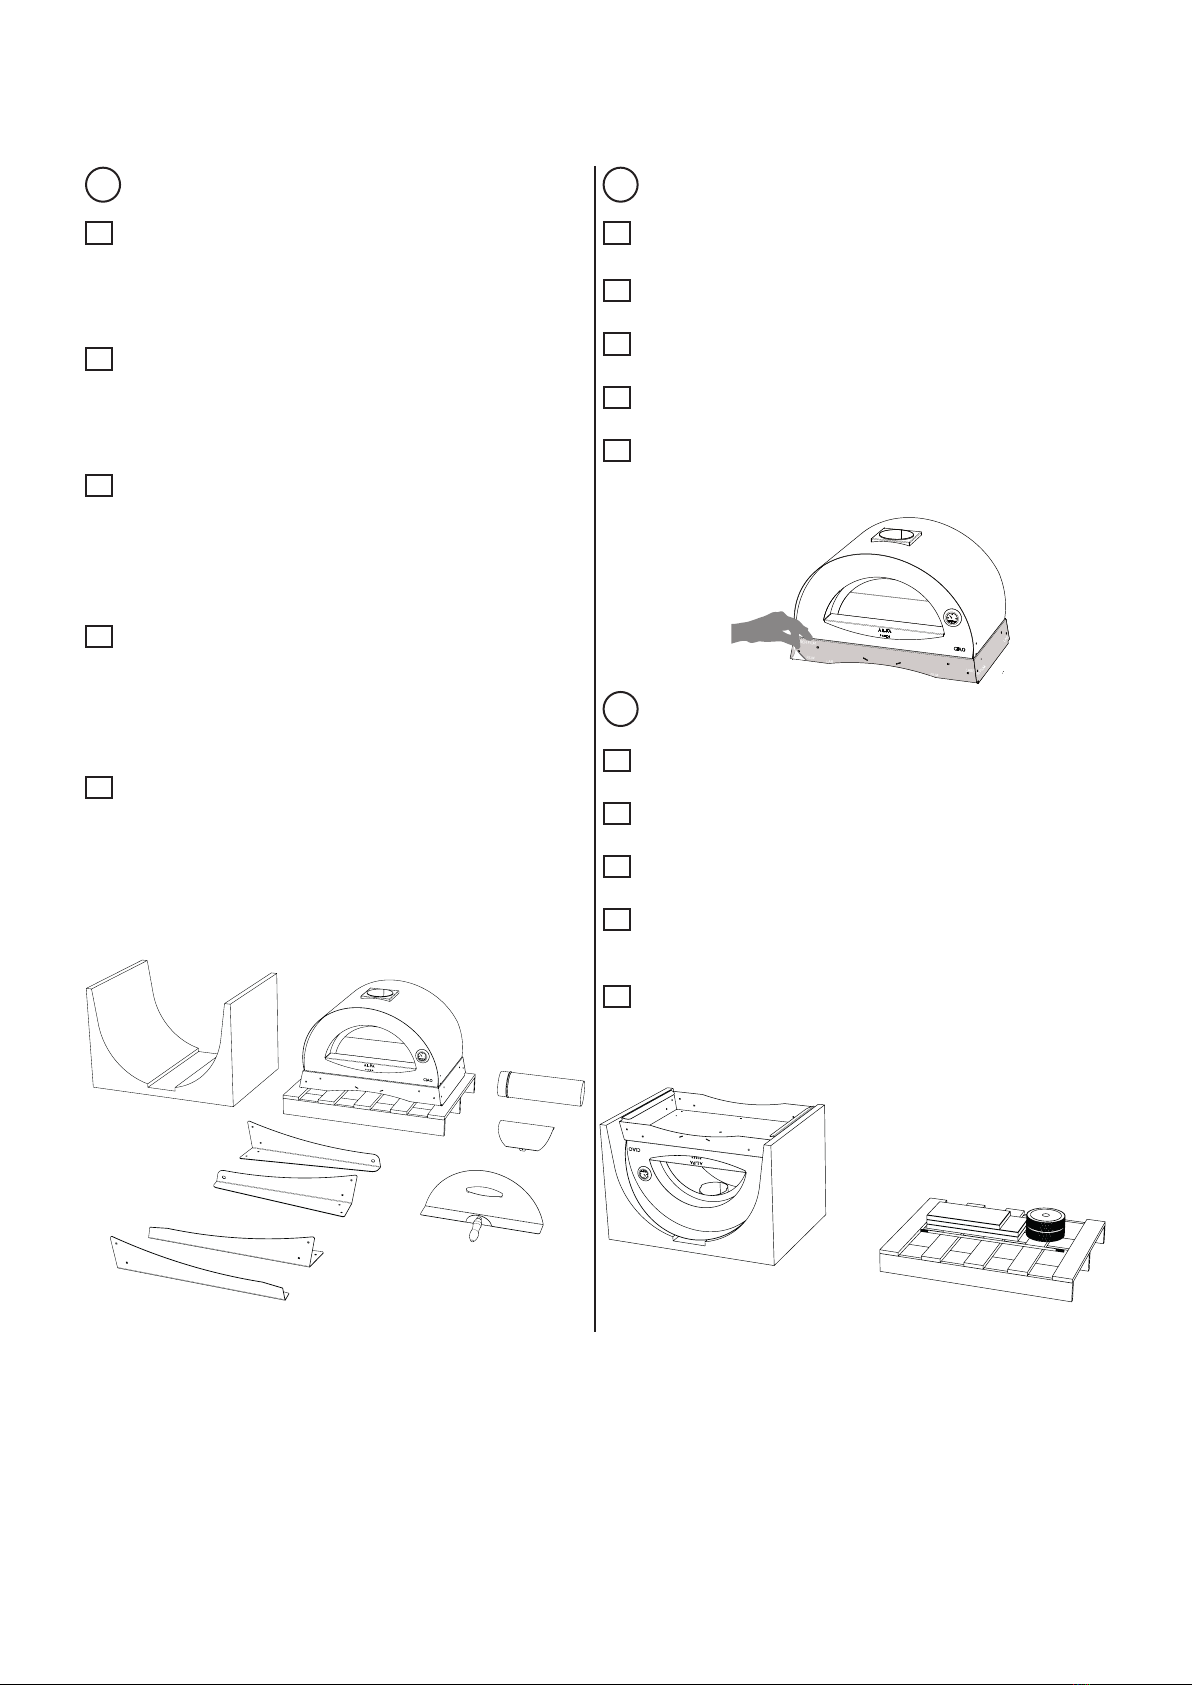
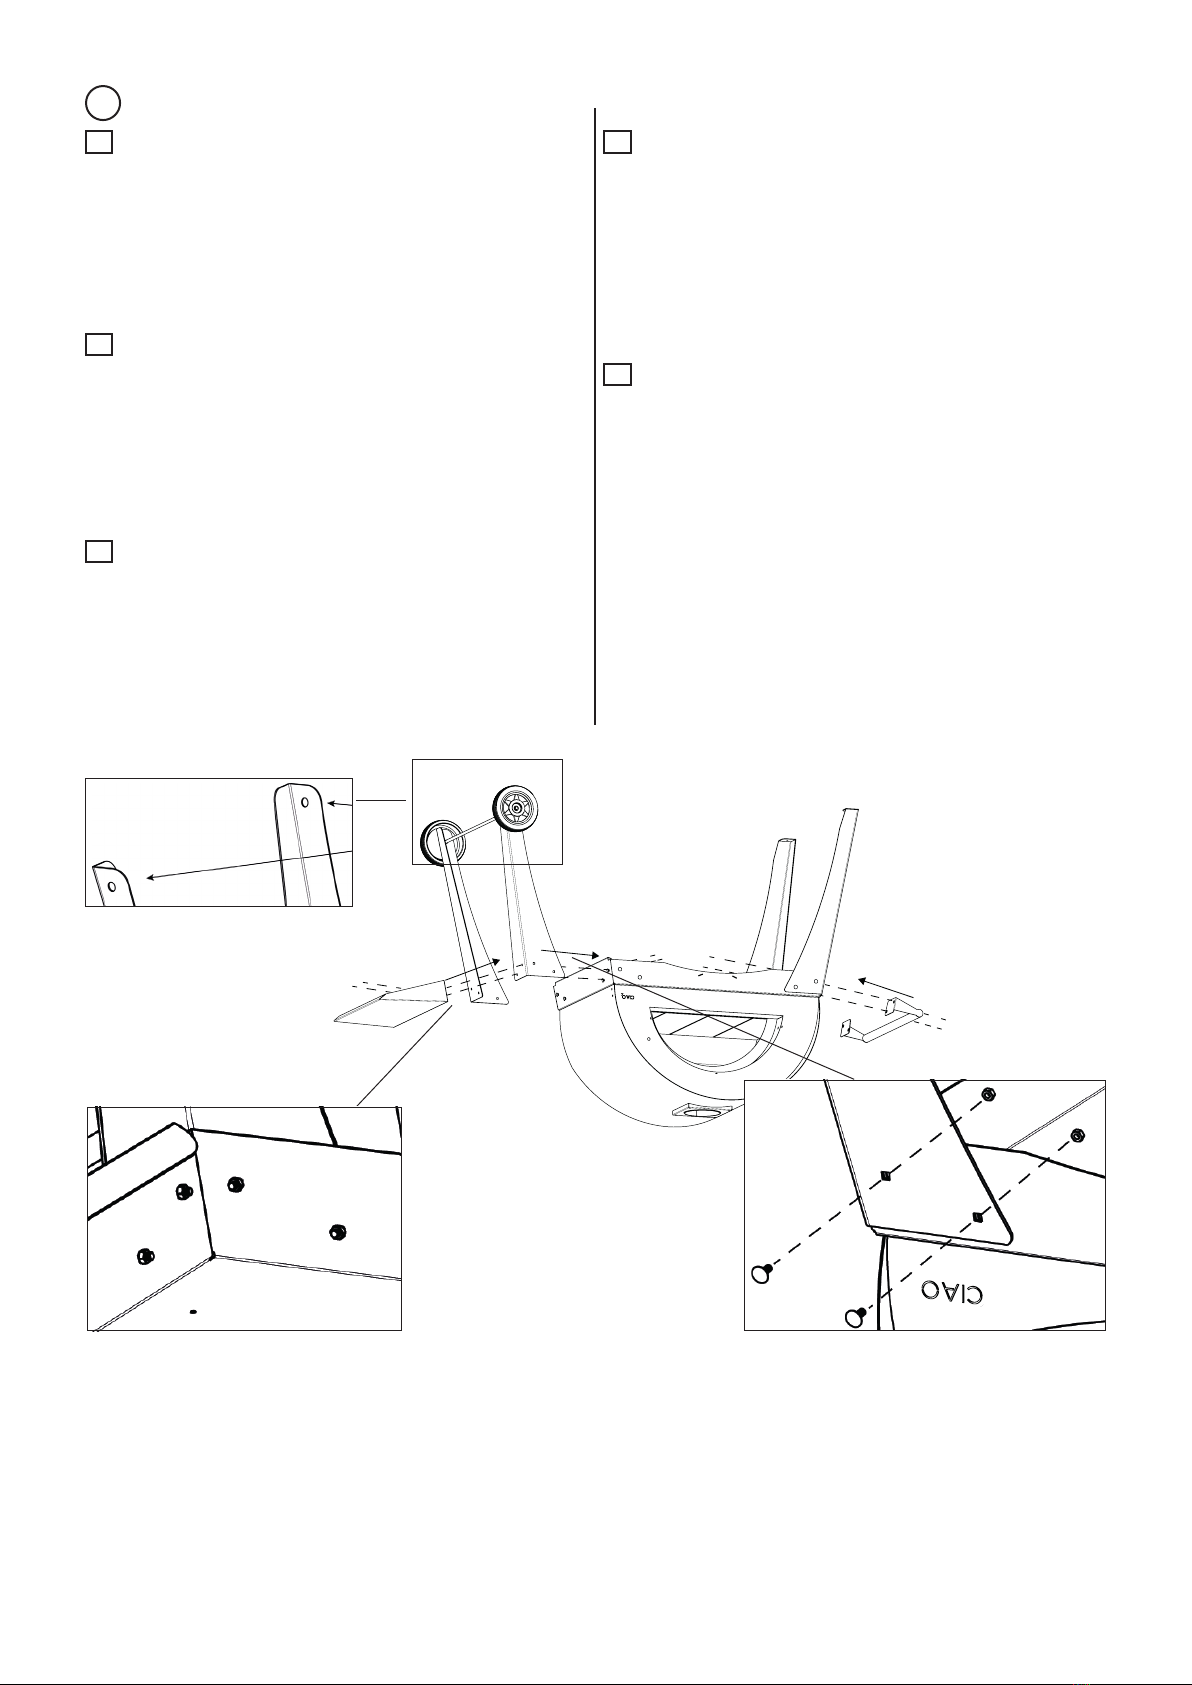
Rovesciare l’imballo di polistirolo e posizionarlo vi-
cino al forno, vi servirà al montaggio delle gambe e
delle ruote; togliere tutti i componenti all’interno del
forno e sul pallet. Il piano forno, il materiale isolante,
le ruote e l’asse si trovano al di sotto del forno.
IT Togliere la pellicola laser lm da tutti i componenti
del forno prima di proseguire con il montaggio.
IT
Tip over the polystyrene packaging and place it
near the oven, you will need it to assemble the legs
and wheels; remove all components inside the oven
and on the pallet. The oven oor, insulating material,
wheels and axle are located under the oven (a).
EN
Remove the laser lm from all parts of the oven
before proceeding with the installation.
EN
Vuelque el embalaje de poliestireno y colóquelo
cerca del horno, será necesario para el montaje de
las patas y de las ruedas; quite todos los compo-
nentes presentes dentro del horno y en el palé. La
placa del horno, el material aislante, las ruedas y el
eje se encuentran por debajo del horno (a).
ES
Quite la película laser lm de todos los componen-
tes del horno antes de proceder al montaje.
ES
Renverser l’emballage de polystyrène et le mettre
près du four, il vous servira pour l’assemblage des
pieds et des roues ; enlever tous les composants à
l’intérieur du four et sur la palette. Le plan du four,
le matériau isolant, les roues et l’axe se trouvent en
dessous du four (a).
FR
Retirer le lm laser de toutes les parties du four
avant de procéder au montage.
FR
Polystyrolverpackung umdrehen und neben den
Ofen legen. Sie wird bei der Montage der Beine und
Räder benötigt. Alle Komponenten aus dem Ofenin-
neren und von der Palette nehmen. Die Ofenäche,
das Isoliermaterial, die Räder und die Achse ben-
den sich unterhalb des Ofens (a).
DE
Bevor mit der Montage fortgefahren wird, ist von
allen Teilen die Laserlm-Folie zu entfernen.
DE
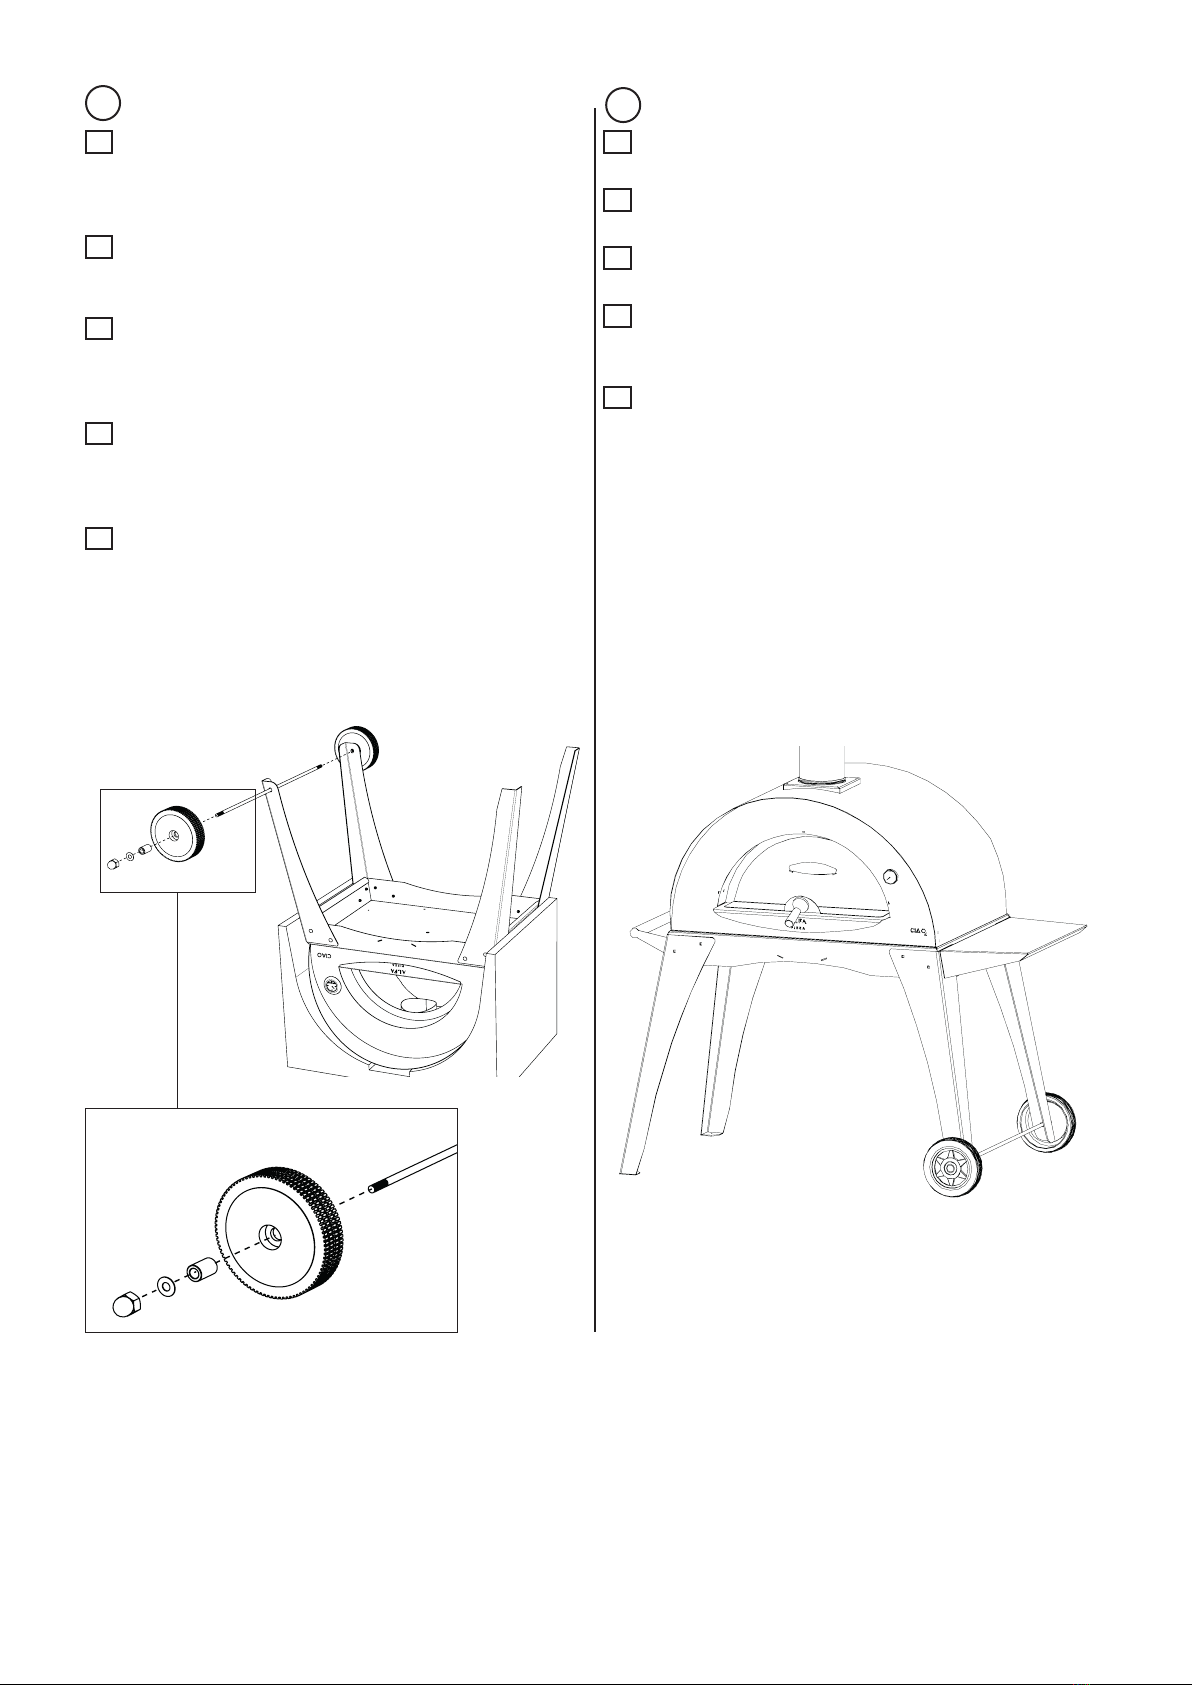
3
Adagiare il forno rovesciato sulla sagoma di polisti-
rolo. Consigliamo in 2 persone.
IT
Lay the oven upside down on the polystyrene tem-
plate. We recommend two people.
EN
Apoye el horno volcado en la plantilla de poliestire-
no. Se recomienda la presencia de 2 personas.
ES
Poser le four renversé sur le gabarit de polystyrène.
Deux personnes sont nécessaires pour effectuer
cette opération.
FR
Den umgedrehten Ofen auf das Polystyriolprol
legen. Hierfür werden 2 Personen empfohlen.
DE