Jumbo W1119NA User manual

Infant baby walker
User's Manual
W1119NA
IMPORTANT!READ CAREFULLY AND
KEEP FOR FUTURE REFERENCE!

1
Check that you have all the parts for this model BEFORE assembling your product.
No tools required.
Parts List
B. 2 rear wheels C. 6 brake padsA. 2 wheels D. Handle
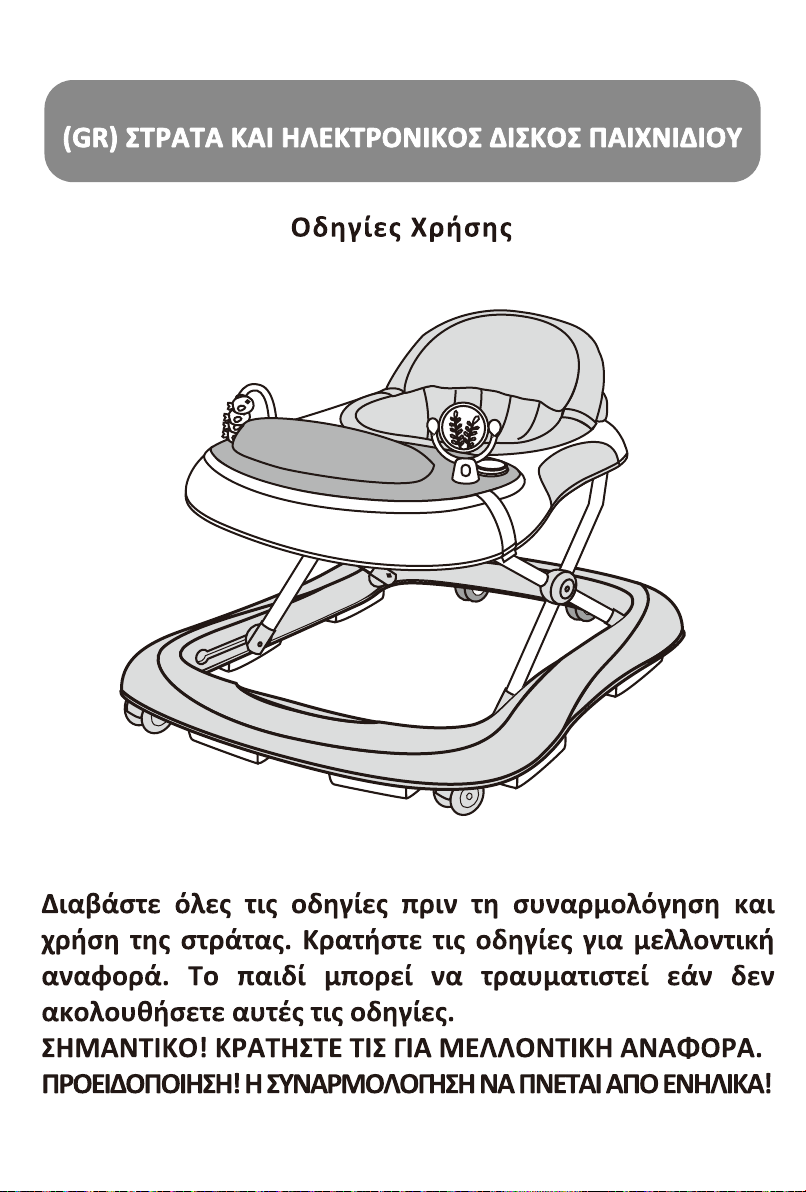
E. Baby walker frame F. Padded seat G. Electronic play tray
• Before using, check that the product and all of its components have not been
damaged during transportation. Check regularly that the product is not broken
or damaged. If the product is broken or damaged, keep out of reach of children.
• The product must only be assembled by an adult. For the correct assembly of
the product, please refer to the following instructions.
STAIR HAZARD: Avoid serious
injury or death. Block stairs/step
• Only use the baby walker frame on flat and stable surfaces.
• Never leave child unattended.
• Always keep child in view while in walker.
The child will be able to reach further and move rapidly
when in the walking frame.
Prevent access to stairs, steps and uneven surfaces,
slopes or unstable floors, swimming pools or other sources of water.
• Guard all fires, heating and cooking appliances.
• Remove hot liquids, electrical cables and other potential hazards from reach.
• Prevent collisions with glass in doors, windows and fumiture.
• Do not use the product if any components are broken or missing.
• This baby walking frame should be used only for short periods of time(e.g.20min).
• This product is intended only for a child who can sit up by itself and until it is able to
walk by itself or weighs more than 12kgs.
• Do not use accessories or replacement parts other than those approved by the
manufacturer.
Read the instructions carefully before use and keep them for future reference.
The child may be hurt if you do not follow these instructions.
Before using, remove and dispose of any plastic bags and other packaging(e. g
fasteners, fixing ties, etc.) and keep them out of reach of children.
securely before using walker even when using parking brake.

2
3. Fix the brake pads in the appropriate housings. Ensure that the brake pads are firmly pushed all the way
into the housing on the down base of the walker.
Assembling Procedures
1. Turn the baby walker frame upside down. Fix the wheels in the appropriate housings. Ensure that the
wheels are firmly pushed all the way into the housing on the down base of the walker.
2. Fix the rear wheels in the appropriate housings. Ensure that the wheels are firmly pushed all the way
into the housing on the down base of the walker.
Front Side
Back Side
Step 2
Step 3
Step 1

3
4. Open the baby walker frame in the in-use posion, ensuring that all wheels touch the floor. Slowly raise the
tray by pulling it in an upward direcon, unl a click indicates that the frame has been locked correctly in one
of the three posions.
Step 4
Step 5
Step 6
5. Insert the plasc rings of the padded seat in the slots located along the upper edge of the walker
frame. Pass the rings through the slots and pull them, ensuring that they are correctly locked in the
position and cannot recede into the slot.
6. Fit the handle on the rear walker frame; simply place it on the housings, located at the rear of the
backrest, and push it firmly in a downward direction, ensuring that it has been fitted in the correct
position. Please do not lift up baby walker from the handle. It is dangerous.

4
Step 7
7. Insert all small toy parts into corresponding holes. Put the electronic play tray into its housing in front
of the walker's seat. Listen for two clicks to confirm the play tray is safely locked in place.
8. Completely assembled.
Step 8

5
When opening, closing or adjusng the walker, ensure that your child is at a safe
distance. Before placing the child in the walker ensure that the secondary lock
buon is correctly locked again.
Step 9
How to Adjust the Height of Baby Walker Frame
9. To adjust the seat’s height, remove the child from the baby walking frame, pull the safe buon
located under the small tray table and rotate it to 90 degrees. keep the safe buon pressed, then
raise or lower the small table until the desired position is reached, then pull the safe button and
rotate it to 90 degrees again to lock the small table.(If the secondary lock locks automatically,
please make sure that it had been rotated to 90 degrees.)
The front
press
90 degree
rotation
90 degrees
rotation

6
Step 11
The walker includes one electronic play tray that aaches to the walker frame as
shown in step 7. The funcon and use of the play tray are shown here.
Using Electronic Play Toy Tray
10. Firstly, pull the button under top tray, making sure that the button is finally parallel to the
adjusted-device (see 1st picture). Meanwhile, press the front button (see 2nd picture), and
press down the top base. The frame folds up completely.
How to Fold the Walker
Step 10
The front
press
90 degree
rotation
90 degrees
rotation
3D colorful designs
Rotang toy
Lights twinkle with music when the lovely
hippocampus is pressed
Press the piano keys to listen to
splendid music
Move tiddler back and forth
Switch

7
Product Care and Maintenance
Fing and / or Replacing Baeries
The toy of the walker frame requires 2X"AA" 1.5Volt alkaline
type baeries(not included).
• Batteries must only be fitted by an adult.
•To fit and/ or replace batteries: loosen the screw on the battery
compartment cover with a suitable screwdriver, press the
tab and remove the battery compartment cover. Then remove
the spent batteries and fit new ones, ensuring that they have
been fitted in the correct polarity, as shown inside the battery
compartment. Replace the battery cover and tighten the screw.
• Always keep batteries and tools out of reach of children.
•Always remove the batteries if the toy will not be used for
a long period.
•Only use alkaline batteries of the same type or equivalent to the
type recommended for the correct function of this product.
•Never mix new and old batteries, or different types of batteries.
•Do not burn or dispose of spent batteries into the environment.
Dispose of spent batteries at an appropriate differentiated
collection point.
• The use of rechargeable batteries is not recommended and
cannot be used.
• Non-rechargeable batteries are not to be recharged.
• Batteries are to be inserted with correct polarity.
• Exhausted batteries are to be removed from the toy.
• Do not short-circuit the battery terminals.
•Check regularly the walker frame for signs of damage or wear.
•Clean the plasc parts, including the stoppers, with a damp cloth.
•Clean the seat with brush or family soap and neutral scour
• Dry the metal parts to prevent the formaon of rust.
•Prolonged exposure to direct sunlight may cause the fabric to fade.


➔
➔
το χερούλι
3


Table of contents