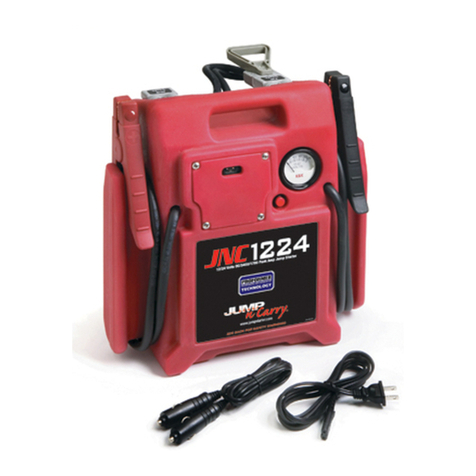
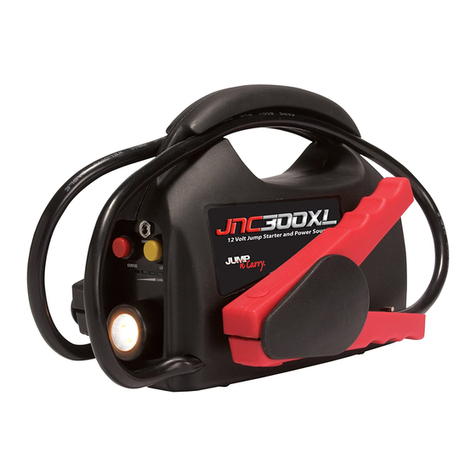
Jump n Carry JNC300XL User manual

JNC300XL
Portable Jump Starter
with 12 Volt Power and LED Flashlight
Your jump starter is engineered and manufactured to provide years of reliable operation. Please
read and understand this owner’s manual and the owner’s manual of any vehicle being jump
started before using your jump starter. Please keep this manual for future use.
Charge your jump starter for 12 hours immediately upon retail purchase, charge
after each use and charge once every three months when not in use.
Pb CONTAINS SEALED LEAD ACID BATTERY.
BATTERY MUST BE RECYCLED.
Warning: This product contains chemicals, including lead, known to the State of California to
cause cancer, birth defects and other reproductive harm. Wash hands after handling.
Failure to follow instructions may cause damage or explosion; always shield eyes.
Read entire instruction manual before use.
WARNING
Never turn the Car Start ON if the LED light is RED and the unit emits an audible alarm.
Doing so could cause sparking, explosion or other damage to your vehicle's electrical
system and the Car Start, as well as personal injury.
Never turn the Car Start ON before connecting the Car Start to a vehicle/battery.
WARNING
WARNING
Read these instructions completely before using the jump starter and save them for
future reference. Before using the jump starter to jump start a car, truck, boat or to
power any equipment, read these instructions and the instruction manual/safety
information provided by the car, truck, boat or equipment manufacturer. Following all
manufacturers’ instructions and safety procedures will reduce the risk of accident.
Working around lead-acid batteries may be dangerous. Lead-acid batteries release
explosive gases during normal operation, charging and jump starting. Carefully read and
follow these instructions for safe use. Always follow the specific instructions in this
manual and on the jump starter each time you jump start using the jump starter.
All lead-acid batteries (car, truck and boat) produce hydrogen gas which may violently
explode in the presence of fire or sparks. Do not smoke, use matches or a cigarette
lighter while near batteries. Do not handle the battery while wearing vinyl clothing
because static electricity sparks are generated when vinyl clothing is rubbed. Review all
cautionary material on the jump starter and in the engine compartment.
Always wear eye protection, appropriate protective clothing and other safety equipment
when working near lead-acid batteries. Do not touch eyes while working on or around
lead-acid batteries.
Always store clamps in their Grip-Lock
®
ears, away from each other or common
conductors. Improper storage of clamps may cause the clamps to come in contact with
each other, or a common conductor, causing the battery to short circuit and generate
high enough heat to ignite most materials.
Use extreme care while working within the engine compartment, because moving parts
may cause severe injury. Read and follow all safety instructions published in the vehicle's
Owner's Manual.
While the battery in the jump starter is a sealed unit with no free liquid acid, batteries
being jump started with the jump starter unit likely contain liquid acids which are
hazardous if spilled.

General precautions for use:
• Someoneshouldalwaysbewithinrangeofyourvoiceorcloseenoughtocometo
youraidwhenyouworknearalead-acidbattery.
• Haveplentyoffreshwaterandsoapnearbyincasebatteryacidcontactsskin,
clothingoreyes.Protectiveeyewearshouldalwaysbewornwhenworkingnear
lead-acidbatteries.
• Ifbatteryacidcontactsskinorclothing,washimmediatelywithsoapandwater.
Ifacidenterseye,immediatelyfloodeyewithcoldrunningwaterforatleast10
minutesandgetmedicalattentionimmediately.
• Thechargeruseshousehold120Velectricalsupply,whichifmisused,maycause
injuryorfire.
• Beextracautioustoreduceriskofdroppingametaltoolontoabattery.Itmight
sparkorshortcircuitthebatteryoranotherelectricalpartthatmaycauseexplosion.
• Removepersonalmetalitemssuchasrings,bracelets,necklacesandwatcheswhen
workingwithalead-acidbattery.Alead-acidbatterycanproduceashort-circuit
current high enough to weld a ring or the like to metal, causing a severe burn.
• Usethejumpstarterforjumpstartinglead-acid batteries only. Do not use for jump
startingdry-cellbatteriesthatarecommonlyusedwithhomeappliances.These
batteriesmayburstandcauseinjurytopersonsanddamagetoproperty.
• NEVERchargeorjumpstartafrozenbattery.
Failure to follow instructions may cause damage or explosion; always shield eyes.
Read entire instruction manual before use.
WARNING
Never turn the Car Start ON if the LED light is RED and the unit emits an audible alarm.
Doing so could cause sparking, explosion or other damage to your vehicle's electrical
system and the Car Start, as well as personal injury.
Never turn the Car Start ON before connecting the Car Start to a vehicle/battery.
WARNING
WARNING
Read these instructions completely before using the jump starter and save them for
future reference. Before using the jump starter to jump start a car, truck, boat or to
power any equipment, read these instructions and the instruction manual/safety
information provided by the car, truck, boat or equipment manufacturer. Following all
manufacturers’ instructions and safety procedures will reduce the risk of accident.
Working around lead-acid batteries may be dangerous. Lead-acid batteries release
explosive gases during normal operation, charging and jump starting. Carefully read and
follow these instructions for safe use. Always follow the specific instructions in this
manual and on the jump starter each time you jump start using the jump starter.
All lead-acid batteries (car, truck and boat) produce hydrogen gas which may violently
explode in the presence of fire or sparks. Do not smoke, use matches or a cigarette
lighter while near batteries. Do not handle the battery while wearing vinyl clothing
because static electricity sparks are generated when vinyl clothing is rubbed. Review all
cautionary material on the jump starter and in the engine compartment.
Always wear eye protection, appropriate protective clothing and other safety equipment
when working near lead-acid batteries. Do not touch eyes while working on or around
lead-acid batteries.
Always store clamps in their Grip-Lock
®
ears, away from each other or common
conductors. Improper storage of clamps may cause the clamps to come in contact with
each other, or a common conductor, causing the battery to short circuit and generate
high enough heat to ignite most materials.
Use extreme care while working within the engine compartment, because moving parts
may cause severe injury. Read and follow all safety instructions published in the vehicle's
Owner's Manual.
While the battery in the jump starter is a sealed unit with no free liquid acid, batteries
being jump started with the jump starter unit likely contain liquid acids which are
hazardous if spilled.
Safety Information

Performanceofyourjump starter will depend upon several factors:
• Agood,solidconnectionbetweenthejump starterclampsandthebattery
and ground connections are a must. Moving the clamps back and forth while
connectingtothebatterywillhelpcreateabetterconnection.
• Cleanconnectionsbetweenyourvehicleorequipmentbatteryanditsterminals
areveryimportant.Foranoptimalconnection,corrosion(softgrayish-whitebuild-
up)onbatteryterminalsmustberemoved.Withtheignitionturnedoff,disconnect
thebatterycablesandcleantheterminalsandbatterypostswithabakingsoda
solution.
• Allbatteriesareaffectedbytemperaturechanges,andthesmall,lightweight
batteryinthejump starter is more sensitive to storage temperature than a standard
automotivebattery.Theidealstorageenvironmentisroomtemperature,or68ºF.
Performance and Temperature
Note: Review this instruction manual and the instruction/safety manual provided by the
manufacturer of the vehicle being jump started.
Note: For optimum performance, do not store your jump starter below 50° when using as
a jump starter. NEVER charge or jump start a frozen battery.
1. Useinawellventilatedarea.Shieldeyeswithsafetyglassesorgoggles.
Jump Starting Instructions
• Topreventarcing,NEVER allow clamps to touch together or to contact the same
piece of metal.
• Useofanattachmentnotrecommendedorsoldbythemanufacturermayresultina
riskofdamagetotheunitorinjurytopersonnel.
• Whenusingthepowerextensioncord,pullontheplugandnever on the wire when
disconnecting.
• Donotrechargethejumpstarterwithadamagedpowerextensioncord.Replaceit
immediately.
• Thejumpstartermaybeusedunderanyweathercondition–rain,snow,hotorcold
temperatures.
• Donotsubmergeinwater.
• Donotoperatewithflammablessuchasgasoline,etc.
• Ifthejumpstarterreceivesasharpbloworisotherwisedamagedinanyway,have
itcheckedbyaqualifiedserviceperson.Ifthejumpstarterisleakingbatteryacid,do
notshipit.Takeittotheclosestbatteryrecyclerinyourarea.
• Donotdisassemblethejumpstarter.Haveitcheckedbyaqualifiedserviceperson.
• Thejumpstartershouldneverbeleftinacompletelydischargedstateforanyperiod
oftime.Damagetothebatterycouldbepermanent,withpoorperformanceasa
result.Whennotinuse,rechargeeverythree(3)months.
• Alwaysstore,useandchargethejumpstarterinanareawherechildrencannotget
to the unit.

Pressandholdtheredbatterylevelstatusbuttontodisplaythebatterystatus.
Battery Status
Quand le Chargeur Est Branché surToujours Sur
Cuándo Corcel se ConectaSiempre En
When Charger is Plugged In*
3 lights . .........Good
2 lights . .........Medium
1 light ...........Low
Flashing .........Recharge Unit
Always On
*Please note this light indicates the charger is working.
LED Display - Press and hold red button
4 lights when plugged in... Charging complete
Always On When Charger is Plugged In
wenn Auflader angeschlossen ist*
3 Lichter. .........Gut
2 Lichter. .........Mitte
1 Licht ...........Tiefpunkt
Aufleuchten .......Laden Sie auf
Immer auf,
*Bitte merken Sie dieses Licht anzeigt, dass der Auflader arbeitet.
LED Ausstellung - Presse und hŠlt roten Knopf
4 Lichter .........Laden vollständig
Immer auf, wenn Auflader angeschlossen ist
Cuándo Corcel se Conecta*
3 luces . .........Bueno
2 luces . .........Medio
1 luz ............Bajo
Destellar .........Recargue la Unidad
Siempre En
*Note por favor que esta luz indica el corcel trabaja.
Despliegue LED - La prensa y tiene el bot—n rojo
4 luces .. ........Cargar completo
Quand le Chargeur Est Branché sur*
3 lumières........Bon
2 lumières........Milieu
1 lumière.........Niveau bas
Flashing .........Recharger l'Unité
Toujours Sur
*S'il vous plaît noter cette lumière indique que le chargeur travaille.
Exposition LED - La presse et tient le bouton rouge
4 lumières........Charger complet
Quando il Caricatore è Inserito InSempre Su
Quando il Caricatore è Inserito In*
3 luci ........ Buono
2 luci ........ Mezzo
1 luce ....... Basso
Lampeggiare. .
.
.
.
.
.
.
.
. Ricaricare l'Unità
Sempre Su
*Per favore di notare questa luce indica il caricatore lavora.
La Mostra LED - la stampa e tiene il bottone rosso
4 luci ........L'addebitamento completo
.
.
.
.
The jump starter featuresa12VoltpoweroutlethiddenbehindtheLEDflashlight.
Removetheflashlight(takingcarenottomisplaceordamageit)toexposethe12Volt
outlet.Toturnontheoutlet,depresstheyellowbutton.Toturnofftheoutlet,depressthe
yellowbutton.
Accessoriesupto12Ampscanbepoweredbytheunit.Iftheamperageratingis
exceeded,abuilt-inauto-resetcircuitbreakerautomaticallyshutspoweroffuntilthe
accessory,oroverloadsource,isremoved.Afterextremepowerusage,rechargetheunit
for36-48hours.
12 Volt DC Power
2. Turnofftheignitionandallvehicleaccessories(lights,radio,heater,etc.)before
making cable connections.
Note: A good, solid and clean connection is essential for a successful jump start
(see Performance and Temperature section).
3. Taking care to never touch the clamps together, first remove the RED POS (+)
clampfromit’searandconnectittotheRED POS (+)batteryterminal.Then
remove the BLACK NEG (–)clampfromit’searandconnectittotheengine
ground,oranon-movingmetalenginepart.Neverconnecttothefuelline,fuel
injector or carburator as the engine ground.
Note: Many vehicles feature alternate starting points, away from the battery.
Always use the alternate starting points whenever available.
4. Makesurethecablesarenotinthepathofmovingengineparts(belts,fans,etc.).
5. Stayclearofbatterieswhilejumpstarting.
6. Startthevehicle(turnonthevehicleignition).
Note: If the vehicle doesn’t start within 6 seconds, let the jump starter cool for 3
minutes before attempting to start the vehicle again or you may damage the jump
starter.
7. Oncethevehicleisstarted,disconnectthenegative(–)batteryclampfromthe
vehicle ground and return it to its Grip-Lock®ear.
8. Disconnectthepositive(+)clampandreturnittoit’sGrip-Lock®ear.
9. AlwaysreturntheclampstotheirGrip-Lock®earsafteruse.Neverattachthe
clamps to the handle of the jump starter.
10.Afteruse,rechargethejump starter (seeRecharging section).

1. Thejump starter comes with a wall mount charger.
2. PlugthechargercordintotheRechargeJackonthefrontoftheunit.
3. PlugthewallchargerintoanACoutlet.
4. TherightLEDwillturnonwhilethechargerispluggedintoACpowertoindicatethe
unit is charging.
5. Wedonotrecommendchargingtheunitformorethan24hoursundernormal
usage. Suggested recharge times are:
•Rechargetheunitfor3hourswhentheunitisusedforjumpstarting
•Rechargetheunitfor12-24hoursunderveryhighdischargeconditions
6. Pressandholdtheredbuttontocheckthebatterychargingstatus.Whentheunitis
fullycharged,allLED’swilllight.
The jump starterisequippedwithabuilt-inLEDflashlight.Theportabilityoftheunit
makes the jump starterextremelyusefulintimesofemergency,recreationandgeneral
use.Simplypresstheyellowbuttontoturnthelightonoroff.
Quand le Chargeur Est Branché surToujours Sur
Cuándo Corcel se ConectaSiempre En
When Charger is Plugged In*
3 lights . .........Good
2 lights . .........Medium
1 light ...........Low
Flashing .........Recharge Unit
Always On
*Please note this light indicates the charger is working.
LED Display - Press and hold red button
4 lights when plugged in... Charging complete
Always On When Charger is Plugged In
wenn Auflader angeschlossen ist*
3 Lichter. .........Gut
2 Lichter. .........Mitte
1 Licht ...........Tiefpunkt
Aufleuchten .......Laden Sie auf
Immer auf,
*Bitte merken Sie dieses Licht anzeigt, dass der Auflader arbeitet.
LED Ausstellung - Presse und hŠlt roten Knopf
4 Lichter .........Laden vollständig
Immer auf, wenn Auflader angeschlossen ist
Cuándo Corcel se Conecta*
3 luces . .........Bueno
2 luces . .........Medio
1 luz ............Bajo
Destellar .........Recargue la Unidad
Siempre En
*Note por favor que esta luz indica el corcel trabaja.
Despliegue LED - La prensa y tiene el bot—n rojo
4 luces .. ........Cargar completo
Quand le Chargeur Est Branché sur*
3 lumières........Bon
2 lumières........Milieu
1 lumière.........Niveau bas
Flashing .........Recharger l'Unité
Toujours Sur
*S'il vous plaît noter cette lumière indique que le chargeur travaille.
Exposition LED - La presse et tient le bouton rouge
4 lumières........Charger complet
Quando il Caricatore è Inserito InSempre Su
Quando il Caricatore è Inserito In*
3 luci ........ Buono
2 luci ........ Mezzo
1 luce ....... Basso
Lampeggiare. .
.
.
.
.
.
.
.
. Ricaricare l'Unità
Sempre Su
*Per favore di notare questa luce indica il caricatore lavora.
La Mostra LED - la stampa e tiene il bottone rosso
4 luci ........L'addebitamento completo
.
.
.
.
Flashlight
Recharging
The jump starter batterymayberemovedbyunscrewingtheperimeterscrewsonthe
backcover.Disconnectthewiresfromthebatteryterminals.Notethepositionofthe
batteryandwirelocations.
Pb
This unit contains a sealed non-spillable lead-acid battery.
This battery must be recycled.Consultyourstateorlocal
government concerning regulations for proper disposal.
Battery Disposal
The jump starter maybestoredvirtuallyanywhere,andinanyposition,thoughwe
recommendstoringtheunitupright.However,takeprecautionstoensurethatthepositive
and negative clamps do not come into contact with each other or a common metal
surface. We recommend storing the jump starter intheboxinwhichitwasoriginally
received.
Storage

CloreAutomotivewarrantsthisproducttobefreefromdefectsinmaterialor
workmanshipforaperiodofoneyearfromthedateoforiginalenduserpurchase.
Thiswarrantyextendstoeachpersonwhoacquireslawfulownershipwithinoneyearof
the original retail purchase, but is void if the product has been abused, altered, misused
orimproperlypackagedanddamagedwhenreturnedforrepair.
Thiswarrantyappliestotheproductonlyanddoesnotapplytoanyaccessoryitems
included with the product which are subject to wear from usage; the replacement or repair
oftheseitemsshallbeattheexpenseoftheowner.
THETERMSOFTHECLOREAUTOMOTIVELIMITEDWARRANTYCONSTITUTE
THEBUYER’SSOLEANDEXCLUSIVEREMEDY.THEIMPLIEDWARRANTIESOF
MERCHANTABILITYANDFITNESSFORAPARTICULARPURPOSEARELIMITED
INDURATIONTOTHISEXPRESSWARRANTY.AFTER1YEARFROMDATEOF
PURCHASE,ALLRISKOFLOSSFROMWHATEVERREASONSHALLBEPUTUPON
THEPURCHASER.
CLOREAUTOMOTIVESHALLNOTBELIABLEFORINCIDENTALANDCONSEQUENTIAL
DAMAGESUNDERANYCIRCUMSTANCES:CLOREAUTOMOTIVE’SLIABILITY,IFANY,
SHALLNEVEREXCEEDTHEPURCHASEPRICEOFTHISPRODUCTREGARDLESSOF
WHETHERLIABILITYISPREDICATEDUPONBREACHOFWARRANTY(EXPRESSOR
IMPLIED),NEGLIGENCE,STRICTTORTORANYOTHERTHEORY.
Somestatesdonotpermitthelimitationofwarrantiesorlimitationofconsequentialor
incidentaldamages,sotheabovedisclaimerandlimitationmaynotapplytoyou.This
warrantygivesyouspecificlegalrights,andyoumayalsohaveotherrightswhichvary
from state to state.
If this product fails within the first 30 days after retail purchase due to a defect in
material or workmanship, return it to your place of purchase for an exchange. From
day 31 to day 365 after retail purchase, contact Clore Automotive Technical Service
at the number below for warranty service. A valid, dated sales receipt is required to
obtain service under this warranty.
Forbestserviceandtoreceiveperiodicproductupdates,followtheinstructionsbelowto
registeryourpurchase:
Pleasevisit:www.cloreregistration.com
Click on the Jump-N-Carry logo
Complete the information in the web form and click “submit”
It’sthateasy!
Foranswerstoquestionsconcerninguse,out-of-warrantyservice,orwarranty/service
informationonthisorotherCloreAutomotiveproducts,contact:
CloreAutomotiveTechnicalService
800.328.2921
913.310.1050
www.cloreautomotive.com
Warning: This product contains chemicals, including lead, known to the State of California to
cause cancer, birth defects and other reproductive harm. Wash hands after handling.
For Warranty or Service
Limited Warranty


Informacion de Seguridad
Precauciones generales para el uso:
• Altrabajarcercadebateríasdeplomo-ácido,siempredebehaberalguiencerca,para
quepuedaoírloyayudarlodesernecesario.
• Tengaamanoabundanteaguafrescayjabón,porsielácidodelabateríaentraen
contactoconlapiel,losojosolaropa.Siempredebeusarprotecciónparalosojosal
trabajarcercadebateríasdeplomo-ácido.
• Sielácidodelabateríaentraencontactoconlapielolaropa,láveladeinmediato
conaguayjabón.Sielácidoentraencontactoconlosojos,enjuáguelosdeinmediato
conabundanteaguafríaporunmínimode10minutosysoliciteatenciónmédicacon
urgencia.
• Tengasumocuidadoenevitarqueunaherramientametálicacaigasobrelabatería.
Podríaproducirchispasoprovocaruncortocircuitoenlabateríauotraspiezas
eléctricasyasíoriginarseunaexplosión.
• Elcargadorutilizaelsuministroeléctricode120voltiosnormaldeunacasaque,sise
lo usa en forma indebida, puede provocar lesiones o incendios.
• Altrabajarconbateríasdeplomo-ácido,quíteselosaccesoriospersonalesdemetal,
talescomoanillos,brazaletes,collaresyrelojes.Lasbateríasdeplomo-ácidopueden
provocar un cortocircuito con corriente capaz de derretir completamente un anillo u
objetosimilaryasíprovocarquemadurasgraves.

Elrendimientodesuunidadarrancadordependerádevariosfactores:
• Esfundamentallograrunaconexiónfirmeeintegralentrelaspinzasdelaunidad
arrancador,ylabateríaylapuestaatierra.Simuevelaspinzashaciaadelantey
haciaatrásalconectarlasalabatería,ayudaráaquetenganmejorcontacto.
• Esmuyimportantequelasconexionesentrelabateríadelvehículooequipo
ylosterminalesesténlimpias.Paraunaconexiónóptima,eliminelacorrosión
(acumulaciónblandadecolorblancogrisáceo)delosterminalesdelabatería.Con
elmotorapagado,desconecteloscablesdelabateríaylimpielosterminalesy
bornesdelabateríaconunasolucióndebicarbonatodesodio.
• Todaslasbateríassevenafectadasporloscambiosdetemperatura,ylabatería
compactaylivianadelaunidadarrancadoresmássensiblealatemperaturade
almacenamientoqueunabateríaestándarparaautomóviles.Elalmacenamiento
idealesatemperaturaambienteo68°F.
Rendimiento y temperatura
• Utilicelaunidadarrancadorparaarrancarsólobateríasdeplomo-ácido.Nolautilice
pararecargarbateríasdeceldassecas,quesuelenusarseenloselectrodomésticos.
Podríanexplotaryprovocarlesionesydañosmateriales.
• NUNCAarranquenirecargueunabateríacongelada.
• Paraevitarlaformacióndeunarcoeléctrico,NUNCApermitaquelaspinzasse
toquenentresíoentrenencontactoconunamismapiezademetal.
• Elusodeaccesoriosnorecomendadosocomercializadosporelfabricantepodría
representarunriesgodedañoalaunidadolesionesalpersonal.
• Siutilizauncargadordeparedouncabledeextensión,aldesconectarlaunidad,tire
del enchufe, nunca del cable.
• Norecarguelaunidadarrancadorconuncabledeextensióndañado.Reemplácelo
inmediatamente.
• Launidadarrancadorpuedeutilizarseencualquiercondiciónclimática:lluvia,nieve,
calorofrío.
• Nolasumerjaenagua.
• Nolaoperecercadeproductosinflamables,comogasolina,etc.
• Silaunidadarrancadorrecibeungolpefuerteosedañadealgunamanera,hagaque
lareviseunprofesionaldeserviciotécnico.Siseproduceunderramedeácidode
labatería,noladespache.Llévelaalestablecimientoderecicladodebateríasmás
próximoasudomicilio.
• Nodesarmelaunidadarrancador.Hagaquelareviseunprofesionaldeservicio
técnico.
• Launidadarrancadornuncadebequedarconlabateríatotalmentedescargada
durantelapsoalguno.Labateríapodríadañarseenformapermanentey,en
consecuencia,funcionarmal.Cuandonolause,recárguelacadatres(3)meses.
• Siempretienda,utilizaycargaelarrancadorenunáreadondeniñosnopuedenllegar
a la unidad.
Nota: Revise la información de este manual de instrucciones y del manual de
instrucciones/seguridad que proporciona el fabricante del vehículo que va a arrancar.
Nota: Para un rendimiento óptimo, no guarde la unidad arrancador a temperaturas
inferiores a los 50° F (10° C) cuando lo utilice como arrancador de emergencia. NUNCA
arranque ni recargue una batería congelada.
1. Uselaunidadenunespaciobienventilado.Protéjaselosojoscongafasolentes
de seguridad.
2. Apagueelmotorytodoslosaccesoriosdelvehículo(luces,radio,calefacción,
etc.) antes de conectar los cables.
Nota: Para un arranque de emergencia satisfactorio, es fundamental contar con
una conexión plena y firme (consulte la sección Rendimiento y temperatura).
3. Con sumo cuidado de que las pinzas nunca se toquen entre sí,quiteprimero
la pinza ROJA POSITIVA (+)desucubiertayconéctelaalterminalROJO
POSITIVO (+)delabatería.LuegoquitelapinzaNEGRA NEGATIVA (–) de su
cubiertayconéctelaalapuestaatierradelmotoroaunapiezametálicadel
motorquenoseamóvil.Paralapuestaatierradelmotor,nuncaconectelapinza
alconductodegasolina,alinyectoroalcarburador.
Nota: Muchos vehículos traen puntos de arranque alternativos, alejados de la
batería. Si el vehículo los tiene, use siempre los puntos de arranque alternativos.
4. Asegúresedequeloscablesnoseenganchenconlaspartesmóvilesdelmotor
(correas,ventiladores,etc.).
5. Manténgasealejadodelasbateríasalarrancardeemergenciaunmotor.
6. Pongaenmarchaelvehículo(enciendaelmotor).
7. Unavezqueenciendaelmotor,desconectelapinzanegativa(–)delaestructura
delvehículoycolóquelaensucubierta.
8. Desconectelapinzapositiva(+)ycolóquelaensucubierta.
9. Despuésdeusarlaspinzas,colóquelassiempreenlascubiertasrespectivas.
Nuncasujetelaspinzasalamanijadelaunidadarrancador.
10.Luegodeusarla,recarguelaunidadarrancador (consultelasecciónRecarga).
Instrucciones para arranques de emergencia

Launidadarrancadorrepresentauna12salidadelpoderdelVoltioescondidadetrás
delalinternadeLED.Quitelalinterna(tomandoelcuidadoparanoperdernidañarlo)
exponerla12salidadelVoltio.Paraprenderlasalida,deprimaelbotónamarillo.Para
girardelasalida,deprimeelbotónamarillo.Esteequipopuedesuministrarpotenciaa
accesoriosdehasta12Amperios.
Silacalificacióndeamperajeseexcede,uncortacircuitosincorporadodeauto-repone
cierraautomáticamenteelpoderlejoshastaqueelaccesorio,olafuentedesobrecarga,
sequite.Despuésqueelusoextremodelpoder,recargalaunidaddurante36-48horas.
Energia de 12 voltios de CD
Mantengapresionadoelbotónrojodeniveldebateríaparaqueaparezcaelestadodela
batería.
Estado de la bateria
1. Elarrancador viene con un corcel del monte de pared.
2. TapelacuerdadelcorcelenlaRecargaJackenlafrentedelaunidad.
3. TapeelcorceldeparedencualquiersalidadeC.A.
4. ElcorrectoLEDprenderámientraselcorcelsetapaenelpoderdeC.A.para
indicar la unidad carga.
5. Nosotrosnorecomendamoscargandolaunidadparamásde24horasbajoeluso
normal.Lostiempossugeridosderecargason:
•Recarguelaunidadpor3horascuandolaunidadseutilizaparaarranca
•Recarguelaunidadpor12-24horasbajocondicionesmuyaltasdedescarga
6. Laprensaytieneelbotónrojoparaverificarlabateríaquecargalaposición.
Cuándolaunidadsecargacompletamente,todoLEDencenderá.
Recarga

Labateríaarrancadorpuedeextraersequitandolostornillosperimetralesdelacubierta
posterior.Desconecteloscablesdelosterminalesdelabatería.Tengapresentela
posicióndelabateríaylaubicacióndeloscables.
Pb
Esta unidad contiene una batería sellada de plomo-ácido
antiderrame. La batería debe reciclarse. Consulte a los
organismos gubernamentales locales o estatales acerca de
las reglamentaciones para un desecho adecuado.
Desecho de bateria
Launidadarrancadorestáequipadaconunalinternaincorporada.Latransportabilidad
delaunidadhaceelarrancadormuyútilentiemposdelaemergencia,larecreaciónyel
usogeneral.Aprietesimplementeelbotónamarilloparaprenderlalinternaolejos.
Linterna
Launidadarrancadorpuedealmacenarseprácticamenteencualquierlugaryen
cualquierposición.Entodocasolerecomendamosquealmaceneelequipoenposición
vertical.Sinembargo,tomeprecaucionesparaasegurarsedequelaspinzaspositivay
negativanoentrenencontactoentresíoconunamismapiezametálica.Serecomienda
almacenarlaunidadarrancadorenlacajaenlaquelarecibióoriginalmente.
Almacenamiento

CloreAutomotivejustificaesteproductoparaserlibrededefectosenlamateriaola
habilidadparaunperíododeunañodelafechadelacompraoriginaldeusuariofinal.
Estagarantíaseextiendeatodaslaspersonasqueadquieranlegalmenteelderecho
depropiedaddentrodelosunoañodelacomprainicial,peroesnulaencasode
queelproductohayasufridoabusos,ohayasidoalterado,ovistosujetoamalusoo
empacadoenformainadecuadaydañadoduranteeltraeyectodedevoluciónluegodela
reparación.
Estagarantíaseaplicaalproductosolamenteynoalosaccesoriosincluídosconel
productoysujetosadesgaste;elreemplazoolareparacióndedichosaccesorioscorre
por cuenta del comprador.
LOSTERMINOSYCONDICIONESDEESTAGARANTIALIMITADADECLORE
AUTOMOTIVECONSTITUYENELREMEDIOUNICOYEXCLUSIVODELCOMPRADOR.
LADURACIONDELASGARANTIASIMPLICITASOMERCANTIBILIDADYADECUACION
DEESTEPRODUCTOPARAUNUSODETERMINADOESTANLIMITADASALA
DURACIONDEESTAGARANTIA.ALCABODELOS1AÑODELAFECHADECOMPRA,
TODOSLOSRIESGOSDEPERDIDAPORCUALQUIERMOTIVOCORRENPORCUENTA
DELCOMPRADOR.
CLOREAUTOMOTIVENOSEHACERESPONSABLEPORLOSDAÑOSINCIDENTALES
OFORTUITOSBAJONINGUNACIRCUNSTANCIA:LARESPONSABILIDADDE
CLOREAUTOMOTIVE,SIALGUNA,NUNCAEXCEDERADELPRECIODECOMPRA
DELAPARATOSINTENERENCUENTASILARESPONSABILIDADSEDEBE
AROMPIMIENTODELCONTRATODEGARANTIA(EXPRESAOIMPLICITA),
NEGLIGENCIA,OCUALQUIEROTRATEORIAJURIDICA.
Algunosestadosnopermitenlimitacionesdegarantíasolimitacionesdedañosen
consecuenciaofortuitos,demodoquelalimitaciónderesponsabilidadespreviapuede
nocorresponderensucaso.Estagarantíaotorgaderechoslegalesespecíficos,ypuede
serquelecorrespondanotrosderechosquevaríandeestadoenestado.
Si este producto falla dentro de los primeros 30 días después que la venta al por
menor compra debido a un defecto en la materia o la habilidad, lo vuelva a su
lugar de la compra para un cambio. Del día 31 al día 365 después de la compra de
la venta al por menor, contactan Clore el Servicio Técnico Automotor en el número
abajo para servicio de garantía. Un válido, fechó recibo de ventas se requiere a
obtener el servicio bajo esta garantía.
Pararespuestasapreguntasconrespectoaluso,serviciofueradelagarantía,o
informaciónsobreservicioygarantíasobreotrosproductosCloreAutomotive,póngase
en contacto con:
CloreAutomotiveTechnicalService
800.328.2921
913.310.1050
www.cloreautomotive.com
Garantia limitada
Servicio técnico o garantia

Informations de sécurité
Précautionsgénéralesd’utilisation:
• Assurez-vousqu’untierssoitàportéedevoixouàproximitépourvousprêter
assistancequandvoustravaillezprèsd’unebatterieauplomb-acide.
• Ayezuneréserved’eaudouceetdesavonàportéedemainaucasoùl’acidede
labatterieentreraitencontactavecvotrepeau,vosvêtementsouvosyeux.Portez
toujoursdeslunettesdeprotectionquandvoustravaillezprèsd’unebatterieauplomb-
acide.
• Sil’acidedelabatterieentreencontactavecvotrepeauouvosvêtements,lavez-
lesimmédiatementàl’eauetausavon.Sil’acidepénètredansvosyeux,rincez-les
immédiatementàl’eaucourantefroidependantaumoins10minutesetconsultez
immédiatementunmédecin.
• Faitestrèsattentionànepaslaissertomberd’outilmétalliquesurunebatterie.Cela
pourraitcréeruneétincelleouentraîneruncourt-circuitdelabatterieoud’unappareil
électrique,cequirisqueraitdeprovoqueruneexplosion.
• Lechargeurfonctionnesousunealimentationélectrique120V,cequi,encasde
mauvaiseutilisation,pourraitoccasionnerdesblessuresoudéclencherunincendie.

• Retireztoutbijououobjetmétallique(bague,bracelet,collieretmontre)quandvous
travaillezprèsd’unebatterieauplomb-acide.Unebatterieauplomb-acidepeut
produireuncourantdecourt-circuitsuffisammentélevépoursouderunebague(ouun
objetsimilaire)àunautremétal,cequipourraitprovoquerdegravesbrûlures.
• Utilisezlesurvolterpourrecharger/survolteruniquementdesbatteriesauplomb-acide.
N’utilisezpasdebatterieàanodesèche,tellesquecellesquisontrégulièrement
utiliséesdanslesappareilsménagers.Eneffet,cesbatteriespourraientexploser,
blessantlespersonnessituéesàproximitéetprovoquantdesdégâtsmatériels.
• N’essayezJAMAISdechargeroudesurvolterunebatteriegelée.
• Pourempêcherl’apparitiond’arcsélectrique,nelaissezJAMAIS les pinces se toucher
ouentrerencontactaveclemêmemorceaudemétal.
• Sivousutilisezunaccessoirecomplémentairequin’estpasconseilléouvenduparle
fabricant,vousrisquezd’endommagerl’appareiloud’êtreblessé.
• Pourutiliserlechargeurmuralouunerallonge,tirezsurlaficheetjamaissurlecordon.
• Nerechargezpaslesurvolterenutilisantunerallongeendommagé(e).Leremplacer
tout de suite.
• Lesurvolterpeutêtreutilisédansn’importequelleconditionclimatique:Pluie,neige,
températurechaudeoufroide.
• Neleplongezpasdansdel’eau.
• Nel’utilisezpasavecdesproduitsinflammables,telsquel’essence.
• Silesurvolterreçoitunchocviolentouqu’ilestendommagé,faites-leinspecterparun
technicienqualifié.Sidel’acidedebatteries’échappedu
survolter,nel’expédiezpas,maisramenez-leaucentrederecyclagedebatteriesle
plus proche de vous.
• Nedémontezpaslesurvolter.Faites-leinspecterparuntechnicienqualifié.
• Nelaissezjamaislesurvolterdéchargépendantunelonguepériode.Vousrisqueriez
eneffetd’endommagerlabatteriedemanièrepermanente.Lorsqu’iln’estpasutilisé,
laissezlesurvolterconnectéauchargeurmuraletrechargez-letouslestroismois.
• Toujourslemagasin,utiliseretchargerlesurvolterunsecteuroùunenfantsne
peuventpasobteniràl’unité.
Laperformancedusurvolteurdépenddeplusieursfacteurs:
• Ilestabsolumentindispensabled’assurerunexcellentcontactentrelespincesdu
survolteur,labatterieetlamiseàterre.Faitesbasculerlespincesd’avantenarrière
quandvouslesreliezàlabatteriepourobtenirunmeilleurcontact.
• Unboncontactentrelabatteriedevotrevéhicule(ouéquipement)etlesbornes
dusurvolteuresttrèsimportant.Pouruncontactoptimal,enleveztoutecorrosion
(dépôtmoublanchâtre)surlesbornesdelabatterie.Coupezlecontact,retirezles
câblesdelabatterieetnettoyezlesbornesdebatterieàl’aided’unesolutionau
bicarbonate de soude.
• Toutebatteriesubitleseffetsdeschangementsdetempérature.Lapetitebatterie
légèredusurvolteurestencoreplussensibleàlatempératured’entreposagequ’une
batteried’autoconventionnelle.Latempératureidéalepourl’entreposageestla
températureambiante,soit68ºF.
Performance et température

Note : Lisez attentivement ce mode d’emploi, ainsi que le mode d’emploi et les
instructions relatives à la sécurité fournis par le fabricant du véhicule que vous aidez à
démarrer.
Note : Pour obtenir des performances optimales, n’entreposez pas le survolter à moins
de 50° F lorsqu’il est utilisé en tant que survolteur. N’essayez jamais de charger ou de
survolter une batterie gelée.
1. Choisissezunendroitbienaéré.Protégez-vouslesyeuxavecdeslunettes
protectrices.
2. Coupezlecontactetéteigneztouslesaccessoiresduvéhicule(éclairage,radio,
chauffage,etc.)avantderelierlescâbles.
Note : Il est essentiel d’assurer un contact propre et net pour réussir le survoltage
(voir la section Performance et température).
3. En prenant soin de ne jamais mettre les pinces en contact,retirezd’abordlapince
ducâblepositif (+) rougedesagaineetreliez-laàlabornepositive (+) rouge de
labatterie.Retirezensuitelapinceducâblenégatif (–) noirdesagaineetreliez-là
aubloc-moteurouàuneautrecomposantemétalliquenonmobiledumoteur.Ne
reliezjamaislescâblesàlacanalisationd’essence,àl’injecteurdecombustibleou
aucarburateuràlaplacedubloc-moteur.
Note : Certains véhicules sont équipés de points de démarrage alternatifs, à
distance de la batterie. Utilisez toujours les points de démarrage alternatifs, le cas
échéant.
4. Vérifiezquelescâblesnesetrouventpassurlatrajectoiredespiècesmobilesdu
moteur(courroies,ventilateur,etc.).
5. Tenez-vousàdistancedesbatteriespendantlesurvoltage.
6. Démarrezlevéhicule.
Note : Si le véhicule ne démarre pas au bout de 6 secondes, laissez le survolter
refroidir pendant 3 minutes avant toute nouvelle tentative de démarrage, sans quoi
vous risquez d’endommager le survolter.
7. Unefoisquelevéhiculeadémarré,déconnectezlapincenégative(–)del’armature
duvéhiculeetrangez-ladanssagaine.
8. Déconnectezlapincepositive(+)etrangez-ladanssagaine.
9. Rangeztoujourslespincesdansleurgaineaprèsutilisation.N’accrochezjamaisles
pincesàlapoignéedusurvolteur.
10.Aprèsutilisation,rechargezlesurvolteur(voirlasectionRechargement du
survolteur).
Instructions relatives au survoltage

Rechargement du survolteur
1. Le survolteursurvoltageestfourniavecunchargeurfixéaumur.
2. BoucherlacordedechargeurdansleRechargeleCricsurledevantdel’unité.
3. Boucherlechargeurdemurdansn’importequellesortiedecourantalternatif.
4. LadroiteLEDallumerapendantquelechargeurestconnectéàl’alimentationpour
indiquerquel’unitécharge.
5. Nousnerecommandonspaschargeantl’unitépourplusde24heuressousl’usage
normal.Suggérérechargerdestempssont:
•Rechargerl’unitépour3heuresquandl’unitéestutiliséepourcommencerdesaut
•Rechargerl’unitépour12-24heuressouslestrèshautesconditionsdedécharge
6. Lapresseettientleboutonrougepourvérifierlapilechargelestatut.Quandl’unité
estentièrementchargée,toutLEDallumera.
Maintenezlerougeboutond’étatdelabatterieenfoncépourafficherlerésultat.
État de la batterie
Lesurvoltageprésenteune12sortiedepouvoirdeVoltcachéederrièrelalampe
depocheLED.Enleverlalampedepoche(faisantattentionpournepaségarerou
endommageril)exposerla12sortiedeVolt.Pourallumerlasortie,déprimerlebouton
jaune.Pouréteindrelasortie,déprimerleboutonjaune.Peutalimenterdesaccessoires
d’unetensionnedépassantpas12ampères.
Sileclassementd’intensitédecourantestdépassé,undisjoncteurd’autoremetàl’état
initialincorporééteintautomatiquementlepouvoirjusqu’àcequel’accessoire,oula
sourcedesurcharge,estenlevé.Aprèsl’usageextrêmedepouvoir,rechargerl’unité
pour36-48heures.
Alimentation c.c. 12 V
Quand le Chargeur Est Branché surToujours Sur
Cuándo Corcel se ConectaSiempre En
When Charger is Plugged In*
3 lights . .........Good
2 lights . .........Medium
1 light ...........Low
Flashing .........Recharge Unit
Always On
*Please note this light indicates the charger is working.
LED Display - Press and hold red button
4 lights when plugged in... Charging complete
Always On When Charger is Plugged In
wenn Auflader angeschlossen ist*
3 Lichter. .........Gut
2 Lichter. .........Mitte
1 Licht ...........Tiefpunkt
Aufleuchten .......Laden Sie auf
Immer auf,
*Bitte merken Sie dieses Licht anzeigt, dass der Auflader arbeitet.
LED Ausstellung - Presse und hŠlt roten Knopf
4 Lichter .........Laden vollständig
Immer auf, wenn Auflader angeschlossen ist
Cuándo Corcel se Conecta*
3 luces . .........Bueno
2 luces . .........Medio
1 luz ............Bajo
Destellar .........Recargue la Unidad
Siempre En
*Note por favor que esta luz indica el corcel trabaja.
Despliegue LED - La prensa y tiene el bot—n rojo
4 luces .. ........Cargar completo
Quand le Chargeur Est Branché sur*
3 lumières........Bon
2 lumières........Milieu
1 lumière.........Niveau bas
Flashing .........Recharger l'Unité
Toujours Sur
*S'il vous plaît noter cette lumière indique que le chargeur travaille.
Exposition LED - La presse et tient le bouton rouge
4 lumières........Charger complet
Quando il Caricatore è Inserito InSempre Su
Quando il Caricatore è Inserito In*
3 luci ........ Buono
2 luci ........ Mezzo
1 luce ....... Basso
Lampeggiare. .
.
.
.
.
.
.
.
. Ricaricare l'Unità
Sempre Su
*Per favore di notare questa luce indica il caricatore lavora.
La Mostra LED - la stampa e tiene il bottone rosso
4 luci ........L'addebitamento completo
.
.
.
.

Lesurvolteursurvoltageestpourvud’unéclairageintégréLED.Laportabilitédel’unité
faitlesurvolteursurvoltageextrêmementutiledanslestempsd’urgence,larécréationet
l’usagegénéral.Simplementappuyerleboutonjaunepourallumerlalumièreoude.
Éclairage
Pourretirerlabatteriedusurvolteur,enlevezlesvispérimétriquesdupanneauarrière.
Débranchezlesfilsdesbornesdelabatterie.Remarquezlapositiondelabatterieet
l’emplacementdesfils.
Pb
Cet appareil contient une batterie au plomb-acide à bac hermétique étanche.
Cette batterie doit être recyclée.Demandezconseilauprèsdel’administration
localeounationalepourconnaîtrelesrèglementsenmatièred’élimination.
Élimination de la batterie
Lesurvolteurpeutêtreentreposéquasimentn’importeoùetdansn’importequelsens.
Toutefois,nousrecommandonsderangerl’unitéàlaverticale.Cependant,prenezgarde
àcequelespincesdescâblespositifsetnégatifsn’entrentjamaisencontactl’uneavec
l’autreouavecunesurfacemétalliquequelconque.Ilestrecommandéderangerle
survolteurdanssonboîtierd’origine.
Entreposage

CloreAutomotivemériteceproduitpourêtrelibredesdéfautsdanslematérieloude
l’exécutionpourunepérioded’uneannéedeladated’achatd’utilisateurfinaloriginal.
Laprésentegaranties’appliqueàtoutepersonneayantfaitl’acquisitionduproduitdans
lesunansuivantladated’achataudétailinitial,maiselleestnulleetnonavenuesile
produitaététraitédefaçonabusive,modifié,malutiliséoumalemballéetendommagé
lorsdesonretouràl’atelierderéparation.
Laprésentegaranties’appliqueuniquementauproduitetnonauxaccessoiresqui
s’usentàl’usage,inclusavecleproduit;leremplacementoularéparationdecespièces
seraàlachargedupropriétaire.
LESTERMESDELAGARANTIELIMITÉECLOREAUTOMOTIVECONSTITUENTLE
RECOURSUNIQUEETEXCLUSIFDEL’ACHETEUR.LESGARANTIESIMPLICITESDE
QUALITÉMARCHANDEETD’ADAPTATIONÀUNUSAGEPARTICULIERSONTLIMITÉES
ÀLADURÉEDELAPRÉSENTEGARANTIEEXPRESSE.APRÈSUNANÀCOMPTERDE
LADATED’ACHAT,TOUTRISQUEDEPERTEPOURQUELQUERAISONQUECESOIT
SERAÀLACHARGEDEL’ACHETEUR.
ENAUCUNCASCLOREAUTOMOTIVENEPOURRAÊTRETENUERESPONSABLEDE
DOMMAGESACCESSOIRESETCONSÉQUENTS.LARESPONSABILITÉDECLORE
AUTOMOTIVENEDEVRAJAMAISEXCÉDERLEPRIXD’ACHATDECETTEMACHINE,
QUELADITERESPONSABILITÉDÉCOULED’UNERUPTUREDEGARANTIE(EXPRESSE
OUIMPLICITE),DENÉGLIGENCE,D’ACTEDOMMAGEABLEOUDETOUTEAUTRE
RAISON.
Certainesprovincesn’autorisantpaslarestrictiondesgarantiesoularestrictiondes
dommagesaccessoiresouconséquents,leprésentdénideresponsabilitéetlaprésente
restrictionnes’appliquentpasàtouslescas.Cettegarantievousdonnedesdroits
spécifiques,etvouspouvezavoird’autresdroitsquivarientd’uneprovinceàl’autre.
Siceproduitéchouedanslepremier30joursaprèsl’achatdedétailenraison
d’undéfautdanslematérieloudansl’exécution,leretournervotreplacerd’achat
pourunéchange.Dujour31aujour365aprèsl’achatdedétail,contacterClorele
Service Technique Automoteur au nombre au dessous pour le service de garantie.
Une ventes valide et démodé que le reçu est exigé obtenir le service sous cette
garantie.
Pourtoutequestionconcernantl’utilisation,leservicehorsgarantieouleservicesous
garantied’autresproduitsCloreAutomotive,contacter:
CloreAutomotiveTechnicalService
800.328.2921
913.310.1050
www.cloreautomotive.com
Garantie limitée du survolteur
Service de garantie

©2015CloreAutomotive 842-404-002B
JNC300XL
Portable Jump Starter
with 12 Volt Power and LED Flashlight
Other manuals for JNC300XL
1
Table of contents
Languages:
Other Jump n Carry Remote Starter manuals

Jump n Carry
Jump n Carry JNC318 User manual

Jump n Carry
Jump n Carry JNC Air User manual

Jump n Carry
Jump n Carry JNC345 User manual

Jump n Carry
Jump n Carry JNC660 User manual

Jump n Carry
Jump n Carry 300 User manual

Jump n Carry
Jump n Carry JNC311 User manual

Jump n Carry
Jump n Carry JNC300XL User manual

Jump n Carry
Jump n Carry 410122 User manual

Jump n Carry
Jump n Carry JNC1224 Installation and operating manual

Jump n Carry
Jump n Carry JNC770R User manual