Just Flight Standard VC10 User manual

OPERATIONS MANUAL

The Spirit of Flight Simulation
Available to buy online at www.justflight.com
www.justflight.com

VC10 Professional – Operations Manual
3
Operations Manual
Please note that Prepar3D or Flight Simulator X must be correctly installed on your
PC prior to the installation and use of this VC10 Professional simulation.
CONTENTS
INTRODUCTION .........................................................................................................6
Aircraft overview .....................................................................................................7
Aircraft specifications .............................................................................................8
Aircraft in this simulation ........................................................................................8
INSTALLATION, UPDATES AND SUPPORT ...........................................................10
PANEL GUIDE...........................................................................................................12
Moving around the cockpit...................................................................................14
Front panel – Captain ...........................................................................................15
Front panel – centre..............................................................................................16
Front panel – Co-pilot........................................................................................... 17
Overhead panel ....................................................................................................18
Centre pedestal ....................................................................................................24
Autopilot and autothrottle system ..................................................................27
Flight Engineer’s station .......................................................................................29
Flight Engineer’s station – jettison panel..............................................................30
Flight Engineer’s station – fuel panel.................................................................... 31
Fuel system .....................................................................................................32
Flight Engineer’s station – engine panel...............................................................34

VC10 Professional – Operations Manual
4
Flight Engineer’s station – powered flying control units.......................................35
Flight Engineer’s station – upper electrical panel.................................................36
Flight Engineer’s station – lower electrical panel .................................................37
Flight Engineer’s station – anti-ice panel.............................................................. 38
Flight Engineer’s station – hydraulic/pressurisation panel ...................................39
Flight Engineer’s station – upper air conditioning panel ......................................40
Flight Engineer’s station – lower air conditioning panel....................................... 41
Flight Engineer’s station – engine start panel ......................................................42
Flight Engineer’s station – rear bulkhead panel ...................................................43
Flight Engineer’s station – rear roof panel............................................................45
Navigator’s station – left panel .............................................................................46
Navigator’s station – right panel........................................................................... 47
INERTIAL NAVIGATION SYSTEM............................................................................48
Mode Selector Unit...............................................................................................48
Control Display Unit..............................................................................................50
Operating the INS................................................................................................. 52
DOORS AND EXITS..................................................................................................54
GROUND EQUIPMENT ............................................................................................56
MENU BAR OPTIONS ..............................................................................................57
FLYING THE VC10....................................................................................................58
Pre-flight ...............................................................................................................59
Starting the engines..............................................................................................64
Taxi........................................................................................................................ 68
Take-off ................................................................................................................. 69
Climb.....................................................................................................................71
Cruise....................................................................................................................72
Descent.................................................................................................................73
Approach and landing ..........................................................................................73
INS TUTORIAL..........................................................................................................76
Pre-flight ...............................................................................................................77
In flight ..................................................................................................................81
Entering new waypoints .......................................................................................82
Landfall and updating the INS..............................................................................83
Descent and landing.............................................................................................83

VC10 Professional – Operations Manual
5
CHECKLISTS ............................................................................................................84
PERFORMANCE.......................................................................................................88
VC10 STORIES, INCIDENTS AND ANECDOTES ...................................................91
CREDITS ...................................................................................................................94
COPYRIGHT..............................................................................................................94

VC10 Professional – Operations Manual
6
INTRODUCTION
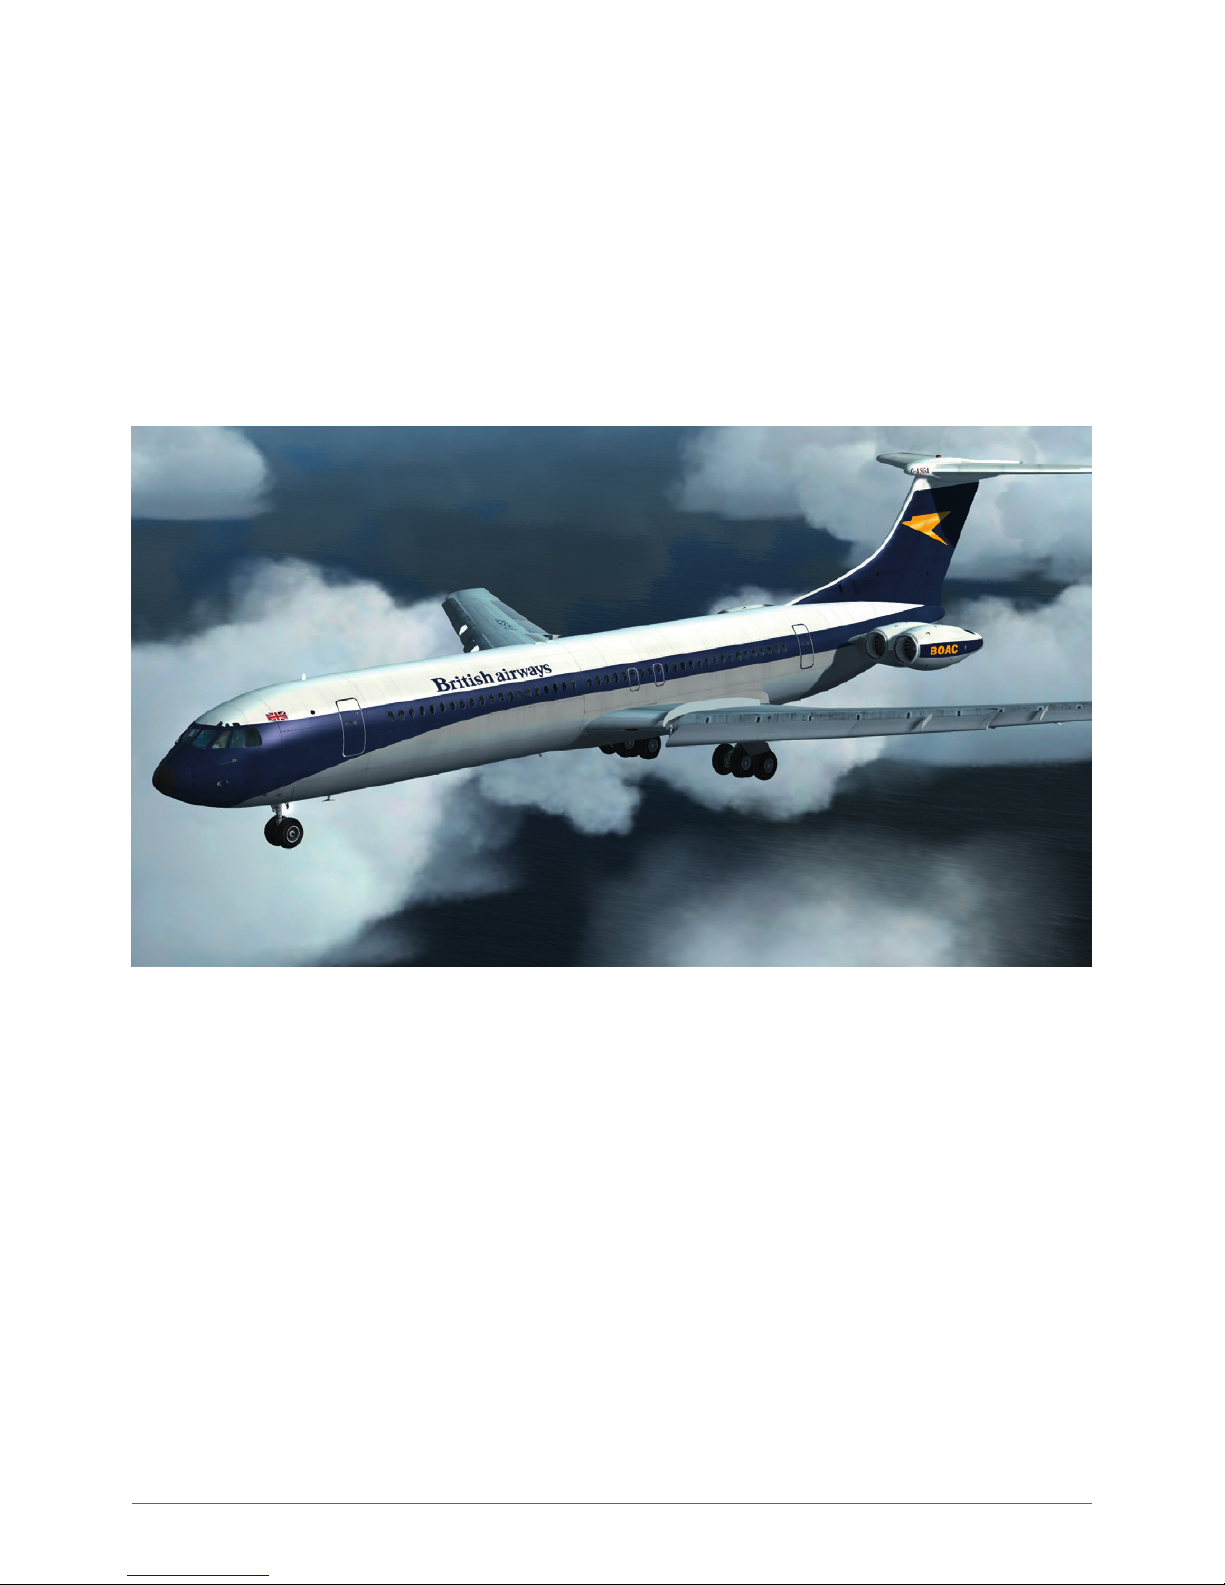
The Standard VC10, along with its larger sister the Super VC10, can rightly be described as a true icon of the
60s. She was cooler than James Bond riding a tiger, faster than her competitors and supremely comfortable
for the jet-setter lifestyle. For all her glamour, though, the VC10 owes her design to the early 1950s and the
developing Cold War. Vickers had launched the Valiant bomber and its swept-wing design and speed proved to
be the basis of a new passenger aircraft. BOAC had seen a sketch of the Valiant in civilian form, which proved
interesting enough for the company to push ahead with a new jet. Designated the V-1000, she was to carry 120
passengers over 2,100 nautical miles. New Conway engines from Rolls-Royce helped increase the range and,
with significant belief in the project, Vickers presented it to BOAC as the VC7.
The V-1000 was put into production, with a prototype planned, but weight was a major problem. Vickers planned
to solve this by getting Rolls-Royce to produce even more powerful Conway engines and by redesigning the
aircraft’s structures to save weight. The Ministry of Supply disagreed, however, and in 1955 the V-1000 was
cancelled. At the same time, across the Atlantic, both Douglas and Boeing were readying their own aircraft for
the jet era – the Douglas DC-8 and Boeing’s 707. With Vickers out of the way, and with BOAC being somewhat
lukewarm about the VC7, the Government allowed BOAC to purchase 15 Boeing 707 aircraft, with a caveat that
no more money be spent on the American-made aircraft. Fearing it had made a mistake, the Government tried to
backtrack on its decision to scrap the V-1000 and with it the VC7. The damage, though, was already done.
In another twist of fate, a year later BOAC sent out a brief for a new high-performance, long-range airliner that
would be suitable for the airline’s ‘hot and heavy’ routes in Africa and Asia. In 1958, after beating off a challenge
from de Havilland, Vickers won the contract to produce 35 aircraft, with an option on a further 20. Suddenly the
old VC7 was back in play, although it was quickly discarded. The VC10 was to be an entirely new design, and
from the outset its design brief was challenging. It had to be able to operate from short runways where the 707
and DC-8 feared to tread; it had to cope with high temperatures and even higher airport altitudes. To meet all
three challenges would require some original thinking and so the iconic VC10 shape was born.
By moving the engines rearward, engineers were able to furnish the VC10 with bigger flaps and larger control
surfaces. The four powerful Rolls-Royce Conway engines allowed a much greater payload to be carried,
especially when leaving a short runway. Neither of the American offerings could compete with the VC10 in this
respect. The clean wing and rear-mounted engines also allowed the VC10 to fly farther and for longer. The swept-
back wing also made her fast. Even today the VC10 still holds the record for the fastest subsonic transatlantic
crossing, from JFK to Prestwick in just five hours and one minute. Passengers loved the aircraft too. The rear-
mounted engines meant that cabin noise was much lower than in its competitors’ aircraft. Even BOAC began to
promote the VC10 for its passengers.
By the early 1970s the VC10 and Super VC10 were starting to leave the BOAC fleet. The energy crisis of 1974
did little to help and the aircraft was removed from the transatlantic route. Airports had also been lengthening
runways to allow for DC-8 and 707 operations, taking away the advantage the VC10 had been built to exploit.
The VC10’s last commercial flight for British Airways, BOAC’s successor, took place in 1981. The aircraft had
barely been in service for 15 years before its retirement and there’s a case to be made that if BOAC’s demand
brief had not been so demanding, the VC10 could have sold better. But this is not the end of the VC10 story.
Alongside BOAC during the 1960s, the RAF had a tender out for a strategic transport aircraft, designated
Specification 239. The VC10 largely fitted the bill, although not without a few changes. The VC10 C Mk1 differed
from a standard VC10 in that she had the more powerful engines and the fin tip fuel tanks of the Super VC10.
The first aircraft was delivered in 1965 for testing and deliveries began in 1966 to No. 10 Squadron. Besides
operating as a strategic transport, the VC10 C1 also worked as a MEDEVAC aircraft and as a VIP transport,
carrying prime ministers and even the Queen. Margaret Thatcher insisted on using the VC10 while she was in
power.
By 1977, as the VC10s began to leave commercial service, the RAF launched studies into converting VC10s
into tanker aircraft and five VC10s and four Super VC10s were converted to K2 and K3 tankers. The last of the
BA Super VC10s were bought in mid-1981 and were stored and used for parts for the existing fleet. The VC10
continued in RAF service until 2013, when the final VC10 flew into Bruntingthorpe airfield for preservation, having
seen everything from the Falklands War to the invasion of Iraq.
We hope you enjoy flying this new Professional edition of the VC10, Super VC10 and the RAF C1K, K3 and K4
variants.

VC10 Professional – Operations Manual
7
Aircraft overview
The VC10 and Super VC10 are both low-wing monoplanes with a pressurised fuselage. Each has a typical
landing gear set-up consisting of a nose-wheel and two under-wing double bogey sets. The wings are swept
back approximately 35 degrees and are described as a ‘clean wing’. Slats on the leading edge improve handling
at low speeds. On top of the wing sit a set of spoilers, while the flaps sit on the trailing edge. Those looking for
the engines in the traditional location will instead find them attached to the tail. For the Super VC10, the wing
chord was extended to allow for the increase in size and weight of the extended fuselage.
Both variants welcome passengers on board via the front or the rear doorway on the left-hand side of the aircraft,
with the opposite doors used for ground crew entry. The Super VC10 also has two over-wing emergency exits,
compared with just the single exit of her little sister.
Up front, the flight deck is spacious by modern standards, with room for a crew of four plus an observer if
required. The crew typically consists of a Captain, Co-pilot, Flight Engineer and a Navigator. A typical VC10
configuration with a first class cabin could accommodate 109 passengers, while the Super VC10 could hold up
to 174.
The four engines are fitted to the tail and provide both the VC10 and Super VC10 with its iconic ‘T-tail’ look.
Rolls-Royce built the Conway 540 engines, a common engine of the time which was used on Boeing’s 707 and
the Douglas DC-8. The VC10 was the last aircraft to make use of the Conway, with the RCo.43 variation used
exclusively for the Super VC10. The RCo.43 offered a modest increase in power, producing 21,800 pounds of
thrust as compared to the Standard VC10’s 20,370 pounds of thrust from the RCo.42. To start either engine, an
external air source is required to turn the HP compressor. If no external source is available, a single engine can
be kept running, providing bleed air to start the remaining three.
In the cockpit, throttle levers are fitted to the Pilot and Engineer stations and reverse thrust is fitted to the
outboard engines on each side (No.1 and No.4).
The fuel system differs between the Standard and Super VC10. Both aircraft have two main tanks per wing
alongside a centre tank. Two additional vent tanks are fitted in the wing tips. The Super has an additional tank
fitted inside the tail fin. In operation, the aircraft uses the outer wings for fuel with the centre tank used to
maintain the aircraft’s Centre of Gravity (CoG). This means that despite the aircraft having up to seven tanks, only
the two inner sets of wing tanks are used to supply the engines. If the crew need to dump fuel, it is expelled
from the rear of tanks 1A and 4A, located in the wings.
AC power (200-volt, 3-phase) is generated by four generators, one fitted to each engine. Under normal
conditions generators 1 and 3 operate in parallel (system A) and generators 2 and 4 also operate in parallel
(system B), providing two independent AC systems. The systems can be interconnected in the event of a failure.
Two independent 28-volt DC systems, each with a 24-volt battery, are supplied by two TRUs.
Two hydraulic systems (A and B) are powered by four engine-driven pumps (EDPs), system A by EDPs 1/2 and
system B by EDPs 3/4. The systems are independent but can be interconnected. The hydraulic systems operate
the landing gear, flaps, slats, spoilers/speedbrakes, tailplane trim, wheel-brakes and nose-wheel steering.
The control surfaces are power-operated:
• Longitudinal control is by four electro-hydraulically powered elevators and a hydraulically powered
variable-incidence tailplane.
• Lateral control is by four electro-hydraulically powered ailerons supplemented by six hydraulically
operated spoilers.
• Directional control is by three electro-hydraulically powered rudders and the aileron/spoiler combination.
The spoiler sections normally operate differentially with ailerons but operate together when used as
speedbrakes.
Hydraulically operated, electrically controlled Fowler-type flaps are fitted, comprised of five sections per side.
They normally operate together with the leading-edge slats but can be operated independently.
The aircraft is fitted with hydraulically operated tricycle landing gear; the four main-wheel bogies retract inwards
and the twin-wheel steerable nose landing gear retracts forward. When retracted, the landing gear is totally
enclosed by doors.
Hydraulically operated brakes, operated by toe pedals, are fitted. The normal system operates via anti-skid units
which are isolated when the standby system is in use.

VC10 Professional – Operations Manual
8
Aircraft specifications
Standard VC10 Super VC10
(Type 1101) (Type 1151)
Dimensions
Length 48.36m (158ft 8in) 52.32m (171ft 8in)
Wingspan 44.55m (146ft 2in) 44.55m (146ft 2in)
Height 12.04m (39ft 6in) 12.04m (39ft 6in)
Wing Area 264.8m² (2,851sq ft) 272.4m² (2,932sq ft)
Engines
Type 4 x Rolls-Royce Conway 540 4 x Rolls-Royce Conway 550
axial-flow bypass turbofan axial-flow bypass turbofan
Power 21,000 lb/f (933.4kN) 22,500 lb/f (100.1kN)
Weights
Empty Weight 146,980lb (66,670 kg) 156,828lb (71,137 kg)
Maximum Take-Off Weight 312,000lb (141,523 kg) 335,000lb (151,953 kg)
Maximum Landing Weight 216,000lb (97,978 kg) 237,000lb (107,503 kg)
Performance
Max. Speed (MMO) Mach 0.86 Mach 0.86
Max. Cruising Speed 502kts (930 km/h) at 25,000ft 505kts (935 km/h) at 31,000ft
Service Ceiling 38,000ft (11,582 m) 38,000ft (11,582 m)
Range 4,380 NM (8,112 km) 4,100 NM (7,600 km)
Rate of Climb 1,920ft (525m)/min 2,300ft (700m)/min
Aircraft in this simulation
Standard VC10
• British Airways G-ARVM (circa 1976)
• British Airways G-ARVM (red tail)
• BOAC G-ARVF (circa 1964)
• BOAC G-ARVC (circa 1966)
• BOAC G-ARVC (circa 1974)
• Gulf Air A40-VI
• Gulf Air A40-VK
• Just Flight house livery
• Nigeria Airways 5N-ABD
• Government of the United Arab Emirates G-ARVF

VC10 Professional – Operations Manual
9
Super VC10
• BOAC
• BOAC Cunard
• BOAC Golden
• British Airways
• British Airways (BOAC scheme)
• Vickers Prototype
• East African Airways
VC10 C1K
• Royal Air Force, 101 Sqn, Modern Grey
• Royal Air Force, 101 Sqn, White/Grey
• Royal Air Force, 101 Sqn, 40 Years of VC10
• Royal Air Force, 101 Sqn, 90th Anniversary
• Royal Air Force, 101 Sqn, 95th Anniversary
• Royal Air Force, 101 Sqn, Camouflage
• Royal Air Force, 101 Sqn, Gulf War, ‘The Empire Strikes Back’
VC10 K3
• Royal Air Force, 101 Sqn, Modern Grey
• Royal Air Force, 101 Sqn, Hemp
VC10 K4
• Royal Air Force, 101 Sqn, Modern Grey
• Royal Air Force, 101 Sqn, Hemp

VC10 Professional – Operations Manual
10
INSTALLATION, UPDATES AND SUPPORT
You can install this VC10 Professional software as often as you like on the same computer system:
1. Click on the ‘Account’ tab on the Just Flight website.
2. Log in to your account.
3. Select the ‘Your Orders’ button.
4. A list of your purchases will appear and you can then download the software you require.
Accessing the aircraft
To access the aircraft in Prepar3D:
1. ‘Select Aircraft’ > ‘Select Aircraft’ from the menu bar.
2. Select the ‘Publisher’ filter mode and then select ‘Just Flight’ from the list of publishers.
3. Choose one of the schemes and click on ‘OK’.
To access the aircraft in Prepar3D v2 or later:
1. Click on ‘Vehicles’ in the menu bar.
2. Type ‘Vickers’ into the search bar, or select ‘Group by Publisher’ and scroll down the list to locate ‘Just
Flight’.
3. Choose one of the schemes and click on ‘OK’.
To access the aircraft in FSX:
1. Click on ‘Free Flight’.
2. Select ‘Just Flight’ from the ‘Publisher’ drop-down menu.
3. Select ‘Vickers’ from the Manufacturer drop-down and choose one of the schemes.
Tick the ‘Show all variations’ box to see all the available paint schemes.
Uninstalling
To uninstall this product from your system, select the appropriate option for your version of Windows from the
‘Control Panel’:
• ‘Add or Remove Programs’ (Windows XP)
• ‘Programs and Features’ (Windows Vista or 7)
• ‘Apps & features’ (Windows 10 or later)
Select the product you want to uninstall and then select the ‘Uninstall’ option, following the on-screen
instructions to uninstall the product.
Uninstalling or deleting this product in any other way may cause problems when using this product in the future
or with your Windows set-up.

VC10 Professional – Operations Manual
11
Updates and Technical Support
For technical support (in English) please visit the Support pages on the Just Flight website.
As a Just Flight customer you can obtain free technical support for any Just Flight or Just Trains product.
If an update becomes available for this aircraft, we will post details on the Support page and we will also send a
notification email about the update to all buyers who are currently subscribed to our Newsletter and emails.
Regular News
To get all the latest news about Just Flight products, special offers and projects in development, sign up for our
Newsletter and regular emails.
We can assure you that none of your details will ever be sold or passed on to any third party and you can, of
course, unsubscribe from this service at any time.
You can also keep up to date with Just Flight via Facebook and Twitter.

VC10 Professional – Operations Manual
12
PANEL GUIDE
Both the Standard and Super VC10 are classic jetliners so the cockpit can be a bewildering place for anyone
used to a modern Airbus or Boeing. To help you better understand how to navigate the plethora of switches,
dials and knobs, we’ve broken the cockpit down into five main areas:
1. Front panel – this area contains the Captain’s, Co-pilot’s and centre panel
2. Overhead panel

VC10 Professional – Operations Manual
13
3. Centre pedestal
4. Flight Engineer’s panel, divided into sub-panels

VC10 Professional – Operations Manual
14
5. Navigator’s station
Over the next few pages we’ll guide you through the 1960s technology that powers the VC10 family.
Moving around the cockpit
To help you navigate around the VC10’s cockpit, we have added several views that will take you directly to the
panel you’re looking for. These are accessible via a right mouse button click.
To move around the cockpit, you can use the hat switch on your joystick, hold down the [Space] bar on your
keyboard while moving your mouse and also use your keyboard keys.
Virtual Cockpit views
Press the [A] key to cycle through the various preset views and the [+] and [-] keys to zoom in and out. Pressing
the [Backspace] key will reset the zoom level to the default setting.
You can also alter your viewpoint using these keys:
[Ctrl]+[Shift]+[Backspace] Left
[Ctrl]+[Shift]+[Enter] (Return key) Right
[Ctrl]+[Backspace] Forward
[Ctrl]+[Enter] (Return key) Back
[Shift]+[Backspace] Down
[Shift]+[Enter] (Return key) Up

VC10 Professional – Operations Manual15
Front panel – Captain
1. LOC/VOR change-over switch – toggles VOR
indicator between NAV 1 and NAV 2
2. ADF change-over switch – toggles ADF indicator
between ADF 1 and ADF 2
3. Normal I/G test switch
4. Hot-rod ice detector switch and Captain’s oxygen
flow magnetic indicator
5. Clock
6. Mach meter
7. SELCAL lights
8. Stall protection system operating and failed
warning lights – extinguished via the stall ident
switch on the overhead panel
9. Airspeed indicator (ASI)
10. VOR indicator – displays the bearing to the VOR
tuned into either NAV 1 or NAV 2, depending on
the position of the LOC/VOR change-over switch
11. Vertical speed indicator (VSI)
12. Autothrottle warning light – illuminates when the
autothrottle is armed or engaged
13. Horizon director indicator (HDI)
14. Course deviation indicator (CDI) – a course
knob allows you to change the OBS value and
a heading knob allows you to move the heading
bug. The currently selected course is shown in
the centre of the gauge, along with course and
glideslope deviation needles.
15. Turn and slip indicator
16. Altimeter
17. True airspeed indicator
18. ADF indicator – displays the bearing to the NDB
tuned into either ADF 1 or ADF 2, depending on
the position of the ADF change-over switch
19. Normal brake pressure gauge – indicator lights
below gauge indicate when left/right brakes are
in use
20. Wheel brakes auxiliary pump switch
21. Standby brake pressure gauge
22. Marker beacon indicator lights
23. Elapsed time clock
24. Generator bus fail lights – illuminate when power
is lost on the associated generator busbar
25. Yaw damper indicators
26. Horizon comparator and compass comparator
warning light
Weather radar
With the increasing number of third-party radar
add-ons available, we have added a placeholder
gauge tile in the centre screen of the weather radar
(WXR) unit. The panel CFG file has an entry for a
radar gauge to allow you to install a third-party radar
gauge into this virtual cockpit.
A third-party radar add-on will usually be supplied
with an entry for the panel CFG. We have provided
a placeholder entry which can be replaced with the
entry supplied with the add-on.
This is how the entry currently looks in the CFG:
//--------------------------------------------------------
[Vcockpit11]
Background_color=0,0,0
size_mm=1024,1024
visible=1
pixel_size=1024,1024
texture=$AH_WXSCREEN
gauge00=vc10_WRxradar!wrxradar, 123,84,769,769
//--------------------------------------------------------
Note: The gauge we have listed and provided in the
folder is just a placeholder weather map.
Please note the texture file name $AH_WXSCREEN.
This is the gauge surface you will use to ‘mount’ your
new gauge.
So, the entry should be edited to:
Gauge00=Source for new gauge!
Newgaugename,xposition,y position,size,size
You should now see your gauge displayed in the
virtual cockpit radar unit. Adjustment will be required
to get the correct size, orientation and so on,
depending on the type of gauge you are using.
Cockpit windows
The cockpit side windows (Captain and Co-pilot) can
be opened using the black handle.
Right-click on the handle to unlock the window and
right-click again to slide it open. The window opens
in two stages. Left-click to close the window and
lock it.

VC10 Professional – Operations Manual16
Front panel – centre
1. No.1 autopilot indicator lights (top to bottom):
- Glideslope engaged – illuminates when glideslope capture has occurred
- Glideslope armed – illuminates when glideslope capture is armed
- Autopilot failure – illuminates when the autopilot has disengaged
2. No.1 autopilot three-axis trim indicator – displays the rudder, aileron and elevator trim positions
3. Flight steering computer mode switch
4. IFF warning light
5. Compass change-over switch – true or magnetic heading
6. Standby altimeter
7. Standby artificial horizon
8. Ice detector light
9. Outside air temperature gauge
10. Warning lights – amber alert light
11. Engine fire warning and fire suppression handles – right-click for bottle 1 and left-click for bottle 2
12. High pressure RPM indicators
13. Red engine failure lights and amber engine reverser lights (engine 1 and engine 4 only)
14. Auto-trim error lights
15. Slat position indicator (port side)
16. Flap position indicators (port side)
17. Flap position indicators (starboard side)
18. Slat position indicator (starboard side)
19. Tailplane indicator gauge (elevator trim) – the white indicates the normal trim range used during take-off
20. Feel failure warning lights (top two) and power controls failure lights
21. DME read-out – displays the distance to the VOR DME tuned into either NAV 1 or NAV 2, depending on the
position of the LOC/VOR change-over switch
22. G-meter
23. G-meter reset switch
24. Aileron upset switches and indicators
25. Aileron trim indicator
26. True outside air temperature gauge
27. Undercarriage standby raise selector switch
28. Undercarriage selector lever
29. Undercarriage door warning lights – illuminate when gear is in transit
30. Undercarriage position indicator
31. Warning lights
32. No.2 autopilot three-axis trim indicator
33. No.2 autopilot indicator lights (top to bottom):
- Glideslope engaged
- Glideslope armed
- Autopilot failure
34. INS 1 CDU

VC10 Professional – Operations Manual17
Front panel – Co-pilot
1. Cabin altitude gauge
2. ADF indicator – displays the bearing to the NDB tuned into either ADF 1 or ADF 2, depending on the position
of the ADF change-over switch
3. Mach meter
4. Stall protection system operating and failed warning lights – extinguished via the stall ident switch on the
overhead panel
5. Airspeed indicator (ASI)
6. VOR indicator – displays the bearing to the VOR tuned into either NAV 1 or NAV 2, depending on the position
of the LOC/VOR change-over switch
7. VOR/ILS magnetic indicator
8. LOC/VOR change-over switch – toggles VOR indicator between NAV 1 and NAV 2
9. Autothrottle warning light
10. Horizon director indicator (HDI)
11. Course deviation indicator (CDI)
12. Turn and slip indicator
13. Horizon comparator and compass comparator warning light
14. Altimeter
15. Vertical speed indicator (VSI)
16. Marker beacon indicator lights
17. Clock
18. Stall protection system nitrogen HP gauge
19. SELCAL lights
20. Co-pilot’s oxygen flow magnetic indicator

VC10 Professional – Operations Manual
18
Overhead panel
Compared to the modern day overhead, the VC10’s layout is sparse and somewhat confusing. We’ve split the
overhead into six sections here to help you get a better feel for the panel.
1. Roof lights switch – used for controlling cockpit lighting
2. Instrument panel floodlights switch
3. Flight deck lights switch – used for controlling cockpit lighting
4. Captain’s chart light knob
5. Red dome light knob
6. Hydraulic system A change-over switch
7. Captain’s panel lights knob
8. Centre panel red light knob
9. Instrument panel white light knob

VC10 Professional – Operations Manual
19
1. Left wing lamp switch – switches on the left wing landing or taxi
light
2. Nose lamp switch – switches on the nose landing or taxi light
3. Right wing lamp switch – switches on the right wing landing or taxi
light
4. Left wing lamp extension switch – extends/retracts left wing lamp
5. Nose lamp extension switch – extends/retracts nose lamp
6. Right wing lamp extension switch – extends/retracts right wing lamp
7. Left turn-off light – switches on the left turn-off light
8. Right turn-off light – switches on the right turn-off light

VC10 Professional – Operations Manual
20
1. Centre windscreen wiper control – left-click to slow/park the wipers
and right-click to increase the speed of the wipers
2. Captain’s windscreen wiper control – left-click to slow/park the
wipers and right-click to increase the speed of the wipers
3. Stall identification switch – switch to either No.1 or No.2 to turn off
the warning light on the front centre panel
4. Stall warning No.1/No.2 switch
5. Auto-ignition test switch and safety switch
6. Nitrogen LP gauge valve A and valve B lights, nitrogen LP warning
light and system fail light (non-functional in this simulation)
7. Control surfaces indicator panel – indicates the control surface
deflection as well as the trim position
8. Co-pilot HDI dimmer switch
9. Red dome light
10. Co-pilot’s windscreen wiper control – left-click to slow/park the
wipers and right-click to increase the speed of the wipers
Table of contents
Popular Aircraft manuals by other brands

HPH
HPH Glasflugel 304S Flight manual

Textron
Textron Cessna Grand Caravan Ex 208B Pilot's operating handbook and faa approved airplane flight manual

Ocean Rodeo
Ocean Rodeo ALUULA G Series Repair instructions

Fly Products
Fly Products TRIKE-FLASH owner's manual

ELA Aviacion
ELA Aviacion ELA 10-Eclipse Pilot operator's handbook

MAC PARA
MAC PARA Elan Light user manual