JVC Everio GZ-HM655 User manual

CAMCORDER
LYT2268-007A
Detailed User Guide
GZ-HM655/GZ-HM650/
GZ-HM446/GZ-HM445/
GZ-HM440

Table of Contents
Beginner's Guide ............................................................ 4
Charging .................................................................................. 4
Recording ................................................................................ 4
Playback .................................................................................. 4
Shooting Tips ........................................................................... 4
Holiday Season/Christmas ...................................................... 5
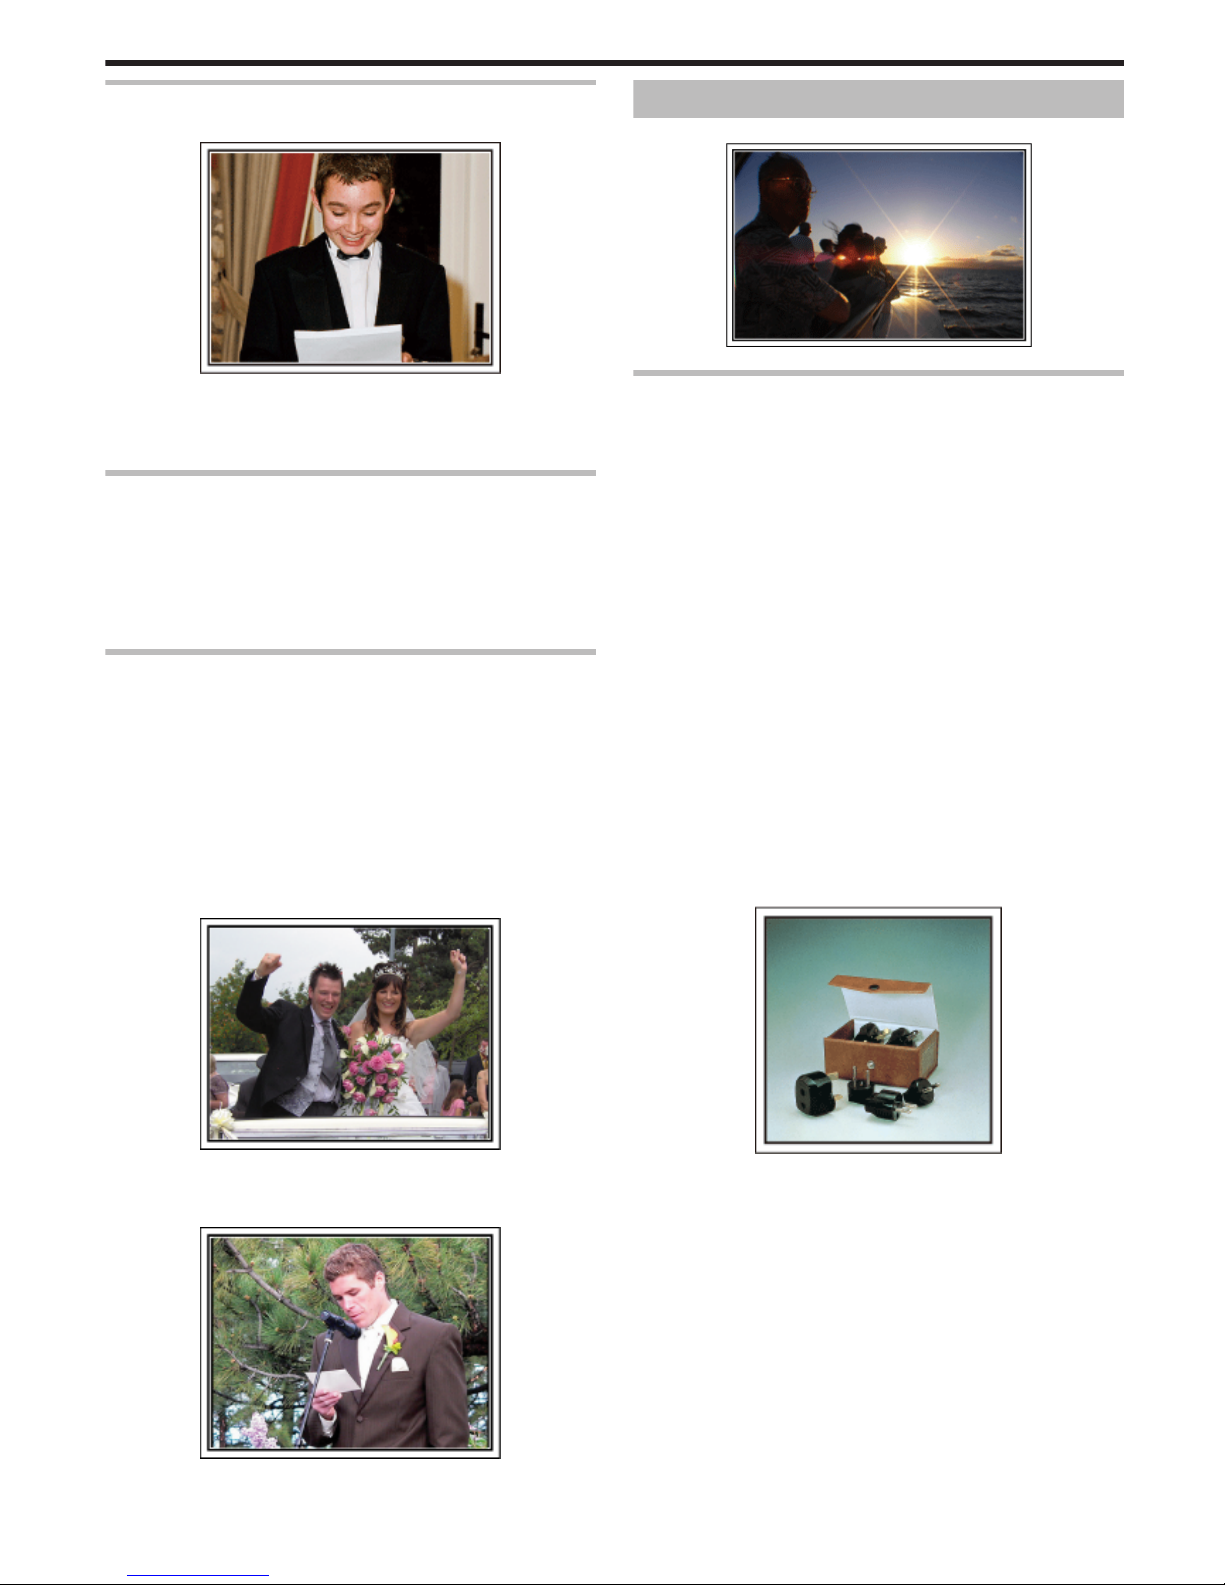
Wedding .................................................................................. 6
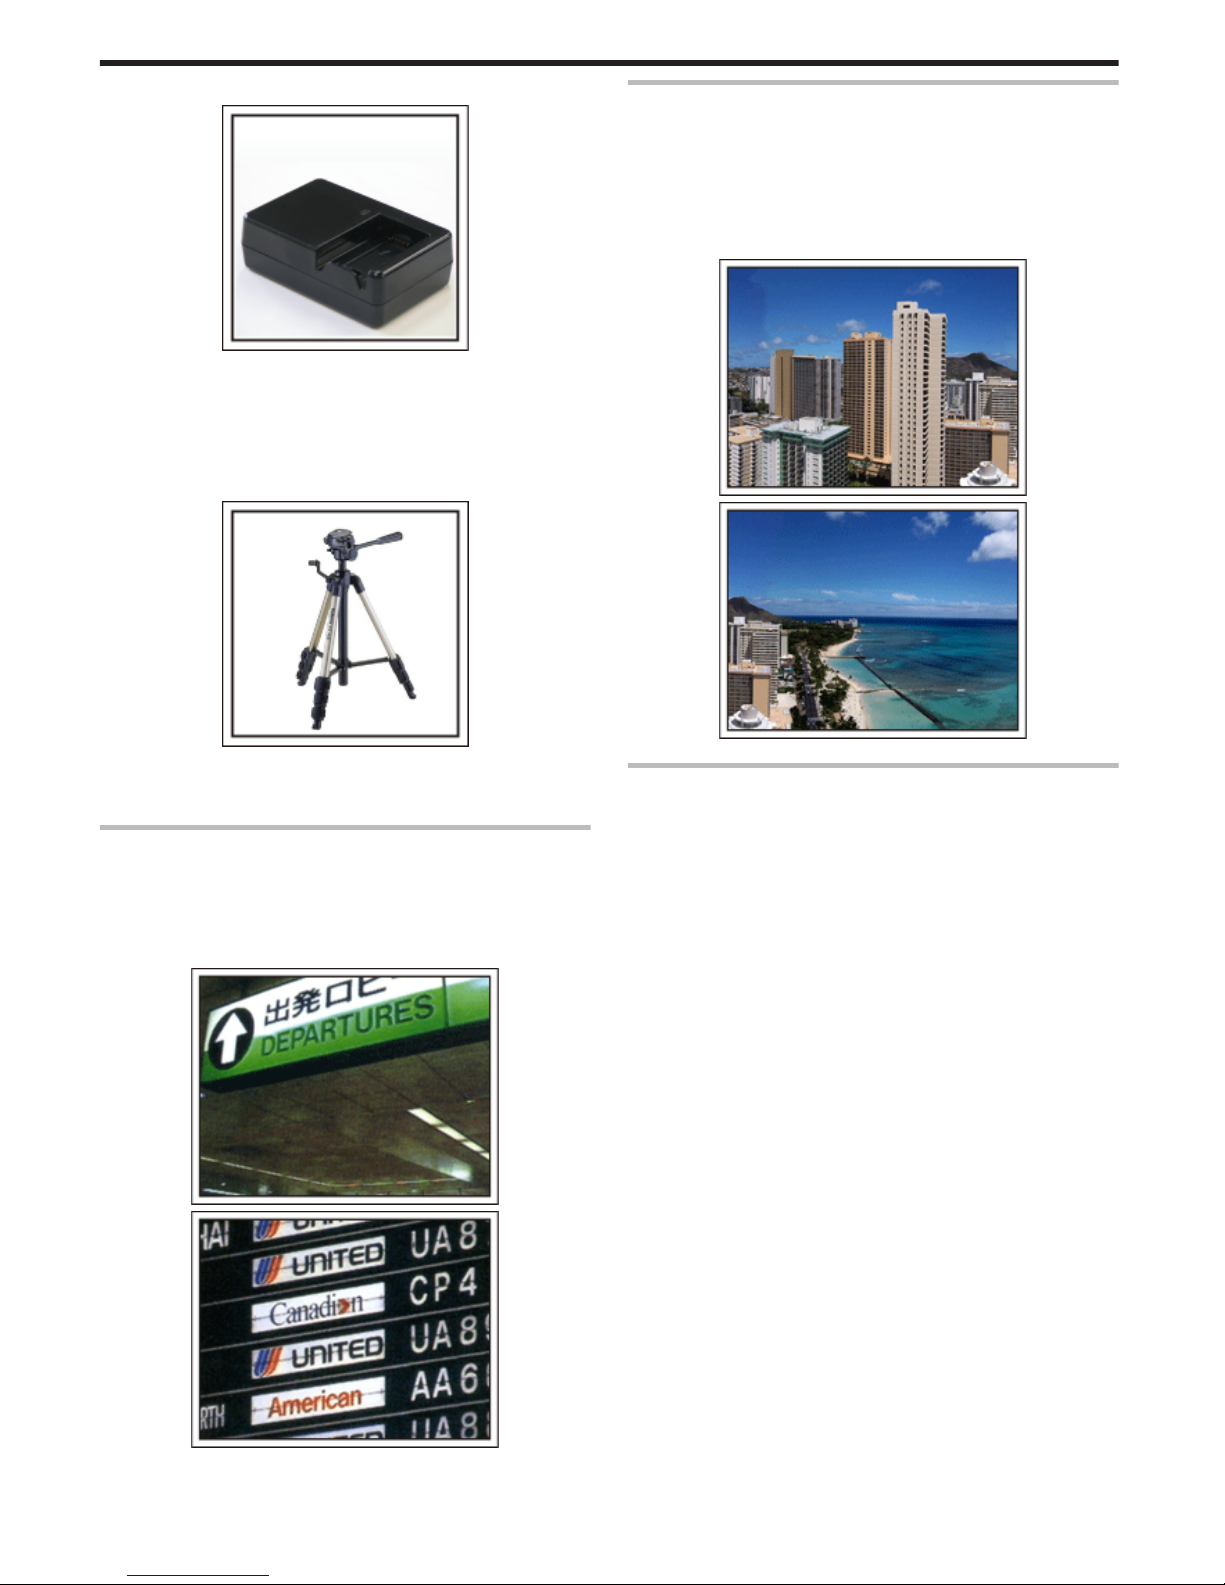
Travel ....................................................................................... 7
Amusement Park ..................................................................... 9
Getting Started
Key Features ......................................................................... 10
Model Differences ................................................................. 11
Verifying the Accessories ...................................................... 12
Charging the Battery Pack ..................................................... 13
Charging with USB Cable .................................................. 13
Grip Adjustment ..................................................................... 14
Using as a Hand Strap ....................................................... 14
Inserting an SD Card (GZ-HM650/GZ-HM655) ..................... 15
Types of Usable SD Card ................................................... 15
Using an Eye-Fi Card ......................................................... 16
Inserting an SD Card (GZ-HM440/GZ-HM445/GZ-HM446)
............................................................................................ 17
Types of Usable SD Card ................................................... 17
Using an Eye-Fi Card ......................................................... 18
Using the Touch Screen ........................................................ 19
Names of Buttons and Functions on the LCD Monitor ....... 19
Clock Setting ......................................................................... 20
Resetting the Clock ............................................................ 21
Changing the Display Language ............................................ 22
Holding this Unit .................................................................... 22
Tripod Mounting .................................................................... 22
Using this Unit Overseas ....................................................... 23
Charging the Battery Pack Overseas ................................. 23
Setting the Clock to Local Time when Traveling ................. 23
Setting Daylight Saving Time ............................................. 24
Optional Accessories ............................................................. 25
Recording
Taking Videos in Intelligent Auto Mode .................................. 26
Zooming ............................................................................. 28
Capturing Still Images During Video Recording ................. 28
Taking Still Images in Intelligent Auto Mode .......................... 28
Zooming ............................................................................. 30
Manual Recording ................................................................. 30
Scene Selection ................................................................. 31
Adjusting Focus Manually .................................................. 32
Adjusting Brightness .......................................................... 33
Setting White Balance ........................................................ 33
Setting Backlight Compensation ........................................ 34
Taking Close-up Shots ....................................................... 34
Creating Animation Effects (ANIMATION EFFECT) .............. 35
Registering Human Face Personal Authentication Information
............................................................................................ 36
Setting SMILE%/NAME DISPLAY ...................................... 37
Editing the Registered Face Information ............................ 38
Capturing Subjects Clearly (TOUCH PRIORITY AE/AF) ....... 40
Capturing Smiles Automatically (SMILE SHOT) .................... 41
Recording while Displaying a Magnified View of a Selected Face
(FACE SUB-WINDOW) ...................................................... 42
Reducing Camera Shake ....................................................... 43
Recording at Intervals (TIME-LAPSE RECORDING) ............. 43
Recording Automatically by Sensing Movements (AUTO REC)
............................................................................................ 45
Taking Group Shots (Self-timer) ............................................ 46
Setting the USER Button ....................................................... 47
Remaining Recording Time/Battery Power ............................ 48
Playback
Playing Back Videos .............................................................. 50
Playing a Video with Defective Management Information
........................................................................................ 52
Playing Back Still Images ....................................................... 52
Slideshow Playback ........................................................... 53
Searching for a Specific Video/Still Image ............................. 54
Date Search ....................................................................... 54
Connecting to and Viewing on TV .......................................... 54
Connecting via the HDMI Mini Connector .......................... 55
Connecting via the AV Connector ...................................... 56
Editing
Deleting Unwanted Files ........................................................ 57
Deleting the Currently Displayed File ................................. 57
Deleting Selected Files ...................................................... 57
Protecting Files ...................................................................... 58
Protecting/Releasing Protection of the Currently Displayed File
........................................................................................ 58
Protecting/Releasing Protection of Selected Files .............. 58
Capturing a Still Image in the Video during Playback ............. 59
Combining Videos Recorded by Seamless Recording .......... 60
Capturing a Required Part in the Video (TRIMMING) ............ 61
Capturing Videos for Uploading to YouTube .......................... 62
Copying
Creating a Disc Using a Connected Blu-ray Recorder ........... 63
Dubbing Files by Connecting to a DVD Recorder or VCR
............................................................................................ 63
Dubbing Files to a VHS Tape Using a VCR ........................... 64
Copying Files to an SD Card (GZ-HM650/GZ-HM655) ......... 65
Moving Files to an SD Card (GZ-HM650/GZ-HM655) ........... 66
Copying to Windows PC ........................................................ 67
Verifying System Requirements (Guideline) ....................... 67
Installing the Provided Software (Built-in) ........................... 67
Backing Up All Files ........................................................... 69
Organizing Files ................................................................. 70
Recording Videos to Discs ................................................. 71
Backing Up Files Without Using Provided Software ........... 72
List of Files and Folders ..................................................... 72
Copying to Mac Computer ..................................................... 73
Menu Settings
Operating the Menu ............................................................... 74
Operating the Common Menu ............................................ 74
Operating the Main Menu ................................................... 74
Operating the Face Short Cut Menu ................................... 74
Main Menu for Video Recording ............................................ 76
SCENE SELECT ................................................................ 77
FOCUS .............................................................................. 77
BRIGHTNESS ADJUST ..................................................... 77
WHITE BALANCE .............................................................. 77
BACKLIGHT COMP. .......................................................... 77
TELE MACRO .................................................................... 77
TOUCH PRIORITY AE/AF ................................................. 77
LIGHT (GZ-HM445/GZ-HM446/GZ-HM650/GZ-HM655)
........................................................................................ 78
DIS ..................................................................................... 78
GAIN UP ............................................................................ 78
WIND CUT ......................................................................... 79
ANIMATION EFFECT ........................................................ 79
TIME-LAPSE RECORDING ............................................... 79
AUTO REC ........................................................................ 79
FACE SUB-WINDOW ........................................................ 79
SMILE SHOT ..................................................................... 79
SMILE%/NAME DISPLAY .................................................. 79
FACE REGISTRATION ...................................................... 79
VIDEO QUALITY ................................................................ 80
ZOOM ................................................................................ 80
SEAMLESS RECORDING ................................................. 81
2

x.v.Color ............................................................................. 81
USER BUTTON SETTING ................................................. 81
Main Menu for Still Image Recording ..................................... 82
SCENE SELECT ................................................................ 83
FOCUS .............................................................................. 83
BRIGHTNESS ADJUST ..................................................... 83
WHITE BALANCE .............................................................. 83
BACKLIGHT COMP. .......................................................... 83
TELE MACRO .................................................................... 83
TOUCH PRIORITY AE/AF ................................................. 83
LIGHT (GZ-HM445/GZ-HM446/GZ-HM650/GZ-HM655)
........................................................................................ 84
SELF-TIMER ...................................................................... 84
GAIN UP ............................................................................ 84
AUTO REC ........................................................................ 84
SHUTTER MODE .............................................................. 84
SMILE SHOT ..................................................................... 85
SMILE%/NAME DISPLAY .................................................. 85
FACE REGISTRATION ...................................................... 85
IMAGE SIZE ....................................................................... 85
USER BUTTON SETTING ................................................. 85
Main Menu for Video Playback .............................................. 86
SEARCH DATE .................................................................. 86
PROTECT/CANCEL .......................................................... 86
COPY (GZ-HM650/GZ-HM655) ......................................... 86
MOVE (GZ-HM650/GZ-HM655) ........................................ 87
TRIMMING ......................................................................... 87
UPLOAD SETTINGS ......................................................... 87
PLAYBACK OTHER FILE .................................................. 87
SEAMLESS REC CTRL ..................................................... 87
K2 TECHNOLOGY ............................................................ 87
Main Menu for Still Image Playback ....................................... 88
SEARCH DATE .................................................................. 88
SLIDE SHOW EFFECTS ................................................... 88
PROTECT/CANCEL .......................................................... 89
COPY (GZ-HM650/GZ-HM655) ......................................... 89
MOVE (GZ-HM650/GZ-HM655) ........................................ 89
Common Menu ...................................................................... 90
CLOCK ADJUST ................................................................ 91
DATE DISPLAY STYLE ..................................................... 91
LANGUAGE ....................................................................... 92
MONITOR BRIGHTNESS .................................................. 92
REC MEDIA FOR VIDEO (GZ-HM650/GZ-HM655) ........... 93
REC MEDIA FOR IMAGE (GZ-HM650/GZ-HM655) .......... 93
REC VIDEO TO SLOTS (GZ-HM440/GZ-HM445/GZ-HM446)
........................................................................................ 94
REC STILLS TO SLOTS (GZ-HM440/GZ-HM445/GZ-HM446)
........................................................................................ 94
OPERATION SOUND ........................................................ 95
AUTO POWER OFF ........................................................... 95
QUICK RESTART .............................................................. 96
DEMO MODE .................................................................... 96
TOUCH SCREEN ADJUST ............................................... 96
DISPLAY ON TV ................................................................ 97
VIDEO OUTPUT ................................................................ 98
HDMI OUTPUT .................................................................. 98
HDMI CONTROL ............................................................... 99
FACTORY PRESET ........................................................... 99
UPDATE .......................................................................... 100
PC SOFTWARE UPDATE ............................................... 100
FORMAT BUILT-IN MEM. (GZ-HM650/GZ-HM655) ........ 100
FORMAT SD CARD ......................................................... 101
ERASE ALL DATA (GZ-HM650/GZ-HM655) ................... 101
Names of Parts
Front .................................................................................... 102
Rear ..................................................................................... 102
Bottom ................................................................................. 103
Interior ................................................................................. 103
LCD Monitor ........................................................................ 104
Indications on the LCD monitor
Common Recording Indications .......................................... 105
Video Recording .................................................................. 105
Still Image Recording ........................................................... 106
Video Playback .................................................................... 106
Still Image Playback ............................................................ 107
Troubleshooting
Battery Pack ........................................................................ 108
Recording ............................................................................ 108
Card ..................................................................................... 109
Playback .............................................................................. 109
Editing/Copying ................................................................... 110
Computer ............................................................................. 110
Screen/Image ...................................................................... 111
Other Problems ................................................................... 111
Error Message? ................................................................... 112
Maintenance ............................................................... 114
Specifications ............................................................. 115
3

Charging
0Refer to the operating instructions found in the animation on the Detailed
User Guide.
Recording
0Refer to the operating instructions found in the animation on the Detailed
User Guide.
Playback
0Refer to the operating instructions found in the animation on the Detailed
User Guide.
Shooting Tips
Basic Way to Hold a Camcorder
~ Recording Stable Images ~
.
This is the standard way of shooting while standing up.
Be sure to master this basic technique in order to achieve stable images.
o[Getting Ready]
A Open your feet to the width of your shoulders.
B Keep the elbow of your right arm, which is holding the camcorder, close
to your side.
C Hold the LCD monitor with your left hand and adjust the angle
accordingly.
Extending Your Hands to Shoot
~ High-Angle Shooting ~
.
Extend your hand when your subject is being hidden behind a crowd of
people.
o[Getting Ready]
A Open your feet to the width of your shoulders.
B Extend your right hand and hold the camcorder over your head.
C Hold the LCD monitor with your left hand and adjust the angle
accordingly.
Caution :
0Use this way of shooting only as a last resort as it is difficult to achieve
stable images.
0Set to the wide angle as much as possible as the image will be prone to
camera shake.
0Be considerate. Do not inconvenience the people around you.
Beginner's Guide
4

Squatting and Shooting at Eye Level
.
Staying low is a common position to take when shooting small children.
By recording from the eye level of the child, you can capture all his cute
expressions clearly.
o[Getting Ready]
A Kneel down with your left knee while keeping your right foot on the
ground.
B Place the elbow of your right arm, which is holding the camcorder, on
your right knee.
C Hold the LCD monitor with your left hand and adjust the angle
accordingly.
Panning
0Refer to the operating instructions found in the animation on the Detailed
User Guide.
Use this method to shoot a wide angle of view.
o[Getting Ready]
A Shoot by rotating your body instead of moving your arms while keeping
the basic way of holding a camcorder as stated above.
B Stand facing the direction where the rotation will stop.
C Twist your upper body to the direction where recording will start.
D Press the start button and record for 2 seconds, then slowly twist back
your body to face the front.
Record for another 2 seconds while facing the front, then press the
stop button.
(The 90 degrees rotation should take about 5 seconds, giving the
feeling of a slow motion.)
Holiday Season/Christmas
Record the happy Christmas celebration with your family!
.
Decorating the Tree and Preparing the Dinner
The decoration of tree and preparation of dinner are part of the joy of
Christmas. Be sure to record these happy family times!
oDecorating the tree
.
A tree is the most important thing to bring out the mood of Christmas.
Simply the scene of all family members engaging in the decorating of a fir
tree with various colorful ornaments is full of the feeling of happiness.
oPreparing the Dinner
.
Record the scenes as everyone helps to prepare the feast of the night.
You can film the mother who is cooking, the children who are helping, and
of course, the process of making a cake!
Useful Shooting Techniques
5

Recording the Christmas Party
.
After all preparations, it is finally the Christmas party itself.
Not only should you record the candle-blowing scene, but also the smiles of
the family while being surrounded by good food, or even the father who is
slightly drunk from champagne!
Finding the Presents
.
For children, the greatest joy of Christmas is receiving presents the next
morning.
Their expression of delight when finding a present next to their pillow is a
recording opportunity not to be missed. Get ready to shoot before the
children wake up!
Wedding
Create an awesome wedding video for the bride and groom!
.
Discussing and Planning Before the Event
Before the day of the wedding reception, it is important to discuss with the
bride and groom about various details such as the order of the ceremony
and whether there are any entertainment programs or change of clothes.
By understanding the preferences of the bride and groom, you will be able
to shoot more appropriately.
oFinding out the route of entrance
.
The highlight of a wedding reception is the entrance of the bride and groom.
Find out which door they will enter from and the route they will take from the
person-in-charge of the wedding hall in advance. Set up the tripod at a place
where you can follow the couple using zoom without having to move around.
oNumber of times and timing of clothes-changing
Find out the timing of any changing of clothes so as to capture the scene well
when the bride and groom enter again.
You can also make use the time while the bride and groom are changing to
record comments of well wishes from the guests.
Finding the Right Angle to Capture Both Bride and Groom
oComposing the picture with the groom in front and the
guests at the back
.
The main characters of a wedding are of course the bride and groom. Record
their expressions clearly during the toast, speech, entertainment programs,
and other scenes.
Another recommendation is to capture the face shots of the guests, then pan
towards the groom. Picture composition containing the crowd of guests only
lacks fun, so be sure to pay attention to the shooting angle and size.
Useful Shooting Techniques
6

Recording the Expressions and Comments of Guests
oSetting the shot from eye level to chest level
.
You can record comments from the guest by going around asking, "Please
say a few words for the bride and groom".
This can be done at the guests' waiting room, when the bride and groom are
changing, or during the entertainment programs.
Closing Up on the Bride's Face During the Thank You Speech
The climax of the event finally comes during the bride and groom’s thank you
speech and presentation of flowers. The touching words of appreciation from
the bride and tears of joy from the parents are scenes that must not be
missed.
Start by closing up on the bride’s face using zoom. As the tears start to form
in the bride’s eyes, continue shooting for a little longer. Then, slowly zoom
out to the wide angle to show the parents who are moved by the speech.
Advanced Operation with Two Camcorders
If video-editing is to be done, record using two camcorders so that a video
with varying scenes can be created. You can try asking a close friend who
has a camcorder at home.
Set the borrowed camcorder on a tripod to focus on taking close-up shots
of the bride and groom. In this way, the other camcorder can be moved
around to record other scenes, enabling an interesting video with changing
scenes to be created through editing and compilation.
As most people own at least a digital camera nowadays, even if you are really
unable to find an extra camcorder, inserting still pictures to the video at
various points is also a good way to add variety. Do give it a try!
o<Camcorder 1>
Closing up on the bride and groom all the time
.
o<Camcorder 2>
Recording the congratulatory messages from friends at the
same time
.
Travel
Capture all the good times of your domestic or overseas trips!
.
Bringing the Necessary Equipment
The necessary things to bring on a trip depends on your traveling purpose
and the destination.
For overseas trips in particular, you have to think about what to bring in
accordance to the local conditions.
Here are some suggestions for your consideration.
oCamcorder
Think about how many hours of shooting you will usually perform in a day.
Be sure to prepare enough recording medium especially for long overseas
trips.
If you are recording in SD cards, get ready the sufficient number of cards,
including some for backup.
oBattery Pack
Prepare a battery pack that is ready for double the expected recording time
in a day. For example, if you plan to record for 2 hours a day, prepare a
battery pack that is ready for 4 hours (actual recording time).
For a day trip, you can prepare a battery with low capacity but for a long trip,
do prepare a few batteries with high capacities.
oAC Adapter
The JVC AC adapter supports voltages from 100 V to 240 V, and hence can
be used anywhere in the world.
Bring along the adapter if you are traveling for a long time. Charge the battery
pack while sleeping so that you can record with full battery power the next
day.
oPower Plug Adapter
.
The shape of the power plug varies according to countries. Be sure to check
the shape of the power plug beforehand, and bring the appropriate power
plug adapter.
“Charging the Battery Pack Overseas” (A p. 23)
Useful Shooting Techniques
7

oBattery Charger
.
Recording cannot be performed when an AC adapter is connected to the
camcorder for battery charging.
You can bring an additional battery charger to charge battery packs if you
plan to use the camcorder for recording at night. You can also charge
multiple battery packs by using both the battery charger and this camcorder
at the same time.
oTripod
.
A tripod is an essential item to take stable images. Select an appropriate
tripod in accordance to your purpose and style of traveling, such as a
compact one to be used on a table or one that is at least 1 m tall.
Recording the Excitement Before Departure
It may be a little abrupt to start your travel video at the destination suddenly.
Record also the preparations prior to departure if it is a family trip, or the time
when everyone is gathered at the meeting place if you are traveling with your
friends.
For overseas trips, taking a shot of the signs and displays at the airport of
the flight you are taking may be useful for future reference.
.
.
Using Pan at the Places of Interest
Tourists spots with beautiful scenery or historical sites are places that you
would certainly want to record.
To capture the magnificence of a scene which cannot be fitted into a single
frame, try the panning technique.
Refer to the "Shooting Tips" found in this website on how to use panning
effectively.
In addition, you may also like to take a shot of the signs or monuments that
can often be found at the tourist spots.
.
.
Showing Everyone Having a Good Time
When taking a video, it is rather dull to shoot only the scenery or historical
sites.
Talk about your feelings while recording the breath-taking scenery of an
attraction so that it will be an interesting scene to view later.
Useful Shooting Techniques
8

Amusement Park
Take more shots of the smiling faces of everyone in the family!
.
Taking Videos or Still Images According to the Attraction
You may choose to take videos all the time. However, you may want to take
some still images too.
The following section explains the scenarios suitable for taking videos or still
images.
oScenarios suitable for taking videos
.
Scenarios with changes in body movement are suitable for taking videos.
This includes situations where there are rapid changes in facial expressions
or voices of surprise and delight.
*Some amusement parks do not allow passengers to perform any recording.
Be sure to check beforehand.
[Examples]
0Merry-go-round, go kart, coffee cup, etc.
oScenarios suitable for taking still images (photos)
.
Scenarios with little movement of the subject are suitable for taking still
images.
Try to take the still images from an angle such that the surroundings can be
seen clearly.
[Examples]
0Carousal, ferris wheel, fun bicycle rides, etc.
Inducing Responses by Calling Out
.
Videos with no waving of hands nor laughter are not only dull when you view
them later, but also put the capability of the audio-recording function of the
camcorder to a waste.
When recording, induce more reactions by enthusiastically waving your
hands or shouting out "Is it fun?" and the like.
Capturing the Best Moment in a Video as a Still Image
.
Shots with the eyes closed are often taken by accident. To reduce such
mistakes, make use of the function to capture still images from videos.
As videos are actually continuous recording of 60 still images within 1 minute,
using this function allows you to select the best moment and save it as a still
image.
“Capturing a Still Image in the Video during Playback” (A p. 59)
Advanced Operation with Backlight Compensation
When the subject’s face is in backlight or when the expression cannot be
seen clearly, the Intelligent Auto function of this unit automatically increases
its brightness for recording.
If Intelligent Auto fails to function as expected or if the brightness correction
is insufficient, you can increase the brightness by using backlight
compensation in the Manual mode.
“Setting Details” (A p. 34)
o<Without backlight compensation>
.
o<With backlight compensation>
.
Useful Shooting Techniques
9

Key Features
Key features of your camcorder
1Full High Definition (1920×1080 pixels) Video Recording
23.2 M (2400×1344 pixels) Still Image Recording (GZ-HM655/GZ-
HM650)
3i.AUTO (Intelligent Auto Recording): Detects 12 types of pre-set scenes
“Scenes of Intelligent Auto” (A p. 26)
42.7” Touch Screen
“Using the Touch Screen” (A p. 19)
5Enhanced Digital Image Stabilizer
“Reducing Camera Shake” (A p. 43)
640x Optical Zoom
“ZOOM” (A p. 80)
7Personal Authentication and Face Registration: Registering Human
Face Personal Authentication Information
“Registering Human Face Personal Authentication Information”
(A p. 36)
8Zoom-in Picture: Record while viewing both overall and zoomed-in
images
“Recording while Displaying a Magnified View of a Selected Face
(FACE SUB-WINDOW)” (A p. 42)
9Smile Shot: Just smile and your happy face will be automatically
detected and captured!
“Capturing Smiles Automatically (SMILE SHOT)” (A p. 41)
10 TOUCH PRIORITY AE/AF: Coordinate exposure and focus area through
face or color tracking
“Capturing Subjects Clearly (TOUCH PRIORITY AE/AF)” (A p. 40)
11 Auto Recording: Automatically starts recording when subject enters the
detecting area
“Recording Automatically by Sensing Movements (AUTO REC)”
(A p. 45)
12 Time-lapse Recording: Watch long hours of recording in a few seconds
“Recording at Intervals (TIME-LAPSE RECORDING)” (A p. 43)
13 Fun Animation Effects for Recording
“Creating Animation Effects (ANIMATION EFFECT)” (A p. 35)
14 Eye-Fi Card Ready: Upload Videos through your home Wi-Fi networks
“Using an Eye-Fi Card” (A p. 16)
15 Easy Uploading to YouTube with the supplied software Everio
MediaBrowser 3
“Copying to Windows PC” (A p. 67)
Getting Started
10

Model Differences
Confirm the model name of your camcorder.
Model Recording
Media
Built-in
Memory
Memory
Card Slot
LED Light Image Sensor Pict. Size
(16:9)
Max. Pict.
Size
(Super
Resolution)
Seamless
Recording
Copy/Move
Files
GZ-HM440 SDHC/
SDXC
- Dual SD - 1/5.8" 1.50M CMOS 2M Slot A N Slot
B
-
GZ-HM445/
GZ-HM446
SDHC/
SDXC
- Dual SD Light 1/5.8" 1.50M CMOS 2M Slot A N Slot
B
-
GZ-HM650/
GZ-HM655
SDHC/
SDXC/
Built-in
Memory
8 GB SD Light 1/4.1" 3.32M BSI CMOS 2M (SR
3.2M)
Built-in
memory N
SD card
Built-in
memory N
SD card
Getting Started
11

Verifying the Accessories
If any of the items are missing or defective, consult your JVC dealer or the nearest JVC service center.
Illustration Description
.
AC Adapter
AC-V10M
0Connects to this unit to charge the battery pack.
It can also be used when recording or playing back videos indoors.
.
Battery Pack
BN-VG114E
0Attaches to this unit to supply power.
.
HDMI Mini Cable (GZ-HM655)
0Connects this unit to a TV to play back recorded images on the TV in a better quality.
.
AV Cable
0Connects this unit to a TV to play back recorded images on the TV.
.
USB Cable
(Type A - Mini Type B)
0Connects this unit to a computer.
.
Basic User Guide
0Read well and keep in a safe place where it can be accessed easily when necessary.
Memo :
0SD cards are sold separately.
“Types of Usable SD Card” (A p. 15)
“Using an Eye-Fi Card” (A p. 16)
0When using the AC adapter overseas, please prepare a commercially available converter plug for the country or region of visit.
“Charging the Battery Pack Overseas” (A p. 23)
Getting Started
12

Charging the Battery Pack
Charge the battery pack immediately after purchase and when the remaining
battery power is low.
The battery pack is not charged at the time of purchase.
1Attach the battery pack.
.
0Align the top of the battery with the mark on this unit, and slide in until
the battery clicks into place.
2Connect the AC adapter to the DC connector.
.
3Plug in the power.
.
0The charging lamp blinks when charging is in progress.
It goes out when charging is finished.
Caution :
Be sure to use JVC battery packs.
0If you use any other battery packs besides JVC battery packs, safety and
performance cannot be guaranteed.
0Charging time: Approx. 2 h 30 m (using supplied battery pack)
The charging time is when the unit is used at 25°C. If the battery pack is
charged outside the room temperature range of 10°C to 35°C, charging
may take a longer time or it may not start. The recordable and playable
time may also be shortened under some usage conditions such as at low
temperature.
Be sure to use the supplied JVC AC adapter.
0If you use any other AC adapters besides the supplied JVC AC adapter,
malfunctions may occur.
Rechargeable Batteries:
0When using the battery in a low temperature environment (10°C or below),
the operating time may be shortened, or it may not function properly. When
using this unit outdoors in the winter weather, warm the battery, such as
by placing it in the pocket, before attaching it. (Keep away from direct
contact with a warm pack.)
0Do not expose the battery to excessive heat, such as direct sunlight or fire.
0After removing the battery, store it in a dry place between 15°C to 25°C.
0Keep a 30 % battery level (X) if the battery pack is not to be used for a
long period of time. In addition, fully charge and then fully discharge the
battery pack every 2 months, then continue to store it at a 30 % battery
level (X).
Memo :
0You can connect this unit to the AC adapter to record for long hours
indoors.
(Battery charging begins when the LCD monitor is closed.)
Detaching the Battery Pack
.
Slide the battery release lever to detach the battery from this unit.
Approximate Battery Charging Time (Using AC Adapter)
Battery Pack Charging Time
BN-VG114E
(Supplied)
2 h 30 m
BN-VG121E 3 h 30 m
BN-VG138E 6 h 10 m
0When the battery life is reached, the recording time becomes shorter even
if the battery pack is fully charged.
(Replace the battery pack with a new one.)
* The charging time is when the unit is used at 25°C. If the battery pack is
charged outside the room temperature range of 10°C to 35°C, charging may
take a longer time or it may not start. The recordable and playable time may
also be shortened under some usage conditions such as at low temperature.
“Approximate Recording Time (Using Battery)” (A p. 49)
Charging with USB Cable
1Close the LCD monitor to turn off the camcorder and disconnect the AC
adapter as well as battery pack from the camcorder.
2Turn on the computer and connect the USB cable to the camcorder.
.
0Do not attach the battery pack before connecting the USB cable.
3Attach the battery pack.
0The charging lamp blinks when charging is in progress.
It goes out when charging is finished.
Memo :
0USB charging is not possible while the AC adapter is connected to the
camcorder.
0Do not turn off or set the computer to sleep mode during charging (the
charging will stop).
0With some types of computers, charging is possible even when the
computer is turned off. Refer to the instruction manual of the computer or
consult its manufacturer.
0Charging is also possible with an optional USB AC adapter (AC-V10L). If
you use any other USB AC adapters besides JVC AC adapters, safety
and performance cannot be guaranteed.
Getting Started
13

0If charging does not start, detach the battery pack and try again from step
1.
0You cannot record or play back videos while the camcorder is connected
to a computer. Disconnect the USB cable after charging.
Approximate Battery Charging Time (Using USB Cable)
Battery Pack Charging Time
BN-VG114E
(Supplied)
18 h 30 m
BN-VG121E 25 h
BN-VG138E 45 h 30 m
Grip Adjustment
.
A Open the lever on the strap lock
B Adjust the length of the belt
C Close the lever
Caution :
0Be sure to fasten the grip belt properly.
If the belt is loose, this unit may drop and result in injuries or damages.
Using as a Hand Strap
Adjust the length of the belt and loop it around your wrist.
.
Getting Started
14

Inserting an SD Card (GZ-HM650/GZ-HM655)
When a commercially available SD card is inserted, recordings can still be
made to the card without stopping when the remaining recording time on the
built-in memory runs out.
“Types of Usable SD Card” (A p. 15)
“Using an Eye-Fi Card” (A p. 16)
“Approximate Video Recording Time” (A p. 49)
1Close the LCD monitor.
.
2Open the cover.
.
3Insert an SD card.
.
0Insert with the label facing outward.
Warning
0Make sure not to insert the card in the wrong direction.
It may cause damage to the unit and card.
0Turn off the power of this unit before inserting or removing a card.
0Do not touch the metal contact area when inserting the card.
Memo :
0When “SEAMLESS RECORDING” is set to “ON”, recordings can still be
made to the SD card without stopping when the remaining recording time
on the built-in memory runs out.
“SEAMLESS RECORDING” (A p. 81)
0To record to the card, it is necessary to perform media settings.
When no card is available, set media settings to “BUILT-IN MEMORY” for
recording.
“REC MEDIA FOR VIDEO (GZ-HM650/GZ-HM655)” (A p. 93)
“REC MEDIA FOR IMAGE (GZ-HM650/GZ-HM655)” (A p. 93)
0To use cards that have been used on other devices, it is necessary to
format (initialize) the card using “FORMAT SD CARD” from media
settings.
“FORMAT SD CARD” (A p. 101)
Removing the Card
Push the SD card inward once, then pull it out straight.
.
Types of Usable SD Card
The following SD cards can be used on this unit.
Operations are confirmed on the SD cards from the following manufacturers.
0Panasonic
0TOSHIBA
0SanDisk
0Eye-Fi
SD Card
.
0This unit supports 256 MB to 2 GB SD cards.
0Use a Class 4 or higher compatible SD card (2 GB) for video recording.
SDHC Card
.
0Use a Class 4 or higher compatible SDHC card (4 GB to 32 GB) for video
recording.
Getting Started
15

SDXC Card
.
0Use a Class 4 or higher compatible SDXC card (Max. 64 GB).
Memo :
0Using SD cards (including SDHC/SDXC cards) other than those specified
above may result in recording failure or data loss.
0To record videos with “VIDEO QUALITY” set to “UXP”, use of a Class 6
compliant SDHC/SDXC card is recommended.
0Class 4 and Class 6 are guaranteed to have a minimum transfer rate of 4
MB/s and 6 MB/s respectively during reading or writing of data.
0You can also use a Class 10 compliant SDHC/SDXC card.
0To protect the data, do not touch the terminals of the SD card.
When your computer cannot recognize the SDXC card
Confirm and update the OS of your computer.
Windows XP /
Windows XP
SP1
Necessary to update to SP2 or higher.
Windows XP
SP2 / Windows
XP SP3
Necessary to download the update software.
(KB955704)
http://www.microsoft.com/downloads/details.aspx?
FamilyID=1cbe3906-ddd1-4ca2-b727-
c2dff5e30f61&displaylang=en
Windows Vista Necessary to update to SP1 or higher.
Windows Vista
SP1 / Windows
Vista SP2
Necessary to download the update software.
(KB975823)
032 bit version
http://www.microsoft.com/downloads/en/
details.aspx?FamilyID=2d1abe01-0942-4f8a-
abb2-2ad529de00a1
064 bit version
http://www.microsoft.com/downloads/en/
details.aspx?FamilyID=7d54c53f-017c-4ea5-
ae08-34c3452ba315
Windows 7 Necessary to download the update software.
(KB976422)
032 bit version
http://www.microsoft.com/downloads/en/
details.aspx?FamilyID=3ee91fc2-a9bc-4ee1-
aca3-2a9aff5915ea
064 bit version
http://www.microsoft.com/downloads/en/
details.aspx?FamilyID=73f766dd-7127-4445-
b860-47084587155f
Mac OS X 10.4
Tiger / Mac OS X
10.5 Leopard
Not compatible.
Mac OS X 10.6
Snow Leopard
Necessary to upgrade to 10.6.5.
Using an Eye-Fi Card
Eye-Fi is an SD memory card with wireless LAN function.
Using an Eye-Fi card, you can transfer videos and still images to a computer
or the web. (A broadband wireless LAN environment is required.)
Use of Eye-Fi card may be illegal and prohibited in countries and regions
where it has not been approved by competent authorities. Please contact
Eye-Fi support for the details of approved countries and regions.
Types of Cards
The following Eye-Fi cards can be used on this unit.
Eye-Fi X2 Series
0Eye-Fi Connect X2
0Eye-Fi Explore X2
0Eye-Fi Pro X2
Using the Eye-Fi Card
Make settings on the Eye-Fi card with Eye-Fi Center.
For how to install and operate the Eye-Fi Center, refer to its instruction
manual.
0Recorded videos and still images are automatically transferred. (The files
already transferred earlier are not transferred again.)
Memo :
0You cannot transfer files during the recording mode, editing and formatting
of the card.
0You cannot transfer video files larger than 2 GB. (as of December, 2010)
0Transfer may take long or be interrupted depending on the connection
conditions.
Icon Description
MIdentifying the Eye-Fi card
OReady for transfer from the Eye-Fi card
OTransferring from the Eye-Fi card (animated)
0We recommend using the AC adapter when transferring files of large size.
0If it doesn’t operate properly, first make use of Eye-Fi Helper to confirm
that the settings of the Eye-Fi card are correct. In addition, try the data
transfer by inserting the Eye-Fi card into other equipment such as a
computer.
0Do not use the camcorder in places where wireless use is prohibited such
as on a plane.
0Before deleting a file, check that you have transferred it to a computer or
uploaded it to a video sharing website.
0For the latest information on the Eye-Fi card, refer to the website of Eye-
Fi, Inc.
http://www.eye.fi/
Getting Started
16

Inserting an SD Card (GZ-HM440/GZ-HM445/
GZ-HM446)
Insert a commercially available SD card before recording.
This unit comes with two SD card slots. When two SD cards are inserted,
recordings can be continued on the other card even if one card is full.
“Types of Usable SD Card” (A p. 17)
“Using an Eye-Fi Card” (A p. 18)
“Approximate Video Recording Time” (A p. 49)
1Close the LCD monitor.
.
2Open the cover.
.
3Insert an SD card into slot A.
.
0Insert with the label facing outward.
Caution :
0Make sure not to insert the card in the wrong direction.
It may cause damage to the unit and card.
0Turn off the power of this unit before inserting or removing a card.
0Do not touch the metal contact area when inserting the card.
Memo :
0Recording switches automatically from slot A to slot B after the card in slot
A is full.
“SEAMLESS RECORDING” (A p. 81)
0To record to the card, it is necessary to perform media settings.
“REC VIDEO TO SLOTS (GZ-HM440/GZ-HM445/GZ-HM446)”
(A p. 94)
“REC STILLS TO SLOTS (GZ-HM440/GZ-HM445/GZ-HM446)”
(A p. 94)
0To use cards that have been used on other devices, it is necessary to
format (initialize) the card using “FORMAT SD CARD” from media
settings.
“FORMAT SD CARD” (A p. 101)
Removing the Card
Push the SD card inward once, then pull it out straight.
.
Types of Usable SD Card
The following SD cards can be used on this unit.
Operations are confirmed on the SD cards from the following manufacturers.
0Panasonic
0TOSHIBA
0SanDisk
0Eye-Fi
SD Card
.
0This unit supports 256 MB to 2 GB SD cards.
0Use a Class 4 or higher compatible SD card (2 GB) for video recording.
SDHC Card
.
0Use a Class 4 or higher compatible SDHC card (4 GB to 32 GB) for video
recording.
Getting Started
17

SDXC Card
.
0Use a Class 4 or higher compatible SDXC card (Max. 64 GB).
Memo :
0Using SD cards (including SDHC/SDXC cards) other than those specified
above may result in recording failure or data loss.
0To record videos with “VIDEO QUALITY” set to “UXP”, use of a Class 6
compliant SDHC/SDXC card is recommended.
0Class 4 and Class 6 are guaranteed to have a minimum transfer rate of 4
MB/s and 6 MB/s respectively during reading or writing of data.
0You can also use a Class 10 compliant SDHC/SDXC card.
0To protect the data, do not touch the terminals of the SD card.
When your computer cannot recognize the SDXC card
Confirm and update the OS of your computer.
Windows XP /
Windows XP
SP1
Necessary to update to SP2 or higher.
Windows XP
SP2 /
Windows XP
SP3
Necessary to download the update software.
(KB955704)
http://www.microsoft.com/downloads/details.aspx?
FamilyID=1cbe3906-ddd1-4ca2-b727-
c2dff5e30f61&displaylang=en
Windows
Vista
Necessary to update to SP1 or higher.
Windows
Vista SP1 /
Windows
Vista SP2
Necessary to download the update software.
(KB975823)
032 bit version
http://www.microsoft.com/downloads/en/
details.aspx?FamilyID=2d1abe01-0942-4f8a-
abb2-2ad529de00a1
064 bit version
http://www.microsoft.com/downloads/en/
details.aspx?FamilyID=7d54c53f-017c-4ea5-
ae08-34c3452ba315
Windows 7 Necessary to download the update software.
(KB976422)
032 bit version
http://www.microsoft.com/downloads/en/
details.aspx?FamilyID=3ee91fc2-a9bc-4ee1-
aca3-2a9aff5915ea
064 bit version
http://www.microsoft.com/downloads/en/
details.aspx?FamilyID=73f766dd-7127-4445-
b860-47084587155f
Mac OS Not compatible.
Using an Eye-Fi Card
Eye-Fi is an SD memory card with wireless LAN function.
Using an Eye-Fi card, you can transfer videos and still images to a computer
or the web. (A broadband wireless LAN environment is required.)
Use of Eye-Fi card may be illegal and prohibited in countries and regions
where it has not been approved by competent authorities. Please contact
Eye-Fi support for the details of approved countries and regions.
Types of Cards
The following Eye-Fi cards can be used on this unit.
Eye-Fi X2 Series
0Eye-Fi Connect X2
0Eye-Fi Explore X2
0Eye-Fi Pro X2
Video and still image files cannot be transferred without the Eye-Fi X2 series.
Using the Eye-Fi Card
Make settings on the Eye-Fi card with Eye-Fi Center.
For how to install and operate the Eye-Fi Center, refer to its instruction
manual.
0Recorded videos and still images are automatically transferred. (The files
already transferred earlier are not transferred again.)
Memo :
0You cannot transfer files during the recording mode, editing and formatting
of the card.
0You cannot transfer video files larger than 2 GB. (as of December, 2010)
0Transfer may take long or be interrupted depending on the connection
conditions.
Icon Description
MIdentifying the Eye-Fi card
OReady for transfer from the Eye-Fi card
OTransferring from the Eye-Fi card (animated)
0We recommend using the AC adapter when transferring files of large size.
0If it doesn’t operate properly, first make use of Eye-Fi Helper to confirm
that the settings of the Eye-Fi card are correct. In addition, try the data
transfer by inserting the Eye-Fi card into other equipment such as a
computer.
0Do not use the camcorder in places where wireless use is prohibited such
as on a plane.
0Before deleting a file, check that you have transferred it to a computer or
uploaded it to a video sharing website.
0For the latest information on the Eye-Fi card, refer to the website of Eye-
Fi, Inc.
http://www.eye.fi/
Getting Started
18

Using the Touch Screen
Icon operation buttons, thumbnails, and menu items are displayed on the
touch screen according to the mode in use.
0There are two ways to operate the touch screen, namely “tap” and “drag”.
The following are some examples.
A Tap the displayed button (icon) or thumbnail (file) on the touch screen
to make selection.
B Drag the thumbnails on the touch screen to search for the desired file.
.
Memo :
0The touch screen of this unit is pressure-sensitive. When the touch screen
does not respond smoothly, apply slightly more force to your fingertip.
0Tap the buttons (icons) on the touch screen accurately. The buttons may
not respond if they are not tapped on the right area.
0Do not press or rub with excessive force.
0If you apply a protect sheet or a sticker, the touch screen may not respond
smoothly.
0Do not operate the touch screen using an object with a sharp or hard tip.
0Pressing two or more places at a time may cause a malfunction.
0Perform “TOUCH SCREEN ADJUST” if the reactive area of the screen is
misaligned with the touched area. (Adjust by lightly tapping with a corner
of an SD card, etc. Do not press with an object with a sharp tip or do not
press hard.)
“TOUCH SCREEN ADJUST” (A p. 96)
Names of Buttons and Functions on the LCD Monitor
The following screens are displayed during the video and still image modes,
and operate as the touch screens.
Recording Screen (Video/Still Image)
.
1Face Short Cut Menu Button
0Displays a short cut screen of face recognition functions.
“Operating the Face Short Cut Menu” (A p. 74)
2Zoom Button
“Zooming” (A p. 28)
3Playback Mode Button
0Switches to the playback mode.
4Recording Start/Stop Button
0g: Video Recording Start Button
0a: Video Recording Stop Button
0Q: Still Image Recording Button
5Menu Button
“Operating the Menu” (A p. 74)
6Display Button
Some displays disappear after approximately 3 seconds.
Use the n button to change the displays as shown below.
0Tap n button
Displays appear for approximately 3 seconds with every tap.
0Tap and hold n button
Displays are fixed such that they do not disappear. After setting, the
display button changes from n to m.
Tap m to release the displays.
Playback Screen (Video)
.
1Recording Mode Button
0Switches to the recording mode.
2Index Screen Button
“Operation Buttons for Video Playback” (A p. 50)
3Delete Button
“Deleting the Currently Displayed File” (A p. 57)
4Volume Adjustment Button
“Adjusting the Volume of Videos” (A p. 51)
5Menu Button
“Operating the Menu” (A p. 74)
6Operation Buttons
“Operation Buttons for Video Playback” (A p. 50)
Playback Screen (Still Image)
.
1Recording Mode Button
0Switches to the recording mode.
2Index Screen Button
“Operation Buttons for Still Image Playback” (A p. 52)
3Delete Button
“Deleting the Currently Displayed File” (A p. 57)
4Menu Button
“Operating the Menu” (A p. 74)
5Operation Buttons
“Operation Buttons for Still Image Playback” (A p. 52)
Getting Started
19

Index Screen
.
1Date Button
“Operation Buttons for Video Playback” (A p. 50)
“Operation Buttons for Still Image Playback” (A p. 52)
2Recording Mode Button
0Switches to the recording mode.
3Delete Button
“Deleting Selected Files” (A p. 57)
4Playback Media Button
0Switches between SD card and built-in memory or slot A and slot B
(GZ-HM440/GZ-HM445/GZ-HM446).
5Menu Button
“Operating the Menu” (A p. 74)
6Page Forward/Back Button
“Operation Buttons for Video Playback” (A p. 50)
“Operation Buttons for Still Image Playback” (A p. 52)
Menu Screen
.
1Help Button
2Menu Items
3Return Button
4Common Menu Button
5Close Button
“Operating the Menu” (A p. 74)
Clock Setting
The “SET DATE/TIME!” screen appears when you turn on this unit for the
first time after purchase, when it has not been used for a long time, or when
the clock is not set yet.
Set the clock before recording.
1Open the LCD monitor.
.
0The unit turns on.
0When the LCD monitor is closed, the unit turns off.
2Tap “YES” when “SET DATE/TIME!” is displayed.
.
3Set the date and time.
.
0When the year, month, day, hour, or minute item is tapped, “∧” and
“∨” will be displayed.
0Tap ∧ or ∨ to adjust the year, month, day, hour, and minute.
4After setting the date and time, tap “SET”.
5Select the region where you live and tap “SAVE”.
.
0The city name and time difference are displayed.
0Tap < or > to select the city name.
Memo :
0The clock can be reset again later.
“Resetting the Clock” (A p. 21)
0When using this unit overseas, you can set it to the local time for recording.
“Setting the Clock to Local Time when Traveling” (A p. 23)
0“SET DATE/TIME!” is displayed when you turn on this unit after it has not
been used for a prolonged period.
Connect the AC adapter for more than 24 hours to charge the internal clock
battery of this unit before setting the clock.
Getting Started
20
This manual suits for next models
4
Table of contents
Other JVC Camcorder manuals

JVC
JVC GR-DVL500 User manual

JVC
JVC LYT0261-001B User manual

JVC
JVC GZ-MS100AC User manual

JVC
JVC GR-AXM80 User manual

JVC
JVC GR-DVL149EG-X User manual

JVC
JVC Everio GZ-X900 User manual

JVC
JVC GR-DVX44EG User manual

JVC
JVC GR-D650U User manual

JVC
JVC GZ-GX1BUS Operating and maintenance manual

JVC
JVC GR-D280EX User manual

JVC
JVC GR-SX150AG User manual

JVC
JVC ProHD GY-HM650 2.0 User manual

JVC
JVC Everio GZ-E110 Operating and maintenance manual

JVC
JVC GZ-MG70E User manual

JVC
JVC GR-AX1010 User manual

JVC
JVC GY-HD200CHE User manual

JVC
JVC GZ-HM1S User manual

JVC
JVC 0206ASR-NF-VM User manual

JVC
JVC Everio GZ-MG730 User manual

JVC
JVC GZ-MG255UB User manual